Since its release, the A7 III has rapidly become one of the most popular mirrorless models, not only within the E-mount range but also industry-wide. The reason is simple: it packs great quality and performance at a competitive price.
The A7R III hasn’t reached the same level of popularity as the A7 III but it isn’t far behind. It has experienced the same success as its predecessor – which was game-changing for Sony at the time of its announcement – but also improves upon its weak points, making it a serious contender on today’s market.
There is a difference in price between these two cameras so naturally many of you will be wondering if the A7R III is worth the extra money. Keep reading to find out!
Ethics statement: We purchased the A7 III and A7R III for long-term reviews and comparisons. We were not asked to write anything about these products, nor were we provided any other compensation of any kind. All opinions we express regarding these products are our own. Within the article, there are affiliate links. If you buy something after clicking one of these links, we will receive a small commission. To know more about our ethics, you can visit our full disclosure page. Thank you!
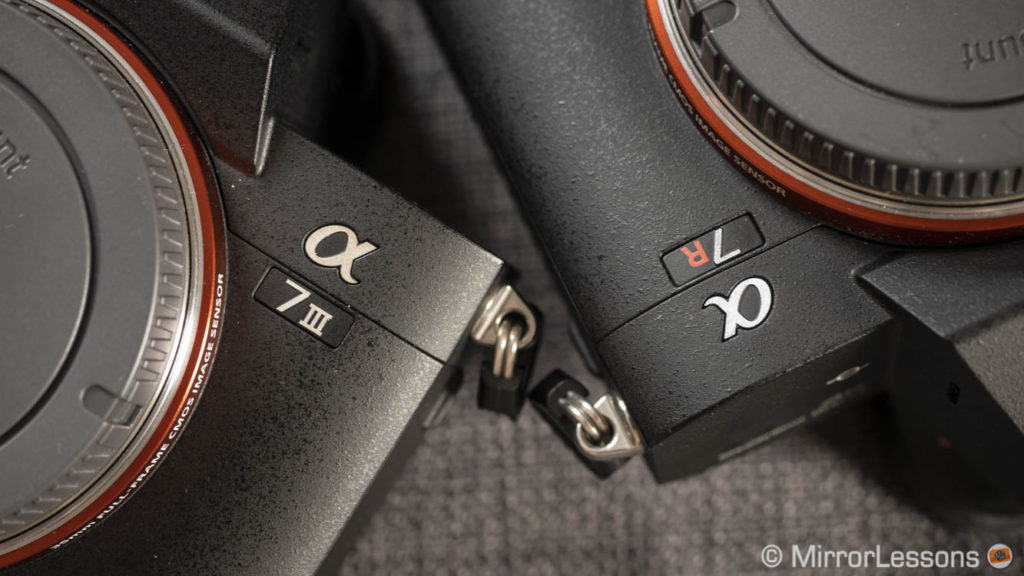
Table of Contents
1. Article updates
2. Mains Specs
3. Design and ease of use
4. Screen and Viewfinder
5. Image Quality: Sharpness
6. Image Quality: Dynamic range
7. Image Quality: Low light and high ISO
8. Image Quality: Colours
9. Autofocus
10. Shutter, continuous shooting speed and buffer
11. 5-axis stabilisation
12. Video
13. Flash and extra features
14. Battery life
15. Price
16. Conclusion
17. Sample images and additional content
Article updates
- April 2019: feedback about EyeAF for animals added (firmware 3.0). You can also read our separate article here.
- January 2019: firmware 2.10 fixes a compatibility issue with third party SD cards
- October 2018: report about firmware 2.0 that limits compatibility with third party batteries for both cameras
Sony A7 III vs A7R III – Specs
A7 mark III
- Sensor: 24.2MP 35mm format BSI Exmor CMOS
- Lens system: E-mount
- Weatherproof: Yes (dust and moisture)
- Internal Stabilisation: Yes (5-axis)
- Autofocus: Hybrid with 693 phase and 425 contrast detection points
- Continuous shooting: 3fps to 10fps with AE/AF Tracking
- ISO Sensitivity: 100 – 51200 ISO (pull 50, push up to 204800)
- Shutter Speeds: 1/8000s to 30s, Bulb
- Viewfinder: 0.5in OLED with 2,360k dots, 23mm eye point, 0.78x magnification and 60fps refresh rate
- Rear monitor: Tilting 3″ LCD (922k dots) with touch sensitivity
- Movie recording: 4K up to 30fps and 100Mbps, Full HD up to 120fps, S-Log and HLG gamma
- Built-in Flash: No
- Extra Features: WiFi, Bluetooth, Bracketing, Tethering, FTP Transfer, Dual SD slots
- Dimensions: 126.9 x 95.6 x 73.7mm
- Weight: 650g (including battery and memory card)
- Firmware version: 2.10
A7R mark III
- Sensor: 42MP 35mm format BSI Exmor CMOS
- Lens system: E-mount
- Weatherproof: Yes (dust and moisture)
- Internal Stabilisation: Yes (5-axis)
- Autofocus: Hybrid with 399 phase and 425 contrast detection points
- Continuous shooting: 3fps to 10fps with AE/AF Tracking
- ISO Sensitivity: 100 – 32000 ISO (pull 50, push 51200 to 102400)
- Shutter Speeds: 1/8000 to 30s
- Viewfinder: 0.5in OLED with 3,686k dots, 23mm eye point, 0.78x magnification and 120fps refresh rate
- Rear monitor: Tilting 3″ LCD (1.44M dots) with touch sensitivity
- Movie recording: 4K up to 30fps, Full HD up to 120fps, S-Log and HLG gamma
- Built-in Flash: No
- Extra Features: WiFi, Bluetooth, Bracketing, Pixel Shift Multi Shooting, Tethering, Dual SD slots
- Dimensions: 126.9 x 95.6 x 73.7mm
- Weight: 657g (including battery and memory card)
- Firmware version: 2.10
Sony A7 III vs A7R III – Design and ease of use
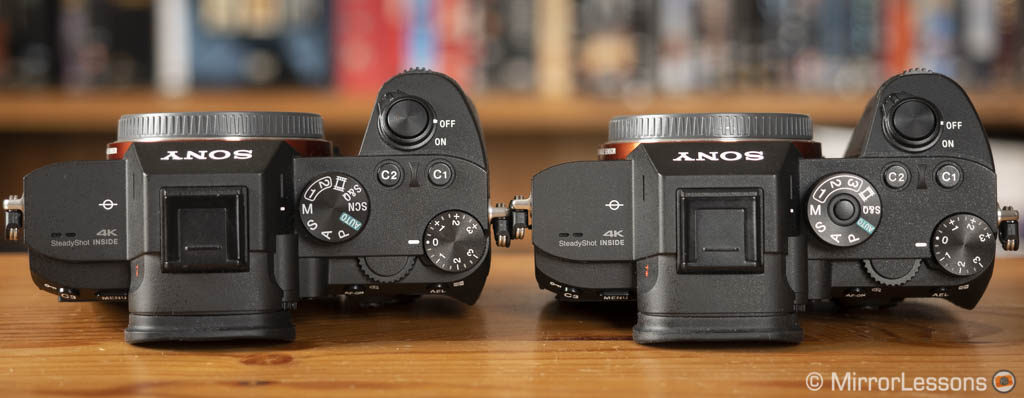
Physically speaking, the A7 III and A7R III are identical in so many ways that only a few details distinguish them from each other.
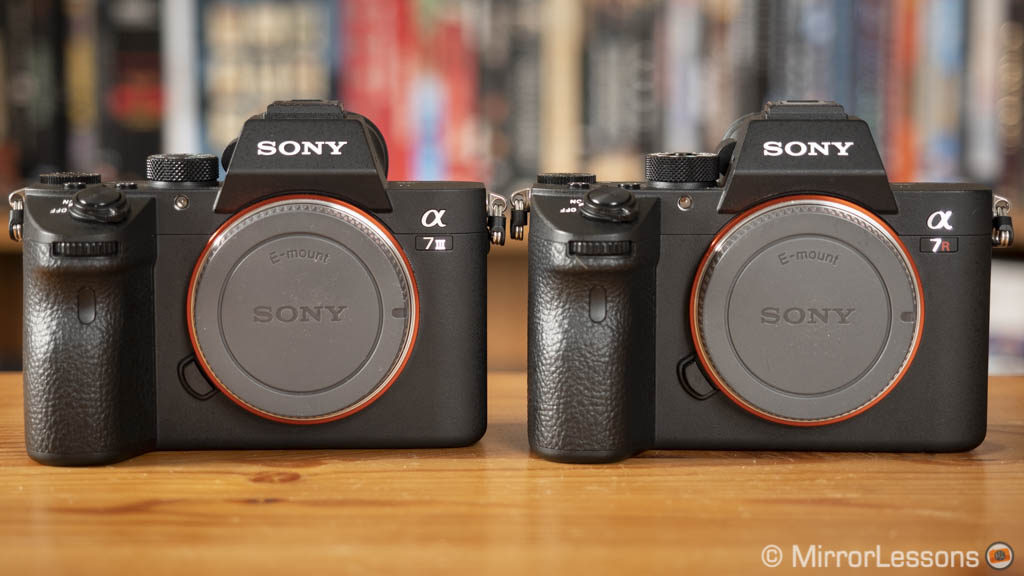
In terms of design and build quality, they share the same:
- dimensions (126.9 x 95.6 x 73.7mm)
- dust and moisture resistance
- magnesium alloy chassis
- mount held in place by six screws
The cameras feel solid in the hand and none of the components are cheap or fragile. There is a difference of 7g, making the A7R III the heavier of the two, but this is of course irrelevant once you mount a lens and start using them.
Some extreme weather-sealing tests – like the one you can see on Imaging Resource – have revealed that the third generation A7 is not perfect. I’ve only ever gone out shooting in light rain with these two models so I can’t really say much except that I haven’t encountered any problems so far.
My only criticism of the design hasn’t changed from what I’ve mentioned in other articles. Because they are compact (despite the large sensor and battery), the grip is small. It is comfortable with small to medium lenses but becomes uncomfortable and somewhat tiring for the hand with large and heavy products such as the 100-400mm GM. An optional grip extender or battery pack allows you to rest all your fingers more comfortably. (We listed the best solutions in our A7/A7R III accessory article.)
The button layout is nearly identical and includes:
- twin dials on the front/back to control the exposure
- exposure compensation dial (±3Ev) on top
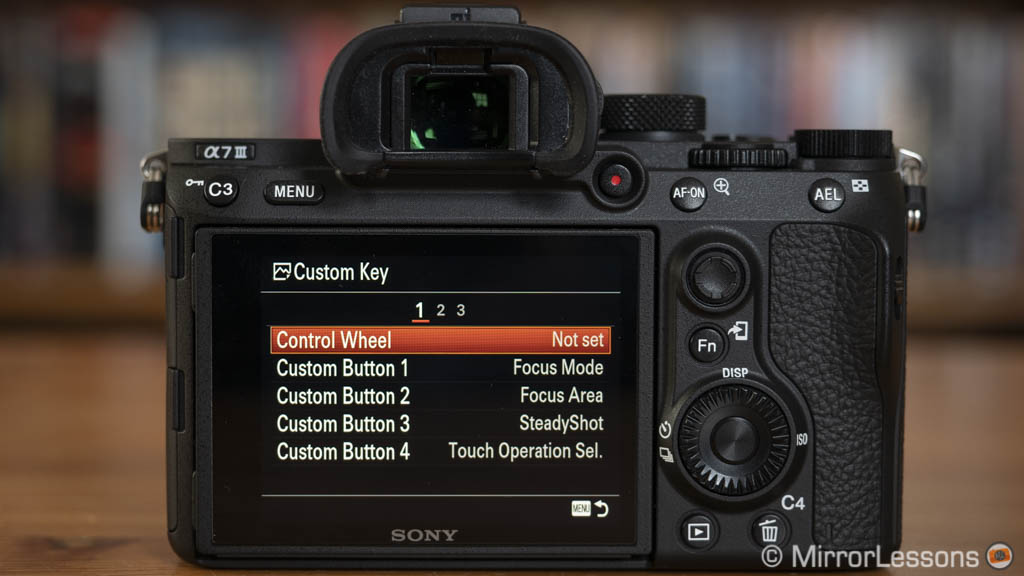
- 13 custom buttons including the control wheel, the AF and AEL buttons on the rear
- an AF Joystick on the back that can also be used to navigate the menu
- a movie recording button placed near the EVF on the rear.
All buttons including the shutter release provide a nice tactile feel and are precise in operation. The rear control wheel is thicker and doesn’t turn as freely in comparison to the previous generation. Some of you may find some of these buttons a little small but I personally got used to them quickly. The only area I would advise Sony to improve are the twin dials as I find them somewhat tiny.
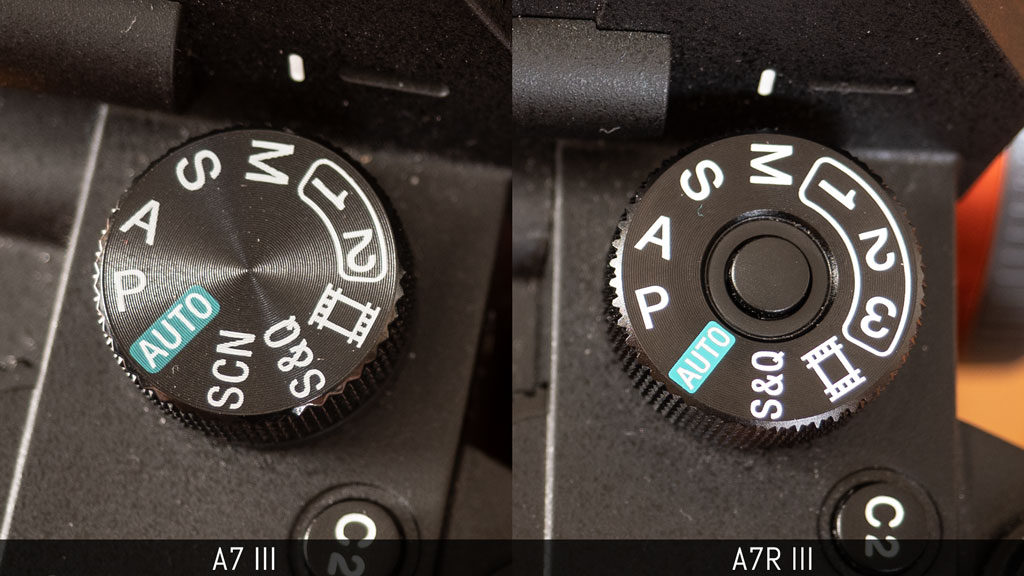
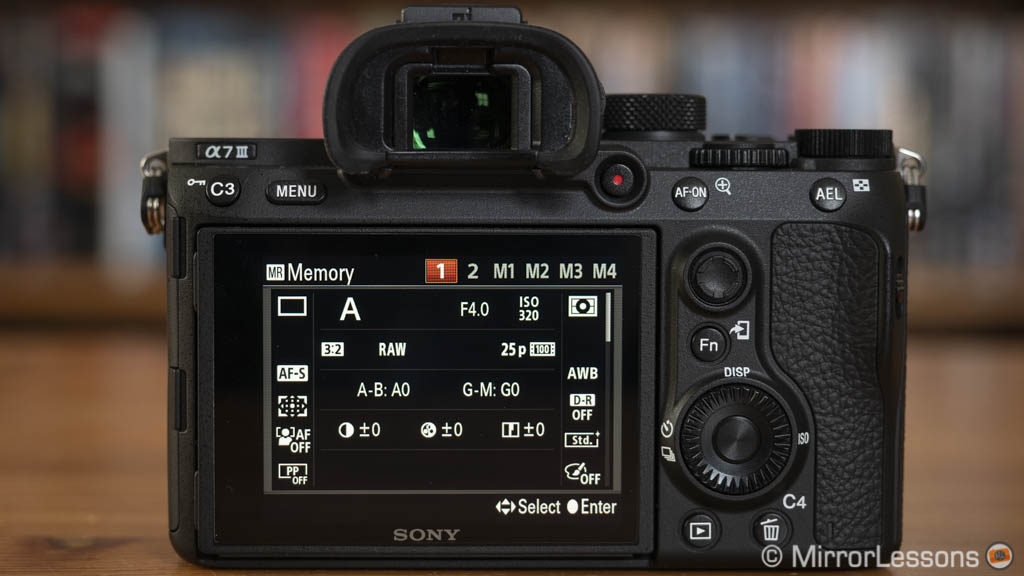
The only difference you can spot on the outside (apart from the camera name) is the shooting mode dial on top. On the A7 III you’ll find a Scene step whereas the A7R III has three Memory Recall slots instead of two. It also features an unlock button at the centre that must be pressed and held in order to rotate the dial. I find this solution somewhat annoying to be honest and would prefer a manual unlock/lock solution.
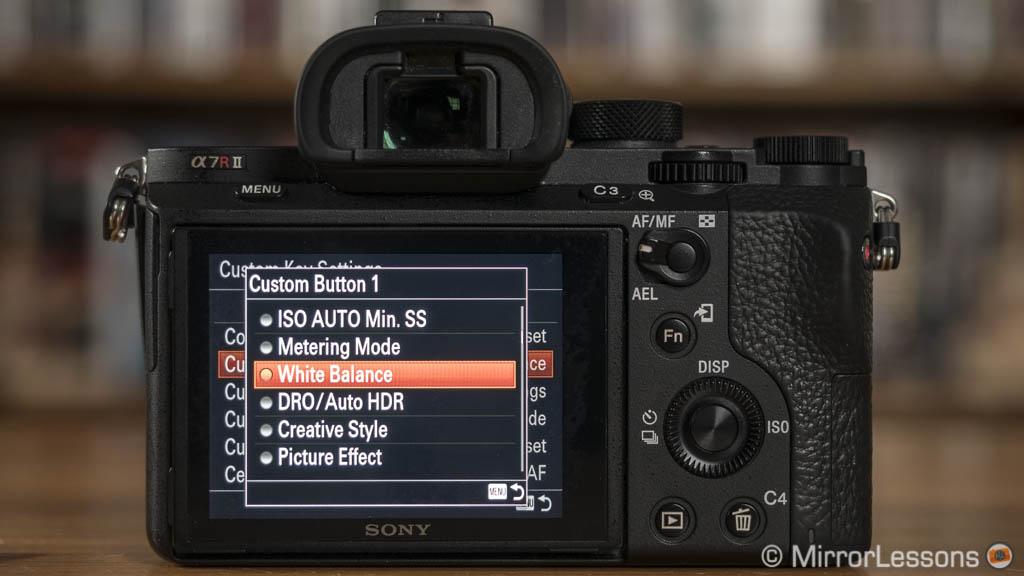
Both cameras allow for a high level of customisation. Each of the 13 custom keys can be assigned to no fewer than 80 settings on the A7 III and 82 on the A7R III. There is also the possibility to configure the buttons separately for stills, movies and playback modes which is very helpful.
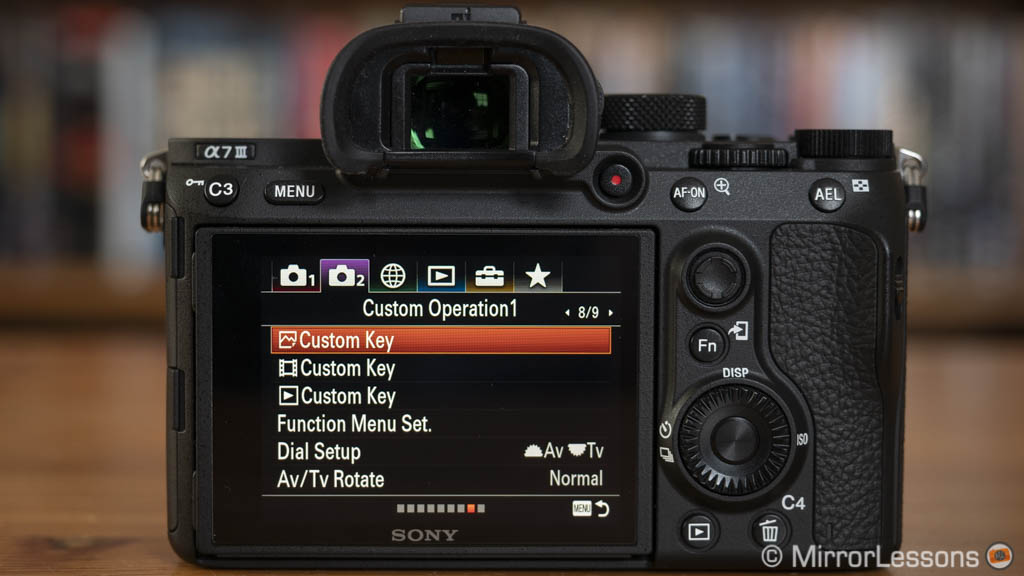
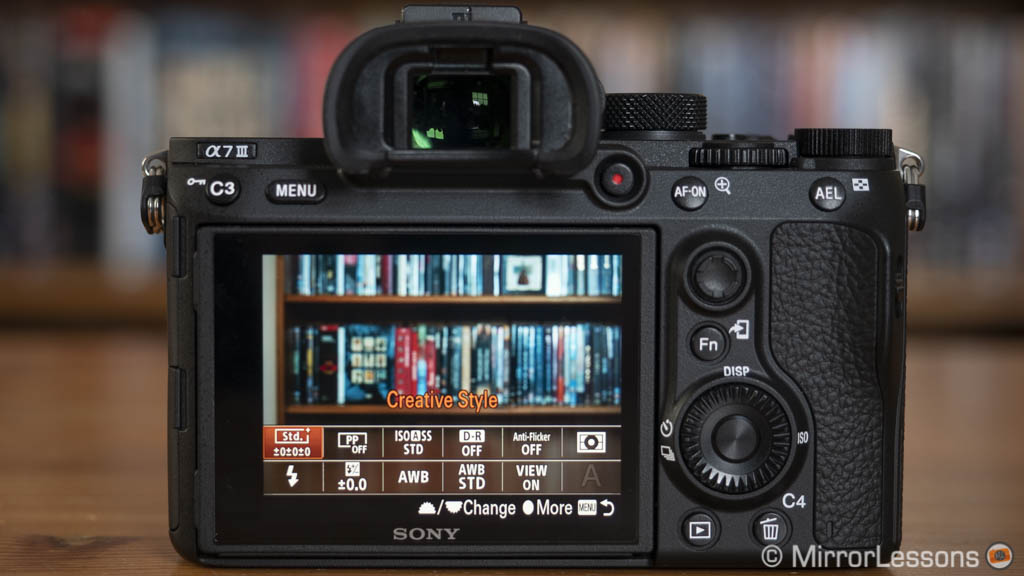
The menu system is the same on both cameras. It includes five main sections plus the My Menu page where you can save your most used settings. The latter is really useful to avoid browsing through the less-than-perfectly-organised menu. There is also a Function menu with 12 slots that can be edited (47 options on the A7 III, 49 on the A7R III).

The Memory Recalls allow you to save and quickly activate a combination of settings you may use for specific occasions (for example your go-to setup for sports or wildlife). There are three for each camera and you recall them either by using the top dial, or with a custom button. In the case of the A7 III, there are only two slots on the dial so the third must be set with a custom key.
It takes some time to create your personal configuration on each of these cameras but once you find the optimal combination, they become much easier to use.
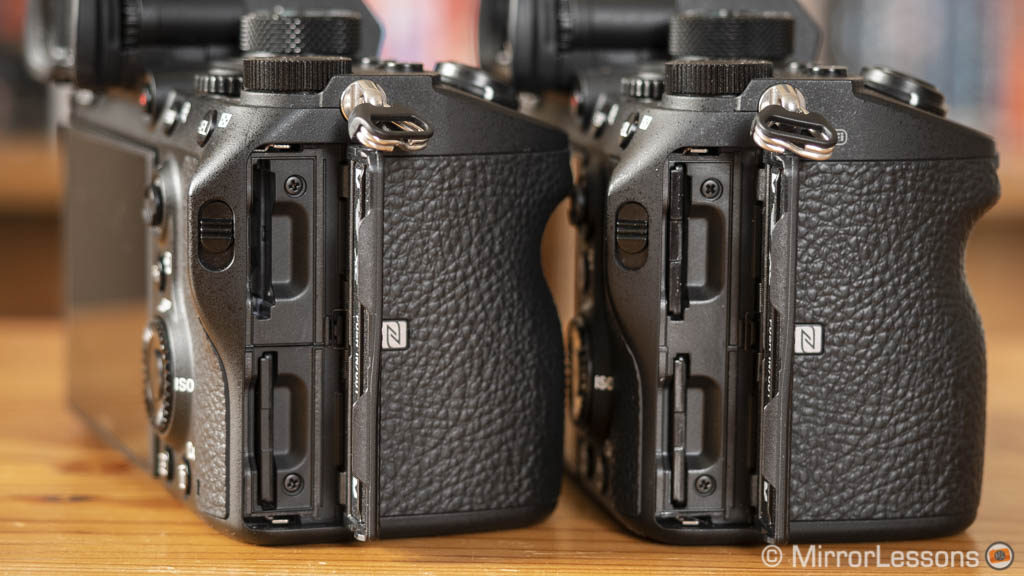
Both models feature two SD card slots and the first is UHS-II compatible. The options are similar to what you find on other cameras. You can record to the second card once the first is full, record simultaneously on both cards (including video files) or sort specific files (for example stills for slot 2, video files for slot 1).
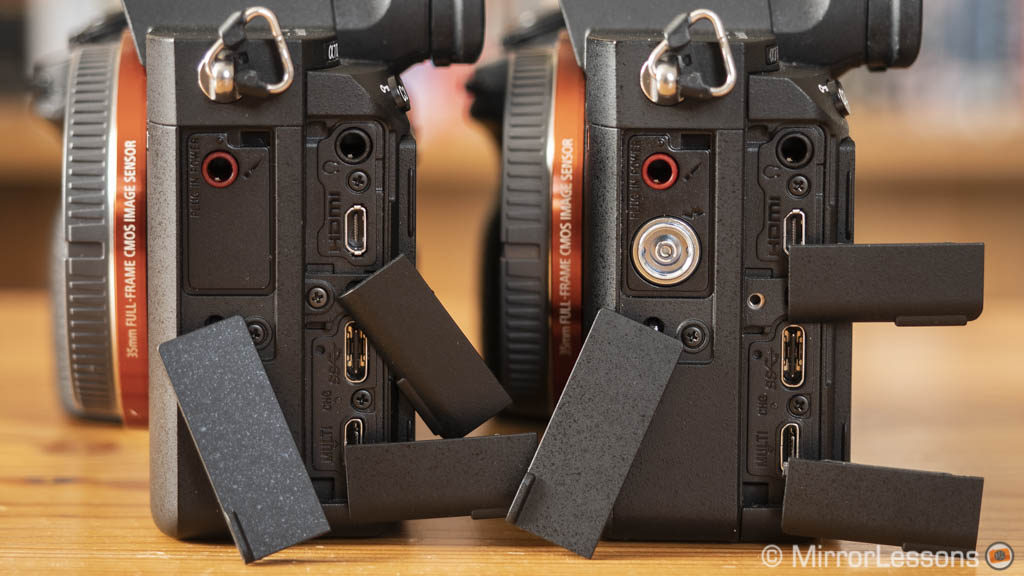
The hardware connections are as follows:
- 3.5mm mic input
- 3.5mm headphone output
- Micro HDMI output
- USB-C port
- USB 2.0/multi terminal port
The A7R III has an additional sync socket for flash units.
To know more about the A7 III and A7R III customisation options and the dual memory card slot set-up, check our dedicated guides below.
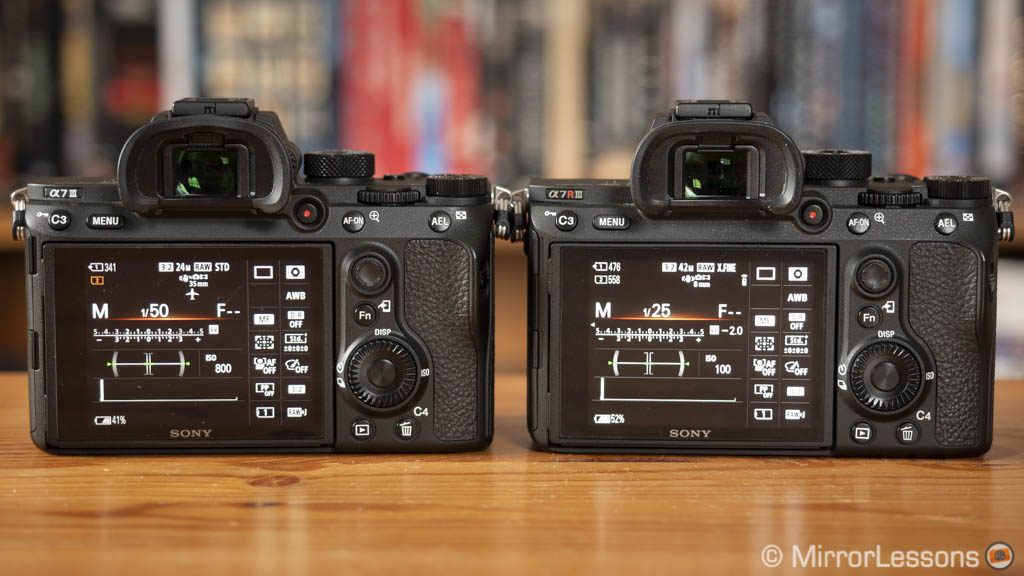
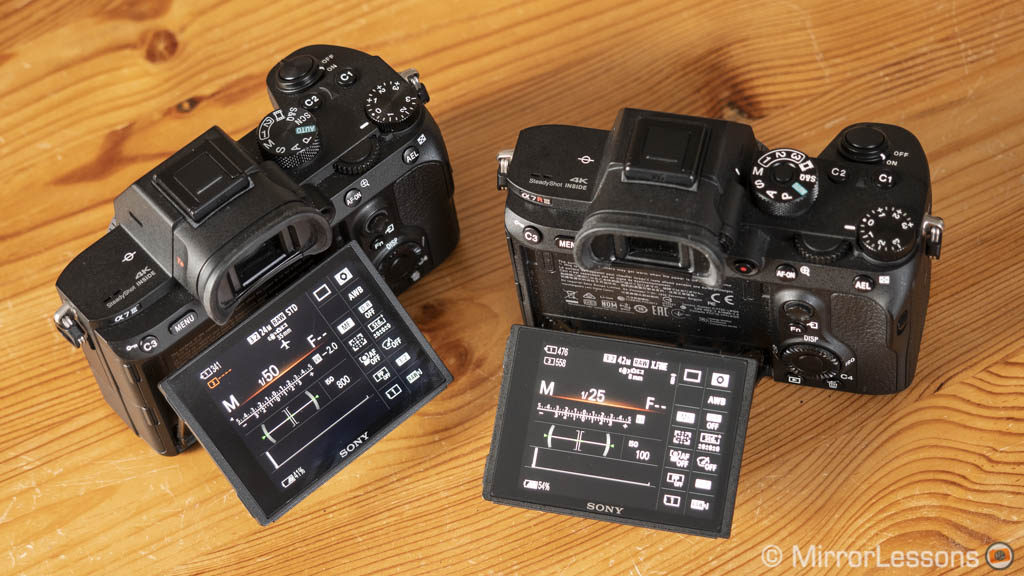
Sony A7 III vs A7R III – Screen and Viewfinder
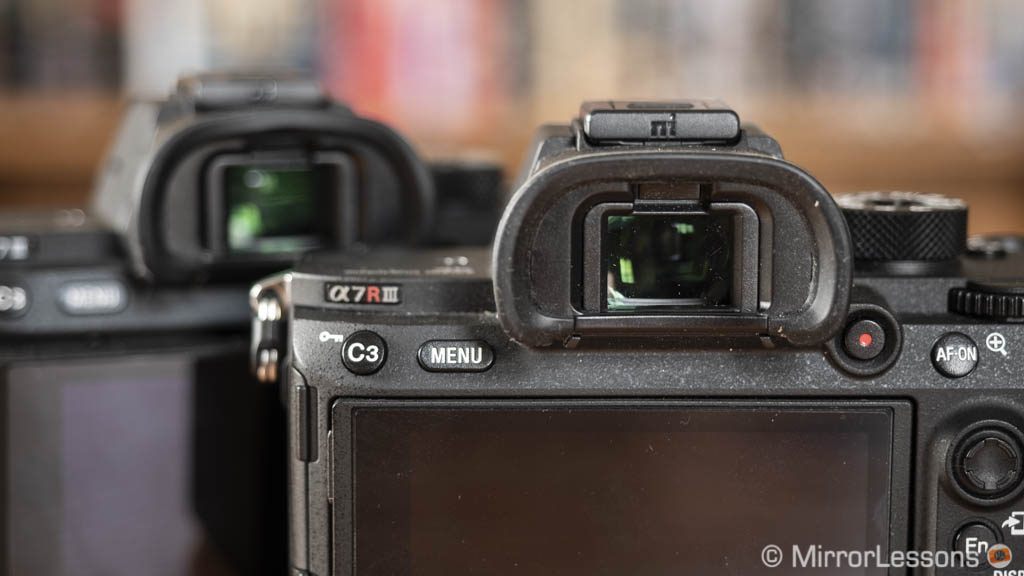
The first relevant difference concerns the electronic viewfinder.
The A7 III features an updated version in comparison to its predecessor with a new optical design that increase the magnification to 0.78x. The OLED panel has not changed however with 2.360k dots and a refresh rate of 60fps.
The A7R III has a more advanced EVF with 3,680k dots of resolution. The frame rate can be switched between Standard (60fps) and High (120fps). The latter gives a more fluid live view which is helpful when following fast subjects. The magnification is the same at 0.78x.
Other EVF specifications include a 100% field of view and 23mm eyepoint which means that both finders are comfortable to use when wearing glasses. You may lose sight of the extreme corners but the view remains wide enough.
The rear LCD screen is the same concerning the tilting capabilities (up 107°, down 41°) and the size (3-inches), but the one on the A7R III has more resolution (1.44M dots vs 921k dots).
The advantage of the A7R III is that both EVF and LCD give you a sharper live view with crispier details. You notice the difference especially when manually focusing and using the focus magnification assist. Unfortunately the advantage in sharpness is minimised when working in movie mode, where there is a significant decrease in resolution and increase in aliasing.
Both cameras include a Display Quality setting (Standard or High) and the High value uses the full resolution available. In many cases you won’t see the difference but the High setting can render the finest details more precisely and this is especially true for the A7 III which has less resolution to start with.
You’ll find touch capabilities on the two products. You can move the focus point or browse through your images in playback mode. The experience is the same on both cameras as far as reactivity and precision are concerned.
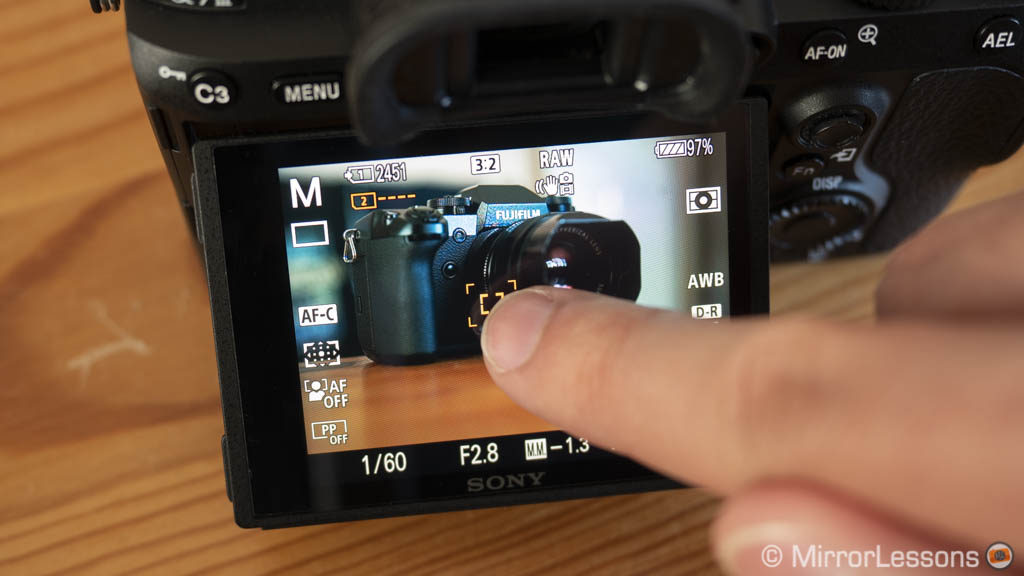
You can choose to keep the touchscreen active when composing with the EVF and use it as an alternative to the physical AF Joystick to move the focus point. You can also render just part of the screen active which stops you from moving the focus point inadvertently with your nose for example. Personally though, I prefer the Joystick solution.
To know more about the viewfinder and LCD monitor, check out our dedicated article below.
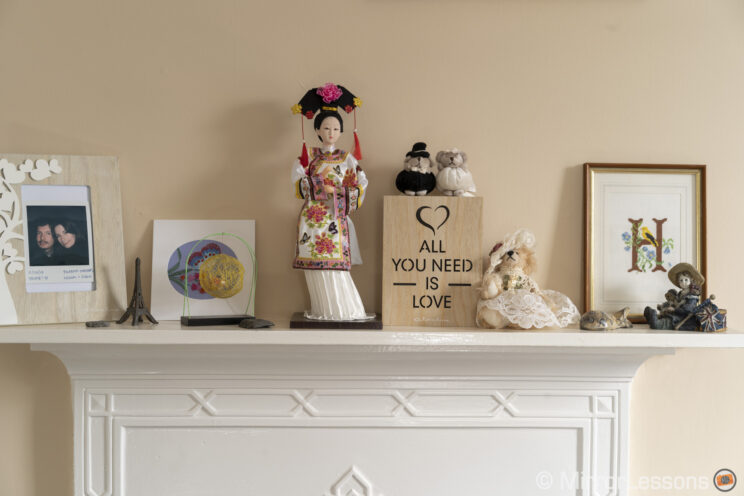
Sony A7 III vs A7R III – Sharpness
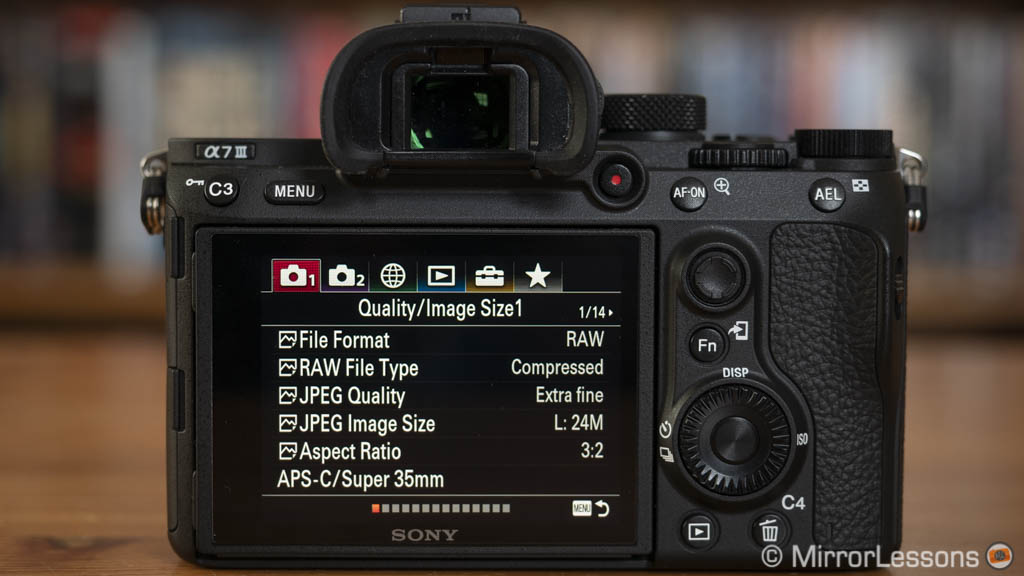
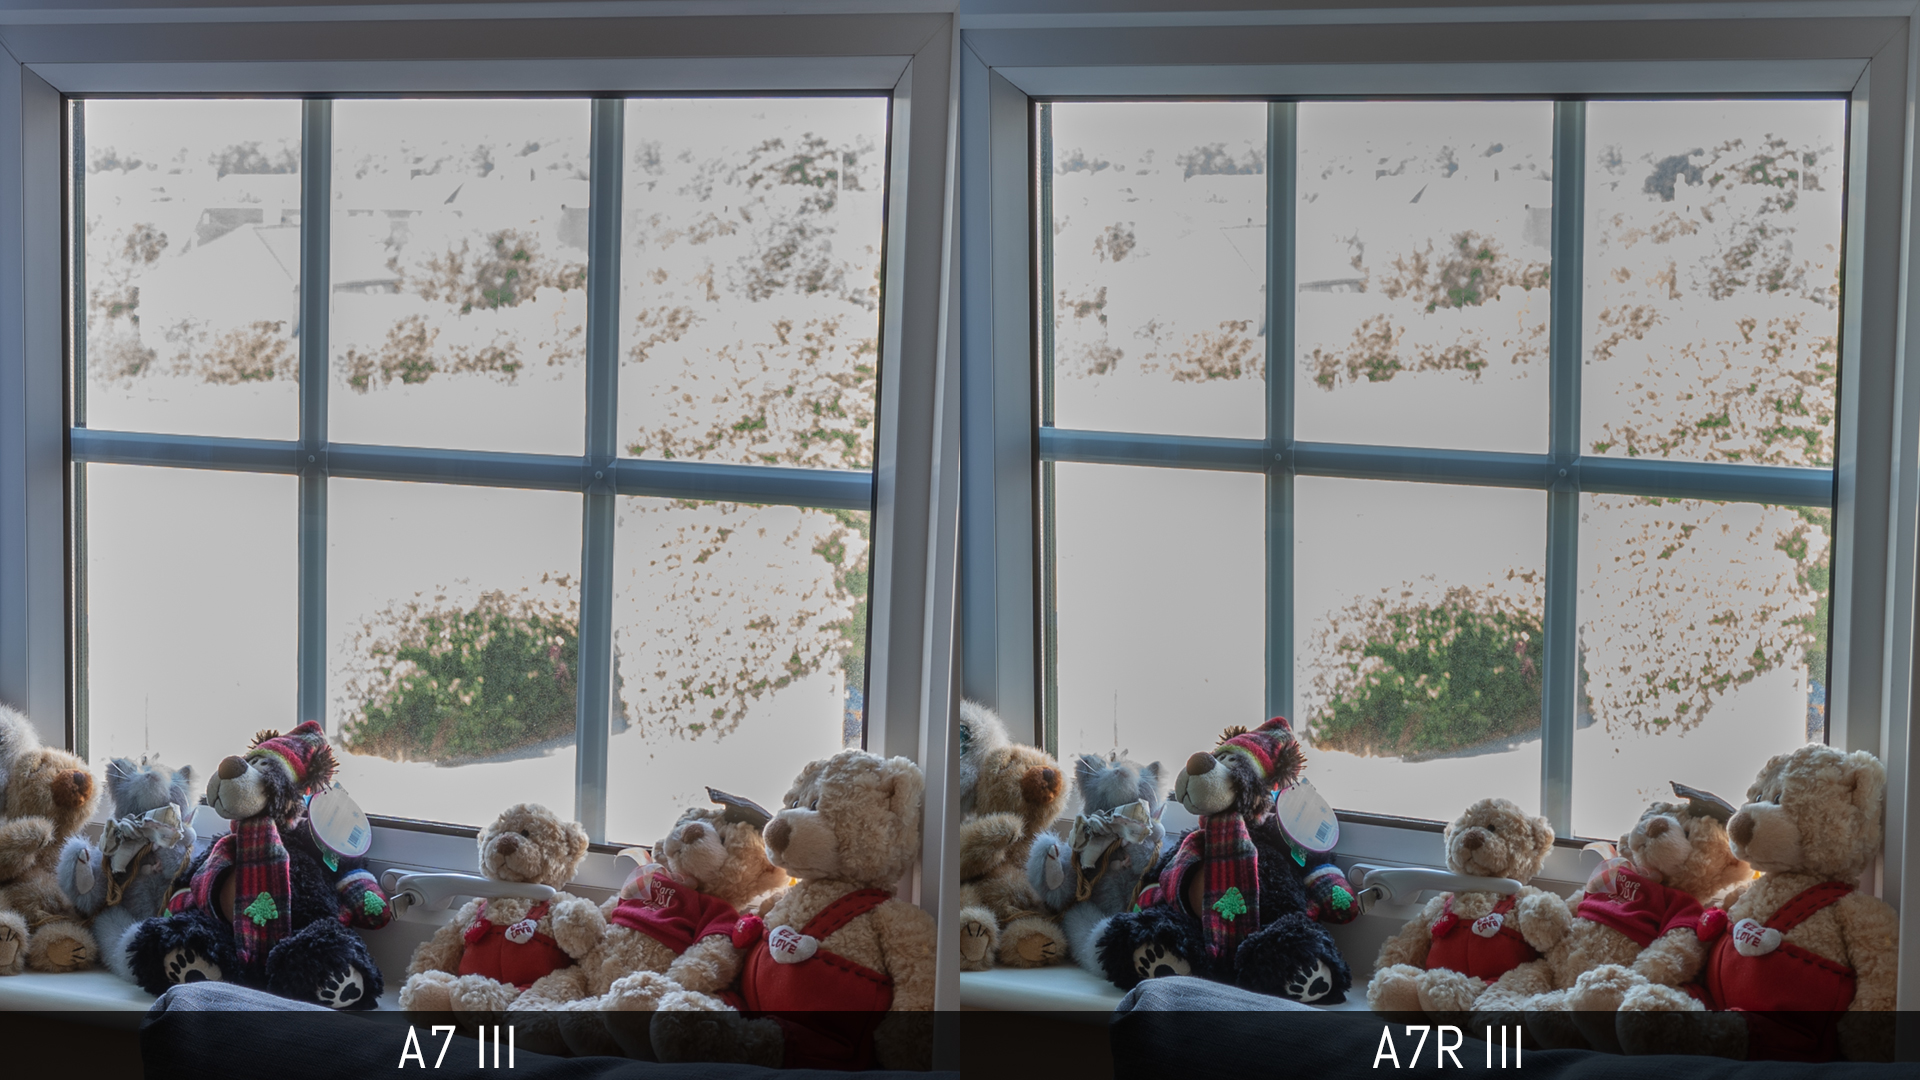
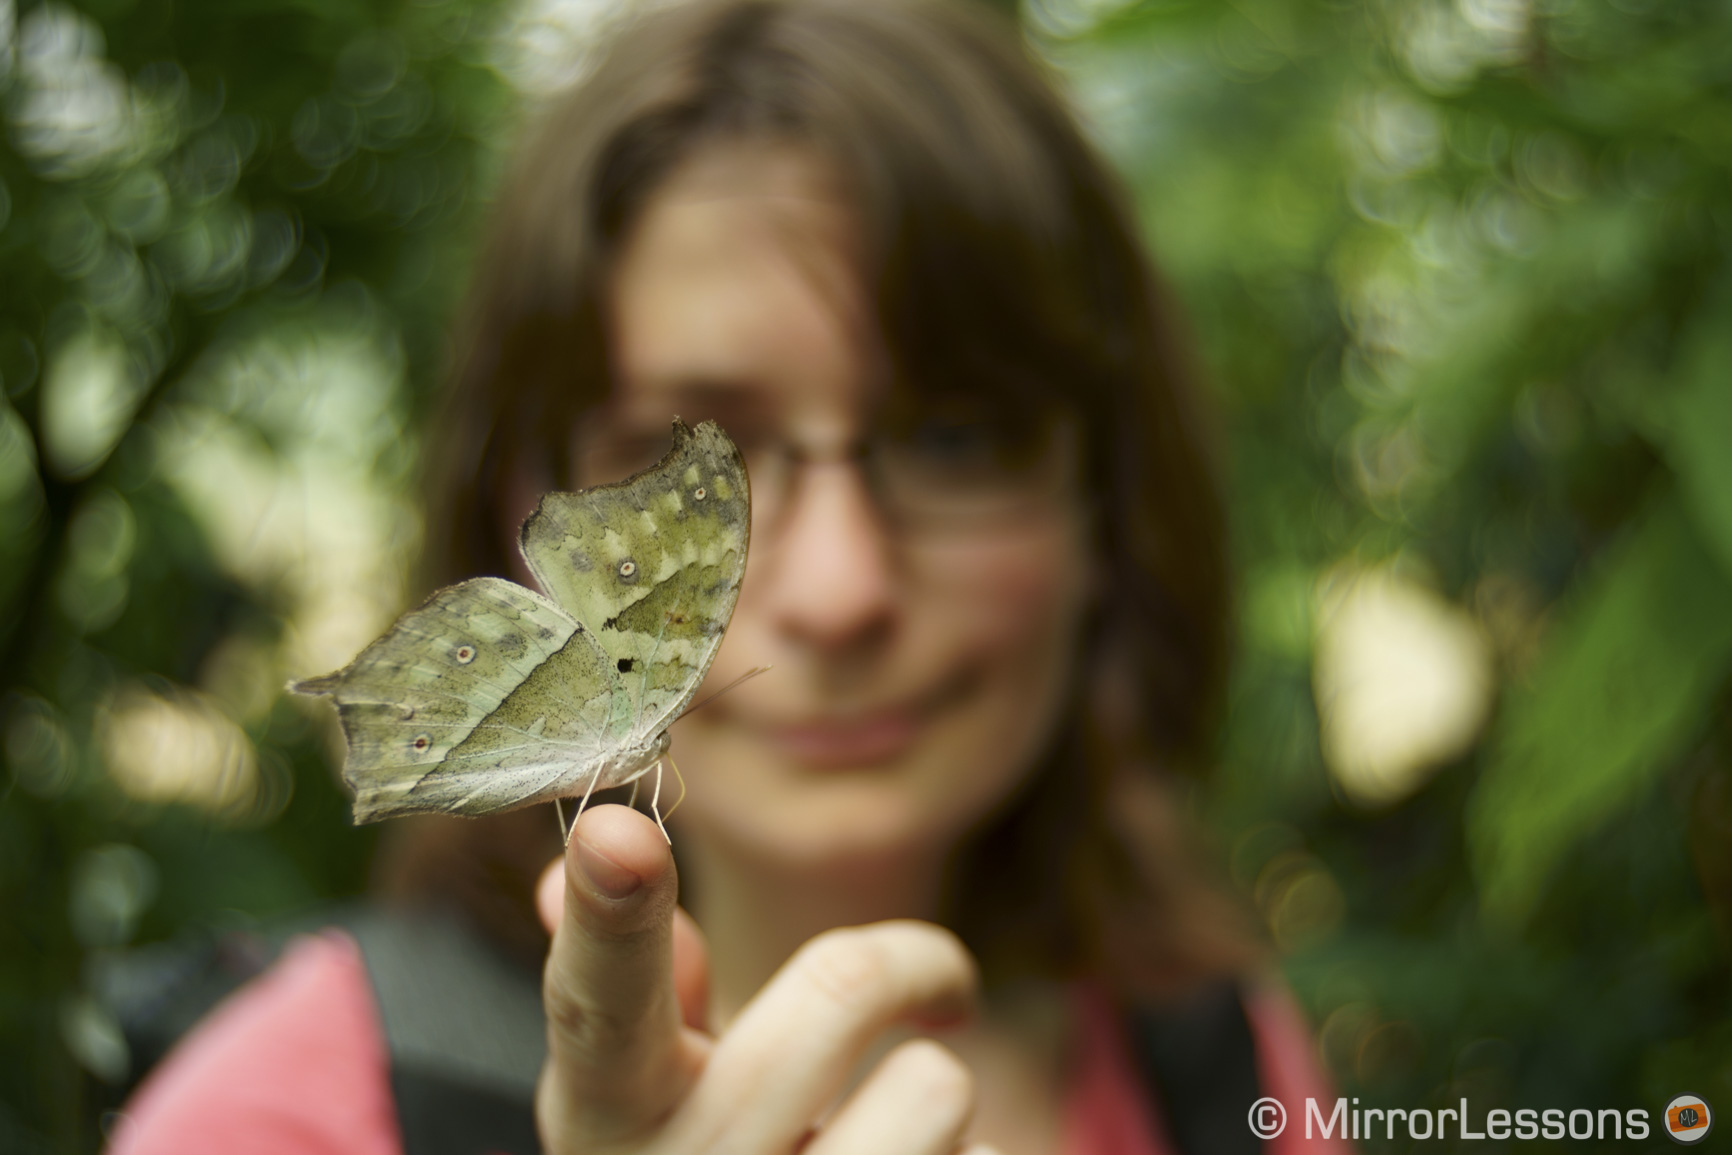
One of the most important differences between these two cameras is found here. They both feature a 35mm format sensor with BSI (Back-Illuminated) technology but the resolution is different. The A7 has 24MP and a low pass filter whereas the A7R III comes with 42MP and no AA filter.
The A7R model gives you an advantage when it comes to sharpness as well as more room for cropping in post production. It can produce finer details which becomes more evident if I upscale the A7 III image to match the same 42MP resolution as the A7r III.
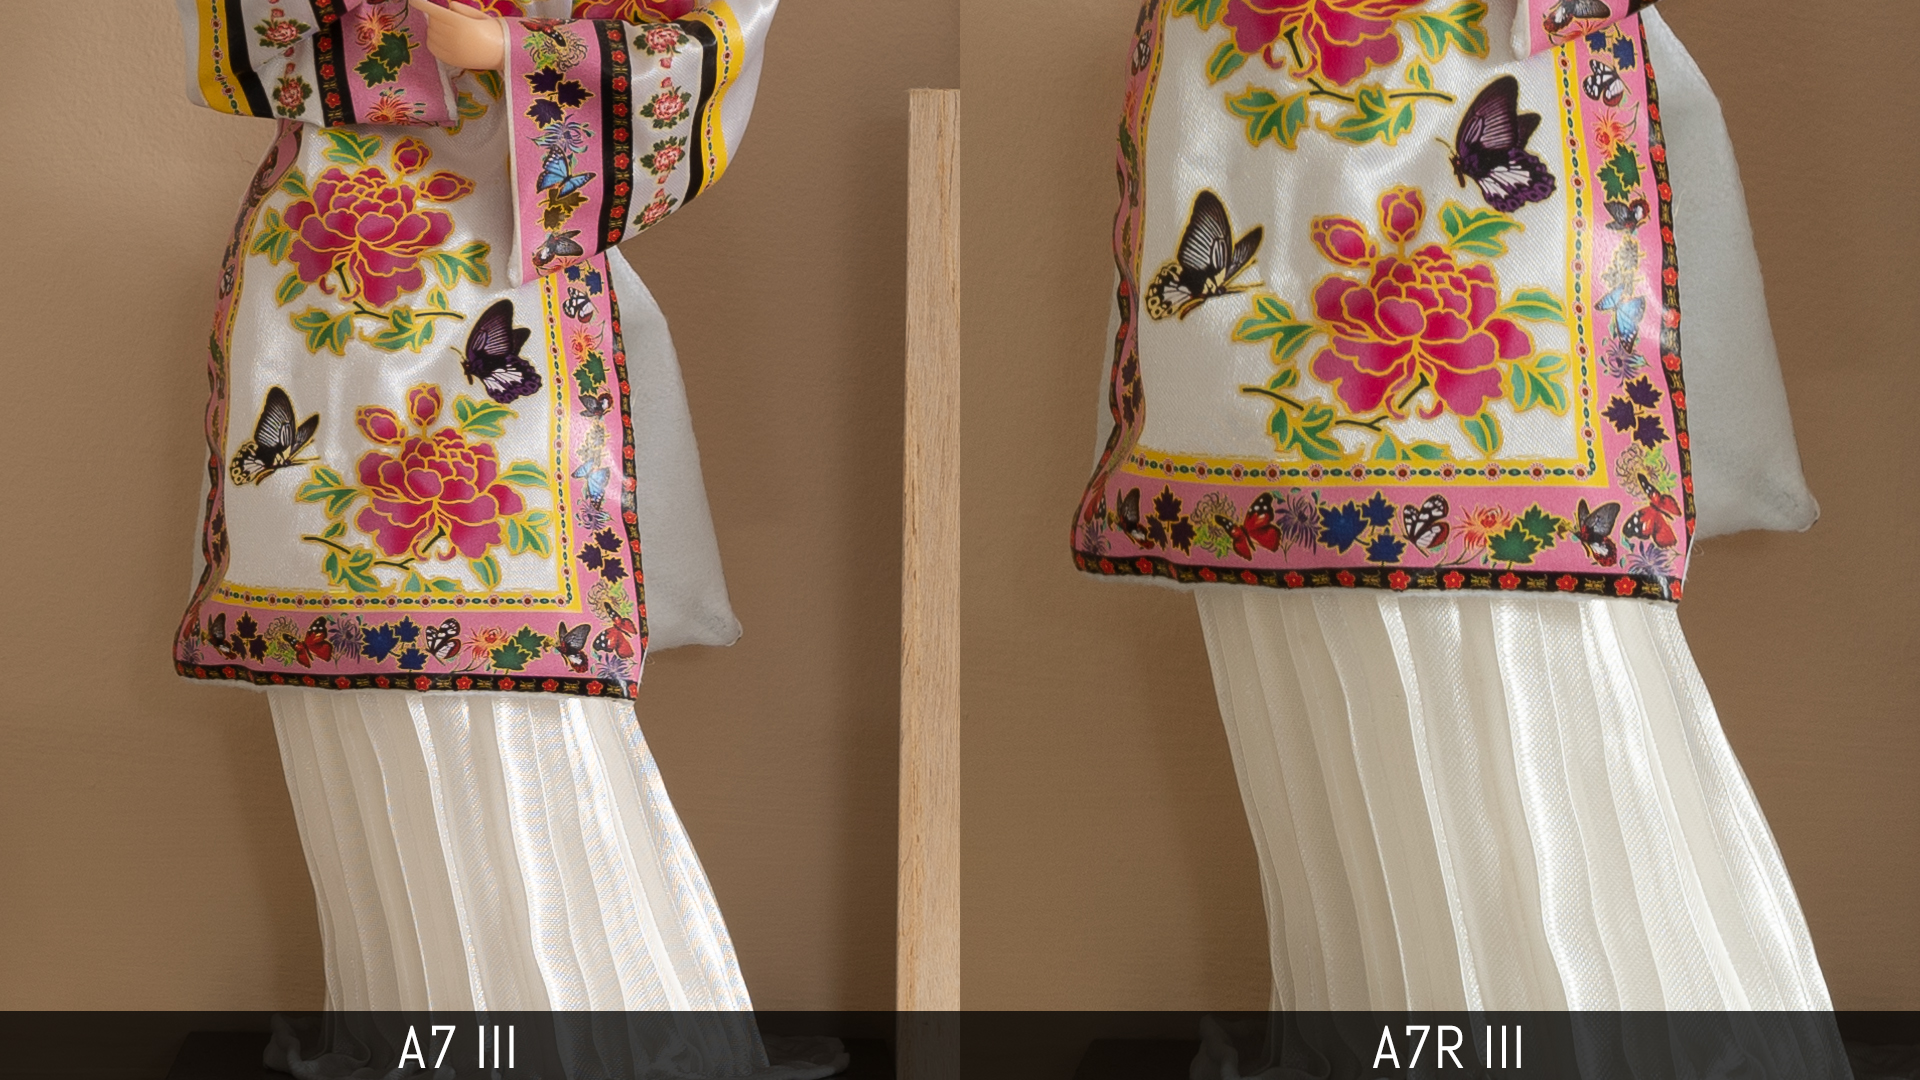
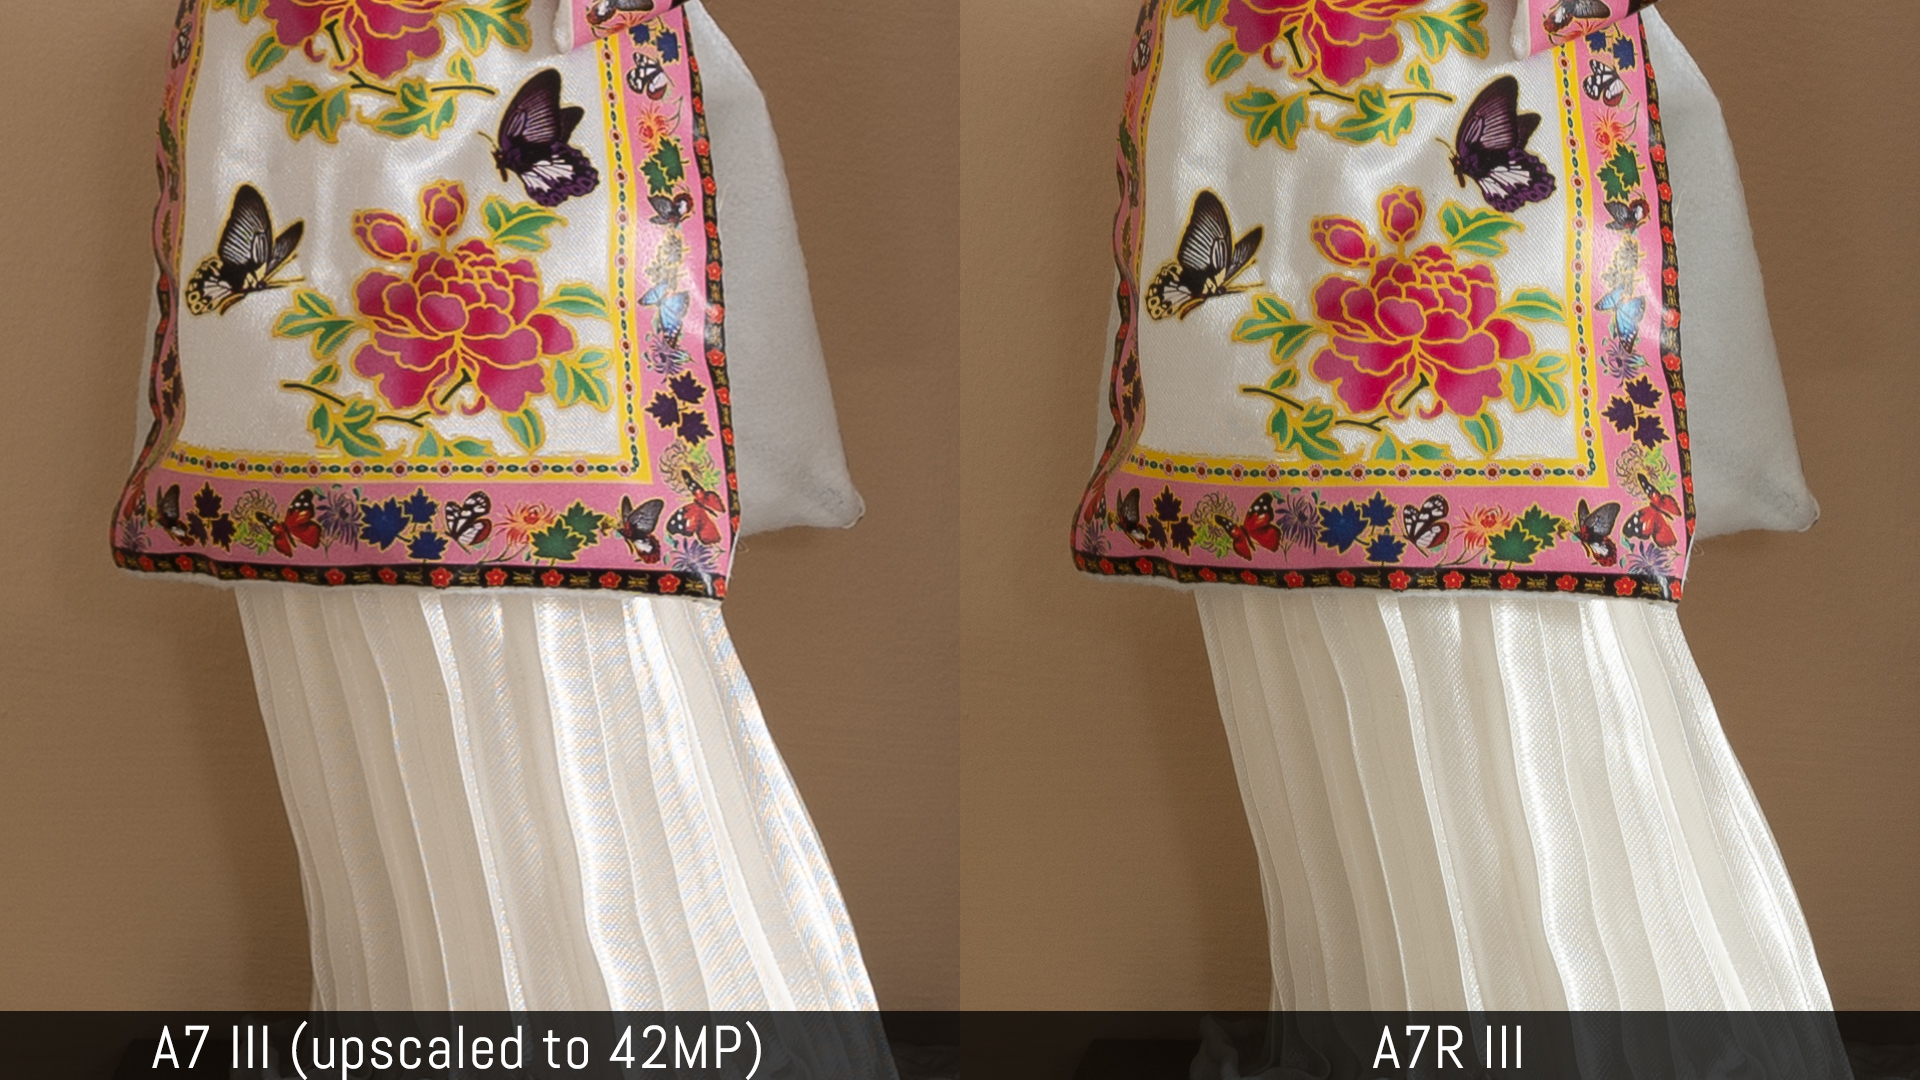
That being said, I find the results with the A7 III really good. If I downscale the A7R image to 24MP, the images are much more similar (although the R3 retains a slight advantage). Curiously, I found some traces of moiré in the A73 image despite the low pass filter, which suggests that it is very weak. Fortunately moiré is easy to remove with post-production software applications. As for the the A7R III, its image processor seems to be efficient enough to eliminate it.

Both cameras provide the option of shooting in APS-C mode (1.5x crop), which gives you a 10MP file on the A7 III and an 18MP file on the A7R III.
The A7R III has an additional tool to increase sharpness even more, or to be more precise, increase colour resolution. Thanks to the built-in sensor shift mechanism (the same used for 5-axis stabilisation that we’ll analyse later on), the Pixel Shift Multi Shoot mode captures four images in a row by moving the sensor by one pixel between each shot. This means that each point in your scene is capture by at least one red, green and blue pixel instead of just one out of the three RGB channels. When you composite the four photographs in post production, you obtain an image with better detail and more colour accuracy. The resolution of 42MP remains the same however.
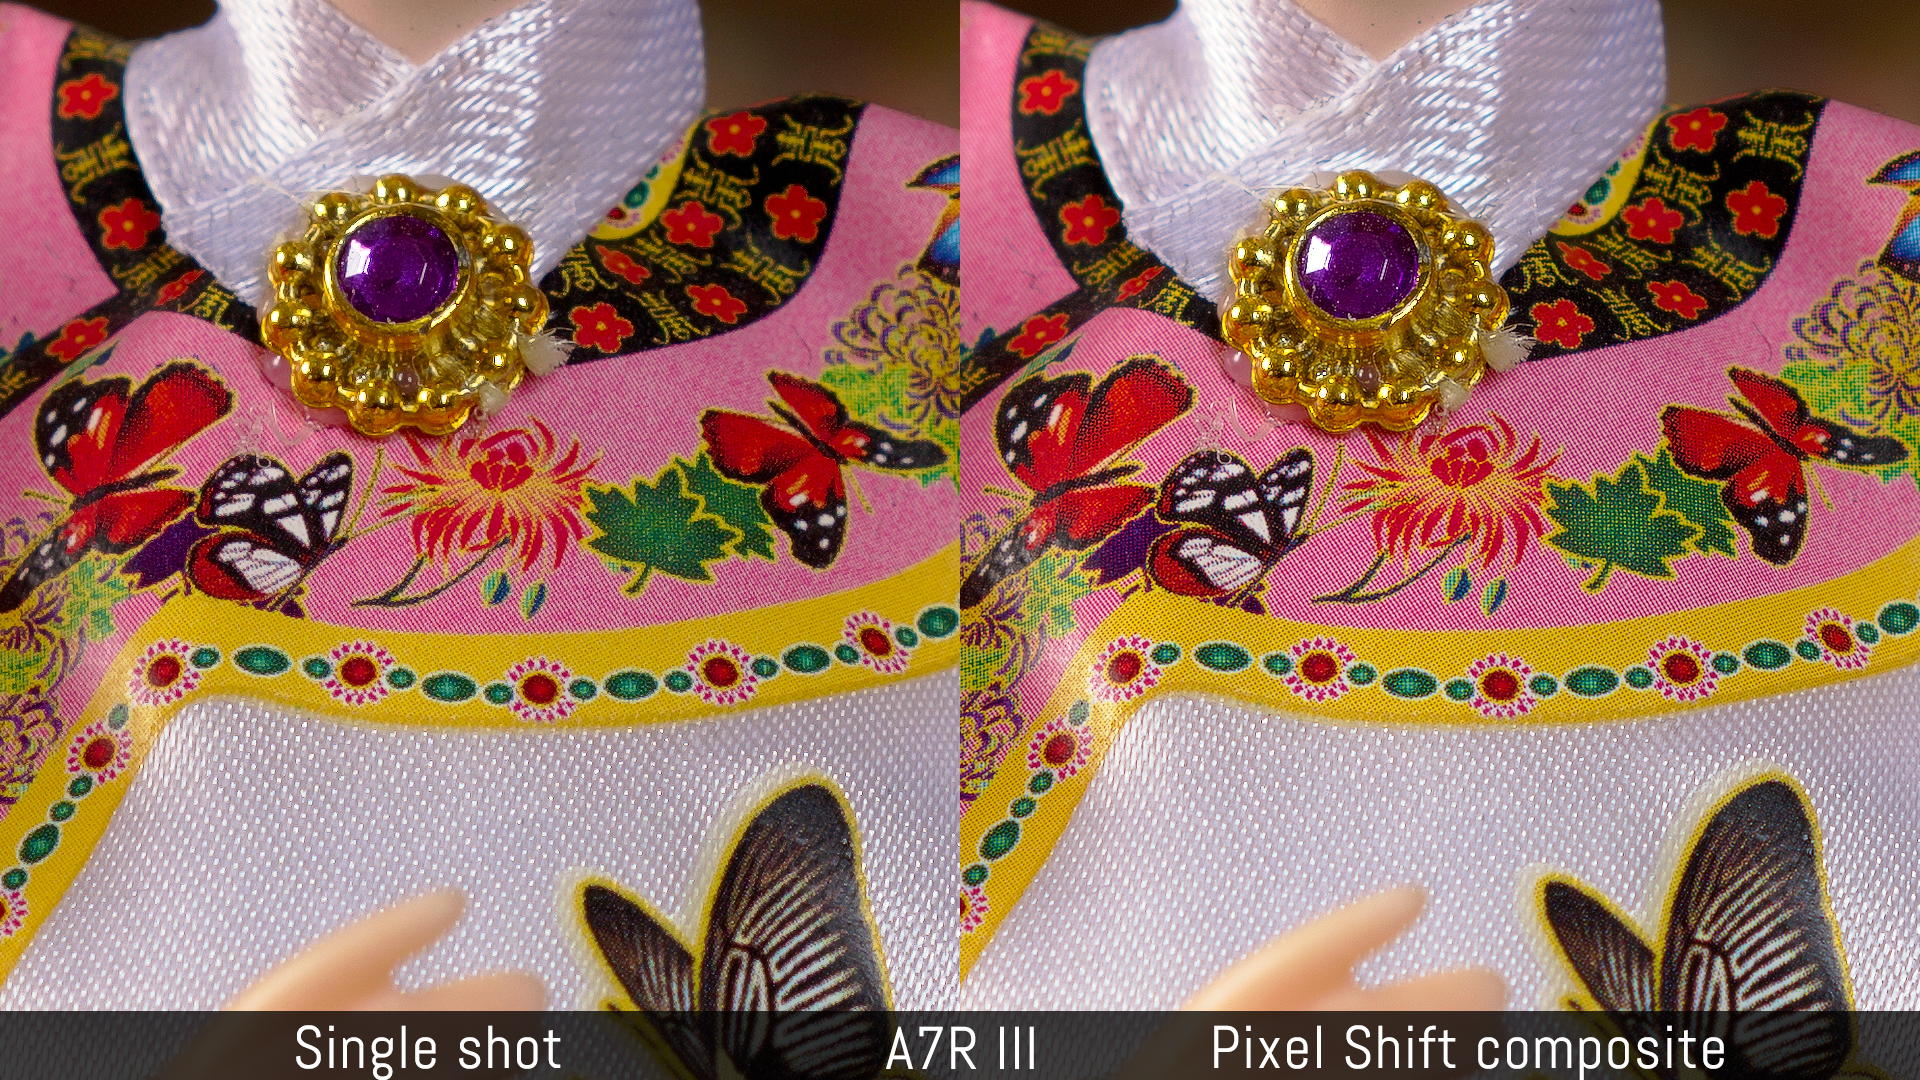
There are a few limitations to be aware of. You can’t use it hand-held because every micro movement will disturb the shifting process and sharpness will decrease significantly when merging the images. Likewise moving elements in your composition will cause artefacts.

The composite can’t be created in-camera. You need the Sony Imaging Edge or the third-party SonyPixelShiftDNG app. The final image is encapsulated in an .ARQ file that can be opened by popular software such as Lightroom Classic.
Sony A7 III vs A7R III – Dynamic range
With dynamic range both cameras are really close in terms of latitude and versatility of the RAW files. The only thing we can notice with extreme shadow recovery (+5Ev) is that noise in the dark areas of the A7r II files is more pronounced, but that can be reduced with luminance noise reduction. With more mild processing, there isn’t any difference really. Highlight recovery is the same on both cameras.

Both cameras can shoot compressed or uncompressed RAW files and have a maximum bit depth of 14-bit. Uncompressed gives you better quality with heavy post processing, whereas the compressed option helps the buffer when shooting in burst mode. Note that they both drop to 12-bit when shooting in continuous mode with the electronic shutter.
The metering modes are the same and so is their behaviour. You can choose between Multi, Center and Spot as well as two additional settings (Highlight, which preserves the brightest areas of the image, and Entire Screen Average). You can also adjust compensation for each metering setting in ±1Ev steps or link the focus point to Spot metering.
Sony A7 III vs A7R III – Low light and high ISO
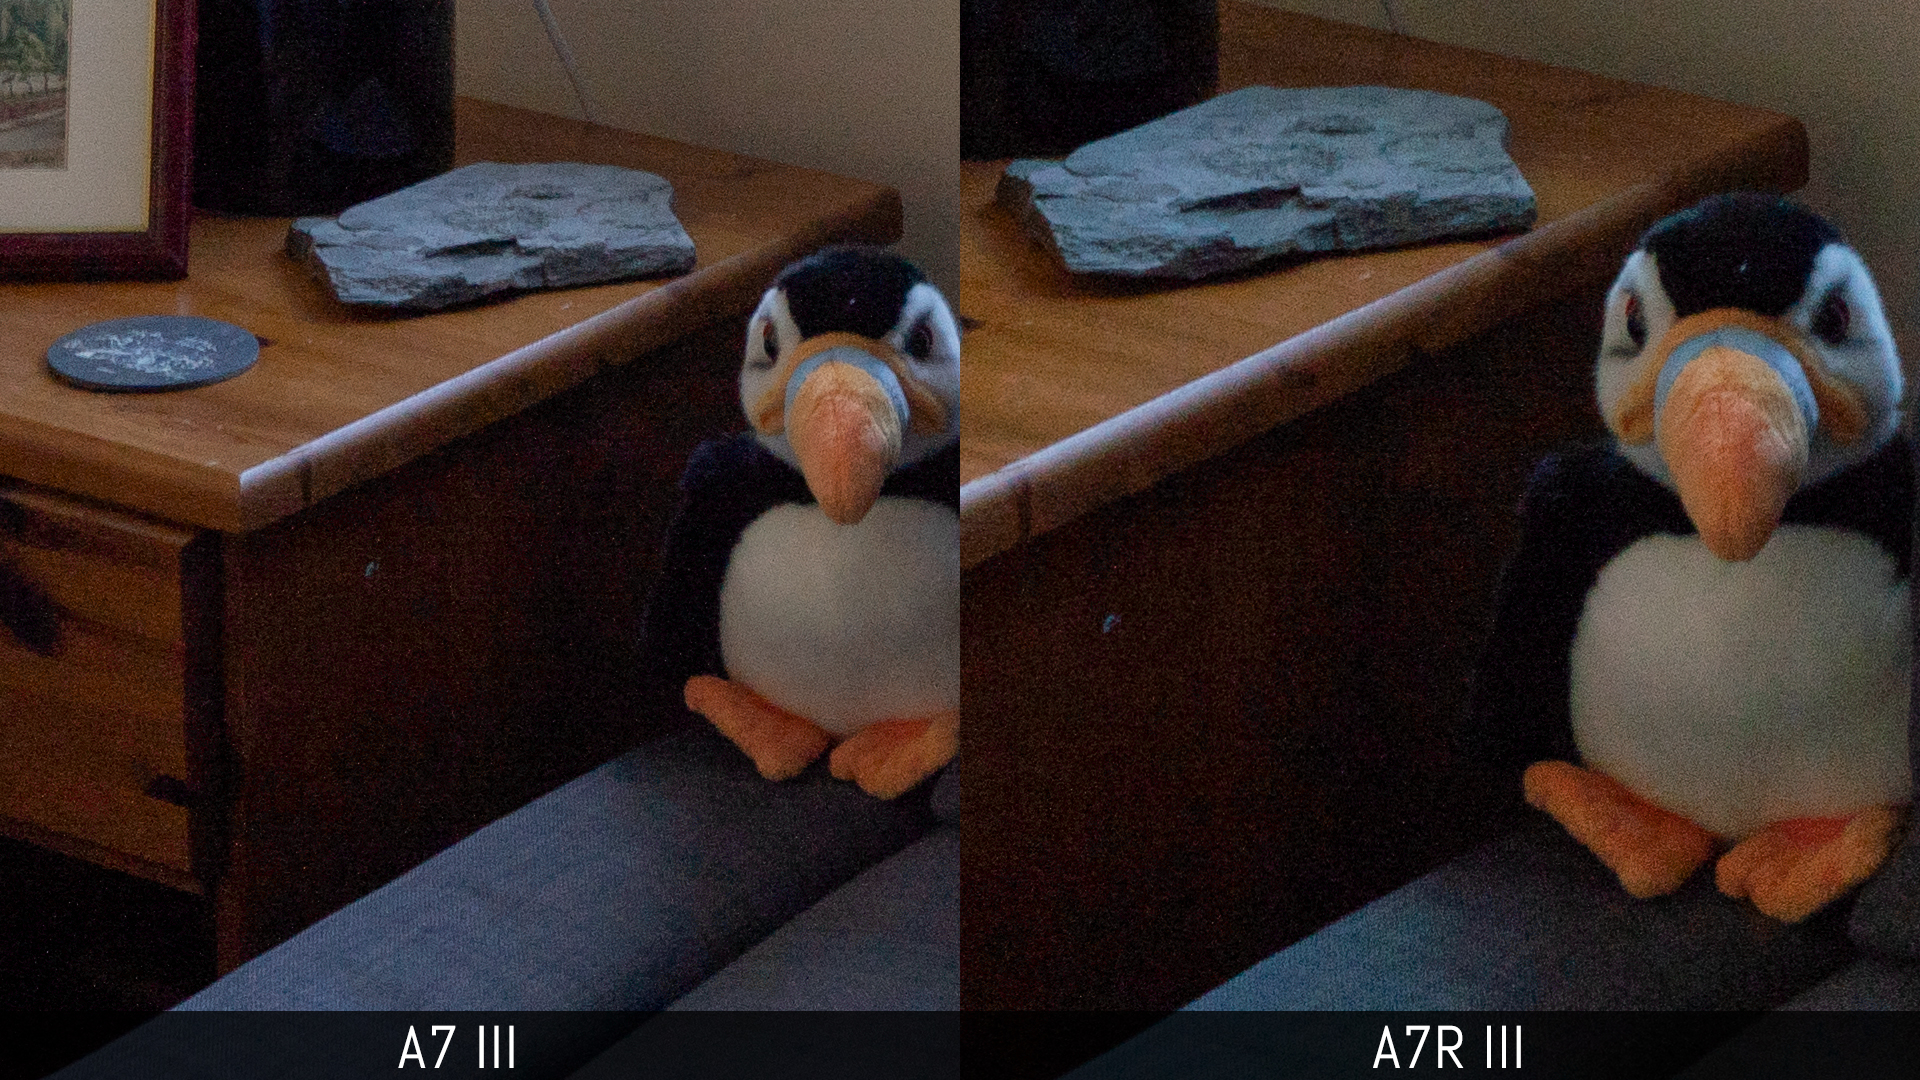
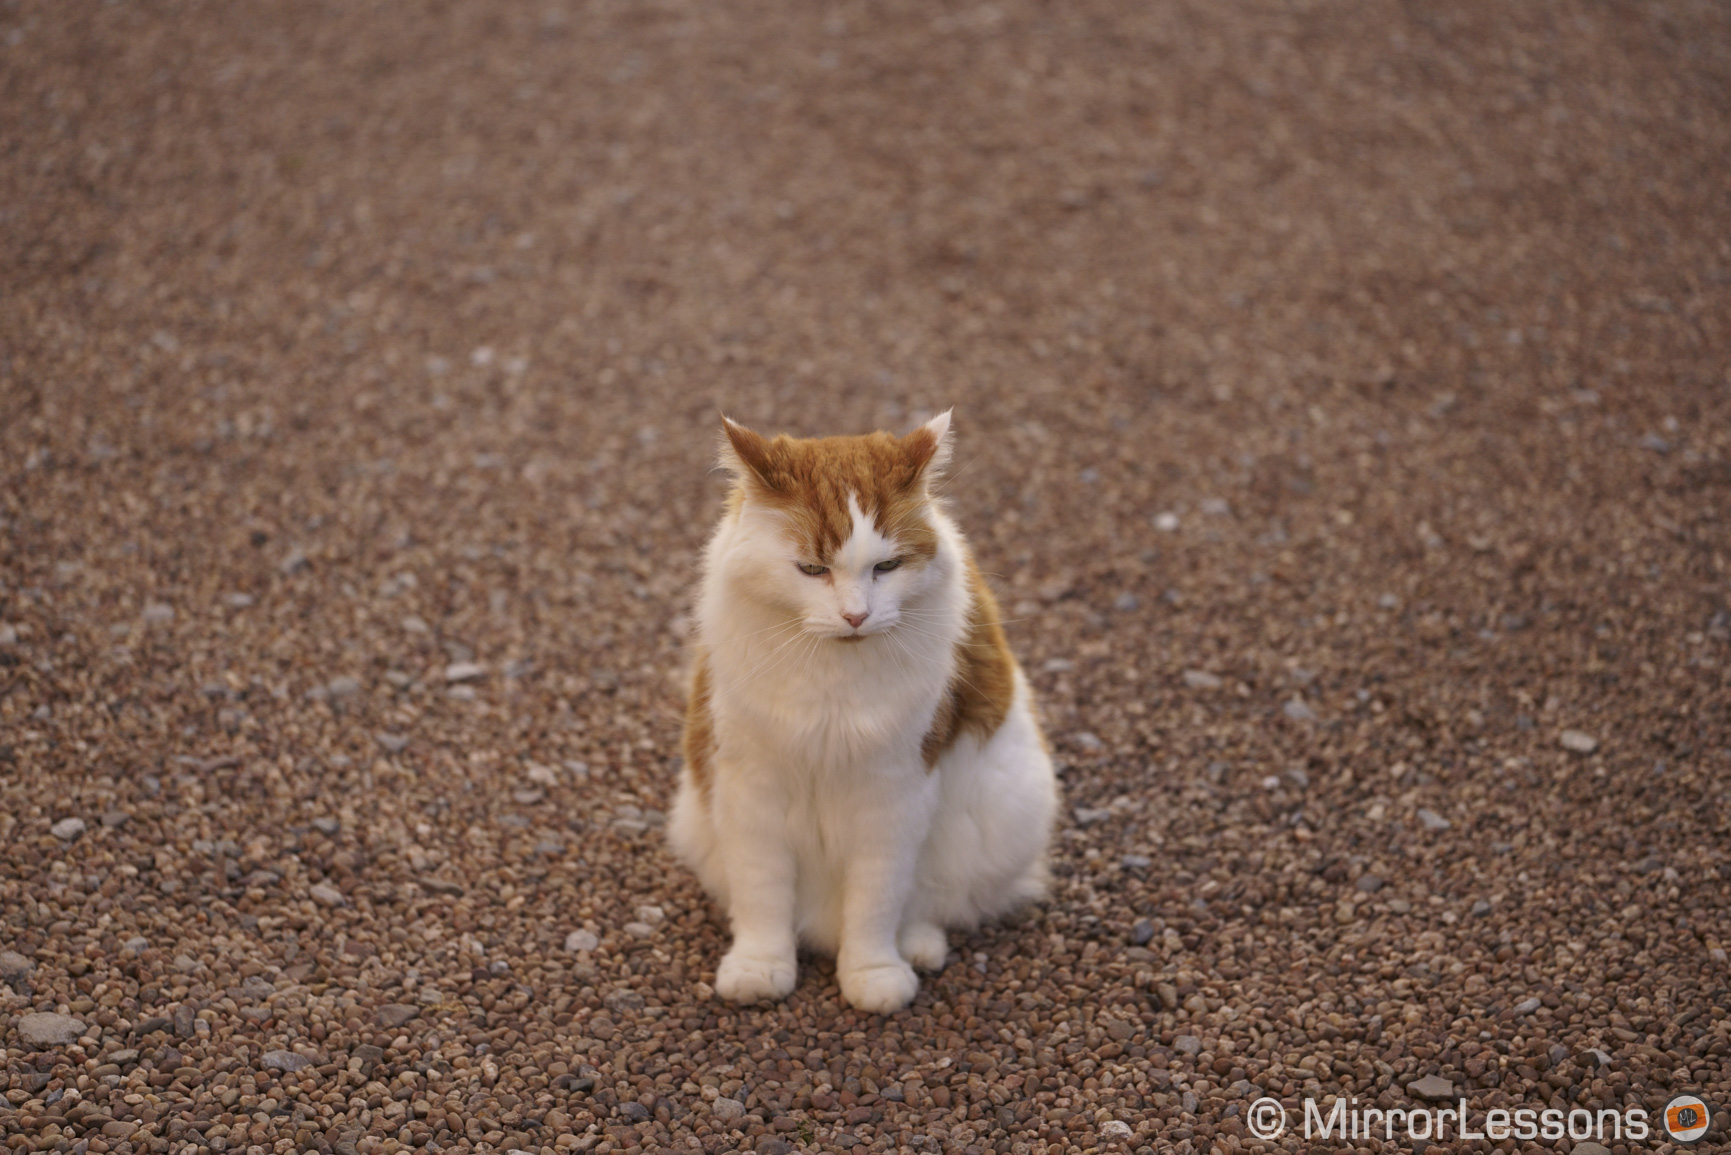
The lower megapixel count gives the A7 III an advantage at high ISOs. Its native sensitivity goes from 100 to 51200, with expanded values down to 50 and up to 204800 ISO. The A7R III stops at ISO 32000 and 102400 ISO respectively. The low ISO level is the same.
The results remain pretty similar up to 1600 ISO. From 3200 ISO, we start to see more noise from the A7R III and it becomes more evident from 6400 ISO.


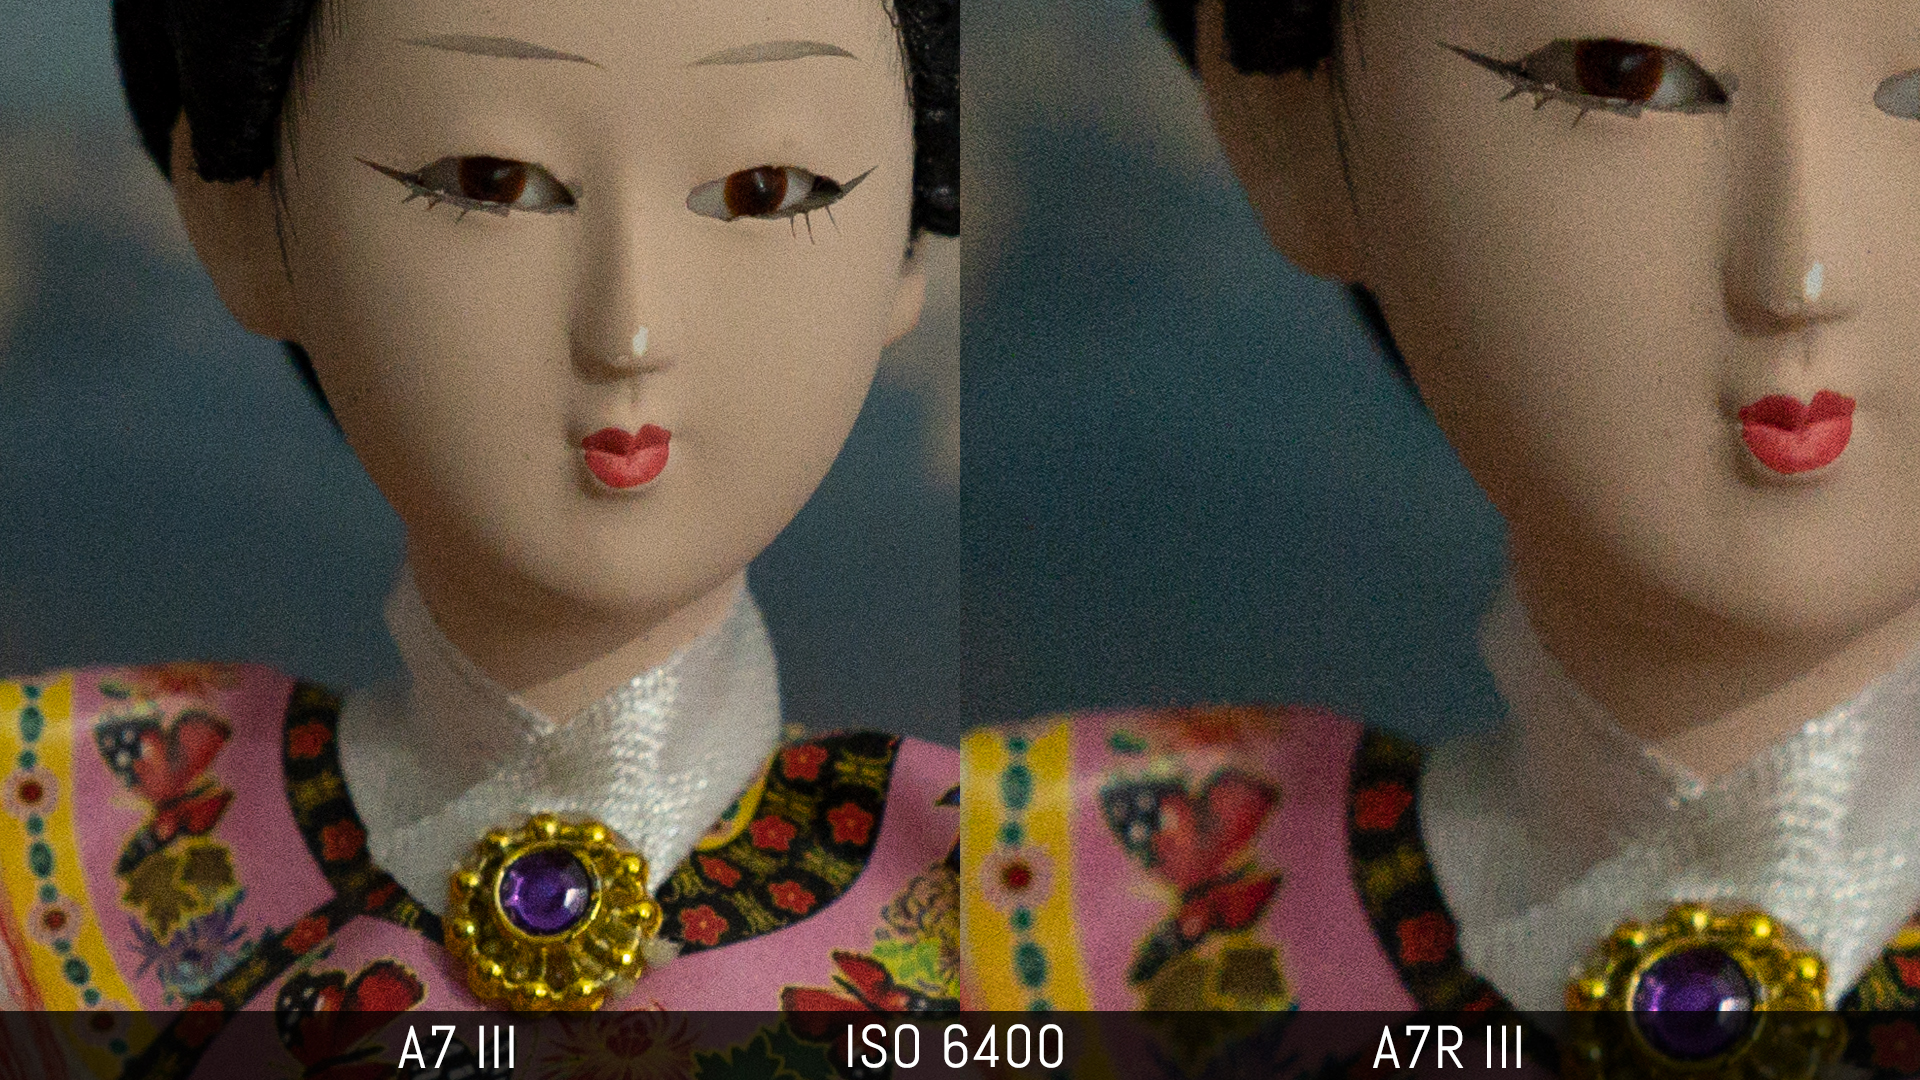
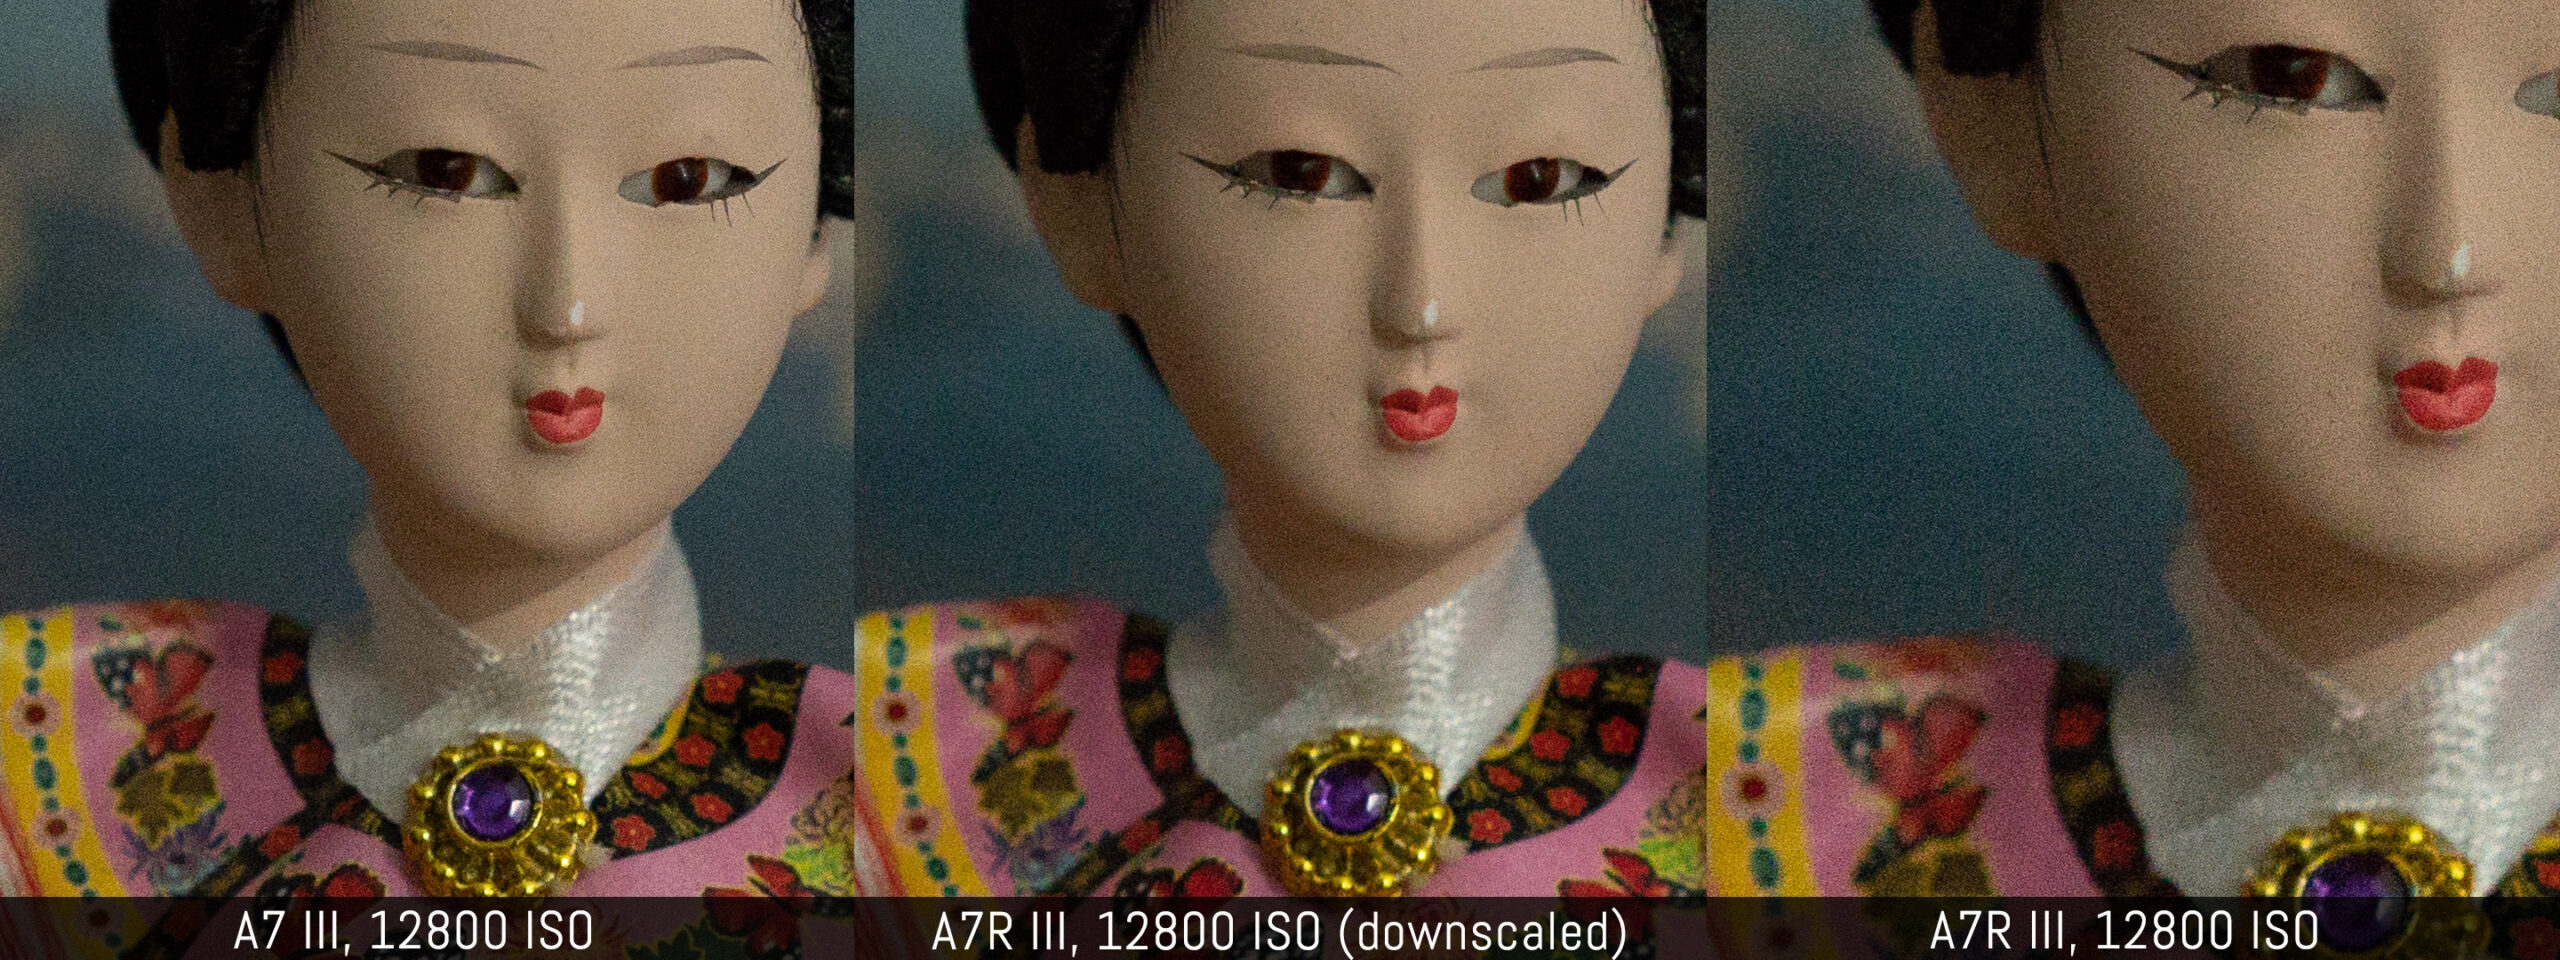
The difference increases from ISO 12800 and the A7 III clearly becomes superior from 51200 ISO where the R model has already started to use the push levels.

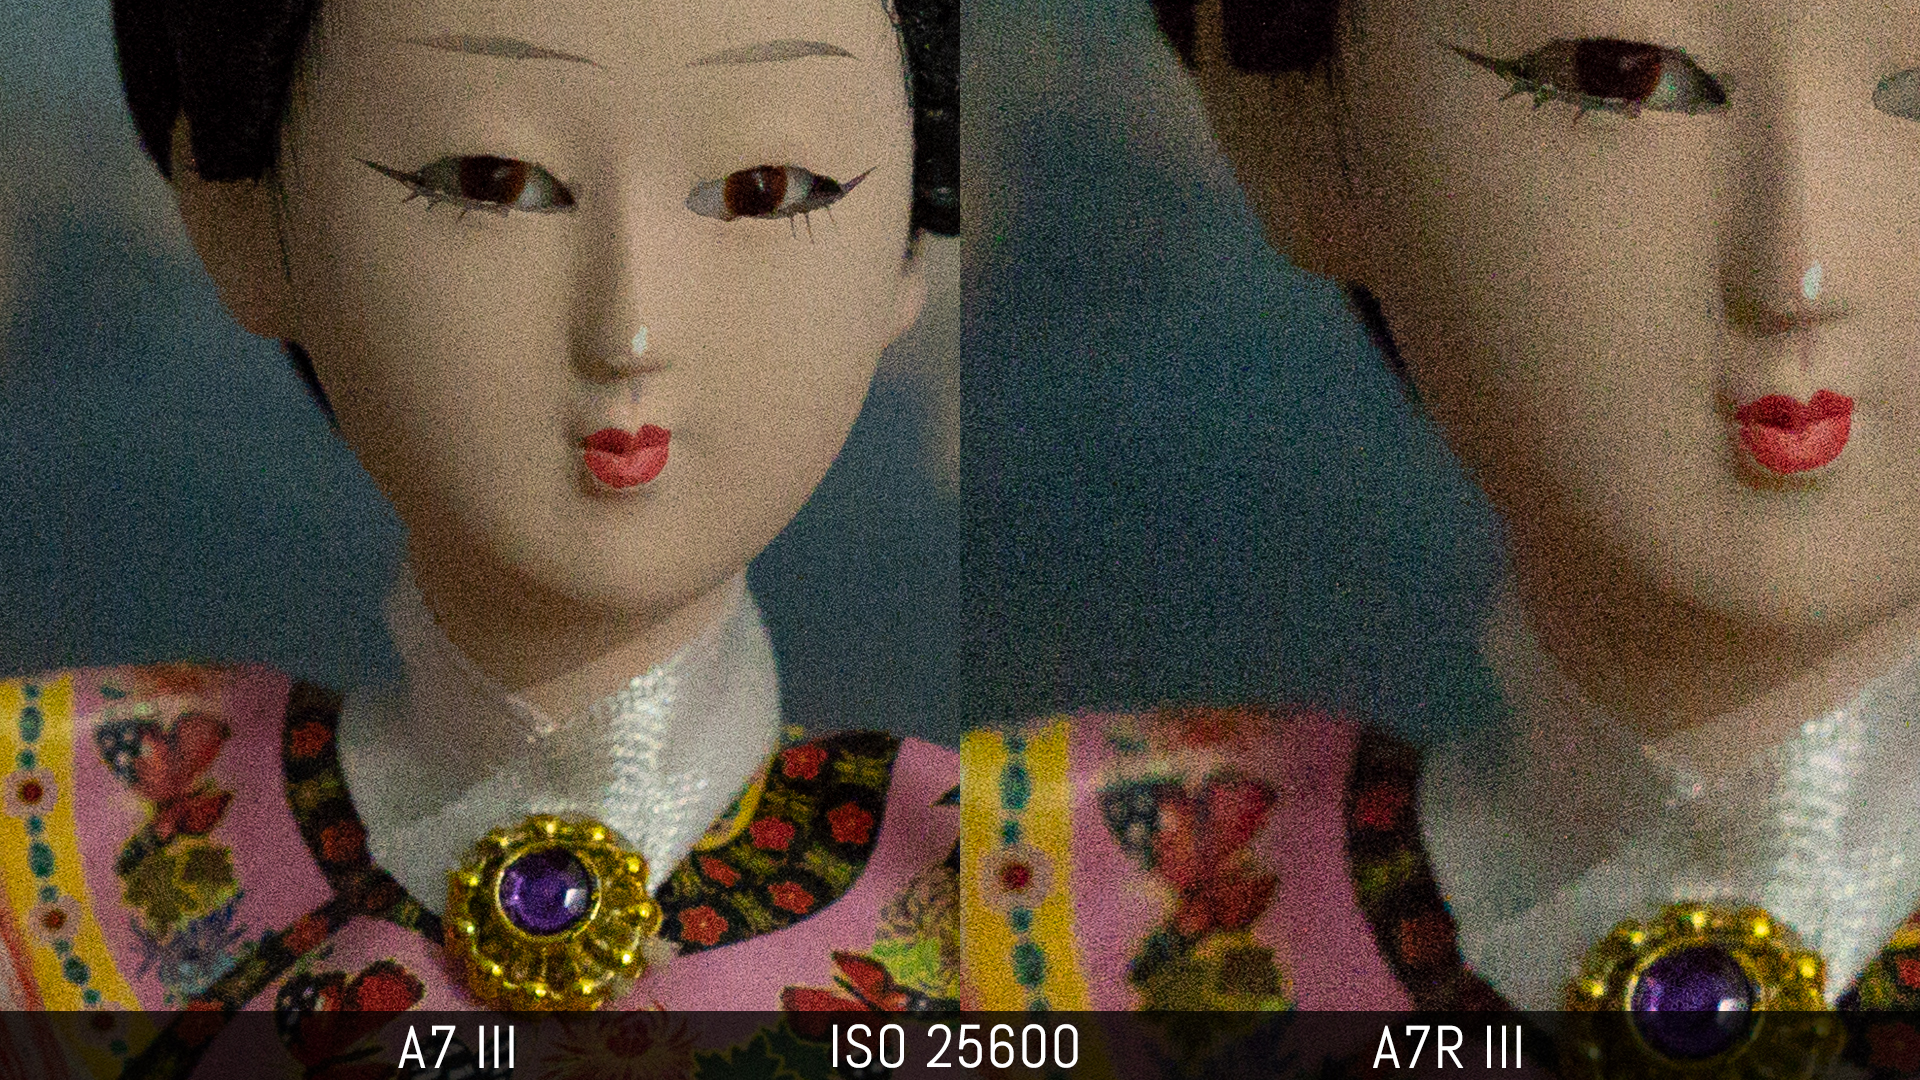

The highest values show lots of noise in the case of both cameras, with 204800 ISO on the A7 III being the worst.

One possibility for the A7R III is to reduce the resolution of the final image. You can see below that if I downscale the 12800 ISO example to 24MP, noise is less invasive.
Additionally, on separate occasions with the two cameras, I had the chance to perform some quick astro-photography tests and I can confirm that the star-eating issue is much more contained in comparison to the previous generation.
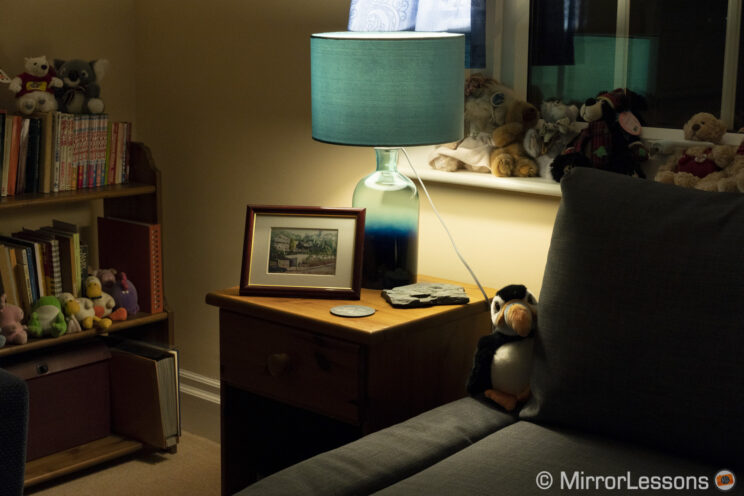
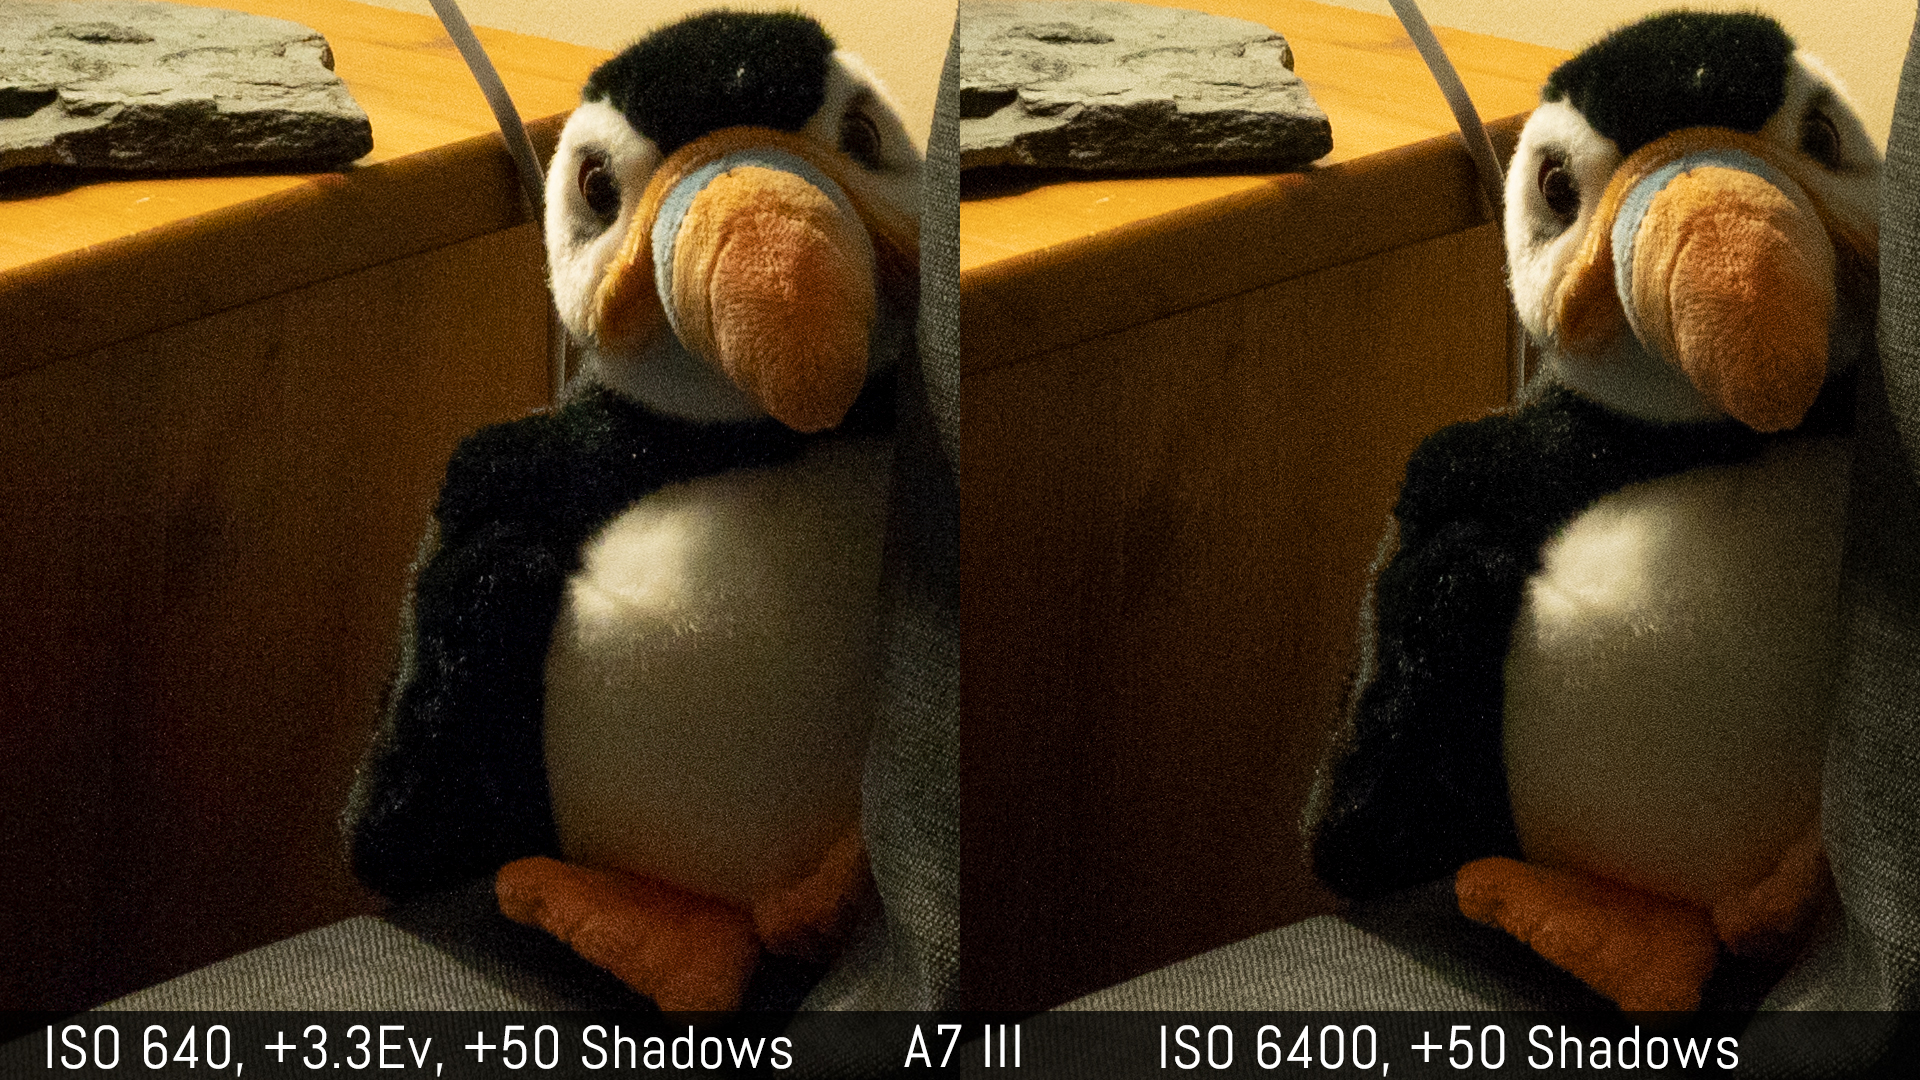
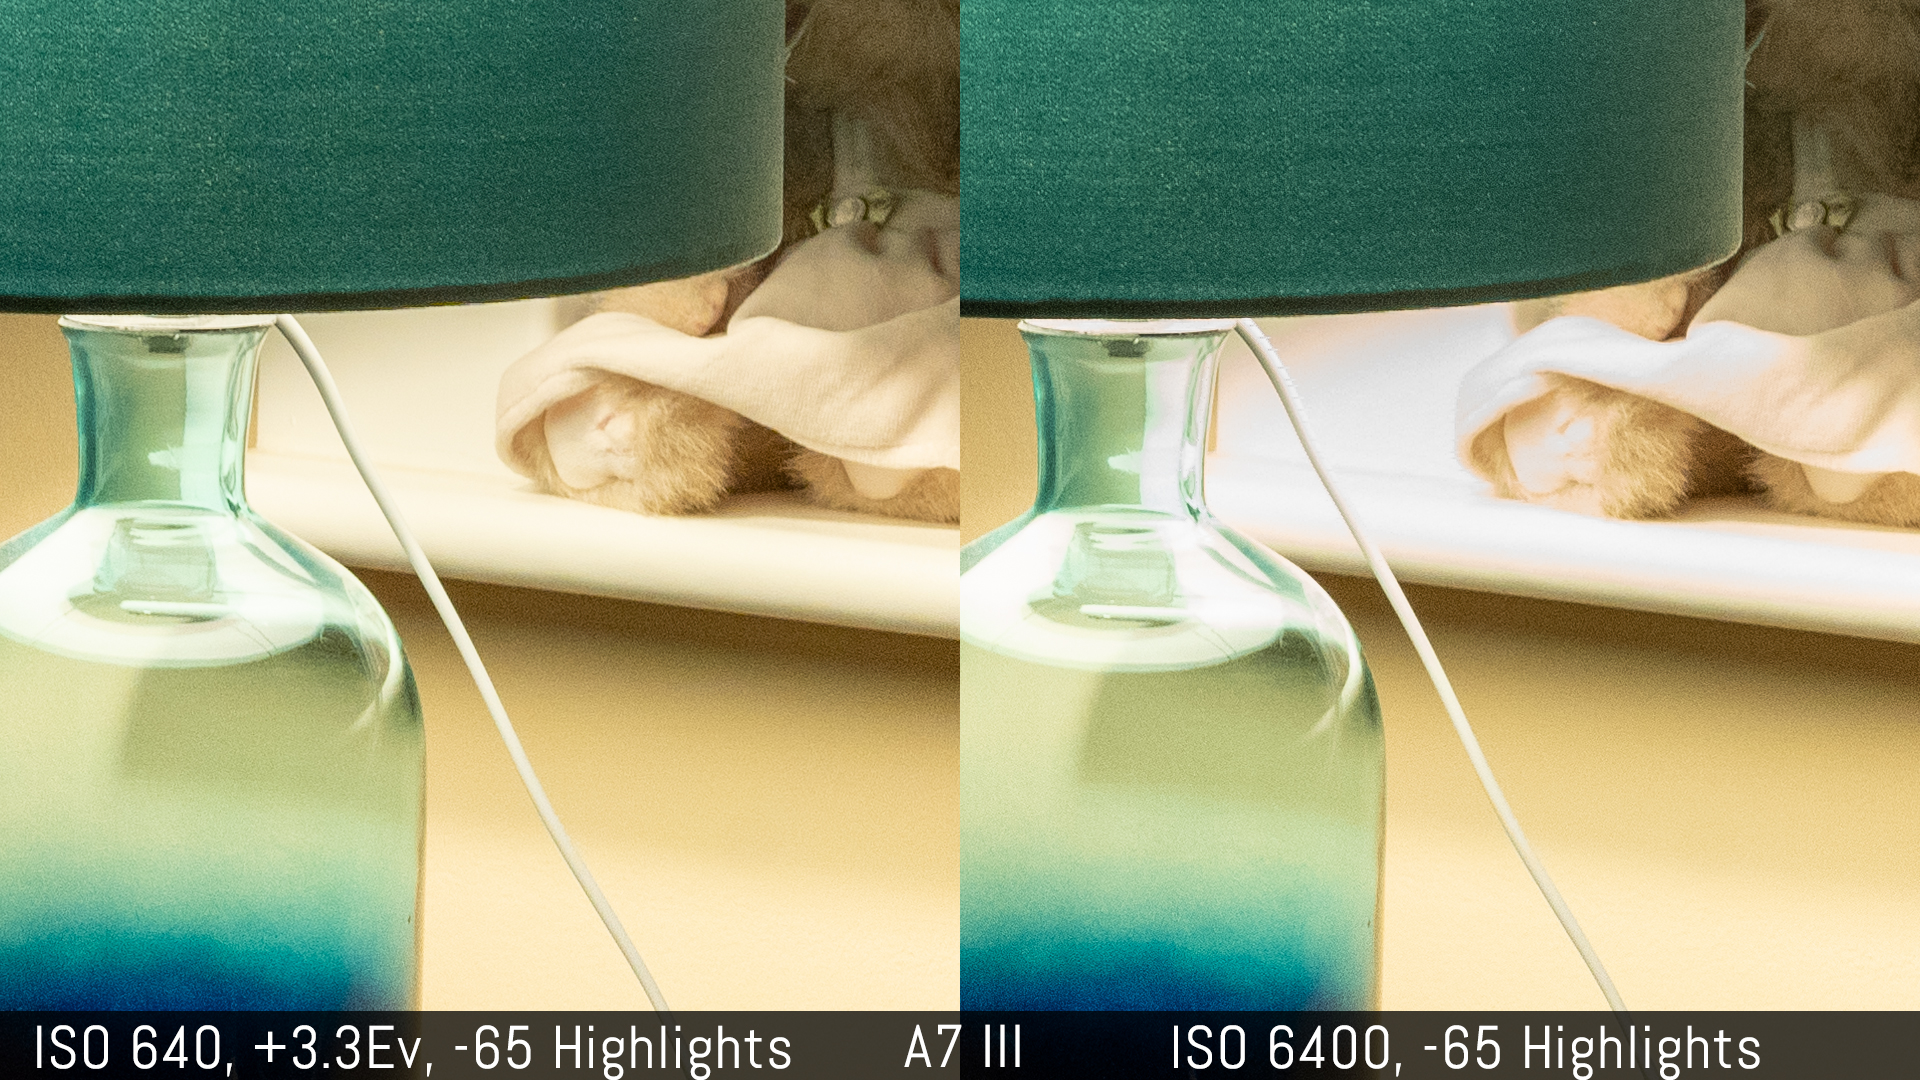
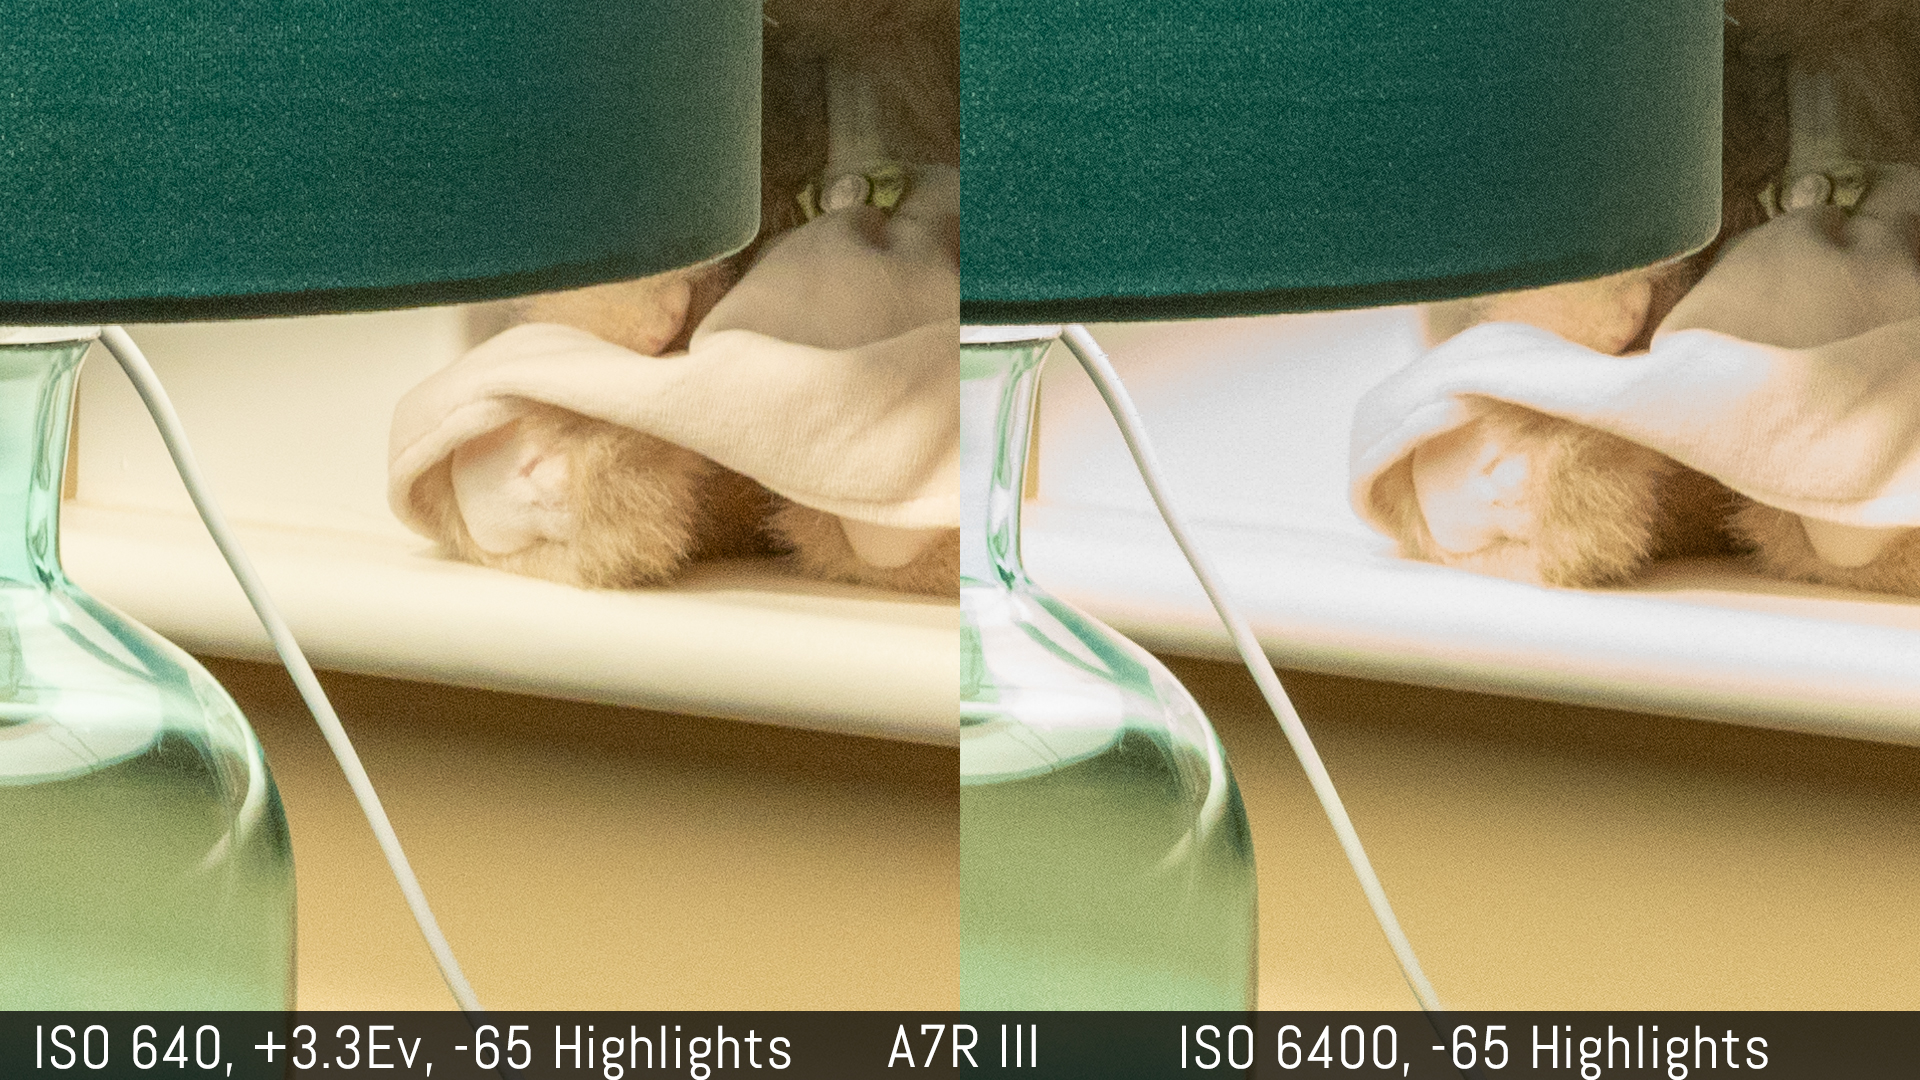
Both cameras benefit from a dual gain architecture where they use a higher sensitivity at the pixel level from ISO 640 to keep noise more contained. This gives you the advantage of being able to shoot at a lower ISO levels and boost the exposure in post, knowing that the amount of noise will be the same as shooting at high ISOs, but with the advantage of retaining more highlight information.

Concerning the JPG engine, Noise Reduction works in a similar way on both cameras. By setting it to off, they display more colour noise. With NR set to Low the noise is less invasive whereas the Standard level is clean but softens the details slightly.
You can increase the dynamic range of the SOOC JPG by using the DR Optimiser setting, which can be left to Auto or set in five steps. The results are the same on both cameras.
Additional content: check out our in-depth article about low light settings for the A7 III and A7R III.
Sony A7 III vs A7R III – Color
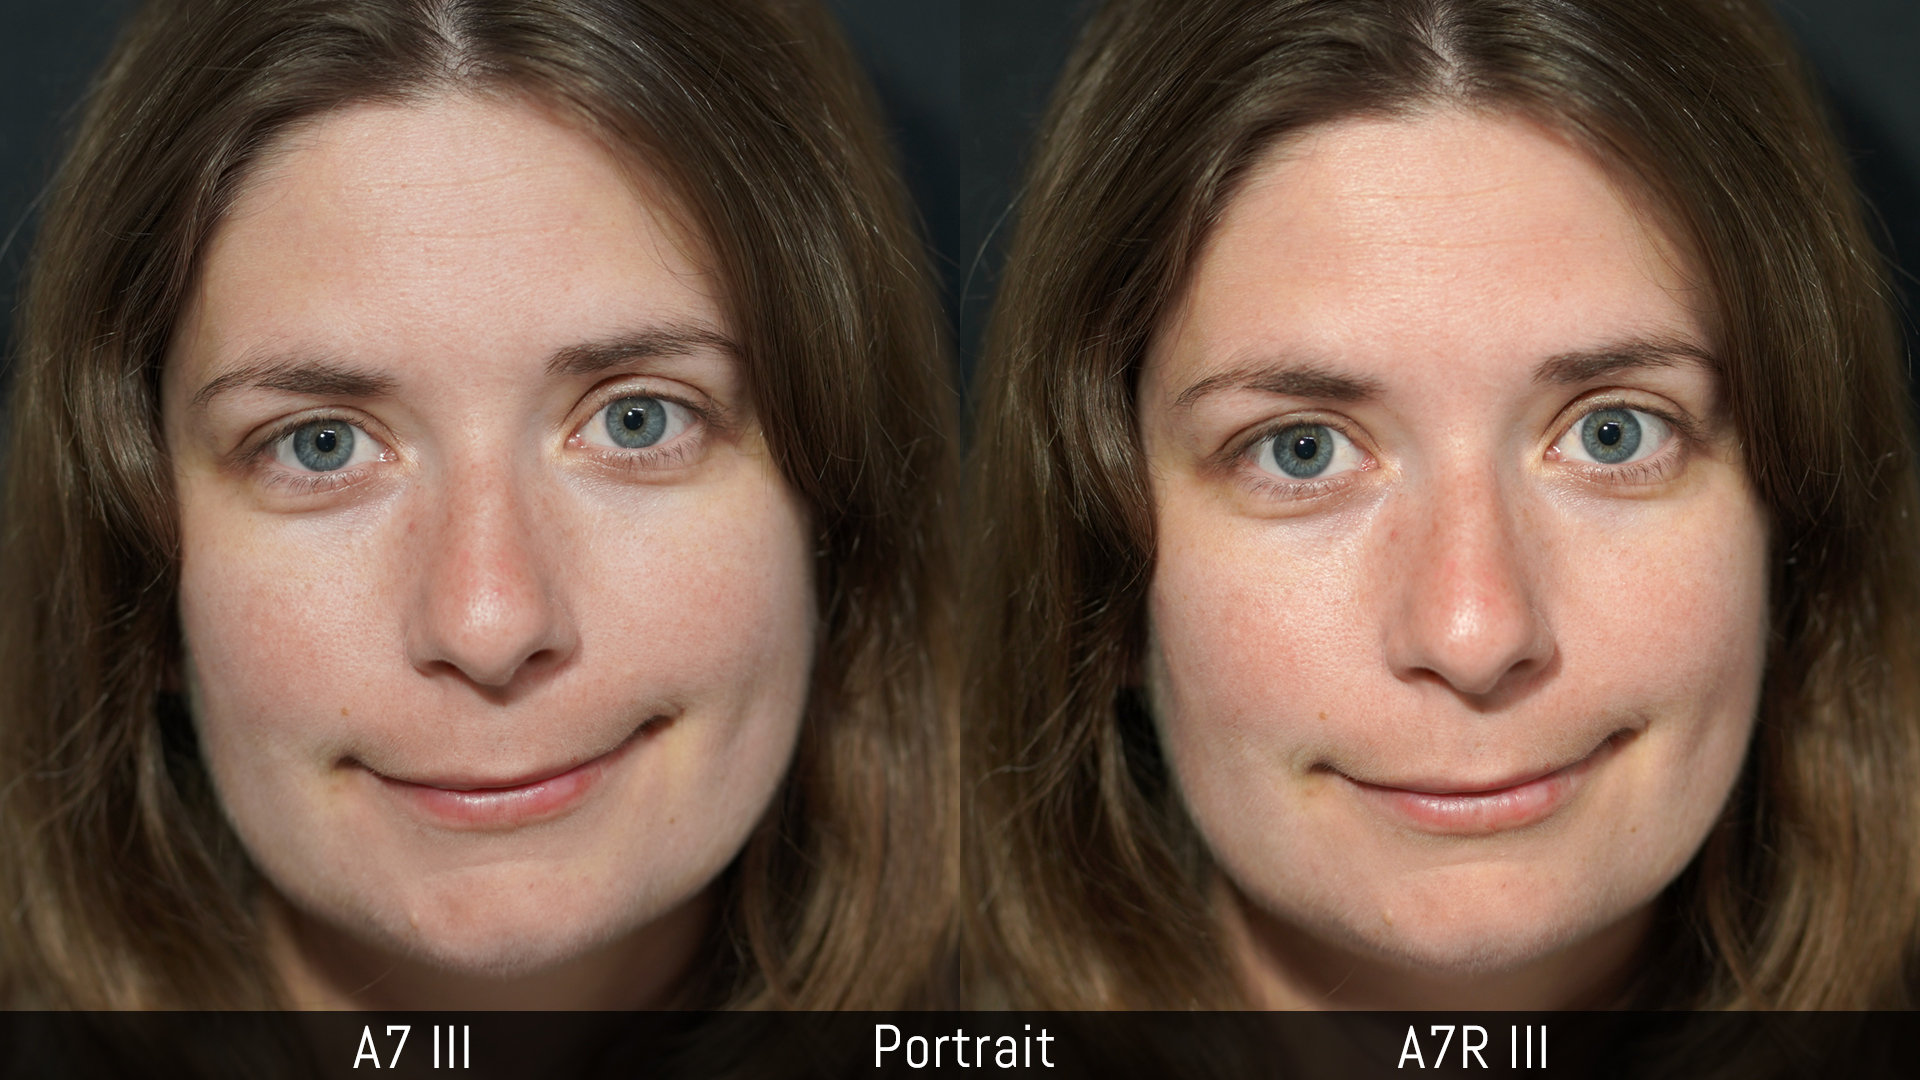
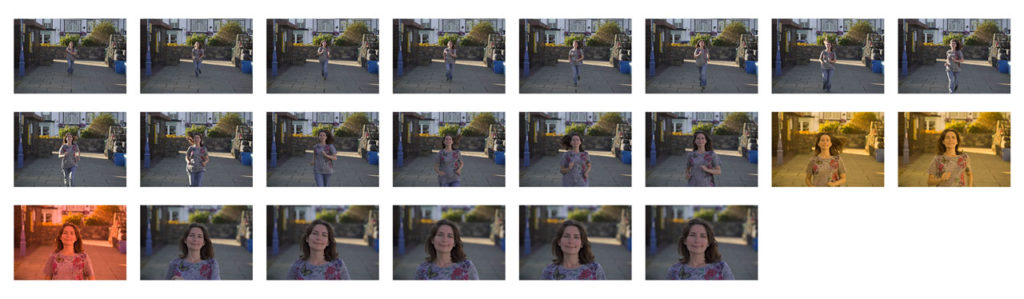
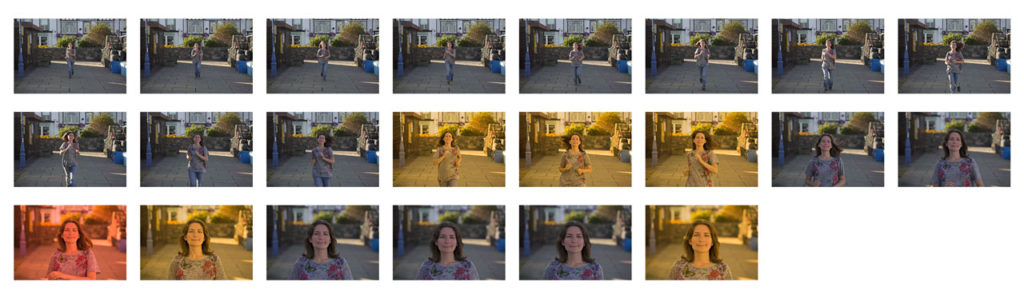
Sony has tweaked its colour rendering with the third generation of A7 cameras so both the A7 III and A7R III benefit from a subtle warmer look in comparison to the previous generation. The colour palette is very similar for both RAW and JPG files, and there is the same number of profiles to choose from (13 Creative Styles plus five that can be customised).

For skin tones, the dominant yellow tint I’ve always disliked on previous Sony cameras when using the Portrait profile is now gone, which makes that style much more pleasant to use. Here we can notice a warmer rendering from the A7R III, but if you work with the RAW files you can obtain the same result.
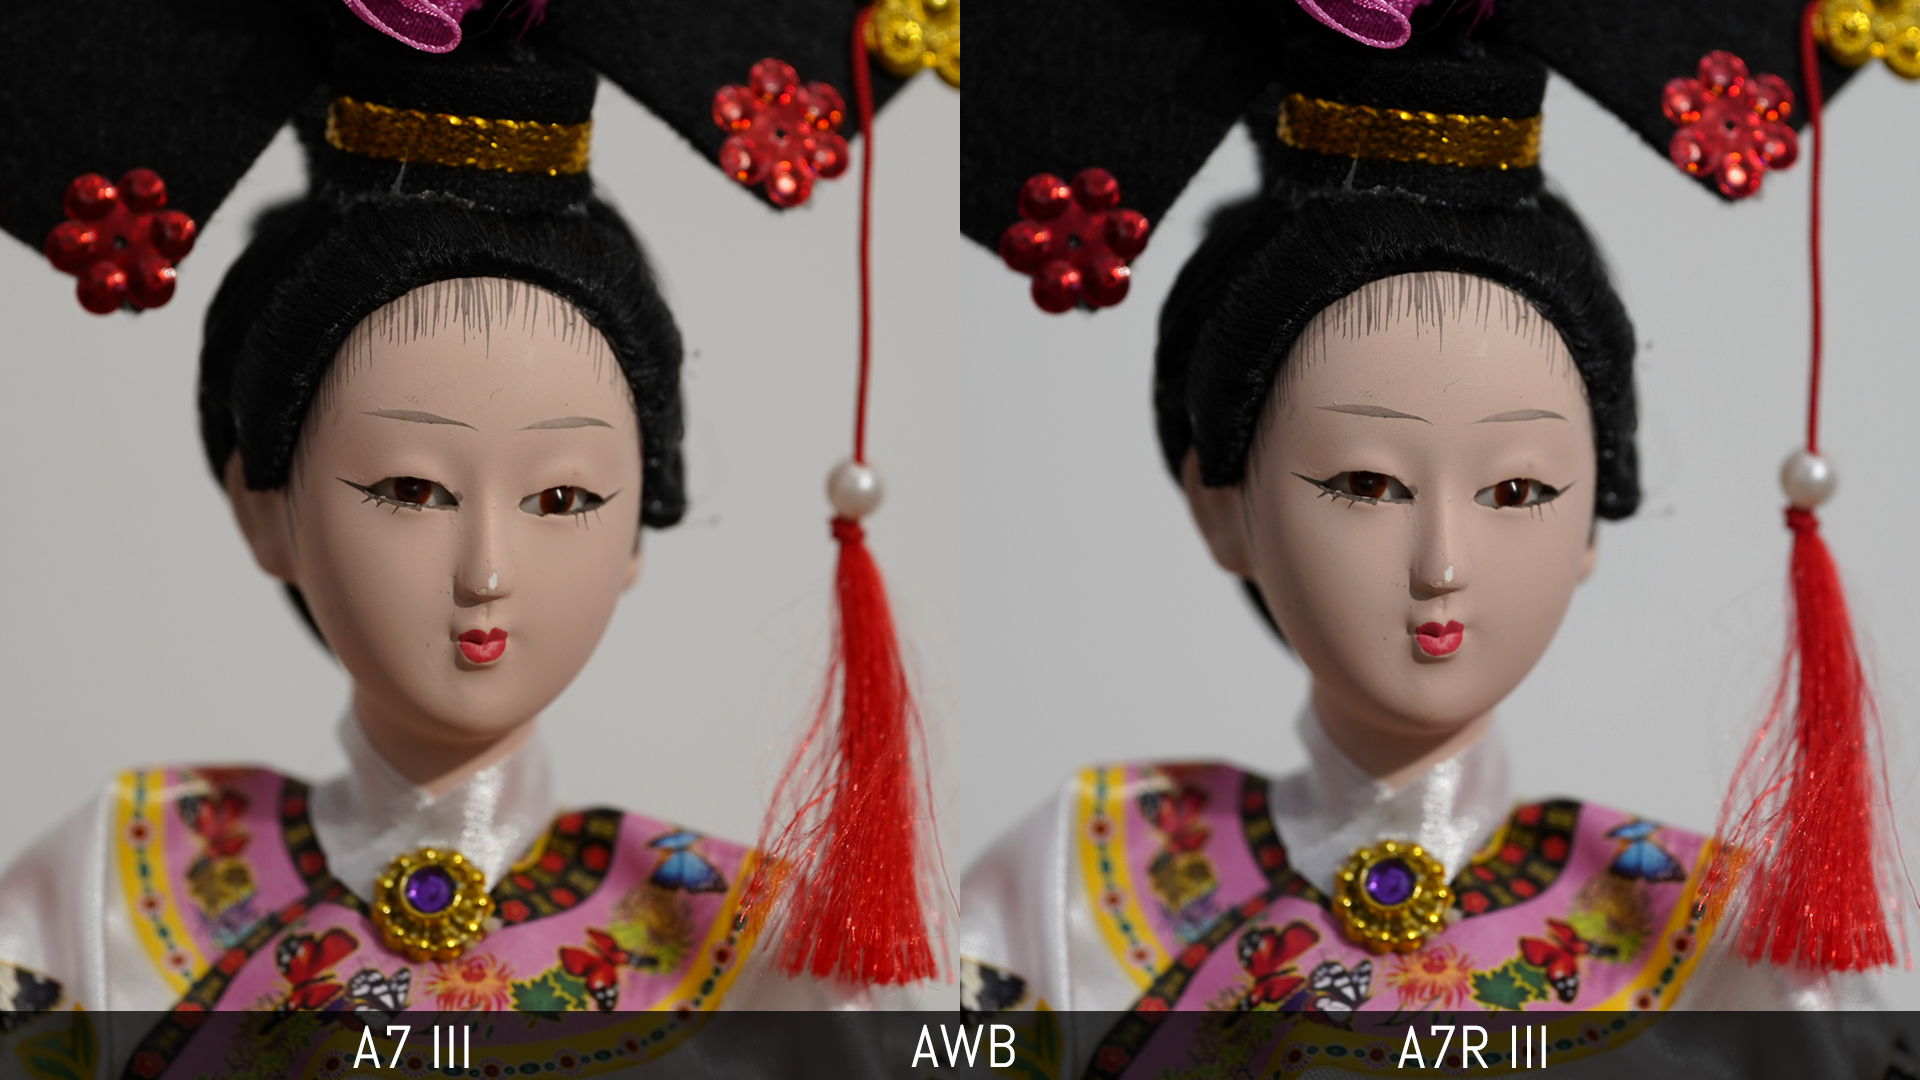
Another small difference I found is with Auto White Balance which can sometimes be cooler on the A7R III. Both cameras have the same settings including the Priority Set. in AWB option where you can prioritise the colour tone of the light source (warmer look) or white colour instead.
Finally, one note about sensor flare. In a strong backlit situation, both models can exhibit some stripe artefacts that – according to DPreview – are likely caused by the light being reflected off the metal masks of the phase detection pixels.
I apologise for the uninteresting composition below but it’s the most relevant example I have found. As you can see the stripes are not that easy to detect unless you view the image at its original size.
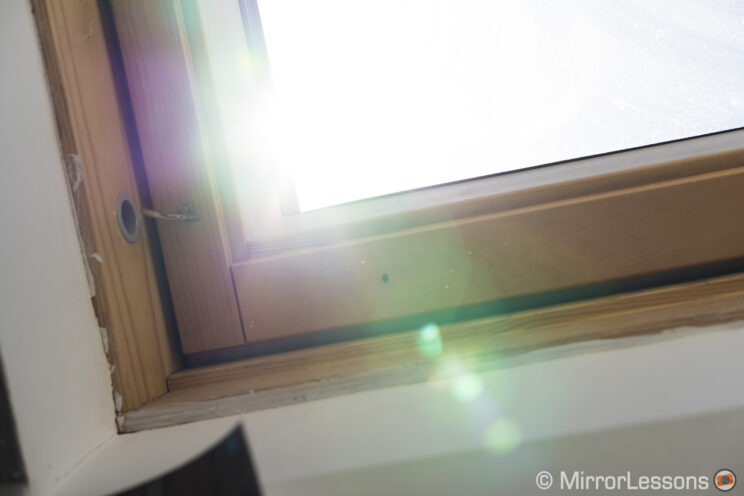
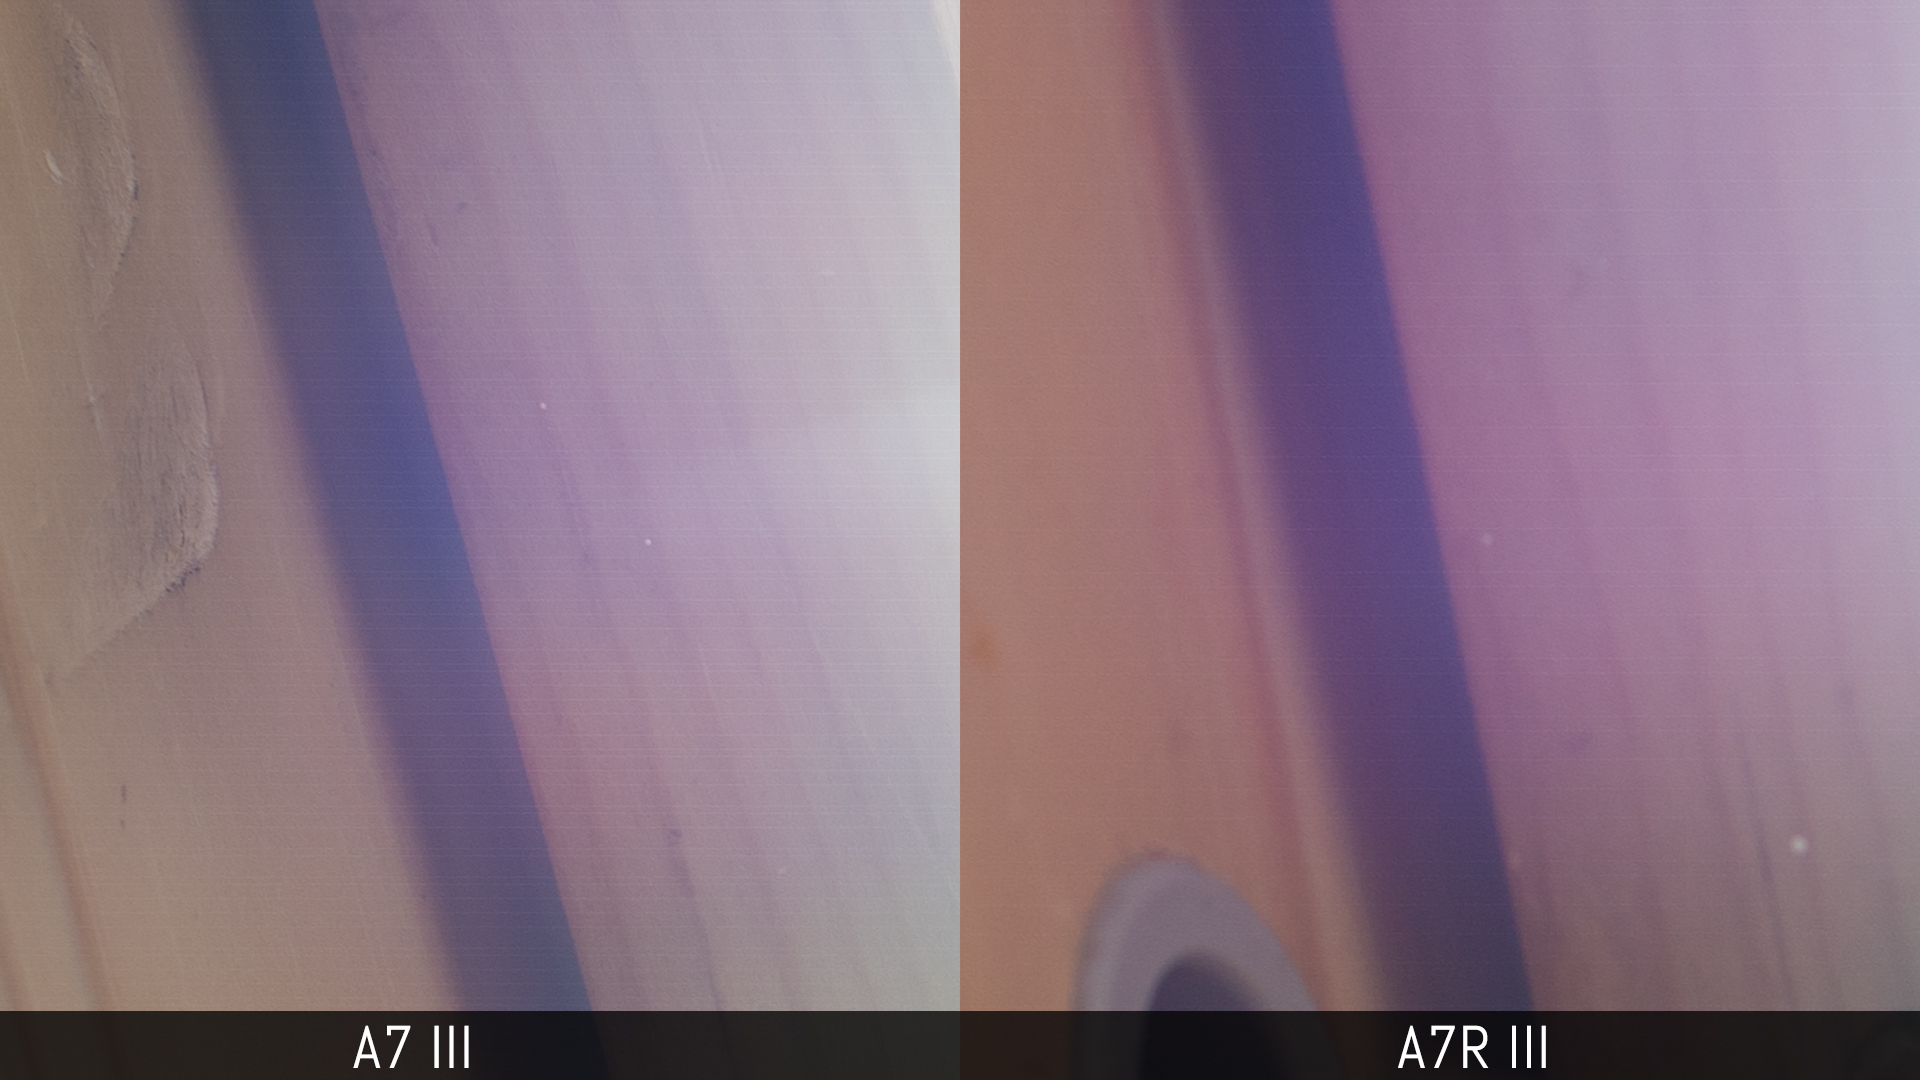
I don’t consider this a major problem but it is useful to know if you shoot a lot in backlit situations for portraits or other kinds of work. I also think that recomposing slightly can help to avoid any veiling or purple flare which tend to accompany these stripes.
Additional resource: our in-depth guide about the A7 III / A7R III Photography settings.
Sony A7 III vs A7R III – Autofocus
The A7 III inherits a similar autofocus system to the Sony A9. Although it doesn’t share the same calculation speed as the flagship model, it retains the same number of phase detection points (693) and feature 425 contrast detection points. The A7R III shares the same number of contrast detection points but has fewer phase detection points (399).
Another aspect to consider is that the phase detection points on the A7 III cover 93% of the sensor, versus approximately 47% on the A7R III which means the A7 III can be more accurate when tracking a subject at the edge of the frame.

A7 III: 693 phase detection points 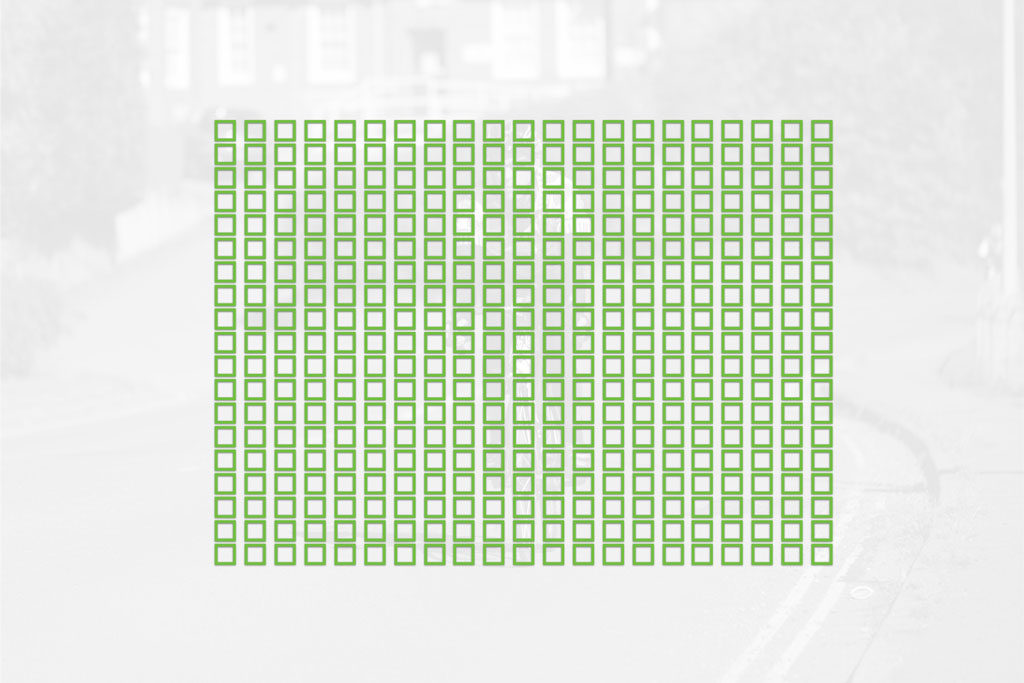
A7R III: 399 phase detection points 
A7 III / A7R III: 425 contrast detection points
There are five different focus modes for each camera:
- AF-S, AF-C and MF which are single, continuous and manual modes respectively
- AF-A switches between single and continuous automatically depending on whether the subject is static or moving; however the cameras can be slow in making the change so I often prefer to switch between AF-S and AF-C manually
- DMF allows you to make manual adjustments after focusing automatically, which I find particularly useful for macro shooting
- Lock-On AF allows you to lock onto a subject and track it across the entire frame with the AF points moving automatically.

The selection of focus areas is the same and includes:
- Wide which uses all the points available
- Zone which works on a 9 group area that can be moved to different positions. It is my favourite for sports and birds in flight.
- Centre is a fixed area at the centre of the frame
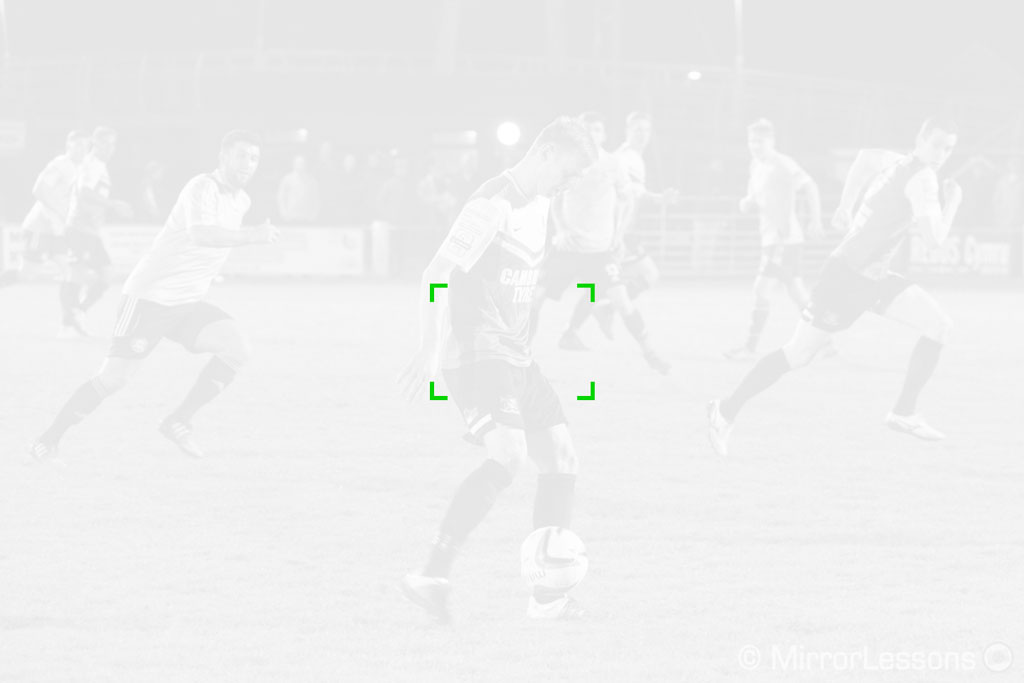
- Flexible Spot is a single are that can be moved and varied in 3 sizes
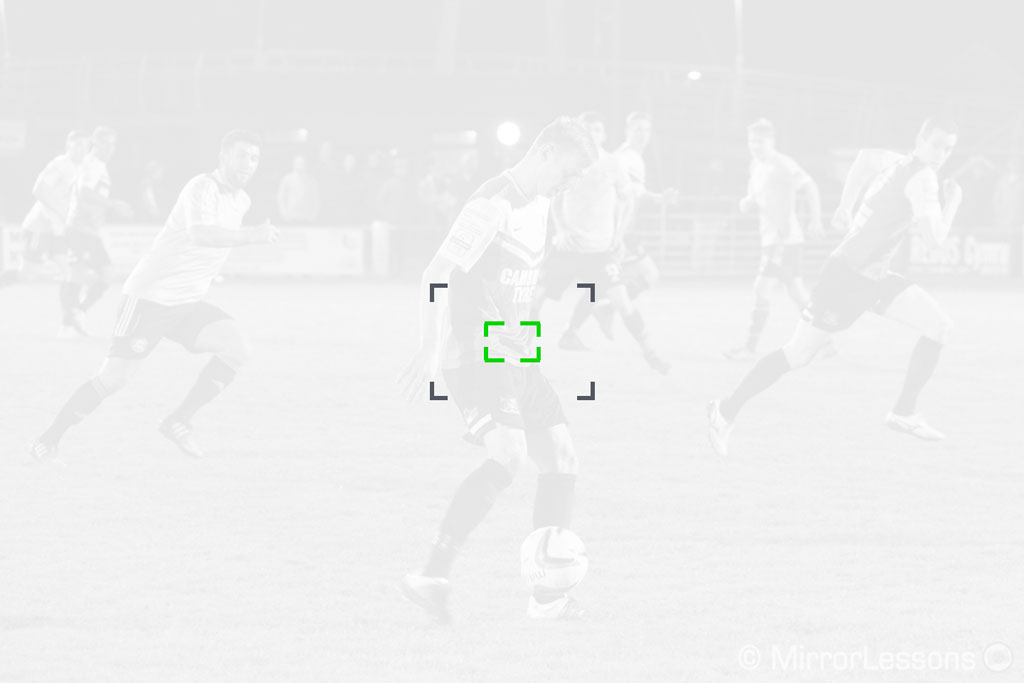
- Expand Flexible Spot uses a small contrast detection point and phase detection points around it to improve accuracy and speed. It is often my go-to setting.
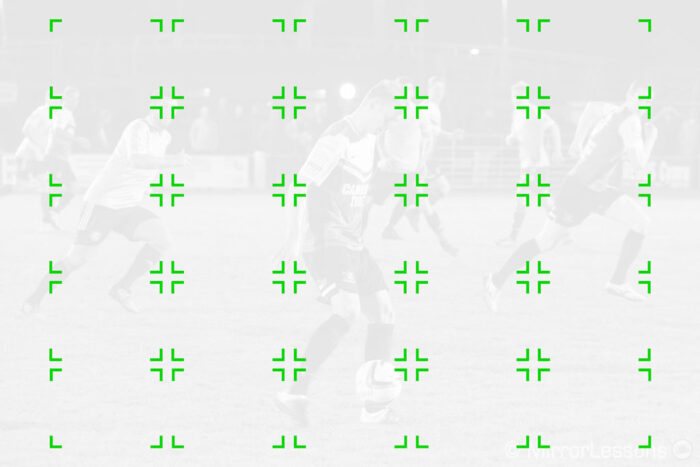

Wide Area 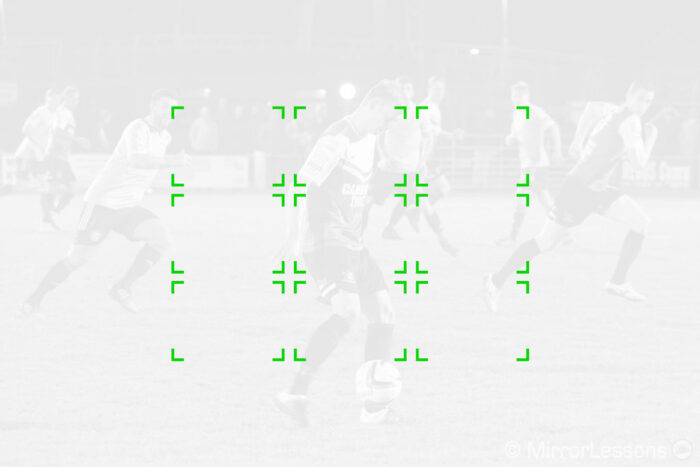
Zone Area 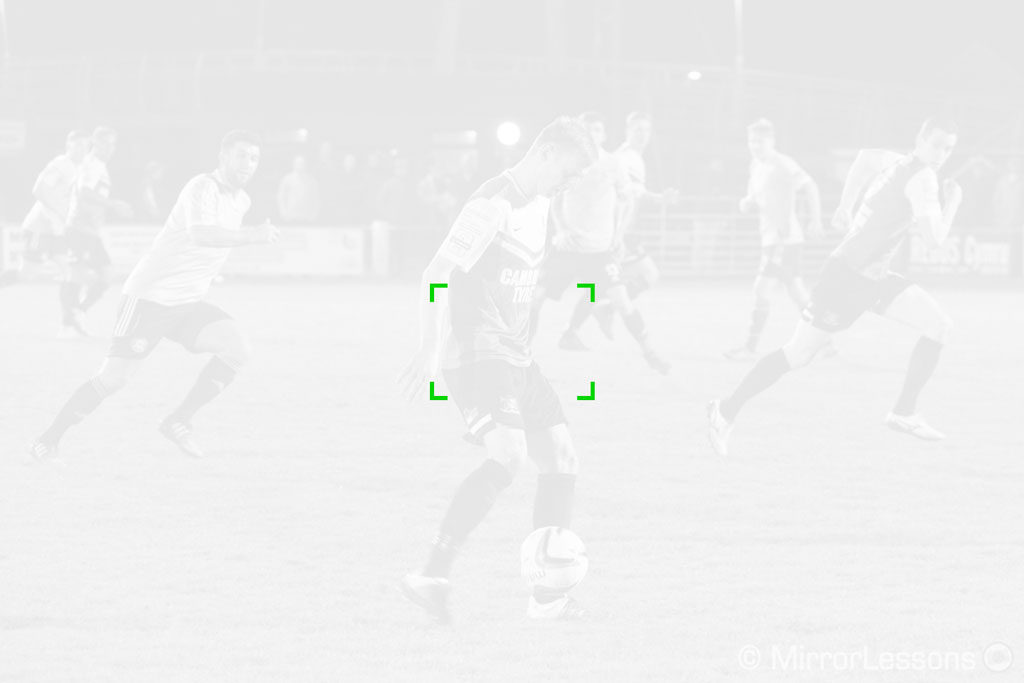
Center and Flexible Spot (3 sizes) 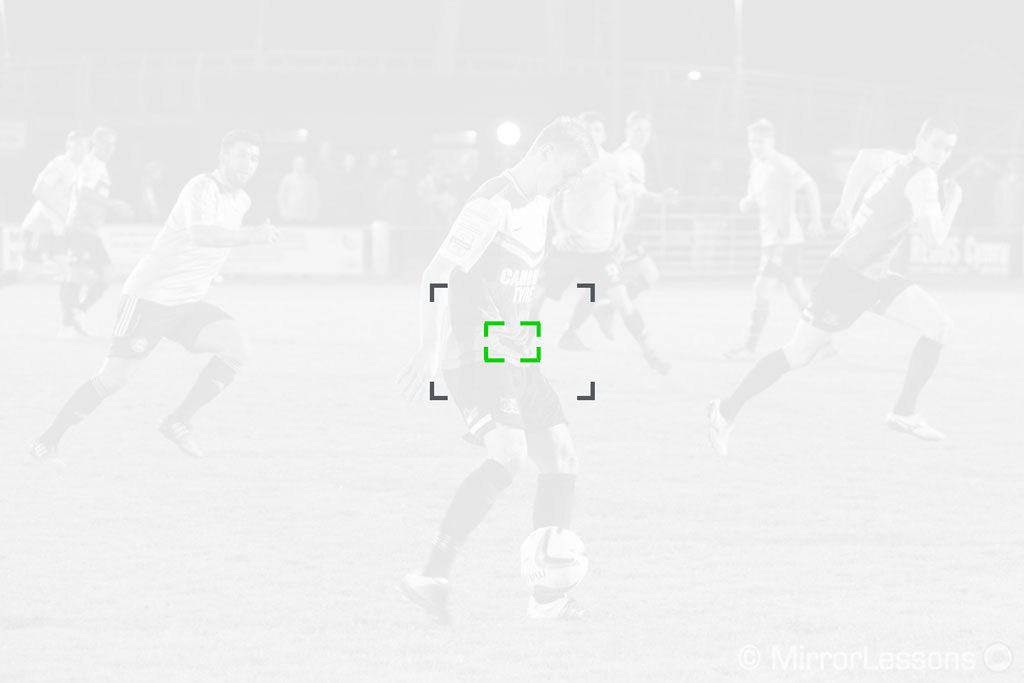
Expand Flexible Spot

Both cameras have received approximately a 2x improvement when it comes to tracking and focusing speed in comparison to their predecessors.
In single AF, they tend to prioritise contrast detection especially when using the centre or flexible spot area which decreases the locking speed. Phase detection points appear more often if you use the Wide or Zone areas.
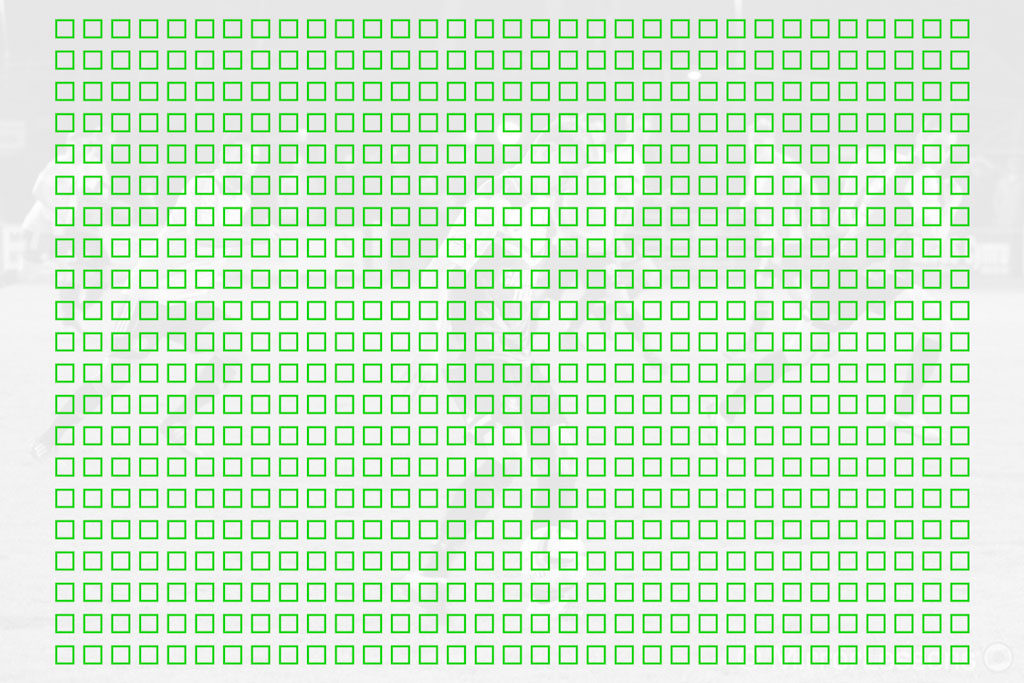
Both cameras give their best performance in continuous AF, where phase detection points are triggered all the time and the camera makes more use of its excellent 4D Tracking technology where as many points as possible are concentrated around the subject.
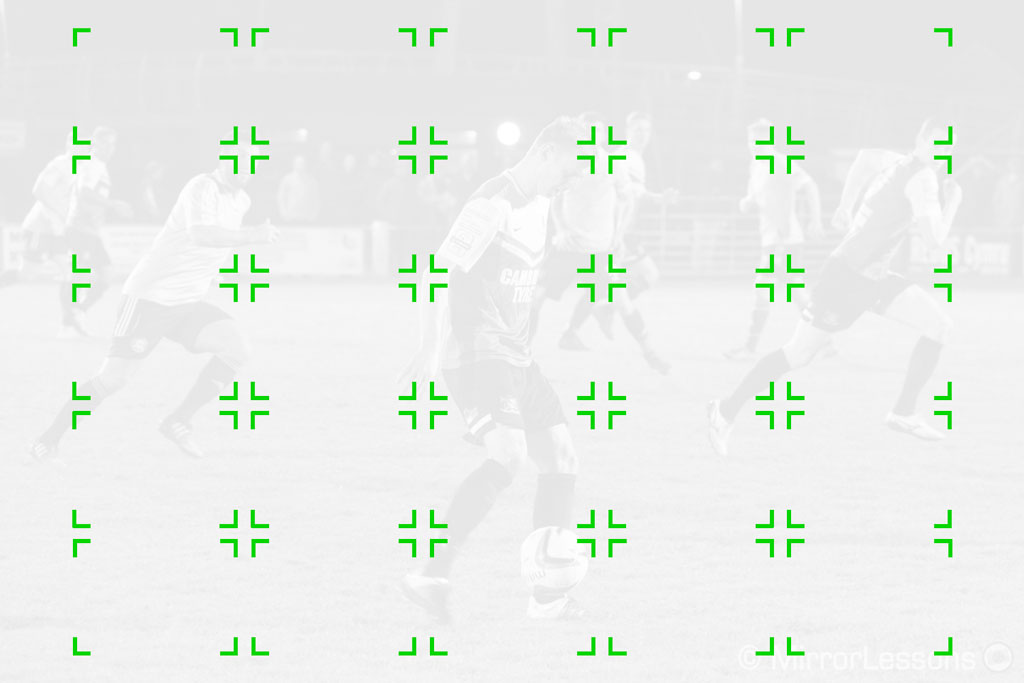
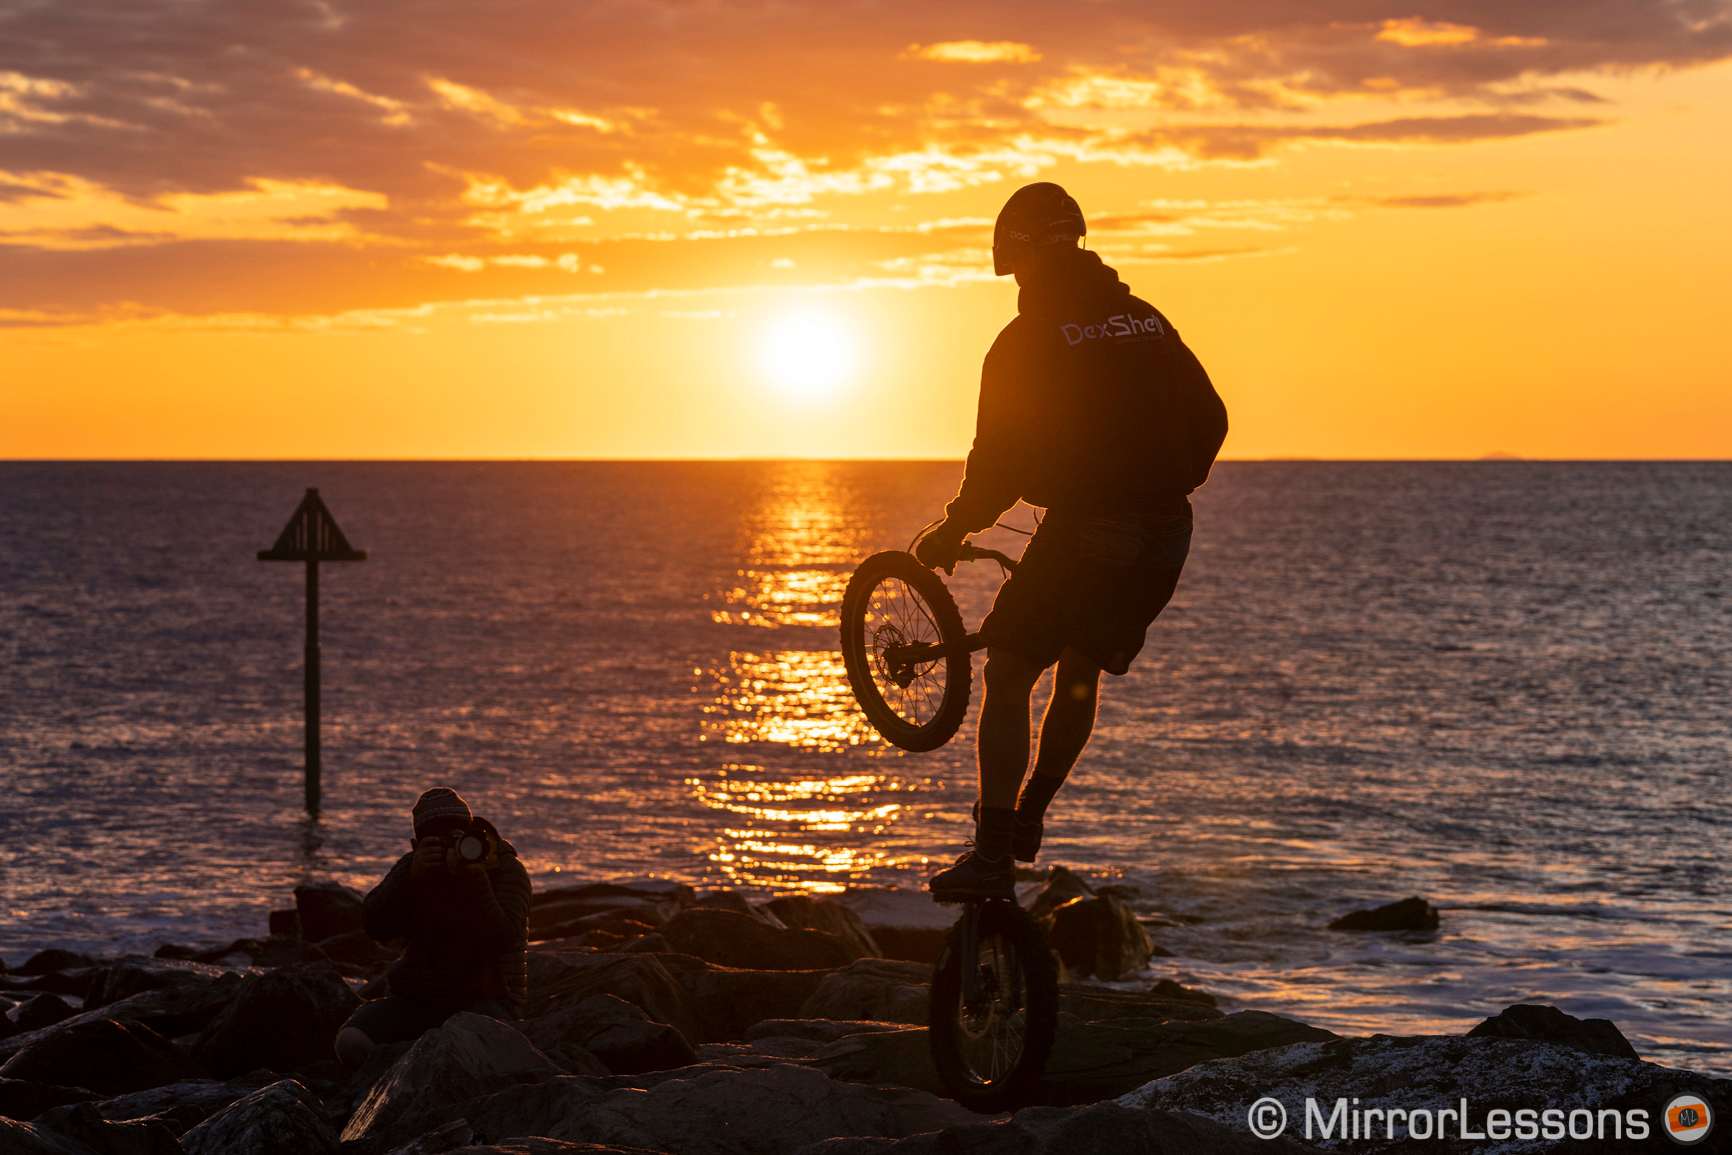
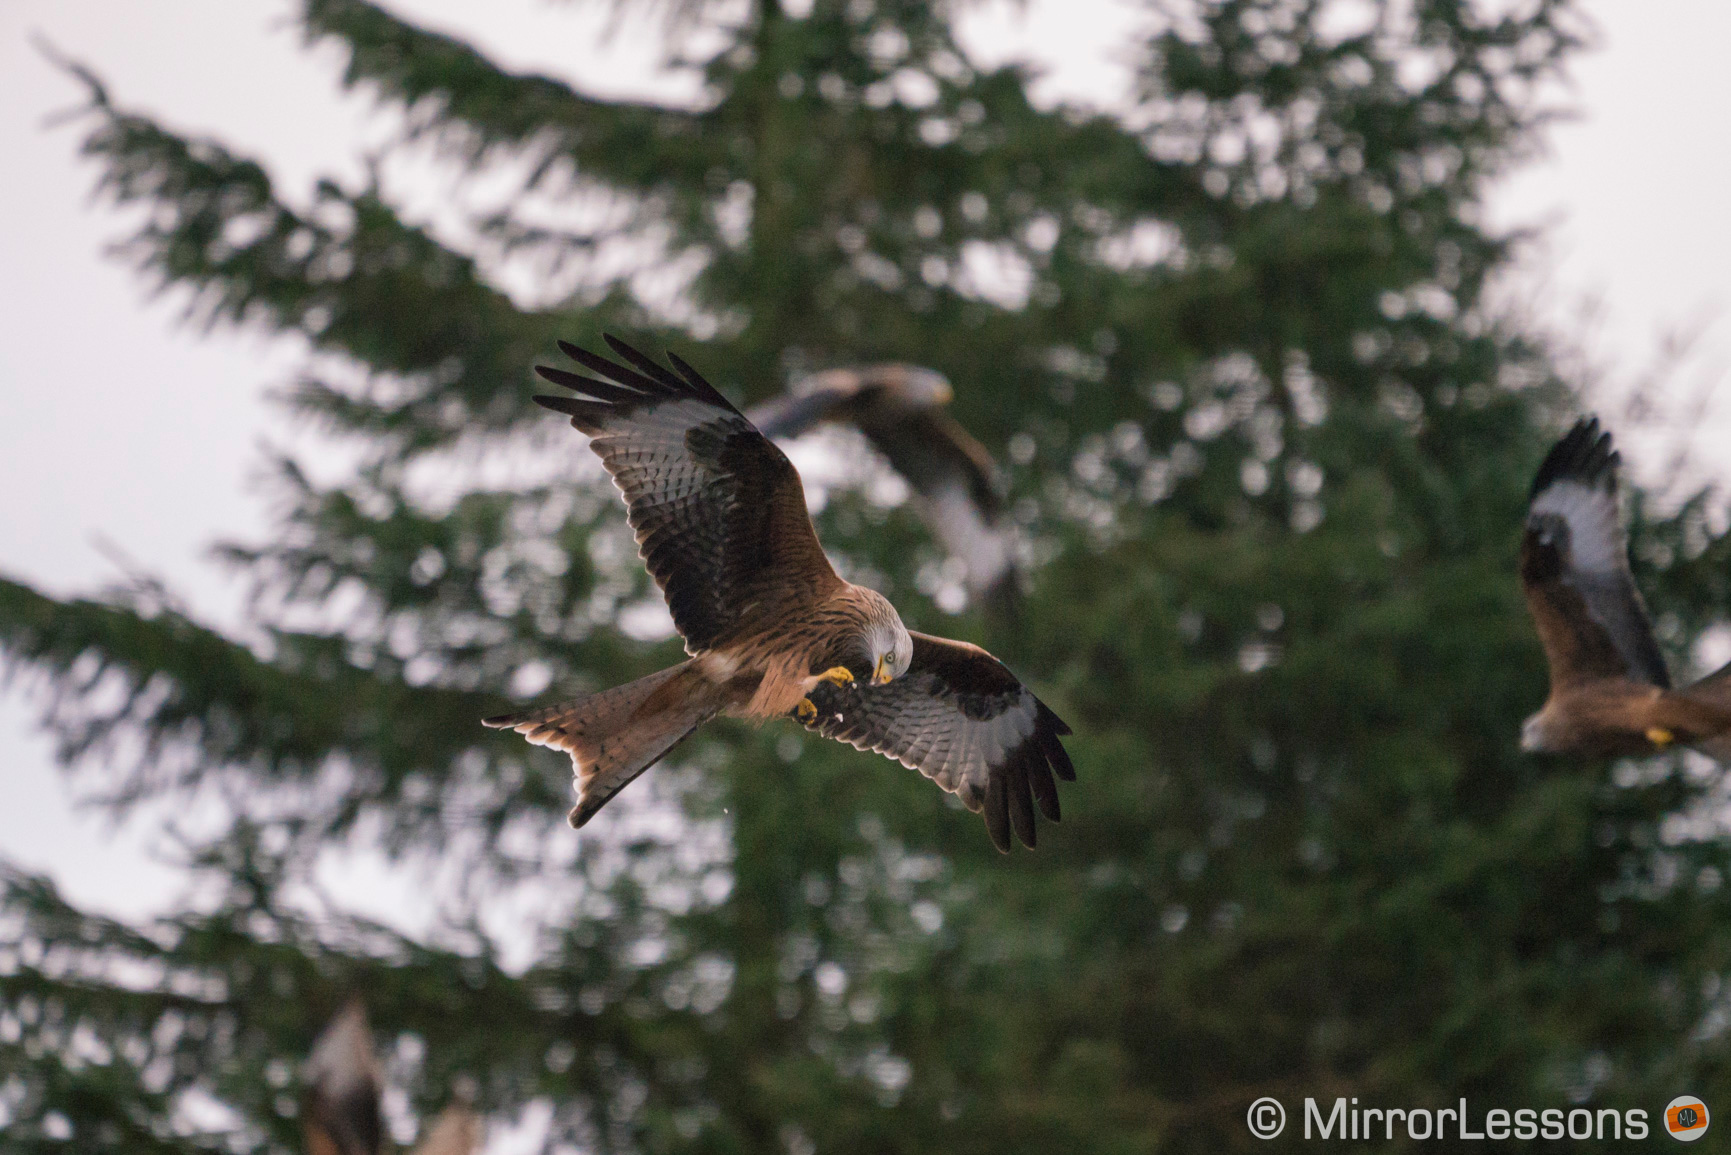
One of the best ways to experience this is to use Lock-On AF with the expanded flexible spot. You’ll be surprised how well the cameras can keep these “dancing” green points on a subject, even if it is in a strong backlit situation such as the rider below. I haven’t noticed a drastic difference between the two cameras, but the higher number of phase detection points on the A7 III can help it be more accurate in these kinds of situations.
Contrast detection can be more effective in low light situations than phase detection but even here, I found C-AF to be the best setting if you want to focus as fast as possible. The minimum sensitivity is -3Ev for both cameras which is enough for most situations. They can both slow down if you don’t use a fast lens (f/4 or slower) which is to be expected.

The most challenging situations I’ve encountered was with the A7 III at a special film screening at my local cinema, where spectators were allowed to come and enjoy “The Isle of Dogs” with their furry friends. The light was poor and I was testing the Samyang AF 35mm f/2.8 which has a decent AF motor but isn’t the fastest you can find amongst primes for the E-mount system. Contrast detection was my only option at times, and overall the camera did a good job but was slower to acquire focus.

Overall I have to say that in most situations I found the performance of the A7 III and A7R III very similar. Our basic running test below confirms this as the R model is just slightly more imprecise.
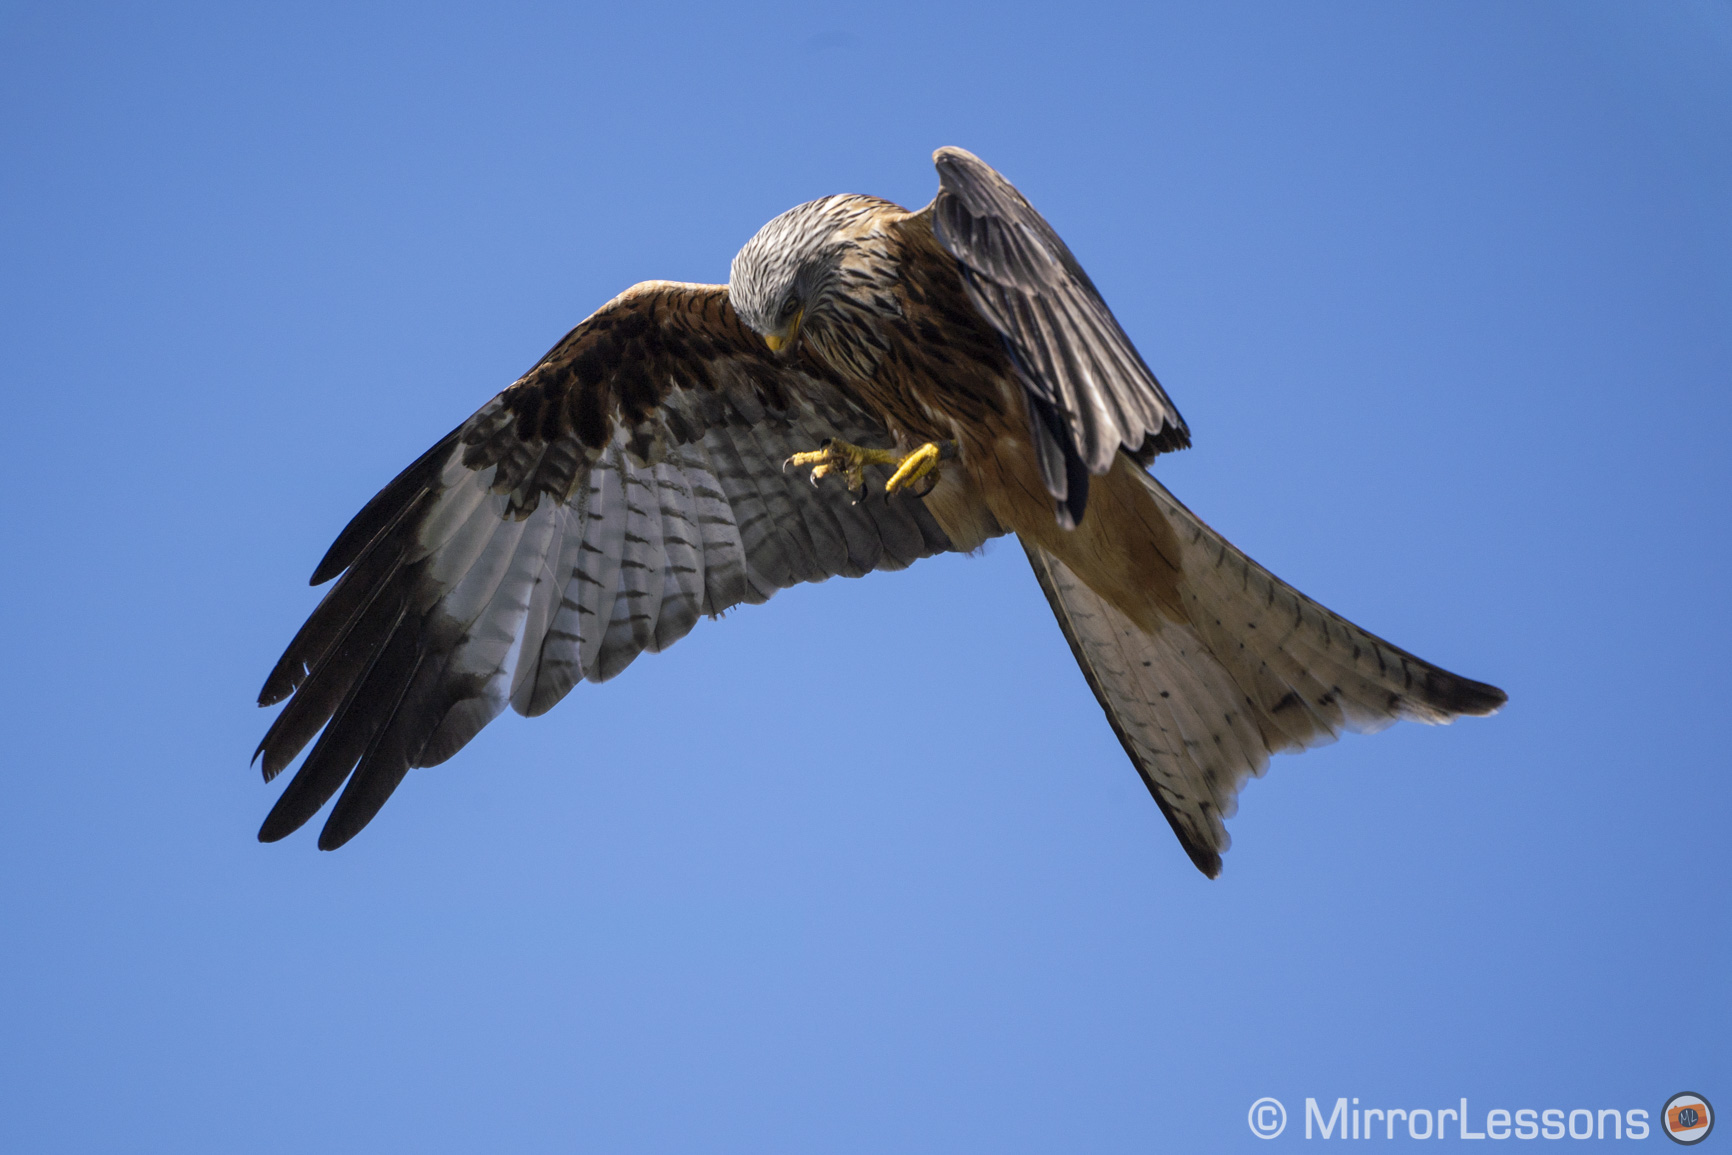
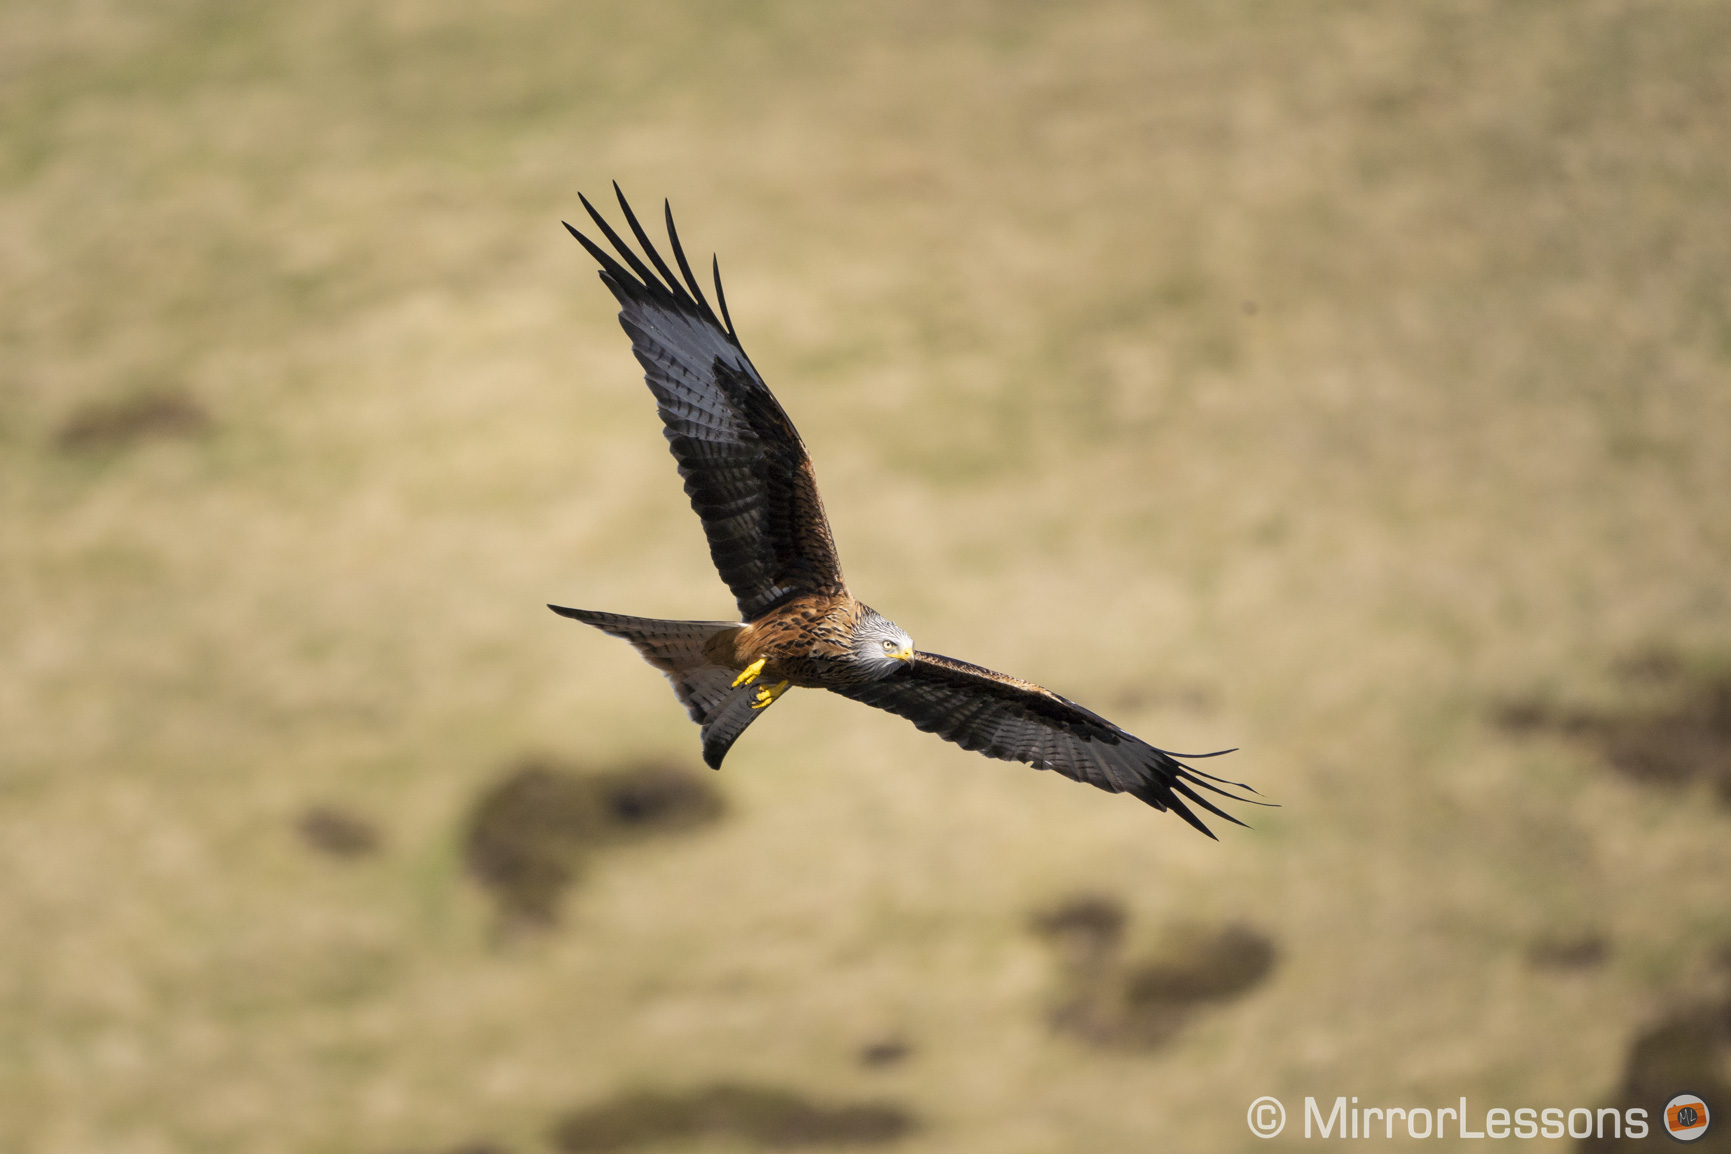
With both cameras I had the chance to work in similar conditions, namely my recurring football and red kite tests. With the former I obtained similar results in terms of accuracy and keeper rate (80% and 76%), though the A7 III was slightly faster on a few occasions.
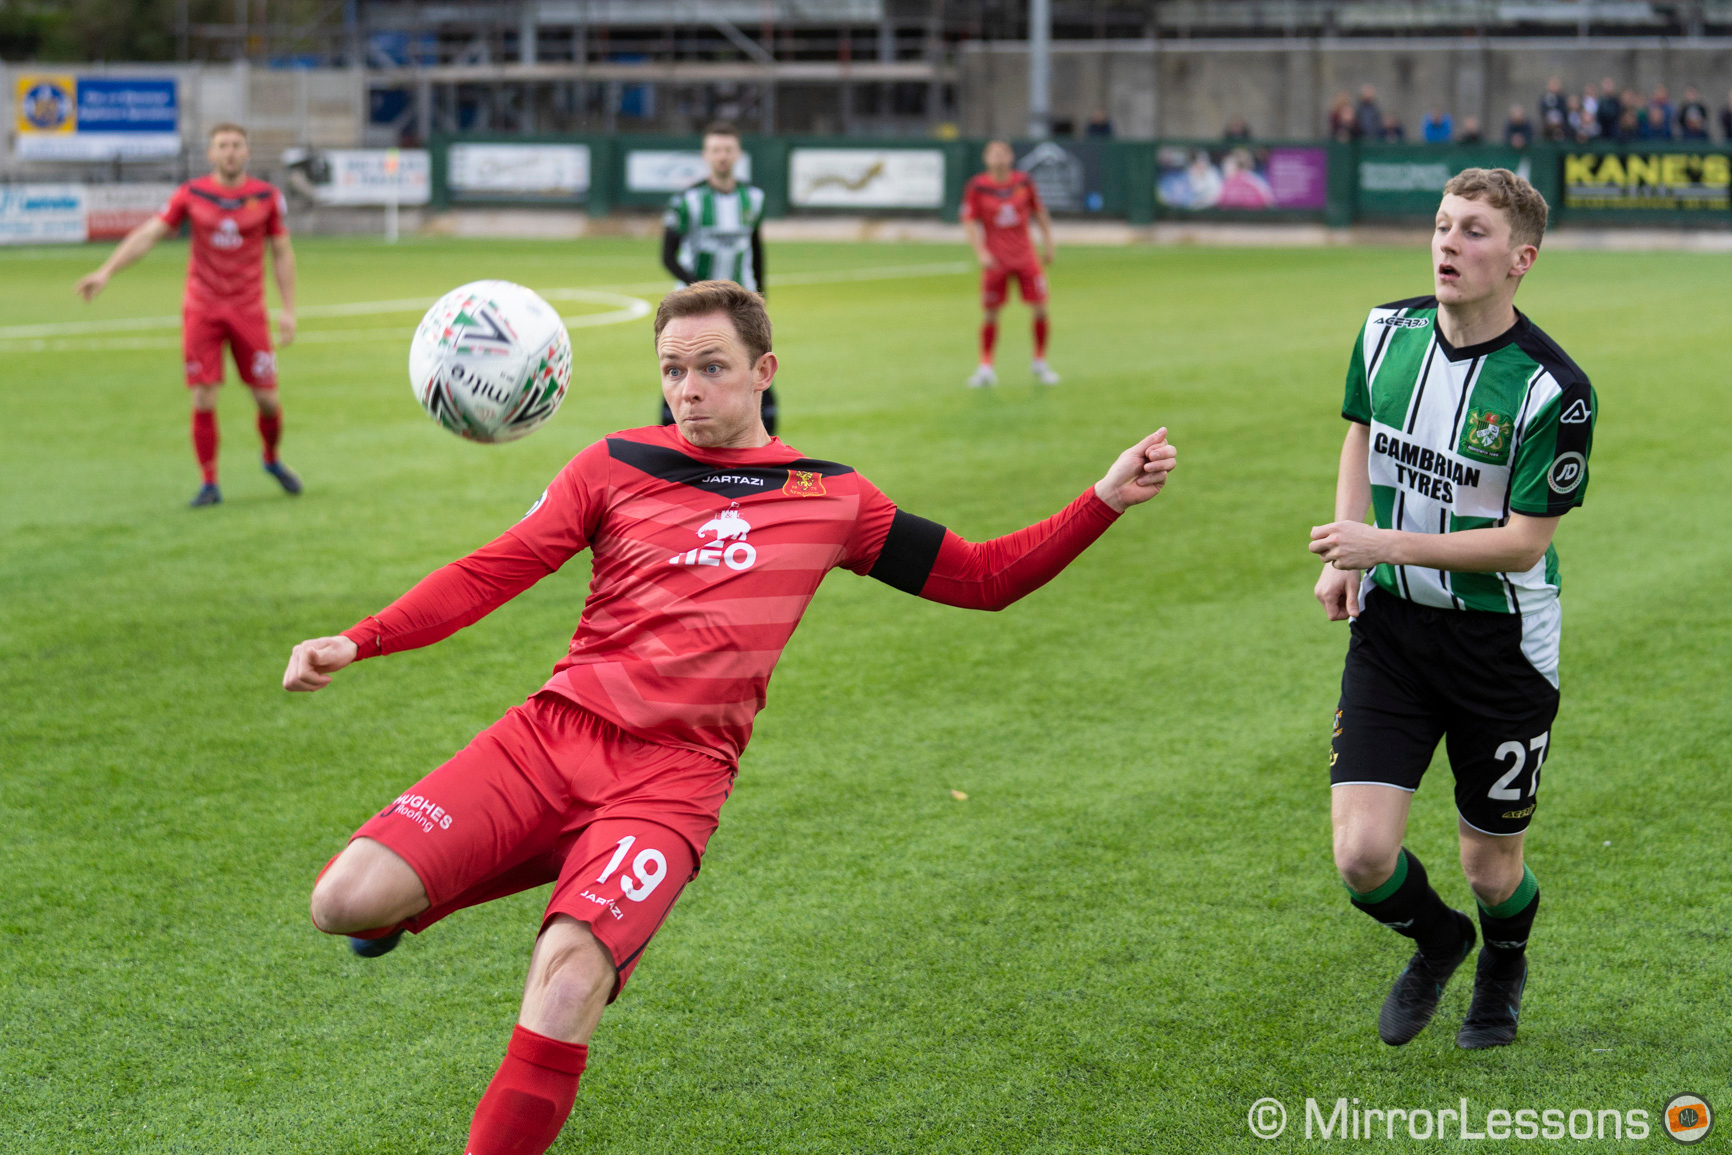
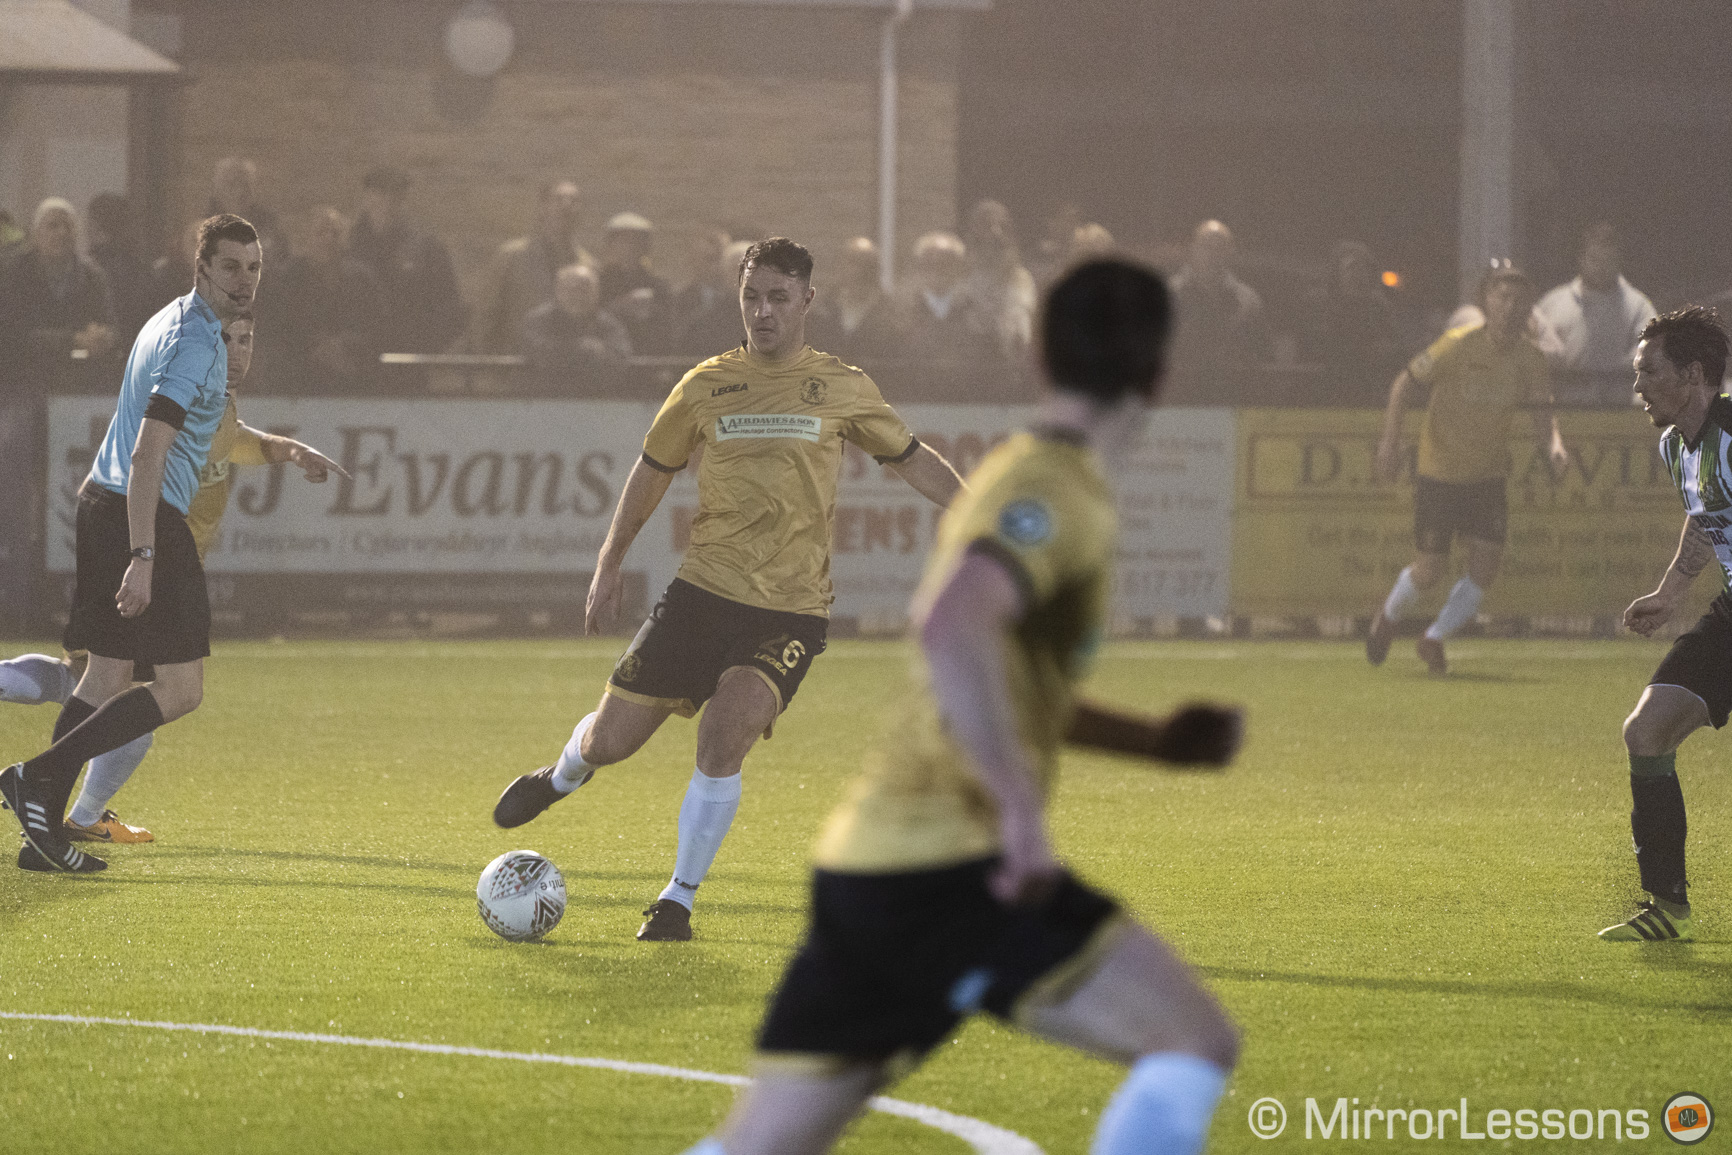

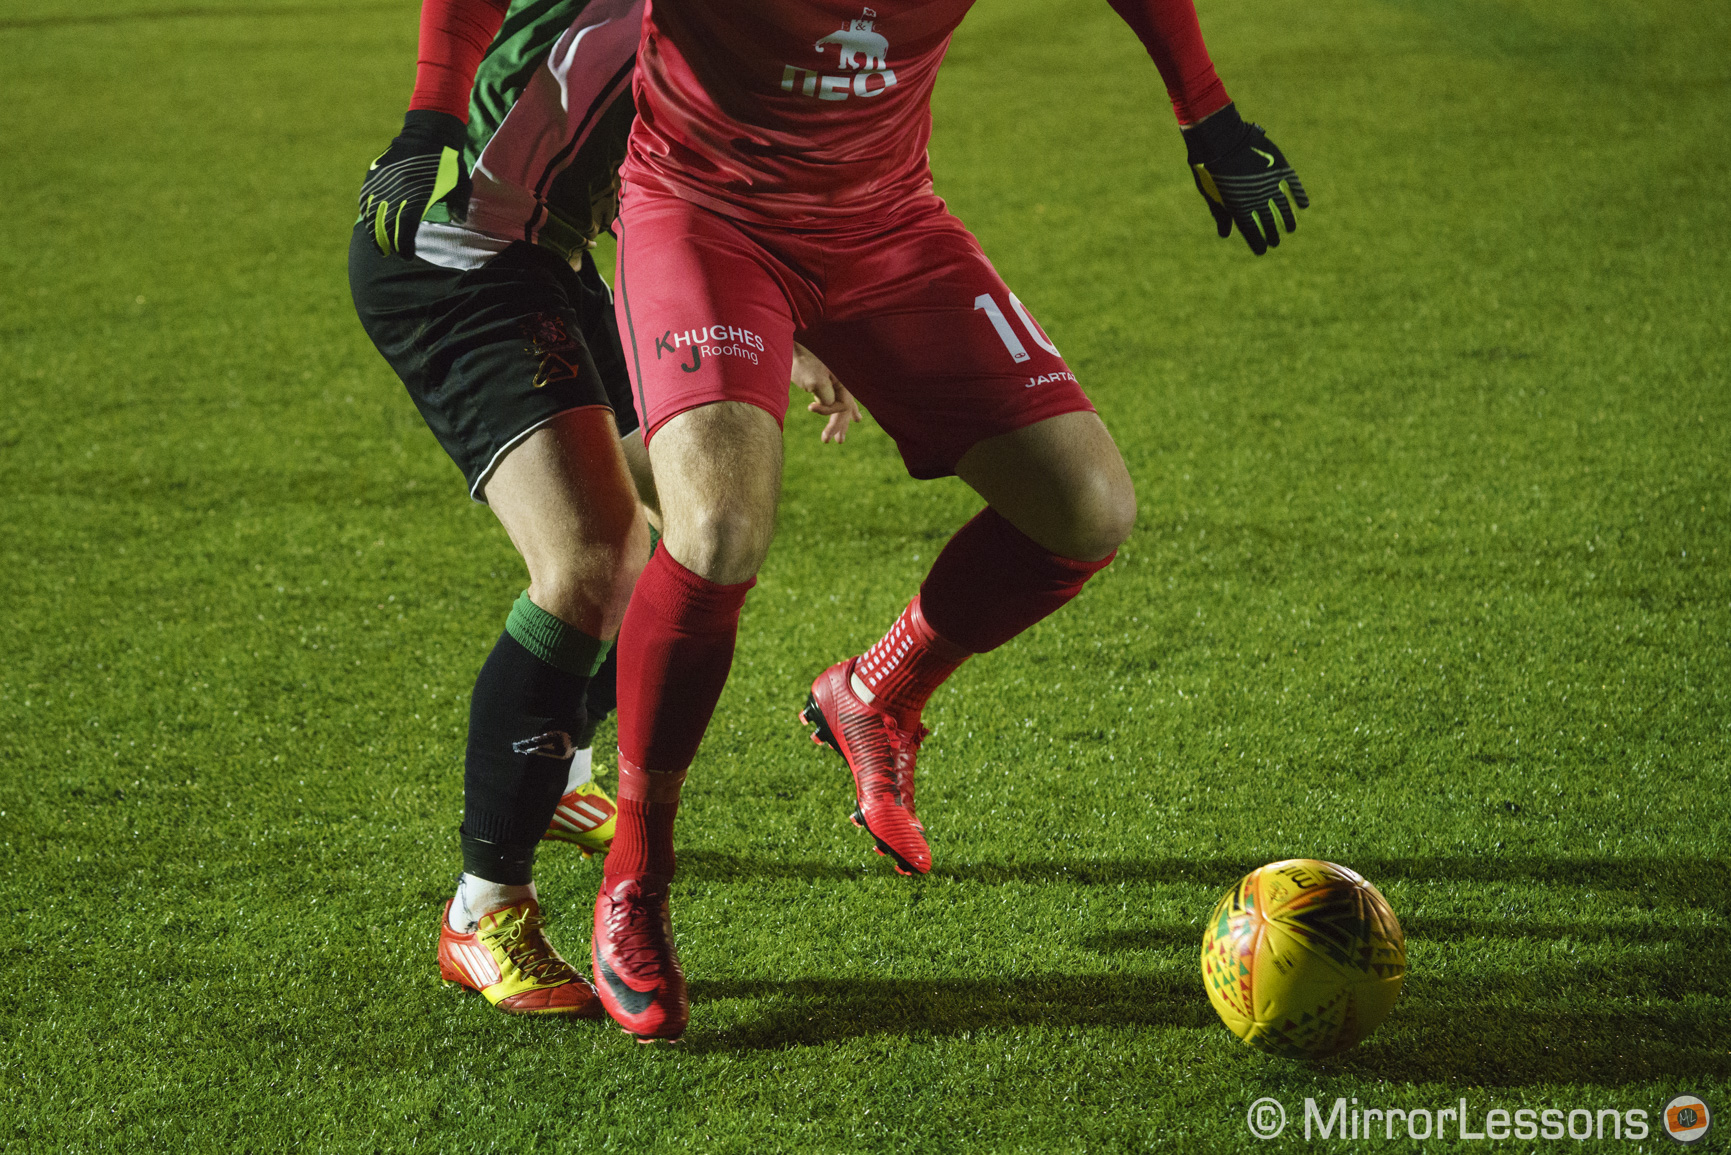
Completely out-of-focus shots are rare although not unheard of like this example below where the camera chose to focus on the player in the background instead of the one in the foreground, despite the latter being larger and having a more distinctive colour.

To find out what are the best settings to use for sports photography, check out our dedicated post below.
With birds in flight, the A7 III proved a little faster with a keeper rate of 77% (or 96% if I include slightly soft results) whereas the A7R III gave a 66%-88% result. To be fair to the R version though, the light conditions were less favourable with darker clouds and no sunshine whatsoever.

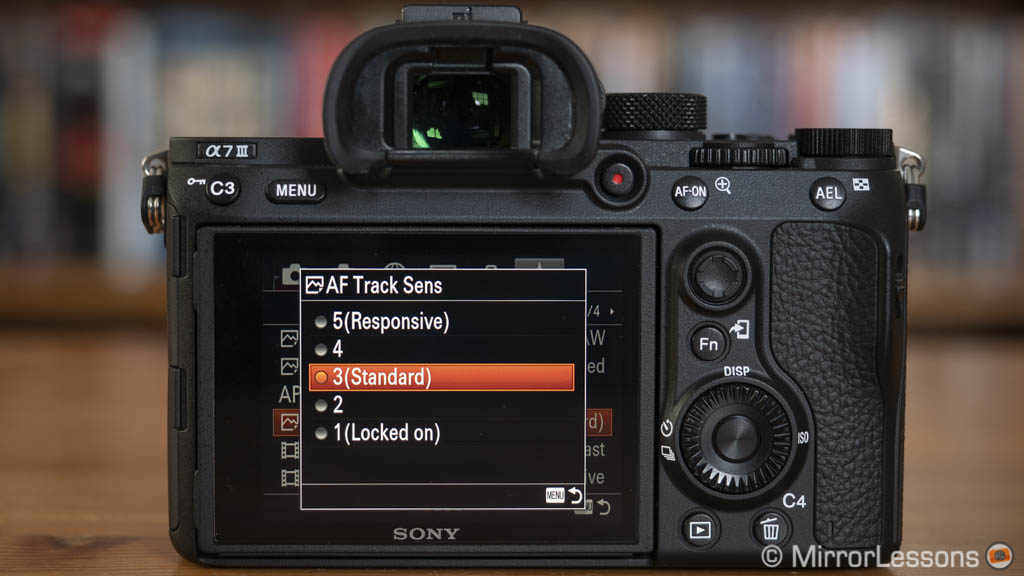
Both cameras have the same AF Track Sens setting to control the reactivity of the autofocus in five steps:
- the lowest level will keep the responsiveness to the minimum, which can be useful if you’re following a subject that doesn’t vary its distance too much from your position, or when there are momentary obstacles in between
- the highest setting will do the opposite and make the camera more reactive with sudden changes in speed, or when a subject suddenly enters the frame.
- the settings in between are a good middle ground and can serve varied situations like football where you deal with a little bit of everything.
To know more about Sony A7 III / A7R III and wildlife photography, check out our guide below.
Finally, we have face and eye detection and once again the performance is not dissimilar. The former is quick in detecting faces even if the person wears a hat or sunglasses, or doesn’t look straight at the camera.

A few settings let you enable or disable the square frame displayed on the screen that indicates when the camera has found a face, and prioritise metering on the detected face when the Multi metering mode is selected. You can also register up to 8 faces to give them priority in shots with multiple people, and change the priority order.
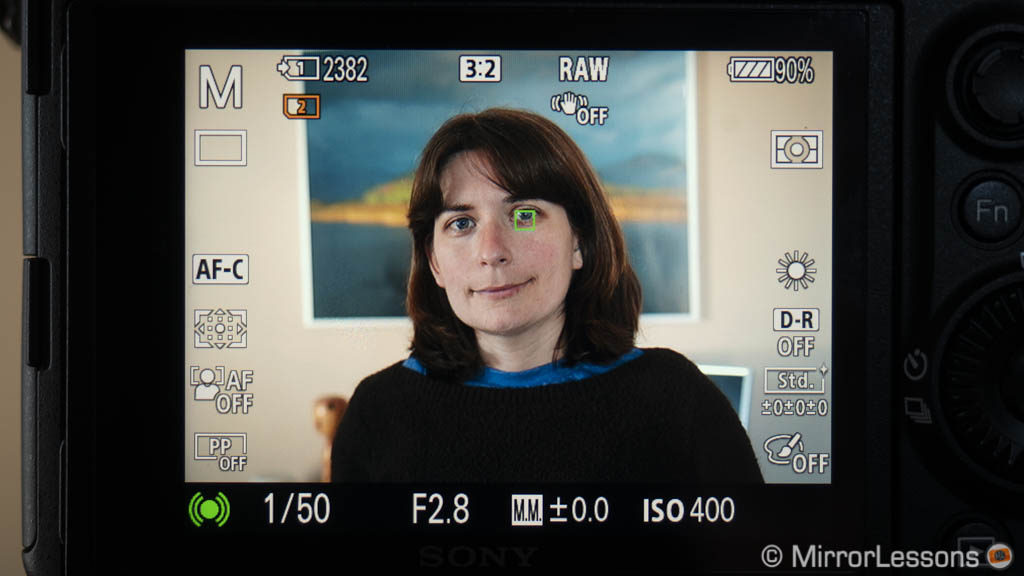
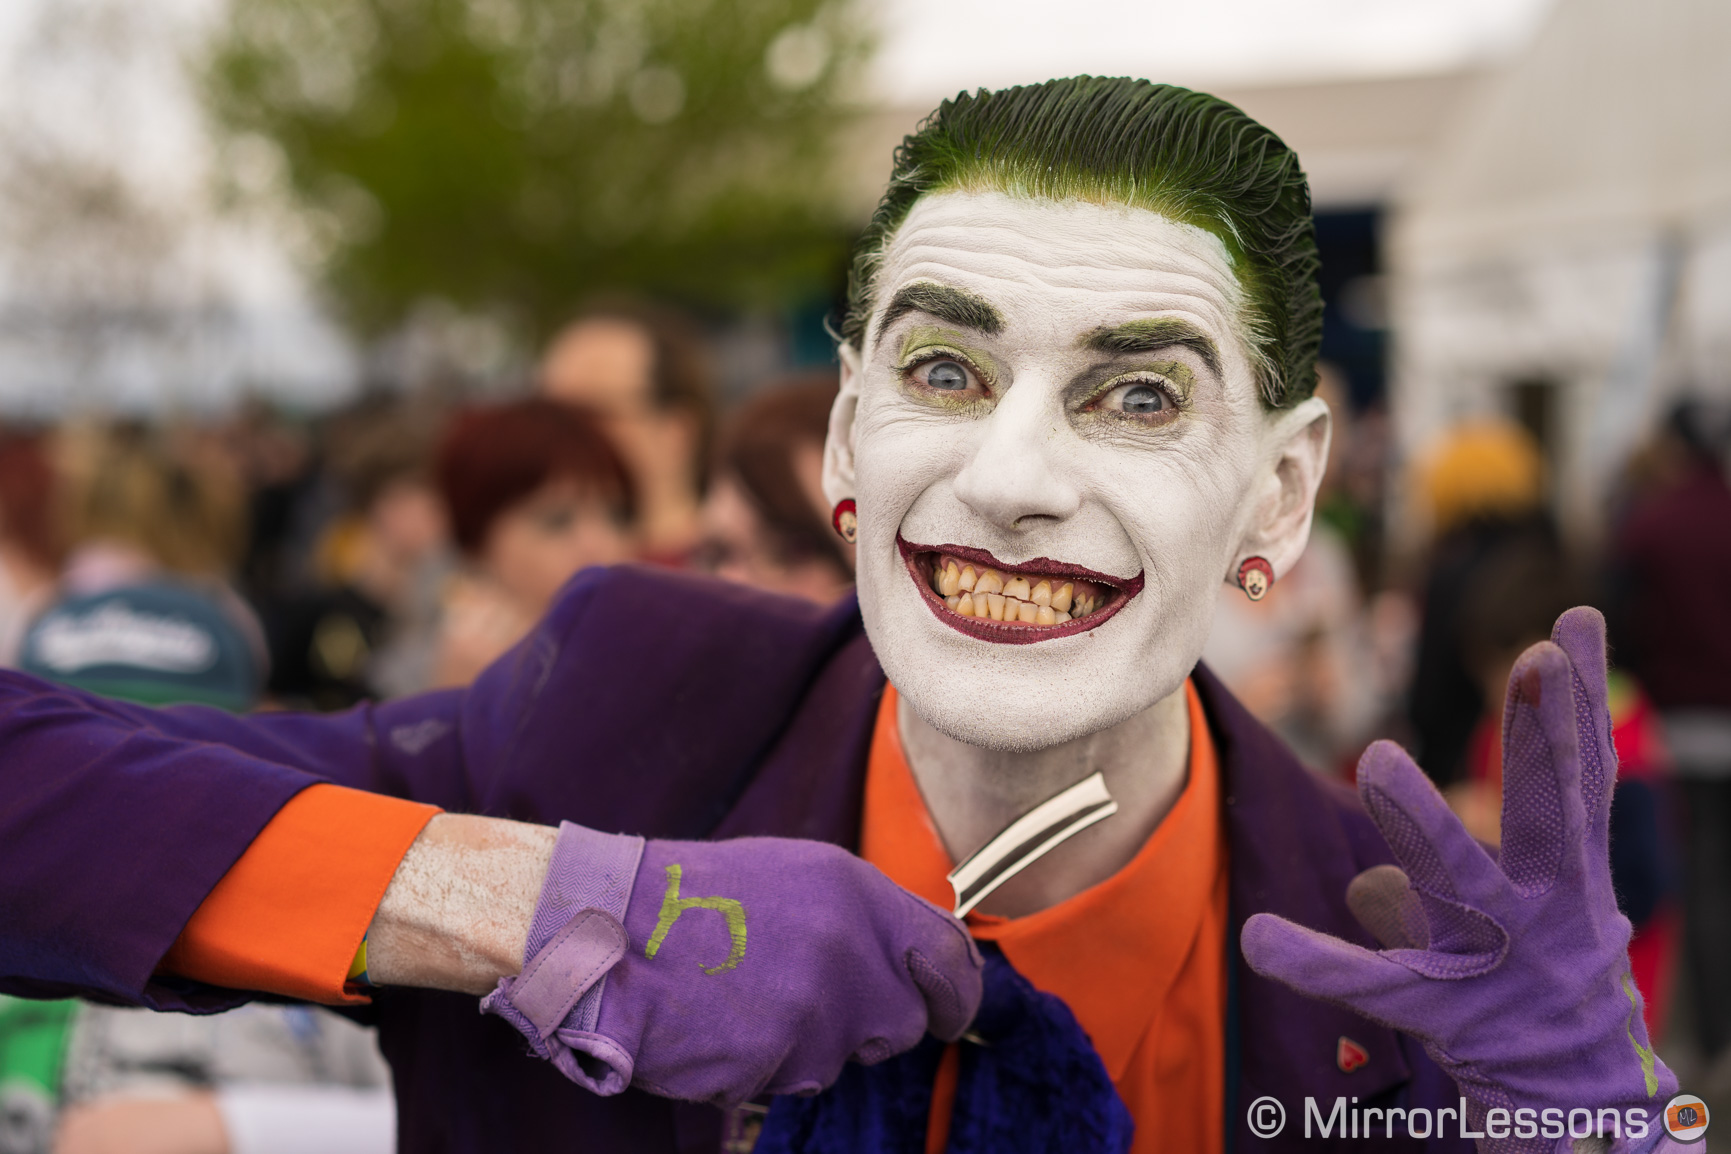
For extra accuracy, EyeAF is a wonderful ally when taking pictures of people or for portrait sessions. On the A7 III it is really fast and works even when people wear masks. In my experience, the only exception that tricked the camera was a cosplay model who was wearing dark make-up and had closed her eyes for an instant. The mode is reliable in low light and backlit situations as well. The A7R III was equally fast and reliable.
Sony has improved the EyeAF performance on both cameras with firmware 3.0.
First you don’t have to assign it to a custom button necessarily; it can work in real time when half-pressing the shutter button (or pressing the back button focus). If the camera stops detecting the eye, it will revert to the focus area you selected. It’s a shame that Sony didn’t include the possibility to prioritise the left or right eye as you can do on the A9 and a6400.
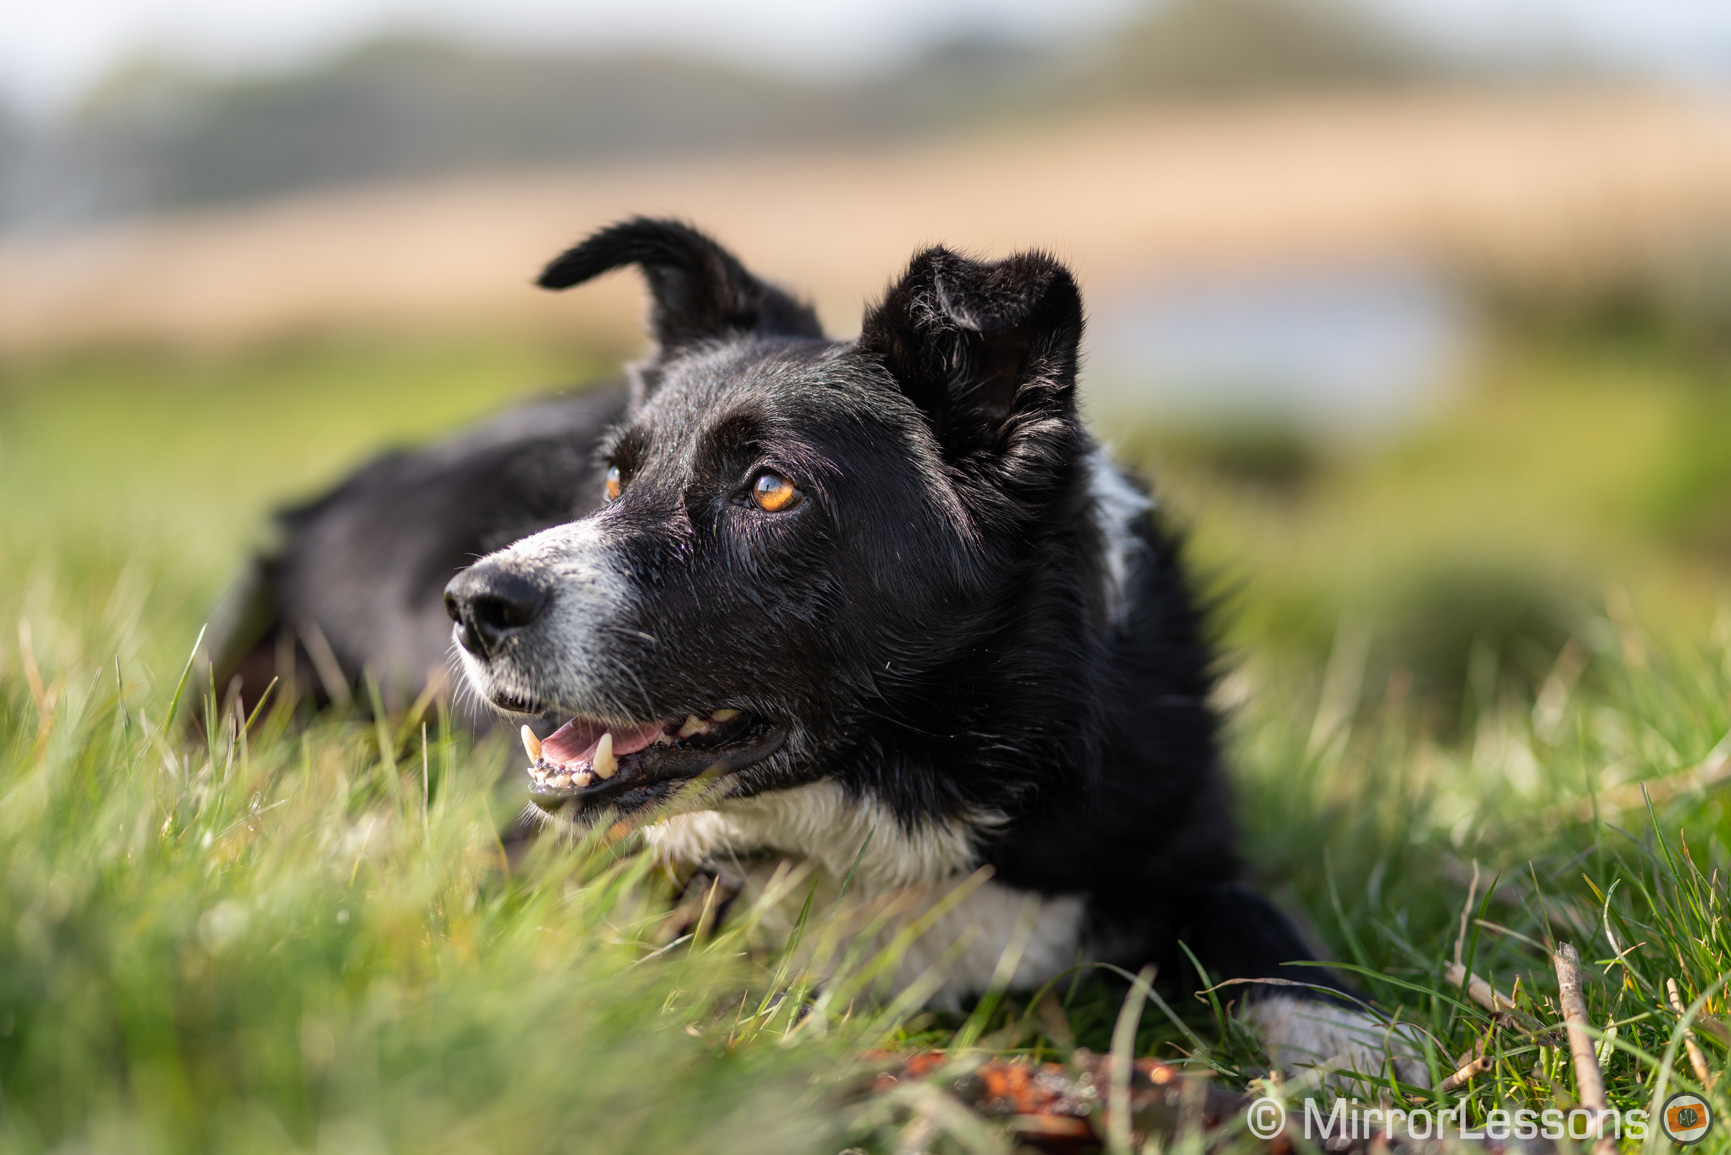
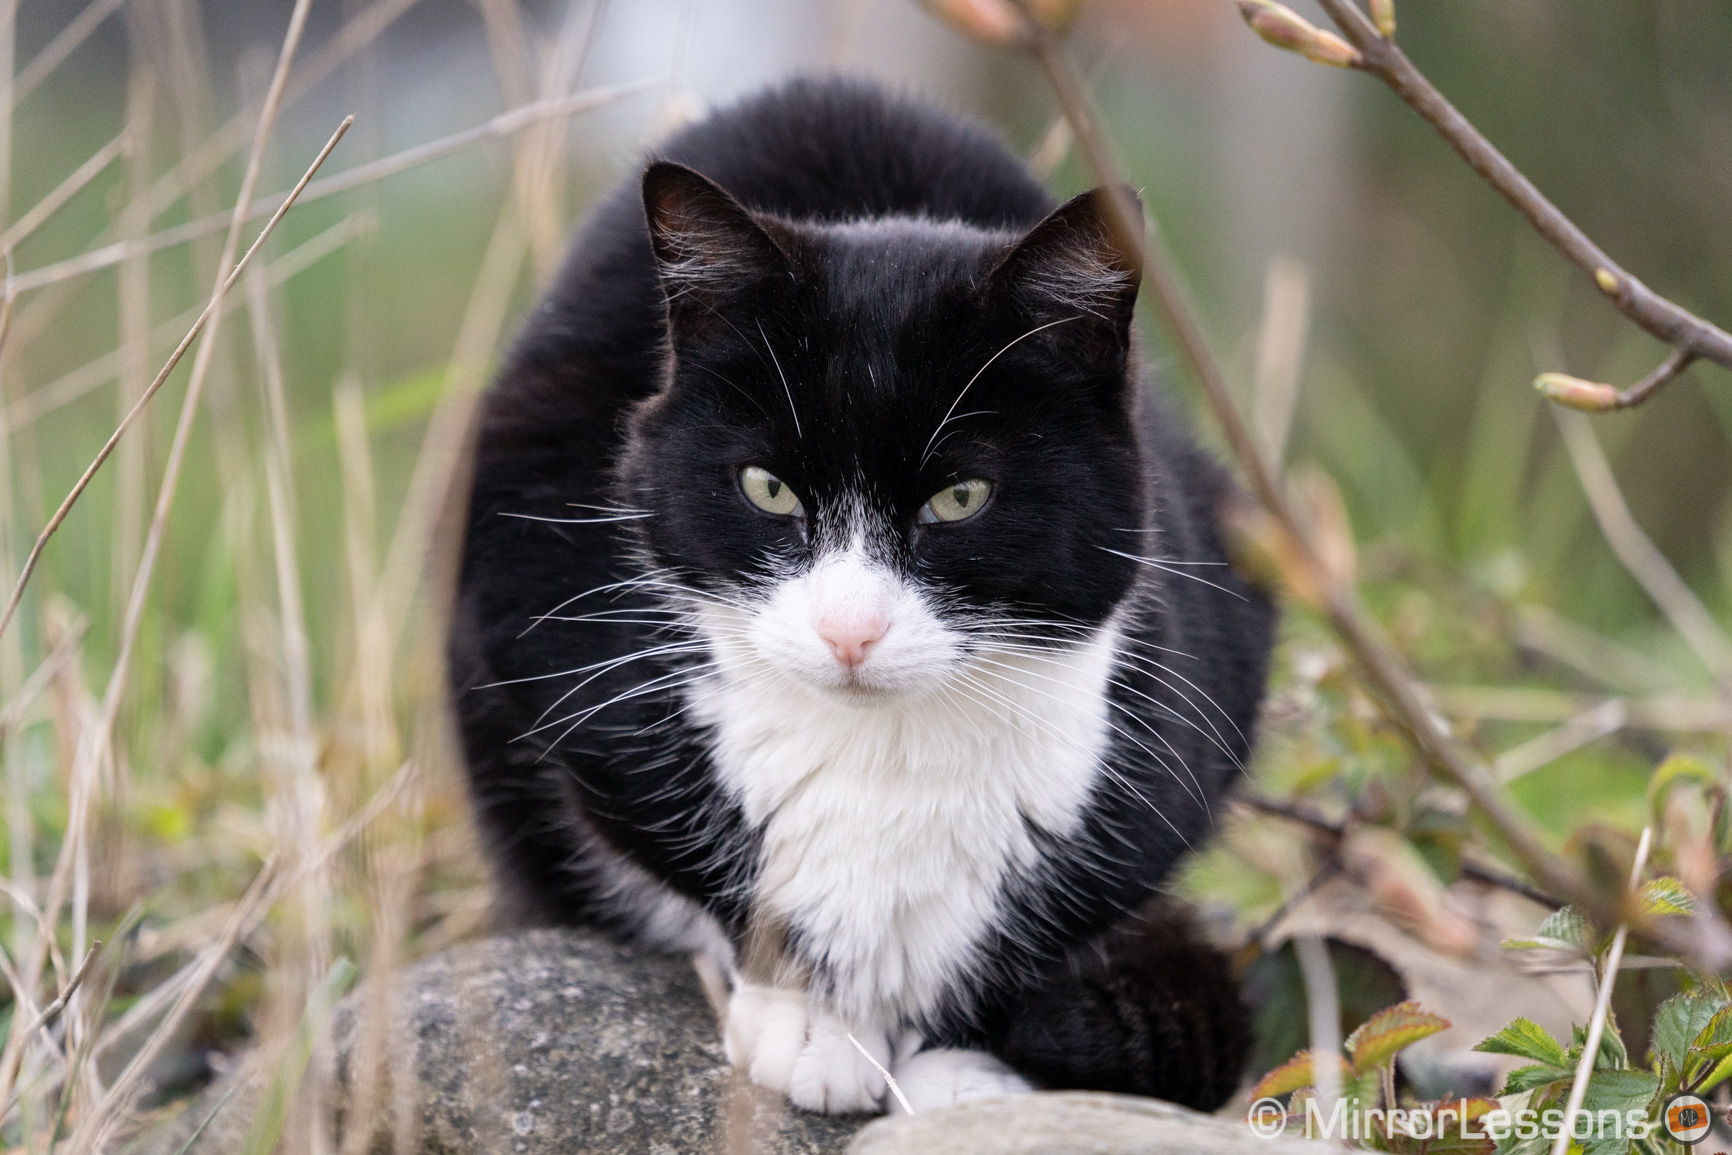
Second, and without a doubt the most interesting aspect, you can choose between humans and animals for eye tracking. It works just as well as it does for people when it comes to speed, responsiveness and accuracy. The little green square overlays the animal’s eye in your screen’s live view.
For dogs and cats, it nailed focus most of the time. The cameras were confused only a couple of times when there was a lot of contrast and dark fur doesn’t help. The animal needs to be close enough for eye detection to activate, although it can detect it at a distance as well as long as the animal fills a relatively large portion of the frame.
With sheep it was less successful mainly because they were more distant but a few times, when the lambs were running closer, the camera started to detect the eye even when the animal was facing sideways.
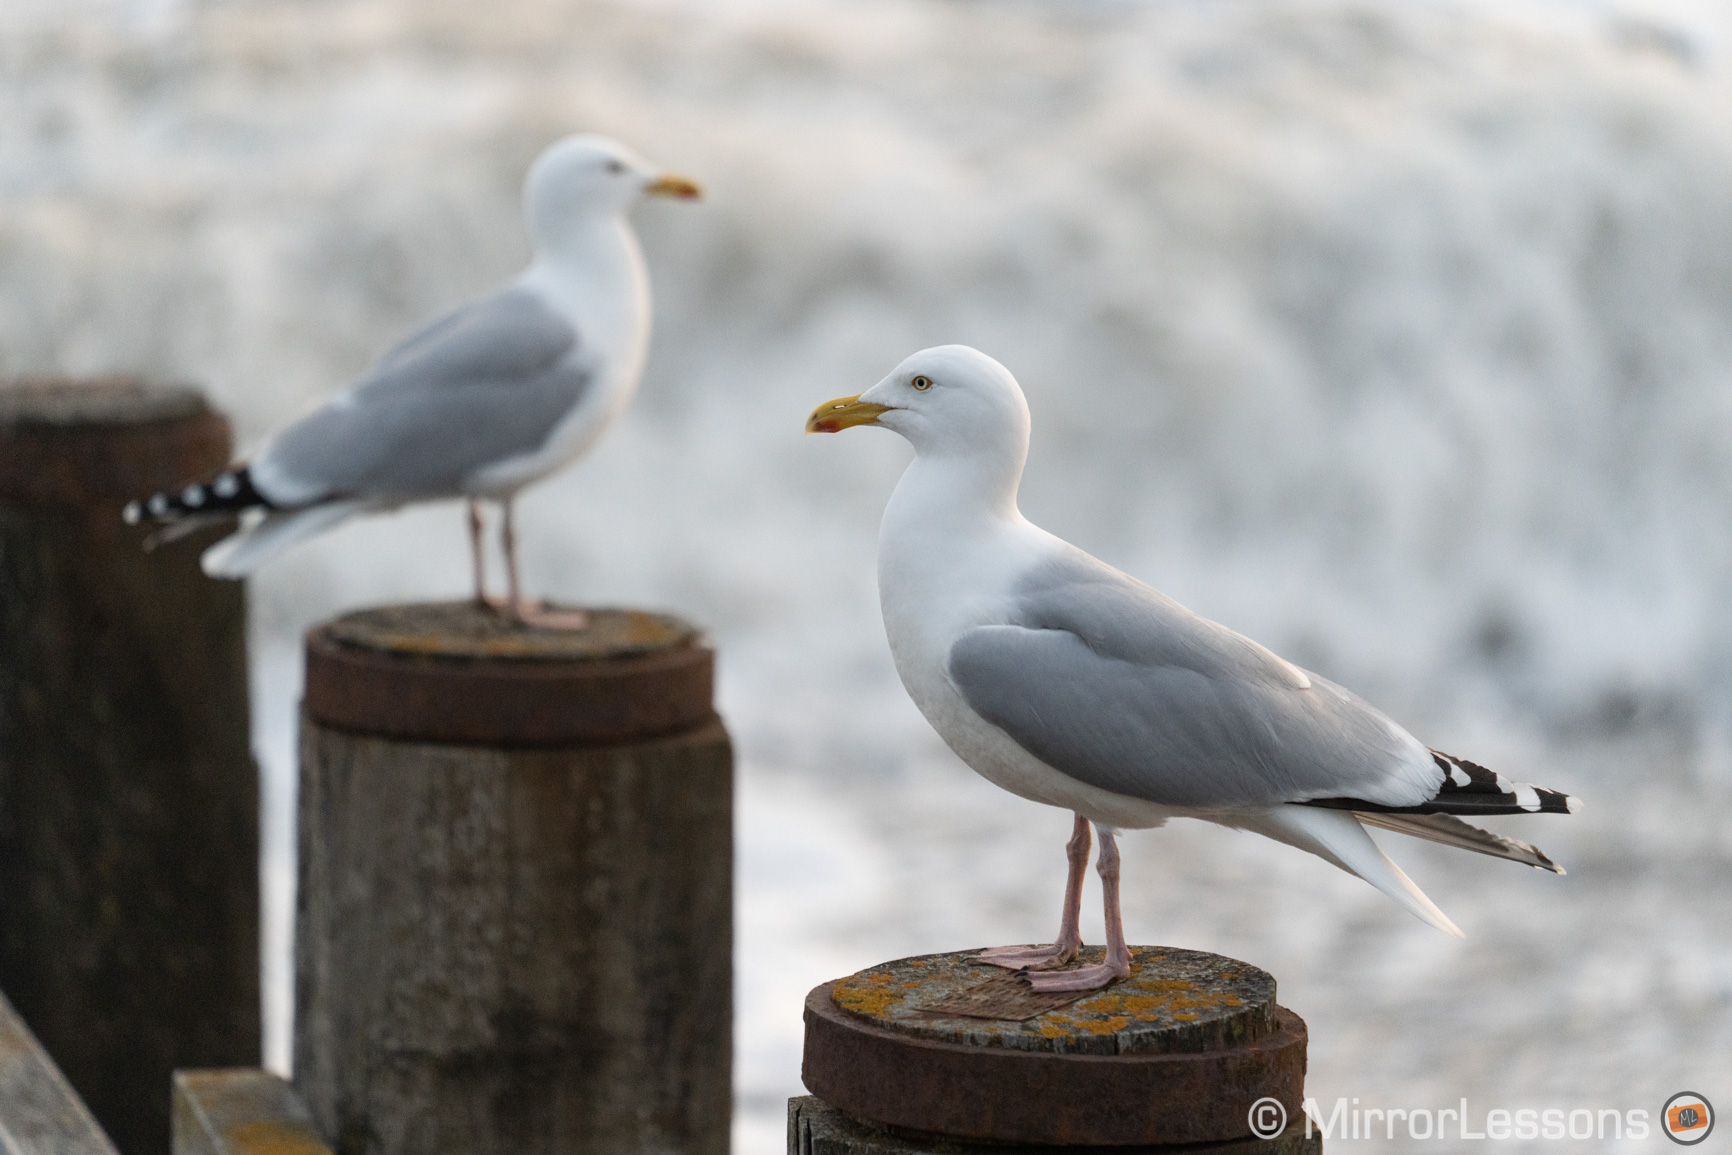
Unfortunately I haven’t been successful in making EyeAF work with birds. Even when they were relatively close and stationery, it would not activate. Perhaps further software updates will improve the detection. I don’t think it is really necessary when they are in flight, but it could be useful for close-ups when certain species allow you to photograph them at a short distance.
Thanks to their advanced phase detection system, both cameras can deliver good autofocus performance with DSLR lenses and compatible adapters. Keep in mind that they won’t be as fast as native lenses and the speed can vary depending on the specific lens and adapter used.
Finally, there are extra setting concerning the autofocus that are available on both cameras:
- With Priority Set in AF-S and AF-C you can choose to prioritise focus, shutter release or a mix of the two with Balanced Emphasis. In situations where you don’t want to miss the shot, Focus priority may prevent the camera from taking the image if focus is not acquired correctly
- Switch Vertical / Horizontal AF Area allows you to store the focus mode and/or area position separately for landscape and portrait orientation
- the AF Area Recognition mode allows frequently used focus areas to be memorised and assigned to a custom button
- AF System lets you choose between contrast and phase detection when using adapted DSLR lenses
- Pre-AF makes the camera focus even if the shutter button or Back Focus button is not pressed
- the AF can be triggered when using Focus Magnification.
To know more about autofocus settings and Eye AF, have a look at the articles below.
Sony A7 III vs A7R III – Shutter, continuous shooting speed and buffer
The A7 III and A7R III can shoot up to 1/8000s, or as slow as 30s before Bulb mode. There are electronic first curtain and full electronic options.
The former is useful to reduce shutter shock, especially when shooting at slow shutter speeds. The latter makes the operation completely silent but banding can be an issue under fluorescent lights. With quick pans, a similar amount of distortion (rolling shutter) can be found in images from both cameras.


The hardware updates brought to the third generation of A7 cameras include a front-end LSI chip that improves the reading and processing speed. As a result both cameras can shoot at a maximum of 10fps, or 8fps with live view. There is also a Mid and Low speed at 6fps and 3fps respectively.
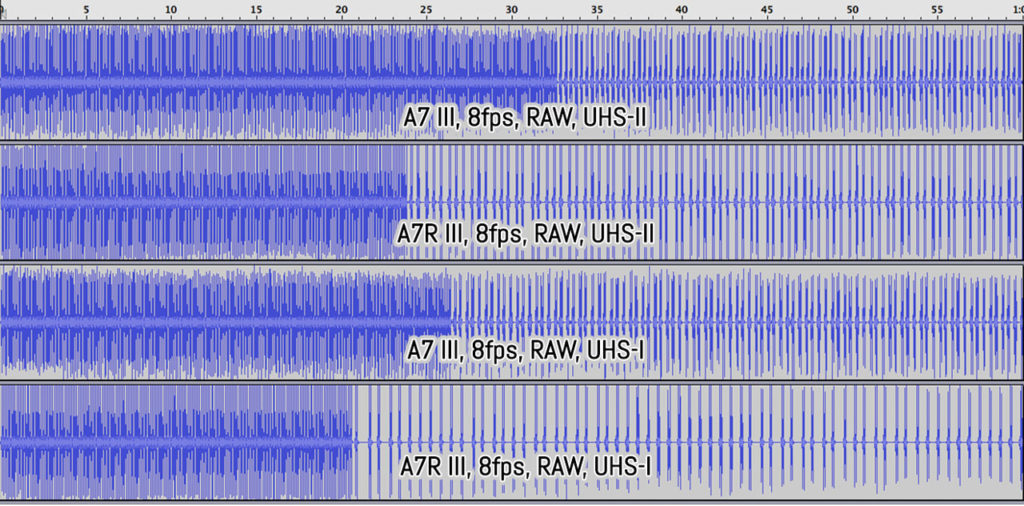
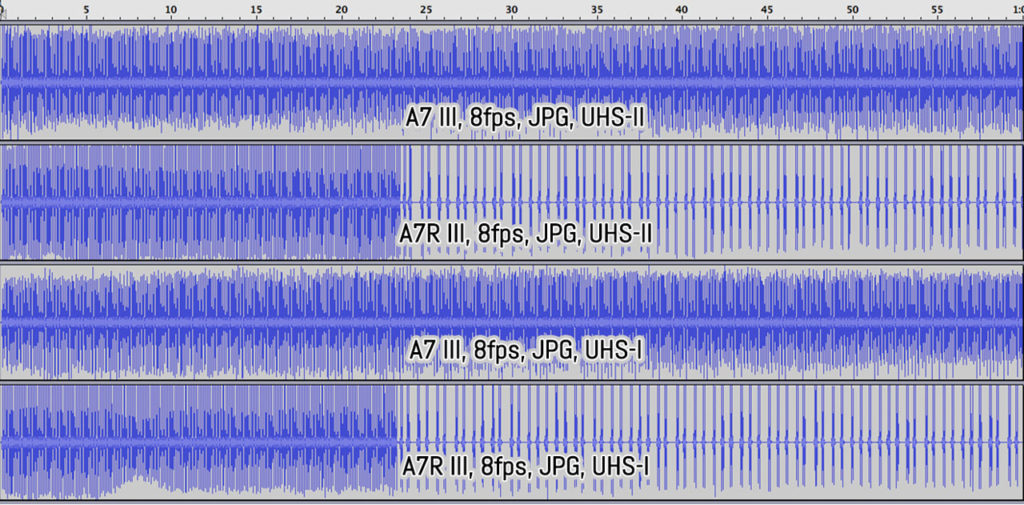
Unsurprisingly the A7 III did better in our buffer test given its lower resolution. It can shoot at 8fps for more than 30 seconds with compressed RAW files before slowing down at 4fps. With JPGs it never slows down. If you use a slower UHS-I cards, performance remains similar except that the buffer fills up a bit sooner with RAW files (26s) and the speed decreases to 3fps.
The A7R III does a good job with compressed RAW files, shooting at 8fps for about 23s before slowing down to 3fps. The performance remains similar for JPGs, or when using an UHS-I card instead.
Continuous AF is available at all speeds and an Anti-Flicker mode prevents changes in exposure when shooting scenes with artificial light sources such as fluorescent light (not available with the e-shutter). Note that this option may slow down the burst speed.
Sony A7 III vs A7R III – IBIS (5-axis stabilisation)
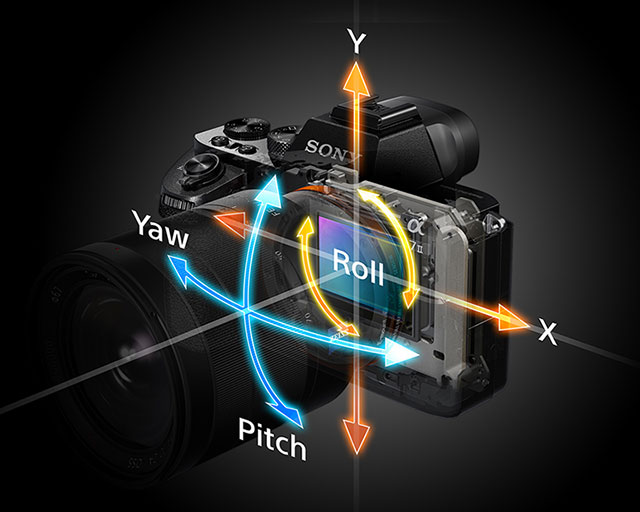
You will find sensor shift technology on both cameras meaning that they can compensate for camera shakes on 5 axes: Pitch, Yaw, Roll, X and Y. This allows you to use slow shutter speeds with sharp results. The A7R III can also use this technology for the Pixel Shift Multi Shoot mode that we already covered in the image quality section.
Looking at the official specifications, the A7R III has a rating of 5.5Ev which is half a stop better than the A7 III (CIPA standards).
In my findings, both cameras deliver similar performance but with some inconsistencies. Starting with my torture test, I managed a sharp shot down to 1 second with both cameras using the FE 35mm f/2.8 which was better than expected, but the keeper rate was poor, especially with the A7R III.
I couldn’t get a decent image at 1/2s with the R model, whereas I got good results at 1/5s with both but the keeper rate was average with lots of slightly soft images. It’s only from 1/10s that the results became more consistent and the keeper rate improves.


With a manual focus lens such as the Trioplan 35mm f/2.8 which lacks electronic contacts, the cameras use three axes instead (Roll, X and Y). The results are slightly worst but remain close down to 1/2s, whereas at 1s neither camera gave me a sharp result and it is more evident with the A7R III.

With an OSS lens such as the FE 70-200mm f/2.8 GM, three axes are used on the camera (Roll, X and Y) and two on the lens (Pitch and Yaw). The keeper rate is decent down to 1/20s but you’ll have little success at 1/10s. Below that speed, all your pictures are destined for the trash bin.


A word of advice: it is possible to use slow shutter speeds in real life situations such as the two scenes below, but it is better to use faster speeds to avoid disappointment. The keeper rate isn’t always good and the IBIS can lack some consistency in its performance. Poor results at around 1/20s using a small wide angle lens are not uncommon and results can vary from lens to lens, not just because of the focal length.


Sony A7 III vs A7R III – Video
The two cameras can record 4K up to 30fps, or Full HD up to 120fps, but there are few important aspects to discuss.
The A7 III records with full pixel readout and no pixel binning using the entire width of the sensor (except in 4K 30p where a 1.2x crop is applied). This ensure better sharpness with no aliasing or moiré because the camera uses approximately 20MP – which corresponds to 6K resolution – and downsamples the data to 4K. At 30p there is still oversampling but it starts from 5K instead. In S35/APS-C mode, the sensor is cropped by 1.5x which means approximately 8MP are used.
The A7R III does full pixel readout in Super35 mode using approximately 18MP of the sensor. This corresponds to 5K which is then downscaled to 4K. In full frame mode there is pixel binning. No sensor crop happens when using the full sensor regardless of the frame rate.
You can watch our 4K comparison video below or keep reading for our written analysis.
The A7 III provides sharper results in full frame mode. In Super35 format, the results are much more similar, with the A7R III having a slight advantage.
In 1080p, details are not as sharp but the quality remains good. The frame rate can go as high as 120fps. You can choose to record at that speed natively or slow it down in camera to have slow motion results at 24p or 30p directly onto your SD card. For the latter you need to use the Slow&Quick mode which allows you to choose frame rates from 1fps to 120fps. However the bitrate with the S&Q mode is lower than recording natively so if you want the best quality, it’s better to slow down the footage on your editing software.
Note: to record at 120fps, you need to select the NTSC mode otherwise the maximum available in PAL is 100fps. Keep in mind that you can’t mix PAL and NTSC footage on the same SD card.
At high ISOs, the A7 III has more sensitivity and goes up to 51200, or 102400 ISO with the extended range. The A7R III tops out at 32000 ISO.
Once again the different formats give different results: the A7 III does better in full frame mode whereas the A7R III has less noise in Super35 mode, although the full frame mode looks much better than on its predecessor and remains usable up to 3200 ISO. Overall though the A7 III retains an advantage at high sensitivity levels.
Concerning dynamic range, both cameras feature Sony’s Picture Profiles with various gamma and colour modes to choose between. The colour rendering of the two cameras is very similar.
There are HLG (Hybrid Log Gamma), S-Log2 and S-Log3 curves. The A7R III exhibits more colour noise in full frame mode, which becomes evident after colour grading. In Super35 mode, the quality improves but the A7 III still remains cleaner in the shadows. There is also a different tint dominance, with the A7 III being a little greener with the S-Log3 profile.
The difference seen with white balance and skin tones in the image quality section are present for video as well, with the A7R III being cooler when using AutoWB but sligthly reddish when selecting the kelvin temperature manually. With Picture Profiles such as Cine1 and Cinema, the difference is minimal and tones can easily be matched with colour grading in post.
Rolling shutter is contained when panning slowly with both cameras. The A7 III is ever so slightly worse in full frame mode, whereas both cameras give the same result in Super35 mode.
They do well with continuous autofocus and when following fast subjects. The same conclusion applies to face detection although they can be a little slow to correct focus if the subject is very close to the camera. You can also take advantage of the touch screen capabilities, the AF Drive Speed and AF Track Sens settings to make smooth transitions between two focus points.
The only thing that doesn’t excel is image stabilisation. It is decent for static shots but not smooth enough when panning or walking with either camera.
I haven’t encountered a lot of overheating but it can happen. There is a setting called Auto Power Off Temp that can force the camera to continue recording but after a few 30 minutes clips it can still shut down if the temperature is too high, which is also influenced by the environment you are working in.
Other things you’ll find on the two products include:
- Proxy recording
- Gamma Display Assist for S-Log2, S-Log3 and HLG profiles
- start/stop the recording with the shutter release button
- separate setup for the custom buttons in movie mode
- 3.5mm mic input and a headphone output
- audio recording level adjustable in 31 steps
- 4:2:2 8-bit output via HDMI.
Sony A7 III vs A7R III – Flash and extra features
The maximum sync speed is 1/250s on both cameras but you can increase it with compatible HSS speedlights. They share other specifications including ±3Ev flash compensation, bracketing (up to 3Ev/5 frames or 1Ev/9 frames), slow sync, rear sync and eye reduction.
There are a number of off-camera flash solutions starting with Sony’s own products. Some of its latest flashes have radio communication and can use the front LED light as an AF assist beam. There are options from third-party brands as well (check out our accessory list to see a few examples).
Neither camera is packed with lots of extra features but there are some good ones nonetheless including:
- Single or Continuous Bracketing with WB, DRO and AE options (up to 3Ev/5 frames or 1Ev/9 frames)
- Two Manual Focus assists: magnification that can activate automatically when moving the focus ring (up to 11.7x on the A7 III, 12.4x on the A7R III) and Peaking with three levels and colours
- Wifi/NFC wireless communication with remote control from a smartphone which works in conjunction with the Playmemories app (iOS/Android). You can also transfer JPGs to your mobile device
- Tethering which works with the USB 3 port and can be used with the Sony Remote Camera Control software or the new Imaging Edge Suite
- FTP Transfer allows you to send images to an FTP server (Playback mode only)
- Bluetooth allows you to record location data by pairing the camera with a smartphone.
Neither is compatible with the PlayMemories app store where you used to be able to download and install apps on the camera to add extra functionalities. This means that extra accessories are required to perform additional tasks such as Time-Lapse.
The A7 III has a dedicated Scene mode with 8 options that allows you to shoot with preset settings that match the type of scene you want to photograph (Sports, Macro, etc.). This mode is not available separately on the A7R III but is integrated automatically into the Auto shooting mode.
Sony A7 III vs A7R III – Battery life
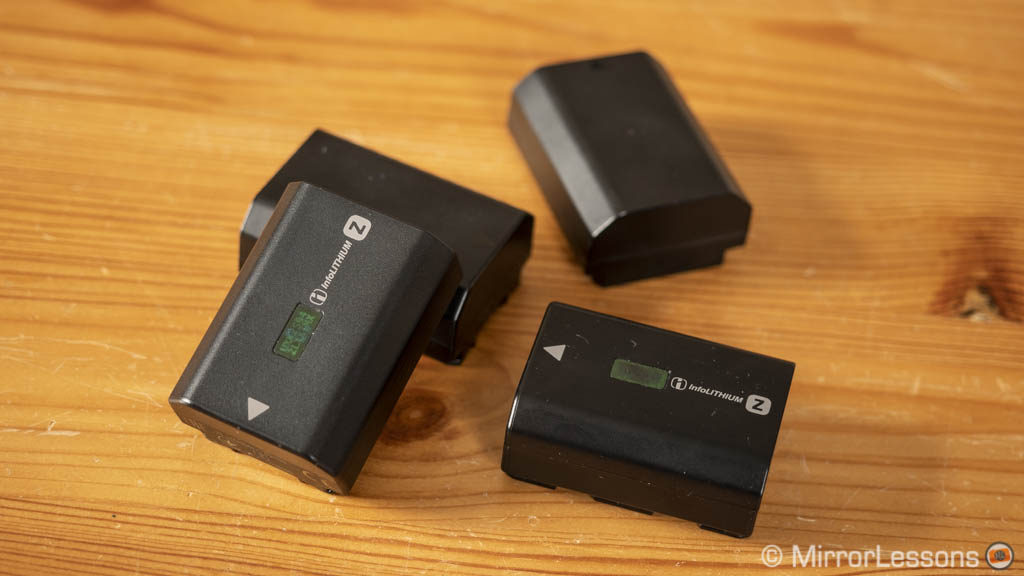
Both cameras use the larger NP-FZ100 battery which has brought a massive improvement to battery life for the series.
Looking at the official specifications, the A7 III is the most efficient managing up to 710 stills whereas the A7R III is rated just below at 650 shots.
In real life, I can easily bring home 2000 images recorded in continuous mode and still have approximately 35/40% battery juice left. For video, two 30 minutes clips in 4K will drain it from 100% to approximately 65%. These figures can vary depending on other settings as well but overall I found the endurance pretty similar.
The funny thing is that I sometimes forget to re-charge the battery but I know that if I didn’t stress the cameras too much the day before, I’ll have more than enough for casual or low-intensive shooting the next day. That’s how much trust you can put into these batteries.
One small yet annoying difference is that only the A7R III comes with a dedicated battery charger. For the A7 III you need to buy it separately or look at third party solutions.
You can charge the cameras via USB from your computer, car or a portable charger bank. You can use the UBS Type C port which means that the Micro 2.0 socket remains free for other accessories such as an intervalometer. A battery grip (VG-C3EM) is also available and can house two batteries.
Important note: if you use a third party battery on the A7 III or A7R III with firmware 2.0, both cameras will display a message saying that the operation and safety of the battery cannot be guaranteed. The percentage indication next to the battery icon will also disappear. The cameras appear to work fine nonetheless. I hope Sony will release another firmware to fix the issue. You can read more about this in our A7 accessory article.
Sony A7 III vs A7R III – Price
Perhaps the most significant difference to influence your choice is the price:
- the A7 mark III costs around $2000 / £2000 / €2300.
- the A7R III is more expensive at $3200 / £3200 / €3500.
Note that there can be some savings depending on the country or store.
Sony A7 III vs A7R III in 2019: which one to get?
The easiest way to make a decision is to look at the price. You’ll need to shell out more than $1000 extra to buy the A7R III, so we aren’t talking mere pennies here. But if you’re reading this, chances are that you already know this and you’re wondering whether the extra money is actually worth spending.
Personally I think that the cheaper model – the A7 mark III – covers 85% of what most photographers and videographers need.

The image quality is superb, the dynamic range is very close to that of the “R” model, and you get better high ISO performance for stills and video.
The autofocus is very similar, and although the A7R III lacks more precision for very difficult subjects or scenes, it’s rare for either camera to mis-focus completely. That being said, if you consider the wider coverage of AF points on the sensor and the better buffer memory, the A7 III can give you something extra for anything involving action, sports or birds in flight.
If you are interested in video, consider that the A7R III provides the best quality in Super35 mode, whereas the A7 III does well in both formats. So the choice can become easier if you have a preference for one or the other format. There are few minor differences concerning white balance and skin tone but – just like for stills – nothing drastic that can’t be adjusted to your taste with in-camera settings or post.

The A7R mark III is a camera that tackles more specific requirements. There is more resolution for large prints or highly detailed images, in addition to more possibilities for cropping. The Pixel Shift mode gives you extra colour resolution for still life and other genres that don’t involve any moving elements.
Design, ergonomics, usability, image stabilisation, settings and battery life are all the same. The only advantage the R model has is the viewfinder which provides more resolution. This can make a difference if manual focus is your go-to focus method when shooting stills.
The truth here is that you can’t go wrong with either model. There isn’t a single example in all the tests I’ve performed that clearly shows one camera dominating the other. For this reason, unless the extra resolution is non-negotiable, I think it makes sense to go with the A7 III.
Choose the Sony A7 III if:
- you want the best bang for your buck
- marginally better AF performance
- better results at high ISO values
- prefer to work in full frame mode for movies
Choose the Sony A7R III if:
- you want to work with extra resolution
- you want a better viewfinder
- you prefer to work in crop mode for video
Reminder: the links below are affiliate links. If you decided to buy something after clicking the link, we will receive a small commission.
Check price of the Sony A7 III on:
Amazon | Amazon UK | B&H Photo | eBay
Check the price of the Sony A7R III on:
Amazon | Amazon UK | B&H Photo | eBay
Second-hand Sony gear on MPB US | MPB UK
Sony A7 III vs A7R III – Photos and additional content
You can check out sample images and download original RAW and JPG files by clicking on the two galleries below:
You may also be interested in the following articles: