Over the last five years, I’ve taken advantage of the natural areas around me to acquire more experience with wildlife and bird photography, and test various cameras with these genres in mind.
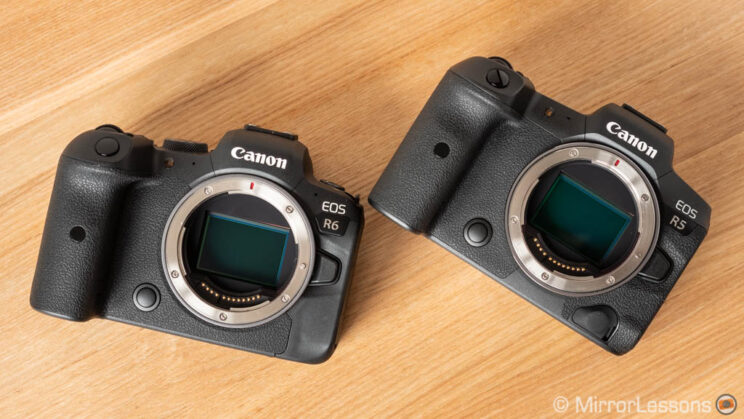
In this article, I’ll be taking a look at the R5 and R6 whose many improvements, from the image sensor to the autofocus performance, are a significant step forward for Canon’s mirrorless series.
I will explain all the most important settings you need to know, and the ones that give you the best results. I will also show you how to customise the camera while including various tips along the way.
I hope this guide can help you understand and use your camera to the best of its capabilities for wildlife and bird photography.
Canon Eos R series compatibility
The information contained in this article is built around the Canon R5 and R6. That said, because I’ve also tested other models such as the original Eos R and the RP, I’ve included information about these cameras too, where relevant.
Note: For each setting that I mention, I’ve included the path to find them in the menu system. The image below shows how the Canon menu is organised. Some settings might be in a slightly different position depending on the camera model. The RP doesn’t have the AF section.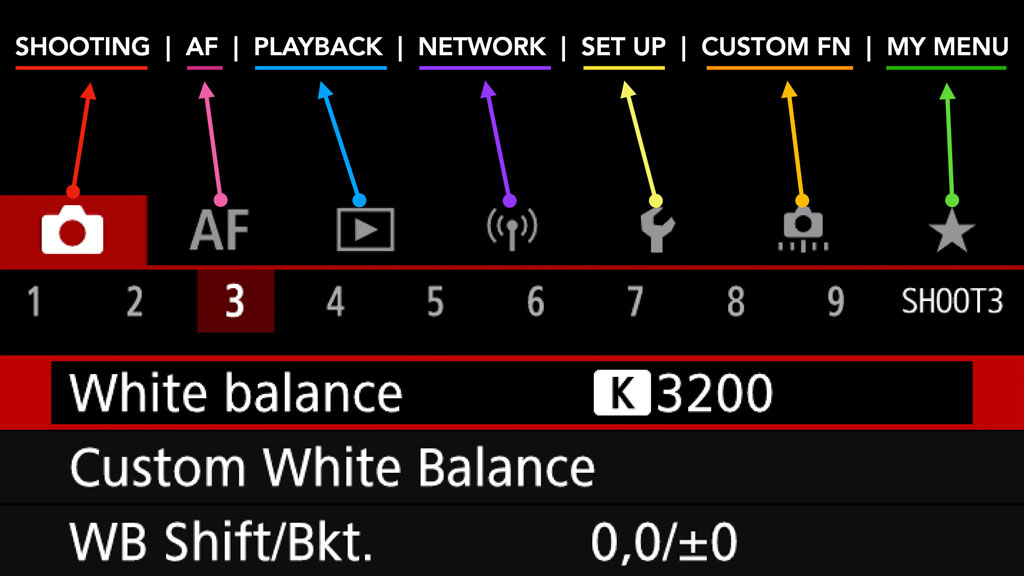
TABLE OF CONTENTS
1. Image quality
2. Image stabilisation
3. Exposure and metering
4. Autofocus
5. Drive and shutter modes
6. Customisation
7. Review
Ethics statement: this guide is based on our personal experience with Canon cameras and wildlife photography, with a focus on the R5 and R6. We were not asked to write anything about these products, nor were we provided with any sort of compensation. Within the article, there are affiliate links. If you buy something after clicking the link, we will receive a small commission. To know more about our ethics, you can visit our full disclosure page. Thank you!
Check the price of the Canon EOS R5 on:
Amazon | Amazon UK | B&H Photo | eBay
Check the price of the Canon EOS R6 on:
Amazon | Amazon UK | B&H Photo | eBay
Check the price of the Canon EOS R on:
Amazon | Amazon UK | B&H Photo | eBay
Check the price of the Canon EOS RP on:
Amazon | Amazon UK | B&H Photo | eBay
Second-hand Canon cameras on:
MPB US | MPB UK
Canon R5 / R6 Wildlife Photography – Image quality
Shooting Menu: SHOOT 1 > Image quality (or Q menu)
I always shoot in RAW format when taking pictures of animals, because I like to have as much versatility as possible in post-production. Light conditions can be tricky outdoors, so you may need to open the shadows, decrease the highlights and, occasionally, recover the exposure by 1 stop or more. RAW gives you much more freedom of adjustment than a JPG file.
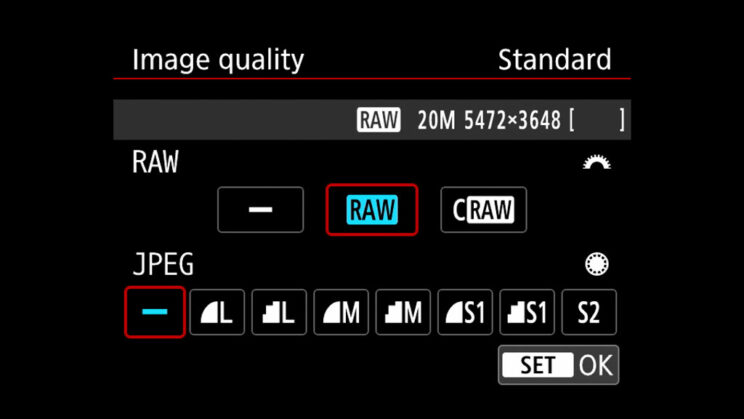
With RAW, you also have the option to choose C-RAW, which results in a 35-to-55% smaller file than regular RAW. However, because it is a lossy compression, some data is lost along the way, which can result in lower image quality if you need to heavily post process your image.
Unless you have problems with buffer memory when shooting at high speeds, or you’re reaching the full capacity of your memory card and don’t have a spare with you, I would stick with the normal RAW format.
Another file format available is HDR PQ (SHOOT 2 page in the Menu) which saves a 10-bit HEIFF file that has better quality than 8-bit JPG. However, compatibility with this type of file and photo editor software is limited as of now. Furthermore, other settings such as the electronic shutter can’t be used when HDR PQ is enabled.
HDR PQ is not available on the EOS R and RP.
1.6x crop
Shooting Menu: SHOOT 1 > Cropping/aspect ratio (or Q menu)
You can take advantage of the 1.6x APS-C crop and get extra reach when the subject is distant (for example a 600mm lens becomes a 900mm equivalent).
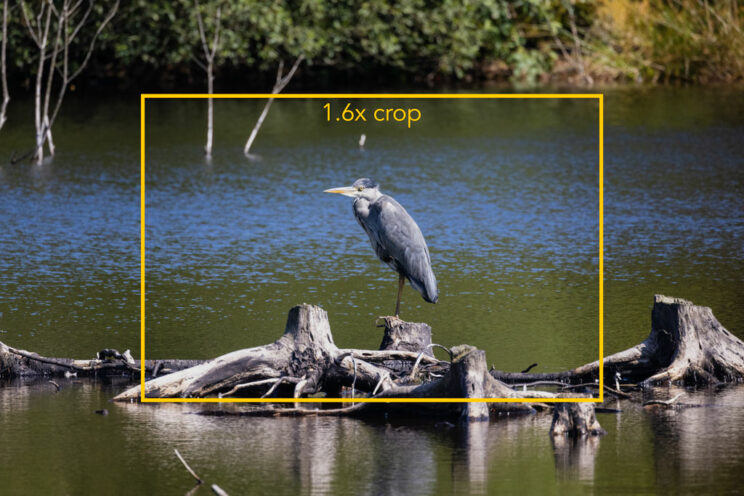
It is worth noting that you can do the same crop in post from the full frame image but, with the APS-C mode enabled, you have the 1.6x magnification in the viewfinder, which is useful to see the subject better.
Tip: an alternative way to see the subject more closely is to use the Magnify function, which can be activated with the dedicated button on the rear of the camera (magnifying glass icon) or a custom button of your choice. Note that it doesn’t work with certain AF method such as Tracking for example.
The APS-C crop makes more sense with a high resolution camera like the EOS R5 because the megapixel output in APS-C remains decent. With other cameras, it is lower.
| Full frame | 1.6x crop | |
|---|---|---|
| EOS R | 30.3MP | 11.6MP |
| EOS RP | 26.2MP | 10MP |
| EOS R5 | 45MP | 17.3MP |
| EOS R6 | 20.1MP | 7.7MP |
Canon R5 / R6 for Wildlife – Image stabilisation
IS switch on the lens
When using long telephoto lenses, image stabilisation (IS) is useful for two reasons : A) you can use relatively slow shutter speeds and keep your ISO down with static subjects; 2) you get a more stable view in the EVF while framing the shot, because stabilisation activates when you half press the shutter button.
Canon RF telephoto lenses have an excellent stabilisation rating, and the performance improves a little with the R5 and R6 that have in-body image stabilisation. Note that you can’t separate IBIS and optical stabilisation. You either activate or deactivate everything at once.
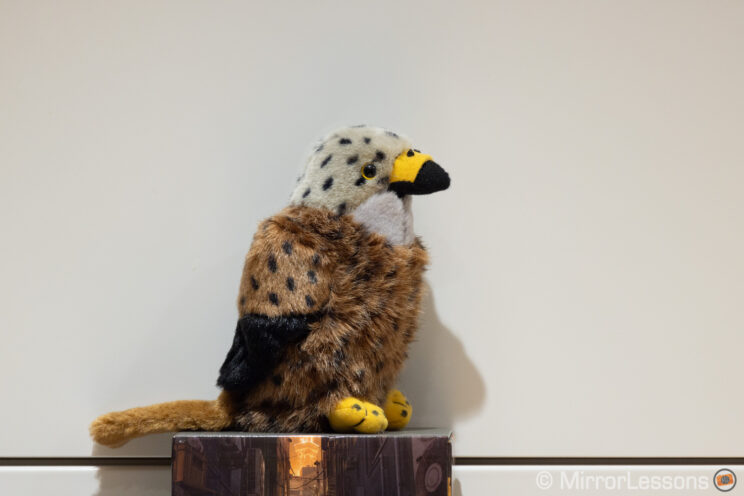
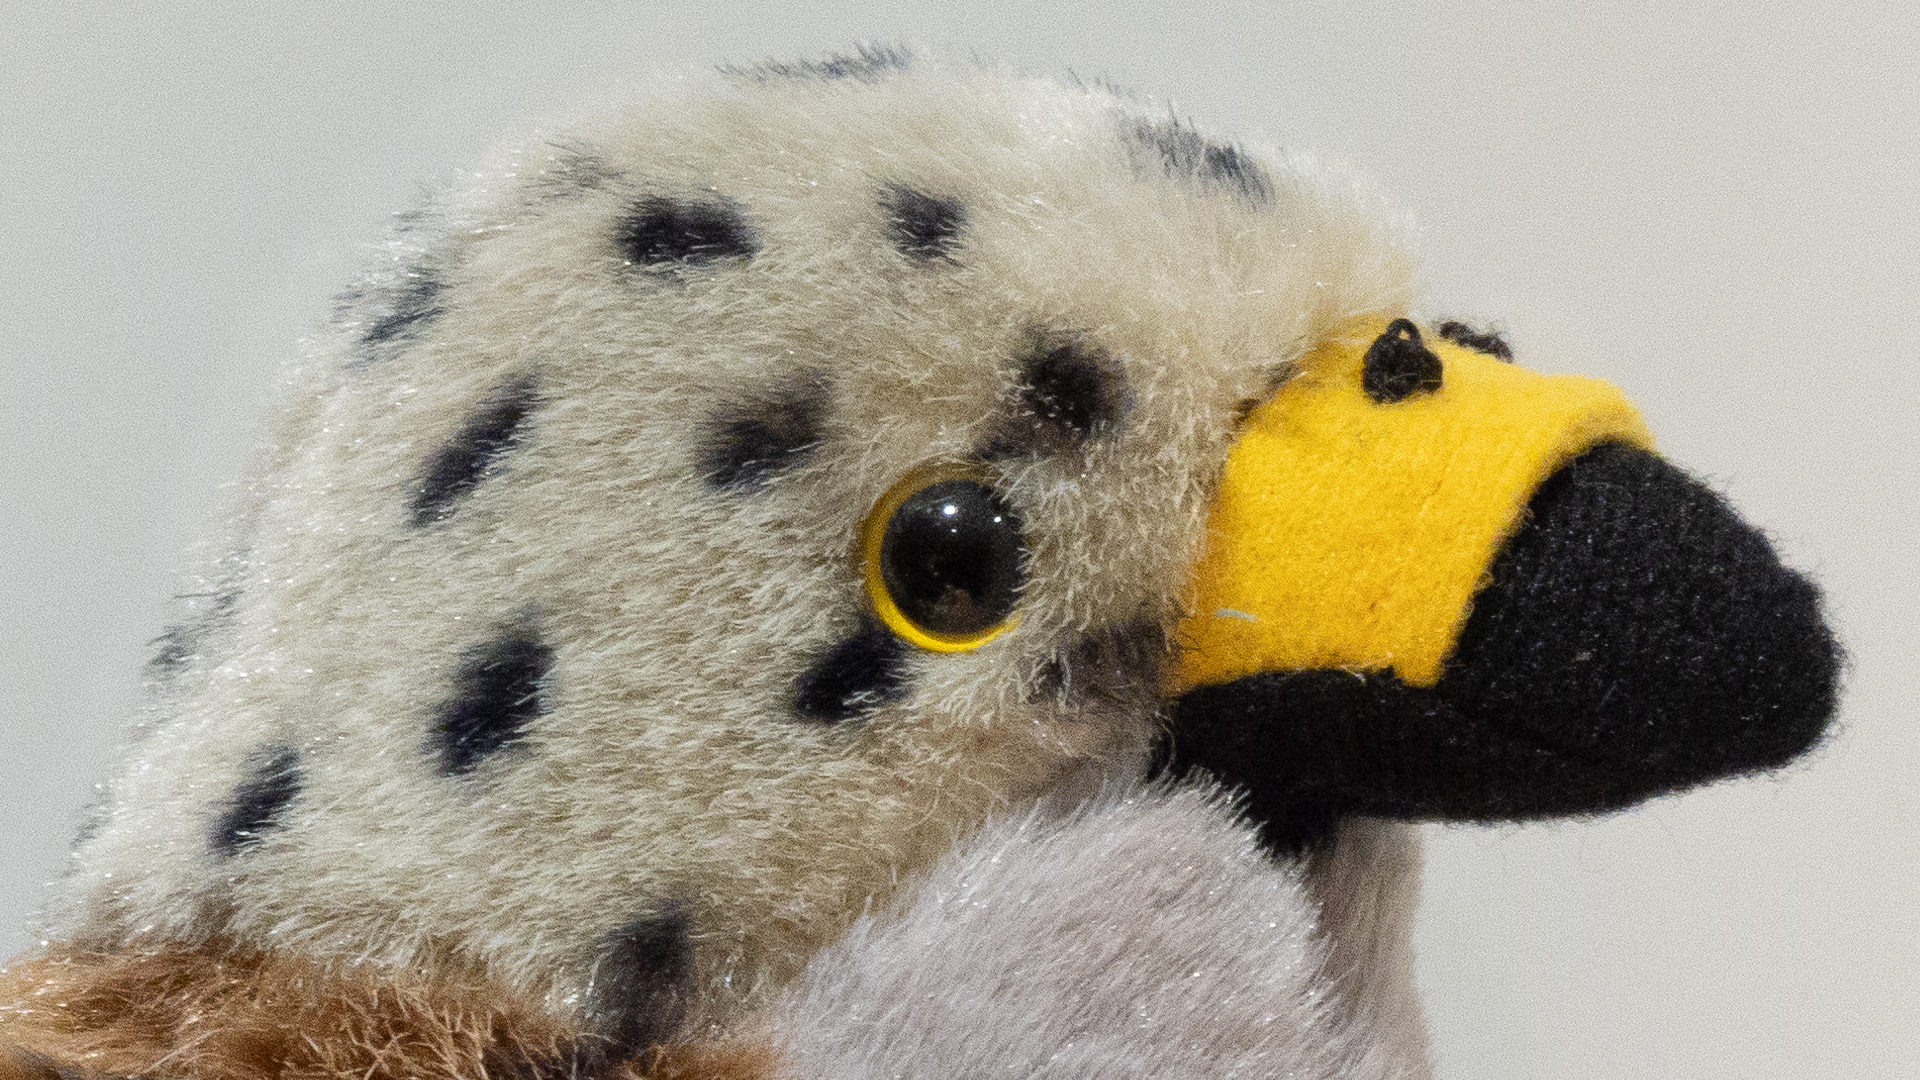
Below is a test image I took at 1/20s hand-held with the 600mm F11. The keeper rate is not perfect but it shows you how good the stabilisation system is. This means that sharp shots taken at 1/50s or 1/100s are very much possible with these cameras. Of course, in real-world scenarios, you’ll need a very still subject to use slow shutter speeds.
In-body image stabilisation is not available on the EOS R and RP. As for the performance with long telephoto lenses, it relies mostly on the lens’ optical stabilisation, so the result should be close to that of the R5 and R6.
With moving subjects, I tend to leave the IS on. I know some photographers believe it can alter the quality of the image (loss of sharpness and motion blur) but modern stabilisation systems are more advanced than before, and I personally never noticed any problem. That said, when shooting at 1/2000s or faster (which I do with birds in flight), you can safely leave it off.
Some lenses have a second switch with various stabilisation modes that are designed to optimise the performance when you’re static, or moving the camera quickly to follow the subject. Here are how the three modes work on the RF 100-500mm lens for example:
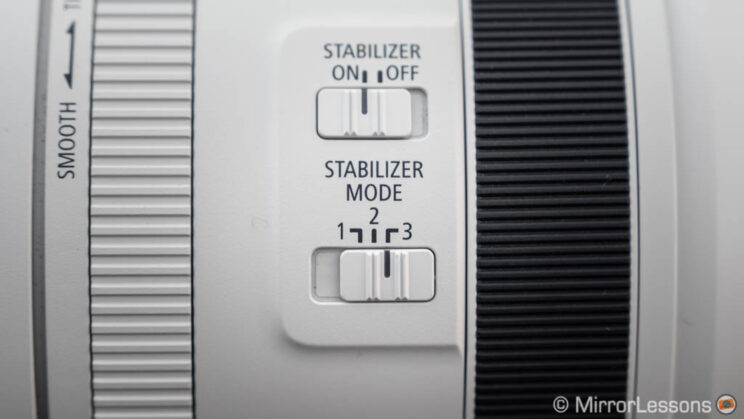
- Mode 1: compensate shakes in all directions, so it’s good for static subjects.
- Mode 2: compensate vertically if you’re panning horizontally (or vice versa), useful for moving subjects
- Mode 3: same as Mode 2, but activates only when taking the shot, which minimises small jumps in the EVF while following an erratic and irregular moving subject.
For birds in flight, I find Mode 2 works perfectly so I rarely bother with Mode 3, as I never noticed annoying jumps in the EVF.
Note: in the menu (SHOOT 7 page), there is a IS (Image Stabilizer) setting but it is of no use when a lens with optical stabilisation is attached, because you control the IS with the switch on the lens barrel. This setting is useful only if the lens has no OS and you want to use IBIS on the R5 and R6.
Canon R5 / R6 for Bird photography and Wildlife – Exposure and metering
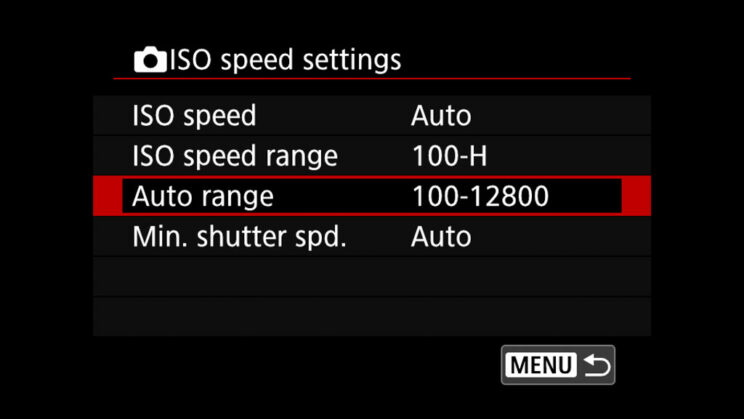
Most of the time, I use manual exposure (shutter speed and aperture) with Auto ISO. I set the upper limit on the latter to 6,400 (R and RP models) or 12,800 ISO (R5 and R6). The ISO speed settings are found in the SHOOT 2 page of the menu.
I tend to use the fastest aperture the lens can give me (if the quality is good) to have more subject-to-background separation, unless the subject is very close to me. In that case, I might close the aperture to keep the entire animal in focus, if the light conditions are not too bad.
For the Metering (accessible from the Q menu), I tend to choose the “Evaluative” option, where the camera evaluates the brightness of the image automatically depending on the scene. I find it gives accurate results for wildlife. I use the exposure compensation tool if I find the camera is over or under exposing.

Other metering settings will prioritise the centre of the frame in various ways. For example “Centre-weighted average” evaluates the whole frame but prioritises the centre more, whereas “Partial” and “Spot” metering measures the centre on 5.8% or 2.9% of the area respectively.
The problem with the settings above is that, often, the dark plumage or fur of the animal can trick the camera into thinking the image is too dark, resulting in overexposure. A white body can do the opposite. That’s why I find the automatic mode fine to work with.
Exposure simulation
Shooting Menu: SHOOT 7 > Expo. simulation
Because the Eos R cameras have an electronic viewfinder, you can enable the exposure simulation: the EVF will go darker or brighter if your image is under or overexposed. This is a very natural way of checking if your image is correctly exposed, so I advise you to leave it on.

If you prefer to have the brightness in the EVF as constant as possible, without matching your exposure (useful if you’re purposely underexposing your photo for example), leave this option disabled.
Alternatively, you can have the best of both worlds: if you choose the “During” option, you can simulate the exposure only when pressing the Depth of Field Preview button.
Canon R5 / R6 for Birds in Flight and Wildlife – Autofocus
Eos R cameras use Canon’s Dual Pixel CMOS AF which is a very good autofocus system. The R5 and R6 have the latest version and have proved to be among the best for wildlife in my tests (see my birds in flight ranking).
There are a lot of autofocus settings, from the most basic to the most advanced. Let’s have a look at the most important ones.
The EOS RP doesn’t have a dedicated AF menu. You’ll find the AF settings in the Shooting menu (SHOOT 7 and SHOOT 8).
Focus mode and back button focus
Custom Fn Menu: C.Fn 3 > Customize buttons
I like to use the back button focus method, meaning starting the AF with a specific button rather than half pressing the shutter release.
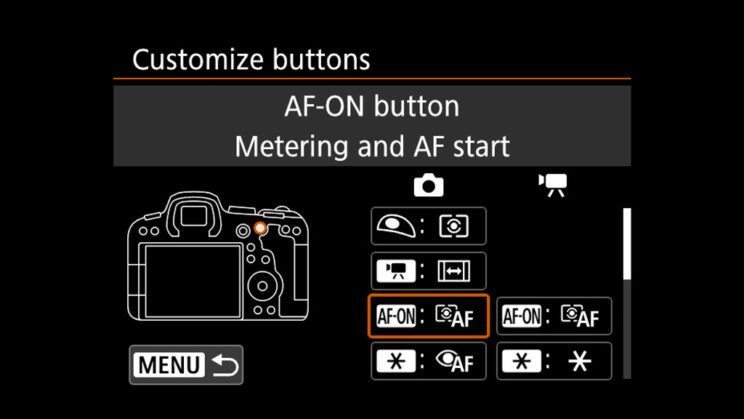
I use the AF-ON button (already configured this way by default) and set “Metering start” for the shutter release button.
This method also allows me to use SERVO AF (continuous AF) most of the time, rather than constantly switching between SERVO and ONE-SHOT AF (Single AF). A quick press of AF-ON is similar to using Single AF, whereas press and hold makes the AF work continuously.
Focus area
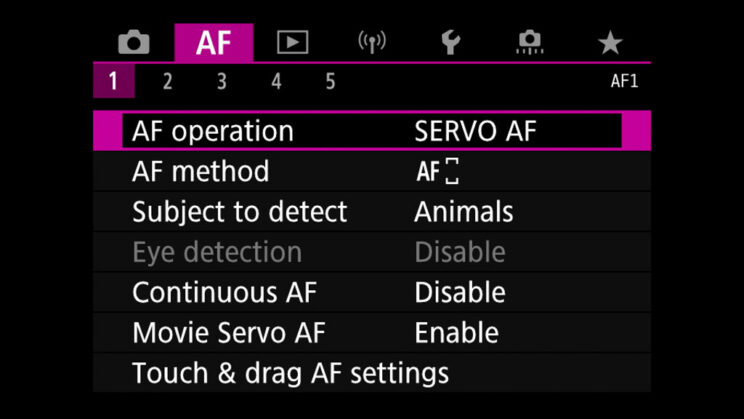
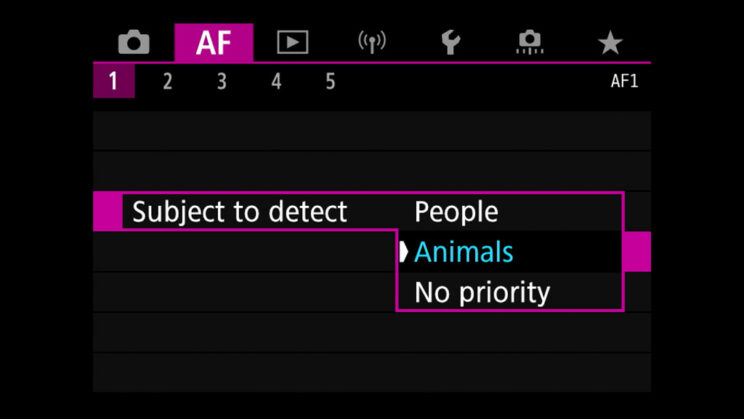
AF Menu: AF 1 > AF method (or Q menu)
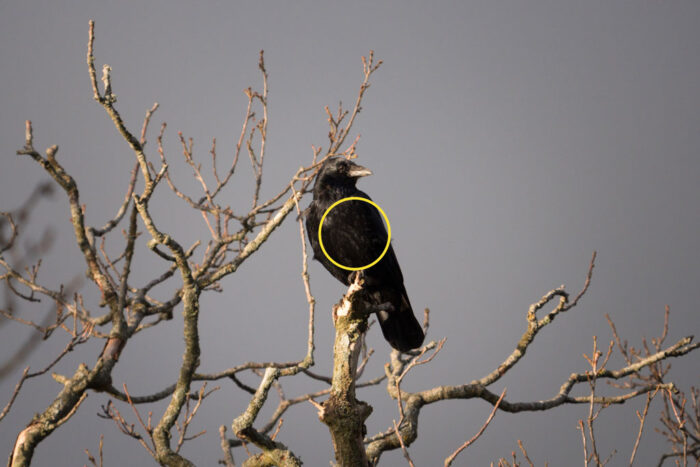
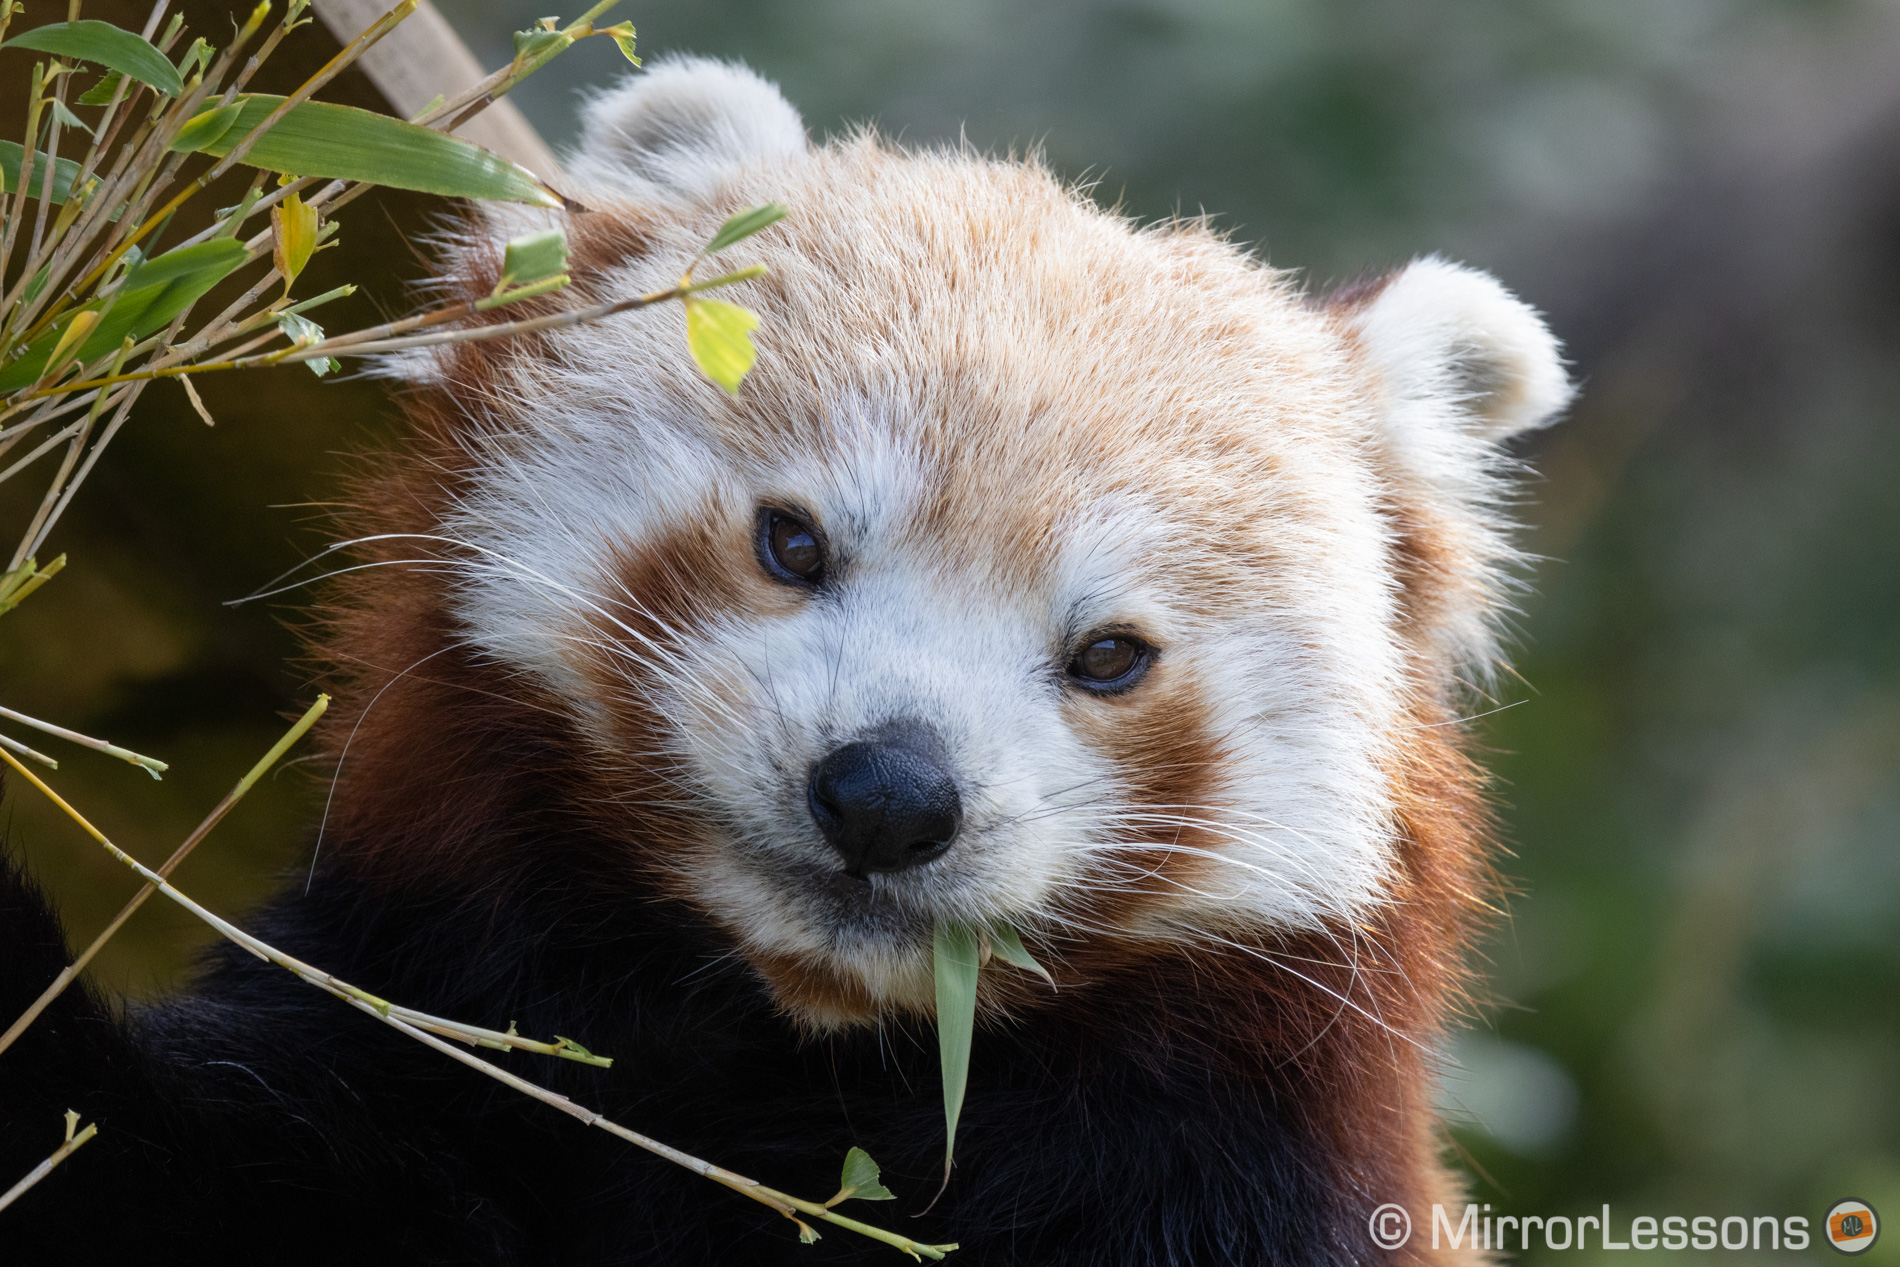
Most of the time, I use the Tracking mode with Animal detection. Whether it is a flying bird, a deer in the distance or a red panda eating leaves, the percentage of precision and reliability is very high, and I rarely need anything else.
The camera automatically focuses on the body, head or eye of the animal depending on the distance. The closer the subject is, the more precise the camera will be by prioritising the head or the eye accordingly.
In the menu, make sure that “Eye detection” is enabled (page AF 1). You can also choose what kind of subject to detect: human, animal or leave it to Auto. I always select Animal.
Animal detection is not available on the EOS R and RP. When I tested the EOS R, I used Expand AF area for static subject and Zone or Large Zone for birds in flight. I find Tracking less reliable on the R and RP.
Note: the maximum autofocus area is reduced when using the RF 600mm F11 and RF 800mm F11. Find out more about this and the two lenses in our side by side comparison.
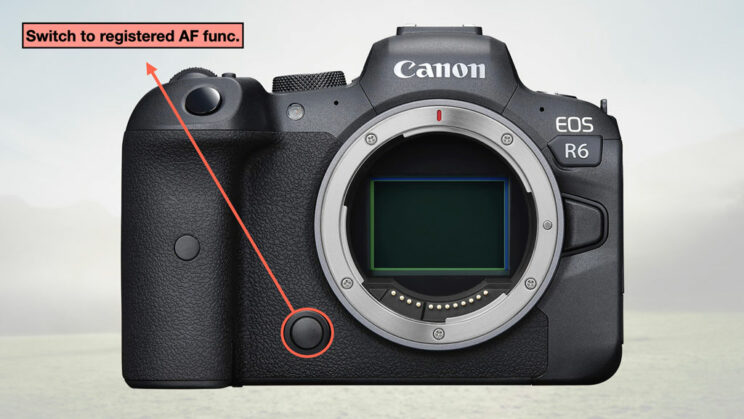
Switch to registered AF function
Custom Fn Menu: C.Fn 3 > Customize buttons
Not available on the EOS R and RP.
Although the Tracking method works very well, there might be a few situations where you prefer to move a smaller AF area manually, for example in the rare instances where tracking doesn’t focus where you want it to.
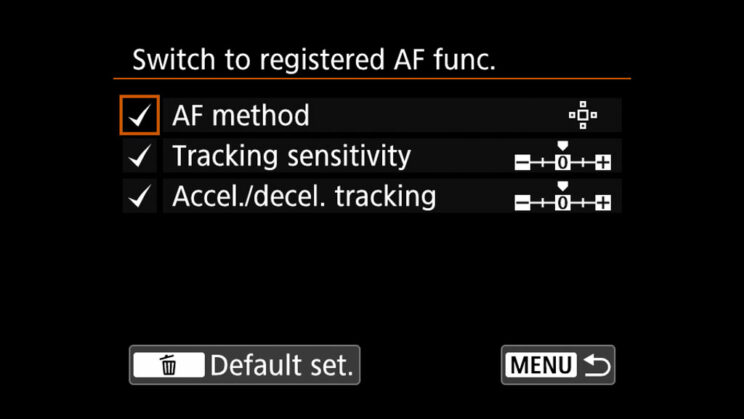
The normal way to change the AF method is to use a custom button or the Quick menu. But if you want to change it temporarily, there is another solution that can be very handy, and it’s called “Switch to registered AF function”.
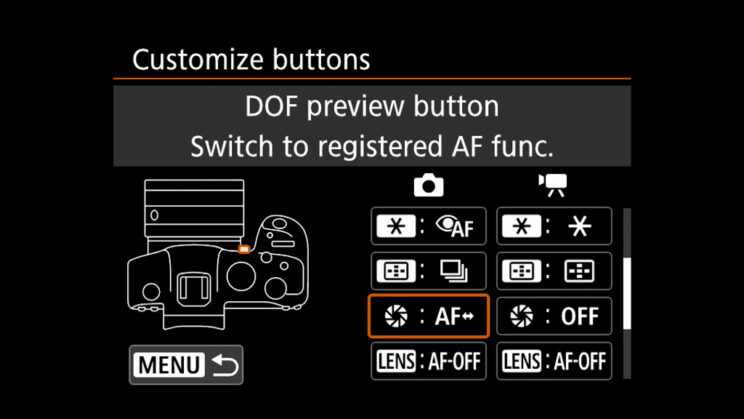
You need to assign this setting to a custom button, and choose which area you want to switch to. Then, when you press and hold that button, you momentarily switch to the focus area of your choosing. You can also temporarily change the Servo AF sensitivity and tracking settings (more on this in the next chapter).
This function can be very useful, but you need to choose a button that is comfortable for you to reach and hold, because you’ll have at least another button to use at the same time, if not two depending on your configuration for focusing and taking the picture. I assigned it to the button on the front of the camera.
Servo AF cases
AF Menu: AF 3
Not available on the EOS RP.
The R5 and R6 have a lot of settings that allow you to configure and control the autofocus behaviour, and they can be a bit overwhelming at first if you’re just starting.
One of the most interesting is made of four different “cases” in which the AF is configured for various types of shooting situations and subjects.
- Case 1: Multi purpose
- Case 2: Ignore possible obstacles (the camera won’t refocus right away if a momentary obstacle covers your subject)
- Case 3: Focuses instantly on a subject that enters in the AF area (kind of the opposite of Case 2)
- Case 4: for accelerating / decelerating subjects, or subjects that suddenly stop or move
- Case A: automatic setting where the camera changes the parameters depending on the subject
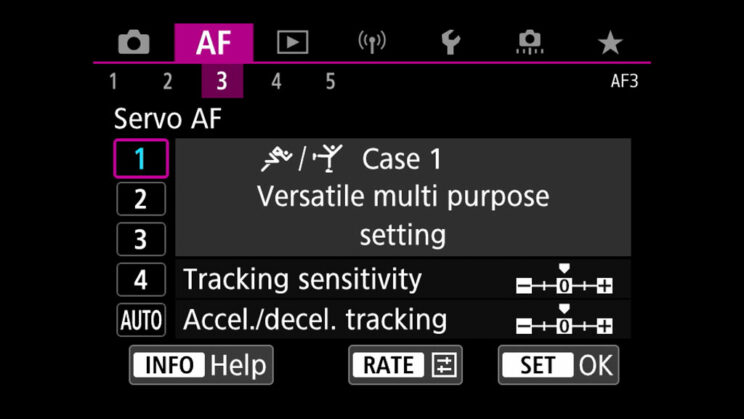
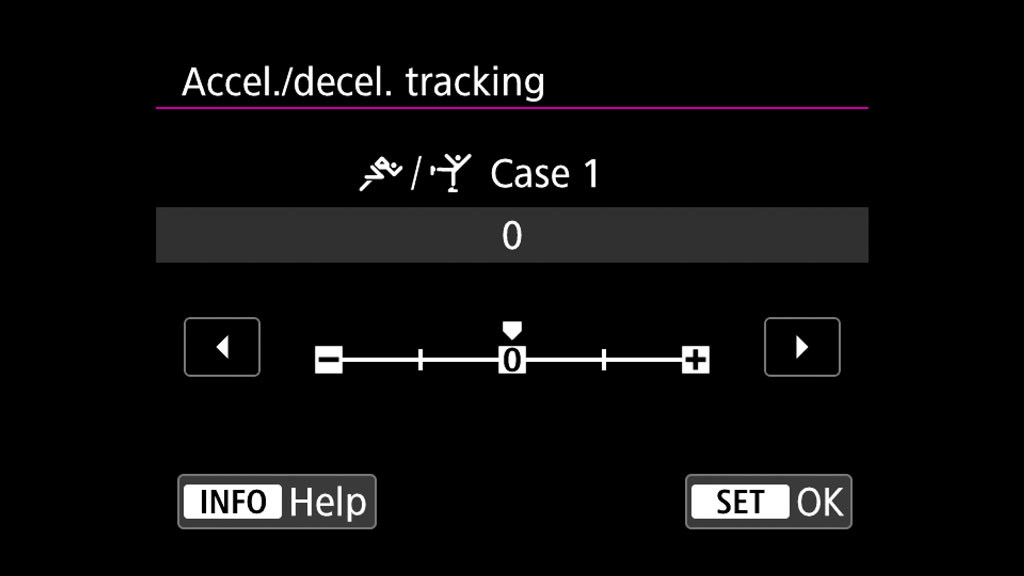
Each Servo AF case is made of two settings that can be modified (except Auto):
- Tracking Sensitivity: determines if the camera should ignore or prioritise other potential subjects that move around your main subject. With -2 (locked-on), the camera will ignore other subjects, with +2 (responsive) it will focus on the closest subject, or new subjects that enter the AF area.
- Acceleration / Deceleration Tracking: determines how the camera should react to sudden changes of movements or speed. Set -2 or -1 for subjects that have a constant speed, +1 or +2 for subjects that have sudden movements or change of speed.
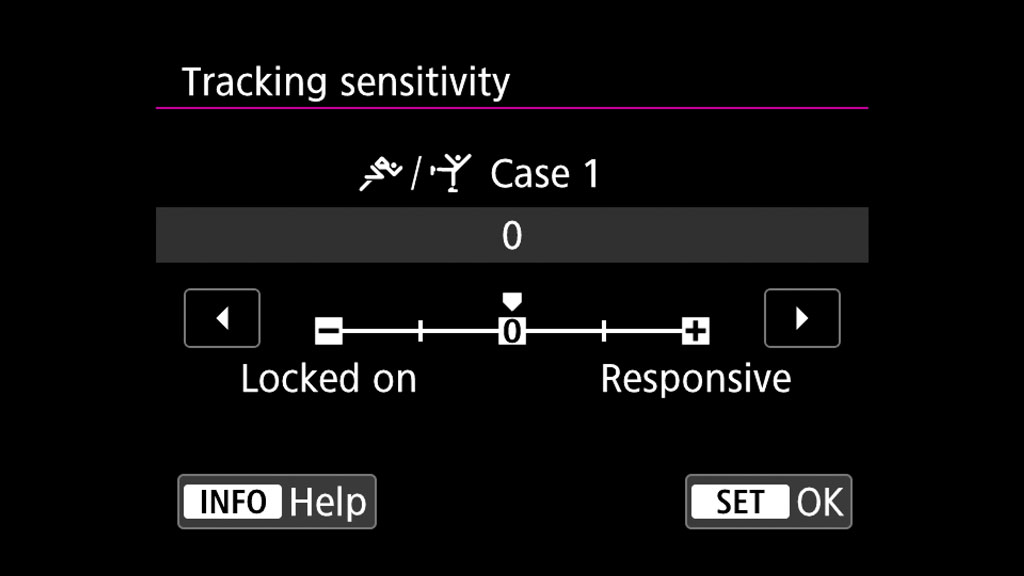
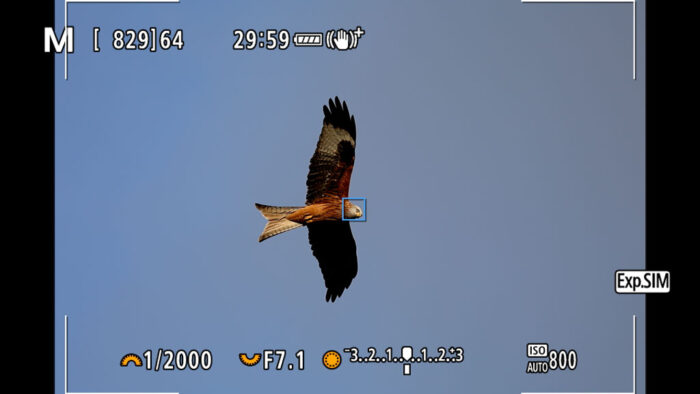
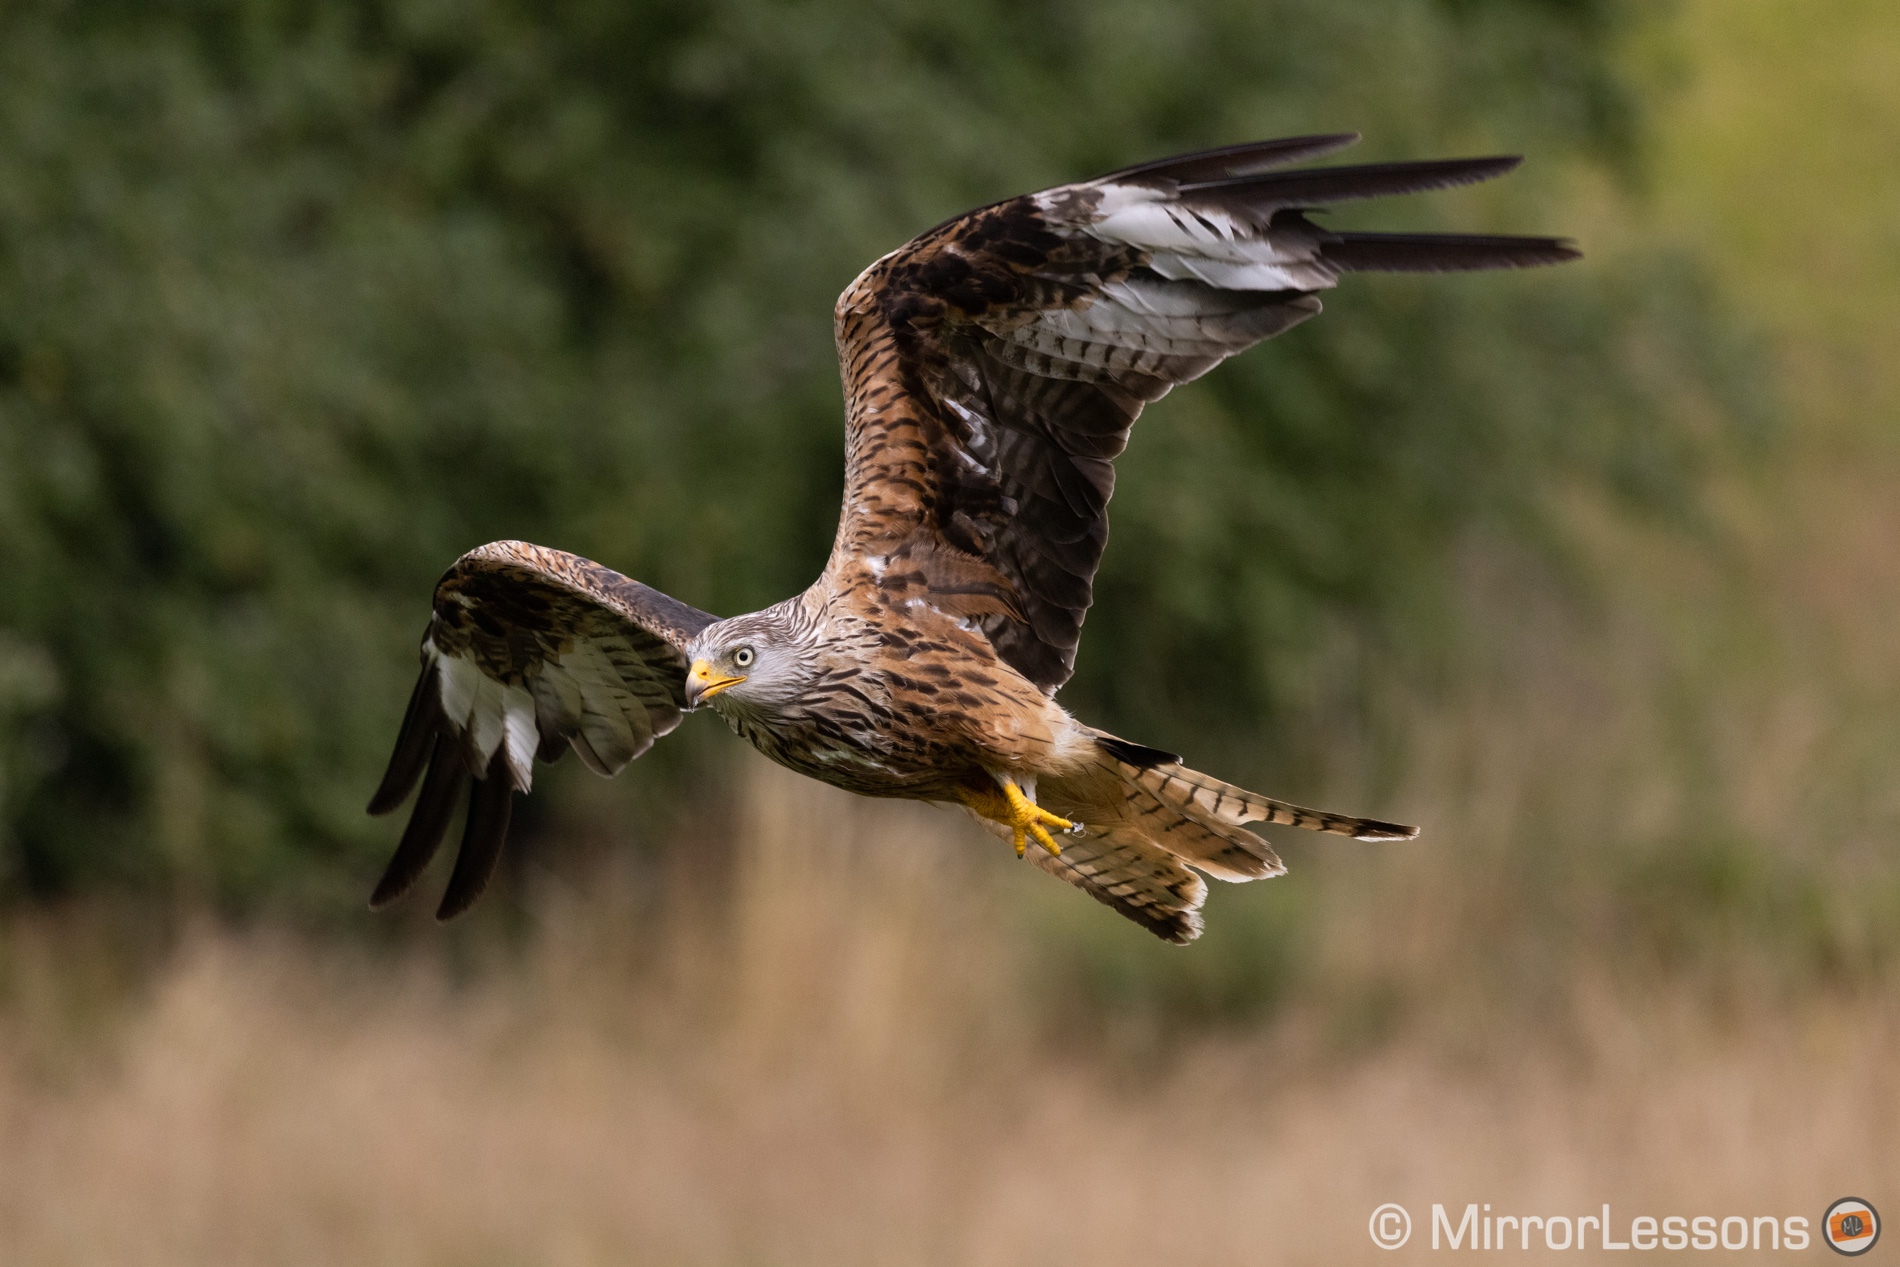
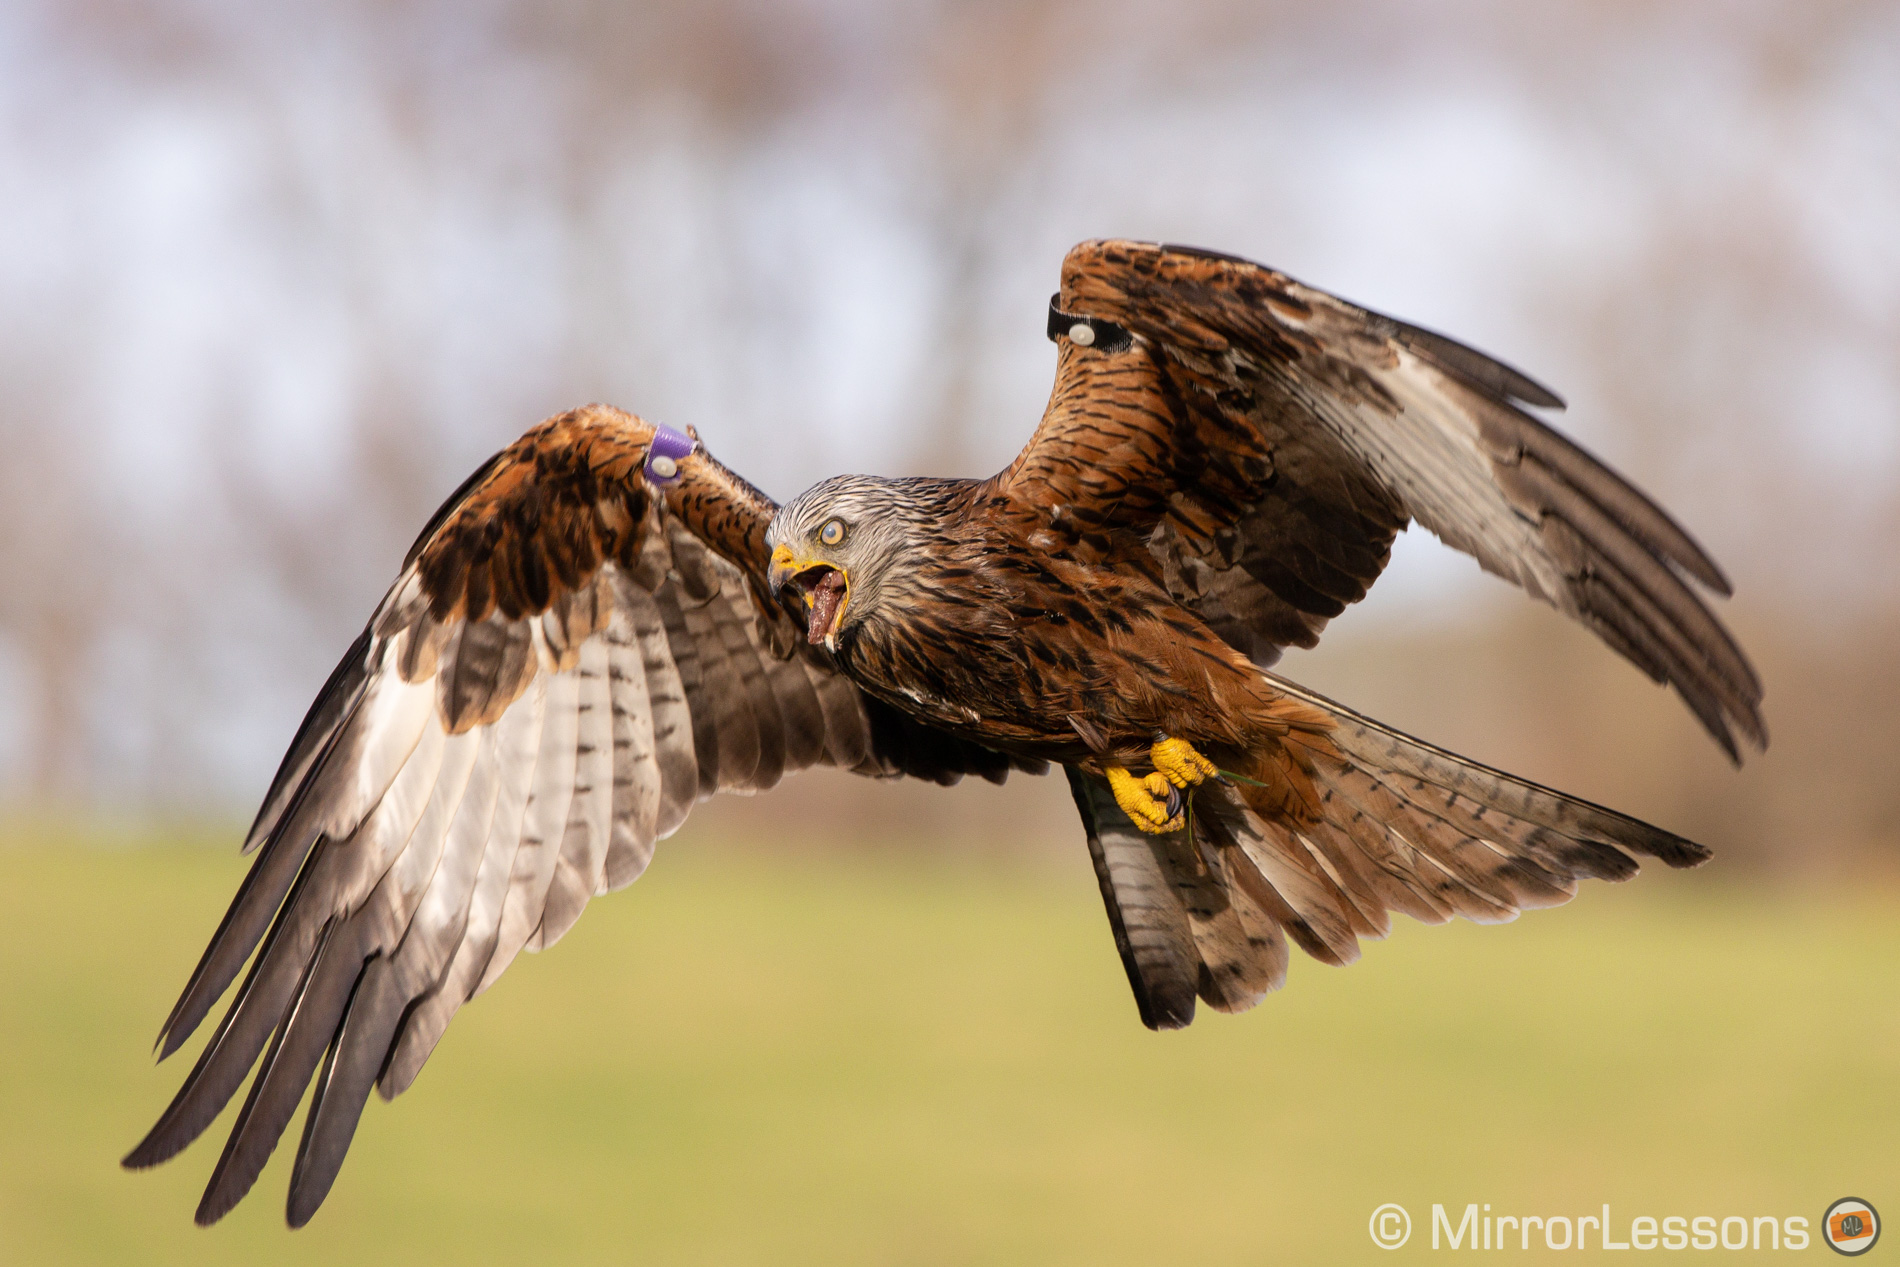
I find Case 1 to work fine for most subjects. I choose Case 3 with birds in flight if they move fast and unpredictably, like at the Red Kite feeding station.
In my various tests, I didn’t find the need to change the default settings of Case 1 and Case 3.
The EOS R doesn’t have the Servo AF cases, but on page AF 3 you can configure Tracking sensitivity, Acceleration / Deceleration and AF point Auto switching. The final option sets how quickly the camera should switch AF points to track a subject that moves a lot inside the frame.
I’d leave these settings to their default values with static subjects. For birds in flight, I’ve got good results with the following:
Tracking Sensitivity +2
Accel./decel. tracking 0
AF point auto switching +2
Other AF settings
AF Menu: AF 1, AF 2, AF 4 and AF 5
In the various AF menu pages you will find other settings. Here is how they are configured on my R6:
- Continuous AF (AF1): disabled (if enabled, the camera will constantly attempt to focus, even when AF-ON or the shutter release button are not pressed. I don’t find this necessary and it will drain the battery more)
- Focus Guide: On (this is the best manual focus assist if you ever need to work in manual focus, because it uses the Dual Pixel CMOS AF system to guide you in focusing correctly)
- AF-assist beam firing: Off (it’s the little red light that turns on every time you focus. It’s for low light situations and you wouldn’t want to risk drawing attention in the wild anyway)
- Switching tracked subjects: 1 (determines how the camera prioritise the subject when engaging focus, I find the middle setting to work best in all cases)
- Lens drive when AF impossible: off (if the camera can’t focus correctly, it will stop and wait for you to re-engage the AF. This is recommended when using super telephoto lenses)
- Limit AF methods: you can disable certain AF areas if you know you’ll never use them, so that you can browse through the list more quickly when changing the setting
- Initial Servo AF pt for Tracking: if selected, you can use a single AF area as the starting point for tracking. For example if you keep said AF point at the centre, Tracking will start at the centre. If the AF point is on the right, Tracking will start on the right.
The second option picks the AF point that was last used with another AF method. The third option (Auto) lets the camera choose where to start Tracking.
I tried all these settings and decided to leave it on Auto because the R5 and R6 choose the right area to start tracking most of the time. Plus, if it detects more than one animal in the frame, you can use the joystick on the rear to go from one to the other.
The EOS R doesn’t have “Switching tracked subjects”.
The EOS RP doesn’t have “Focus Guide, Switching tracked subjects, Lens drive when AF impossible, Limit AF methods” and “Initial Servo AF pt for Tracking”.
Canon R5 / R6 for Wildlife Photography and Birds – Drive and shutter modes
Shooting Menu: SHOOT 6 > Shutter mode
Q Menu or Custom button for the Drive mode
The R5 and R6 can work with the mechanical shutter, the electronic-first curtain shutter or with the full electronic shutter.
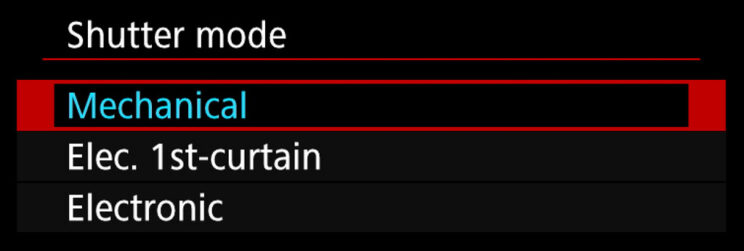
The RP only has the mechanical shutter. On the EOS R, the first electronic curtain can be set with “Silent Live View Shooting”, Mode 1 (SHOOT 6).
The electronic-first curtain can be useful if your camera has problems with shutter shock at certain shutter speeds, or to ensure better sharpness when using slow shutter speeds hand-held (taking advantage of the image stabilisation system). Be aware that it can make the bokeh less pleasant with speeds faster than 1/500s, or create an uneven exposure at very fast speeds (1/4000s or faster).
The maximum continuous shooting speed varies depending on the type of shutter used. With the mechanical shutter, the R5 and R6 can shoot up to 12fps. With the electronic shutter, the speed increases to 20fps. The Eos R and RP have slower performance.
| Mechanical | Electronic | |
|---|---|---|
| EOS R | 8fps (5fps with Servo AF) | No burst |
| EOS RP | 5fps (4fps with Servo AF) | – |
| EOS R5 | 12fps | 20fps |
| EOS R6 | 12fps | 20fps |
A speed of 20fps can be useful for wildlife when trying to capture very fast action. I’ve also found that I have better keeper rate with autofocus and birds in flight when using the electronic shutter.
A couple of things to be aware of with the electronic shutter on the R5 and R6:
- the RAW file are 12-bit rather than 14-bit
- it always works at 20fps, regardless of whether you choose “High Speed +, High Speed” or “Low speed”. The only other option is the single shooting mode.
- with very fast movements, there can be distortion (rolling shutter effect). The easiest way to see this is to quickly pan left and right in front of a building, and the vertical lines will become a bit diagonal. Animals have a much more complex shape and it is difficult to notice anything. I haven’t had any problems with birds in flight for example.
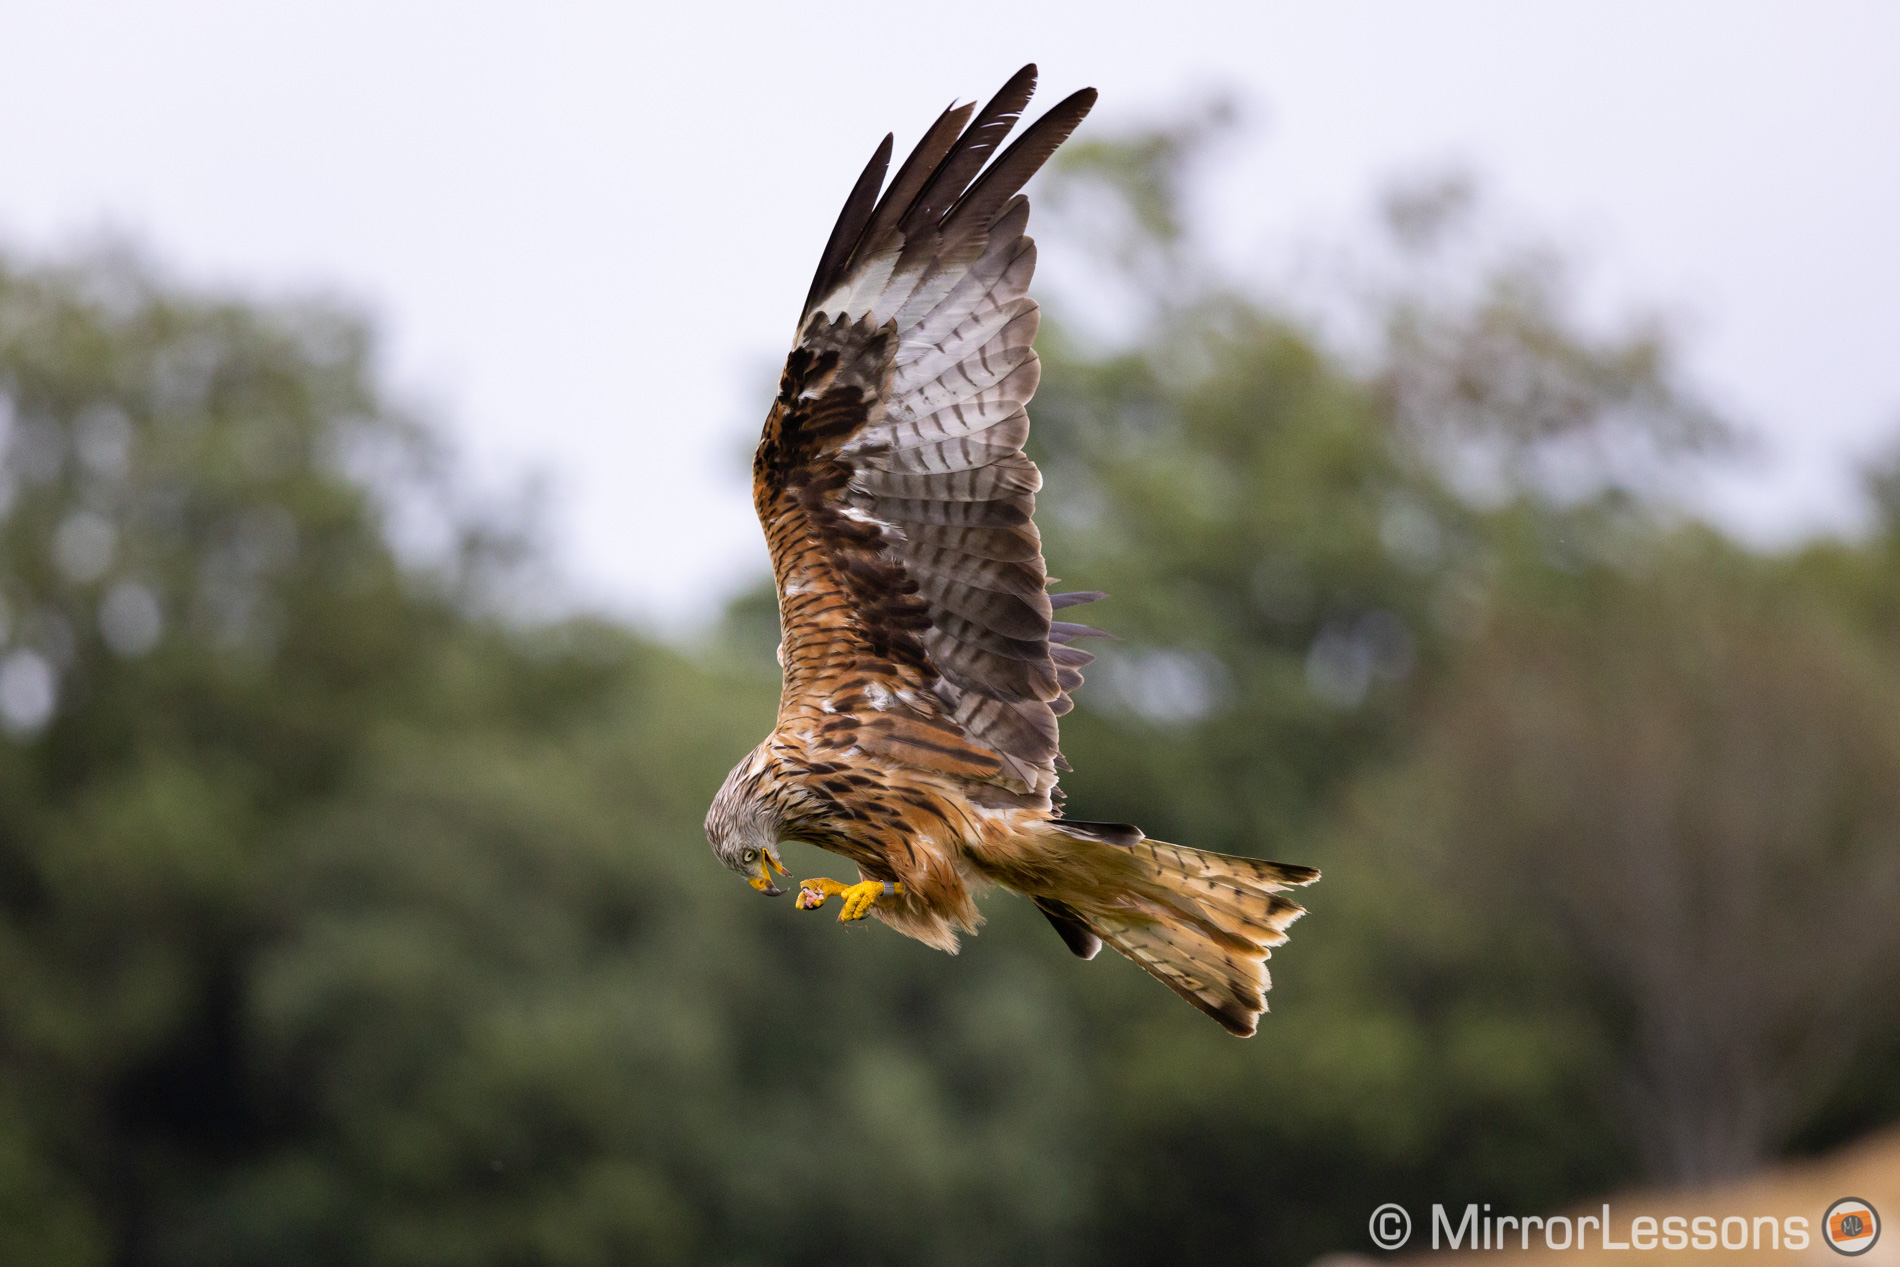
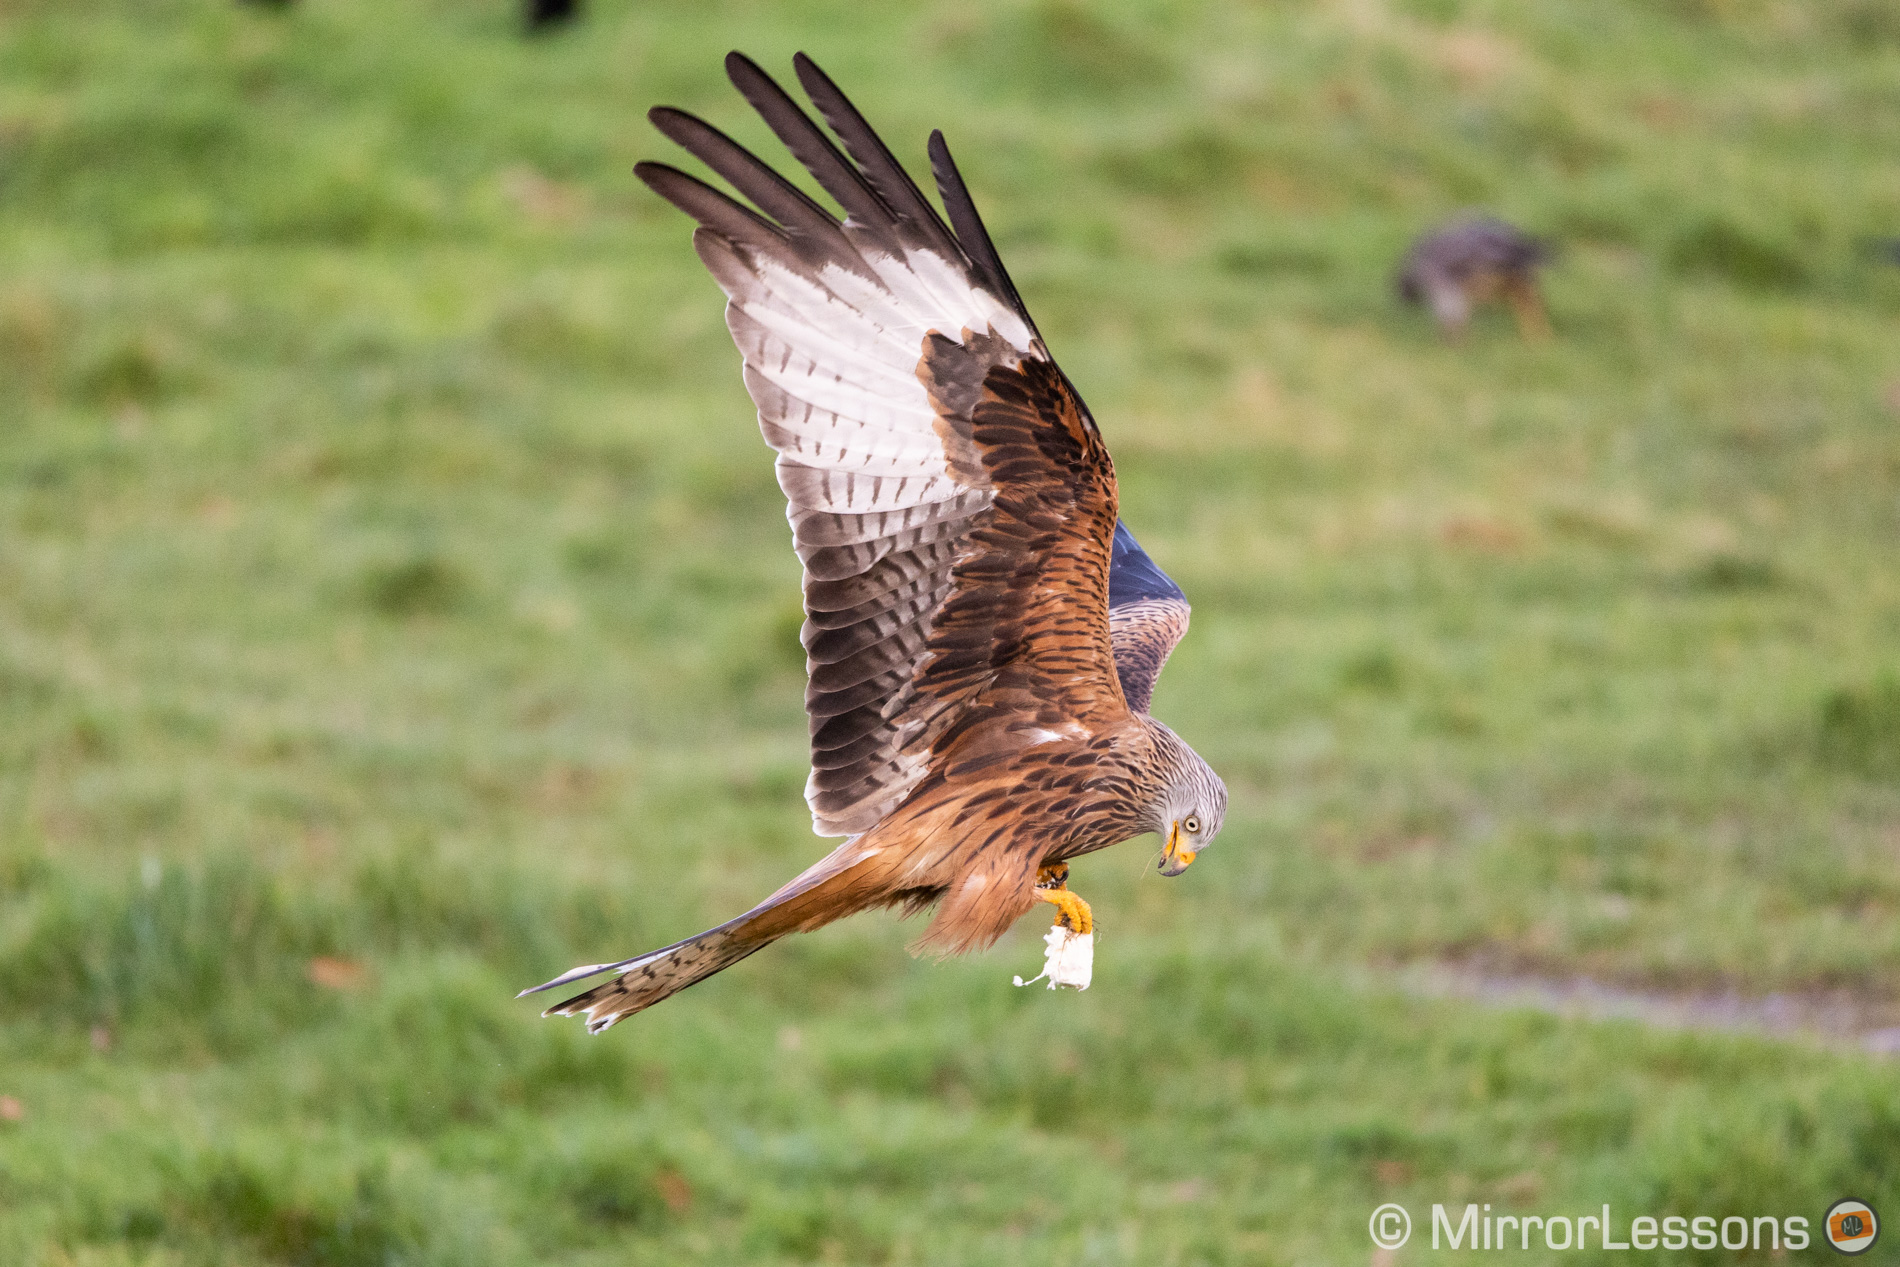
Taken at 20fps with the electronic shutter
It is also worth noting that at 20fps, what you see in the EVF is not live view, but the last image taken in rapid succession. Because it is very fast (20fps), you get a very smooth and uninterrupted view of the action and, thanks to the short lag, the sequence almost looks like live view but it is not.
About the High-Speed Display option (SHOOT 7)
When shooting at the “H” speed mode, you can enable this function. It alternates live view with the last image taken. Canon says it makes the EVF more responsive, but I find it unpleasant because it gives you the impression of a constant lag and it is all but smooth. I advise keeping it off. This is not available on the Eos RP.
Canon R6 / R6 for Wildlife – Customisation
The EOS R cameras have a good factory configuration that is easy to follow if you’re starting out. For wildlife photography however, I quickly found the need to change a few things to have all the settings I need at my fingertips.
Below you’ll find my personal customisation for the R5 and R6. Of course you don’t have to copy it “button by button” because customising a camera is a personal matter, but I hope it can be a good suggestion for where to start.
Buttons and dials
Custom Function Menu: C.Fn 3 > Customize buttons / Customize dials
The button at the front has a convenient position: I can use my ring finger to press it, while keeping my index on the shutter release and my thumb on the AF-ON button. You may need to get used to pressing three buttons at the same time, but it is doable if you only need this occasionally.
The EOS R and RP don’t have a front button.
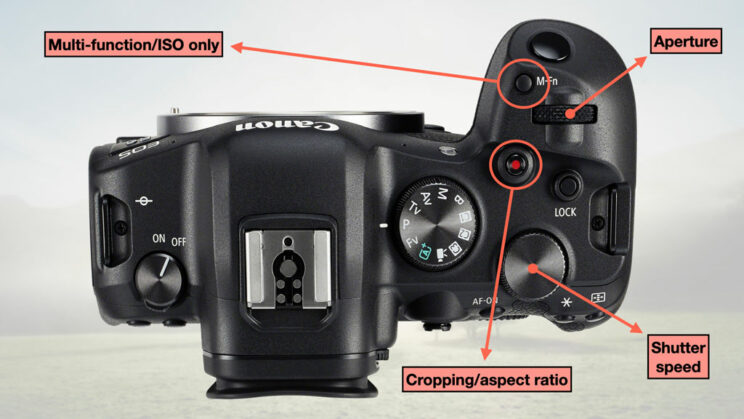
On top, I inverted the function of the two exposure dials because I’m used to having them this way on other cameras.
The Multi Fn button, by default, allows you to scroll through different settings of your choice (ISO, drive, etc.) with a maximum of 9 options.
What I did here was select ISO and deselect everything else, for a specific reason: it is the only method I found to switch between Auto and Manual ISO. If you assign ISO as a single function, you can only select the values manually but cannot switch to Auto.
As I wrote earlier, with wildlife I use Auto ISO most of the time, but I like to be able to switch quickly to manual ISO if I need to.
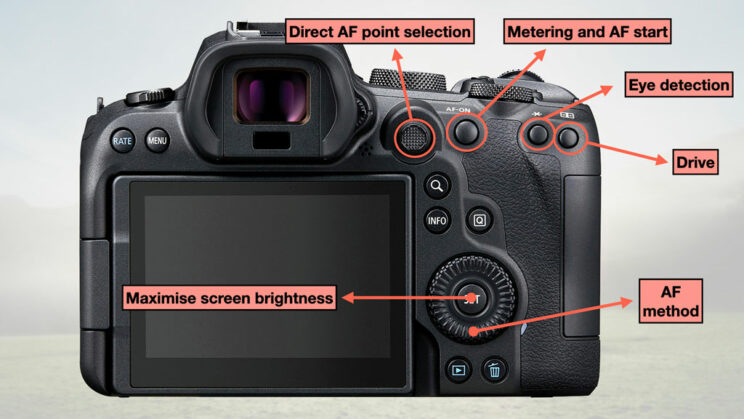
I’ve moved a few of the default settings to the rear buttons. I assigned Eye Detection to the AE Lock button (marked with the ✶ symbol) so that I can quickly enable or disable it. I rarely need to do that because as I said earlier, Eye AF rarely fails but, if you see that the autofocus is struggling with a certain subject or light situation, you may want to turn it off temporarily.
Tip: engage focus with two different buttons
An alternative method is to leave Eye Detection disabled by default when AF tracking is selected, and assign “Eye Detection AF” to the ✶ button. This way, you can use the AF-ON button to focus without Eye detection, or use the ✶ button to focus with Eye AF.
I moved the AF method to the rear wheel but this setting can be assigned to a button if you prefer. With the latter, you have the choice of pressing the button and using a dial to choose the desired AF area, or pressing the button repeatedly to change AF area (Direct AF method selection).
The joystick can only be set to move an AF point, and I’ve kept it that way. Pressing it resets the AF area to the centre.
To the SET button I assigned the option of maximising the brightness of the screen temporarily (simply press it again to bring it back to normal). This is useful when you are working outdoors and want to see the LCD better while reviewing an image for example.
The EOS R and EOS RP don’t have a joystick.
The EOS R has a touch sensitive multi function bar on the rear to which you can assign various functions.
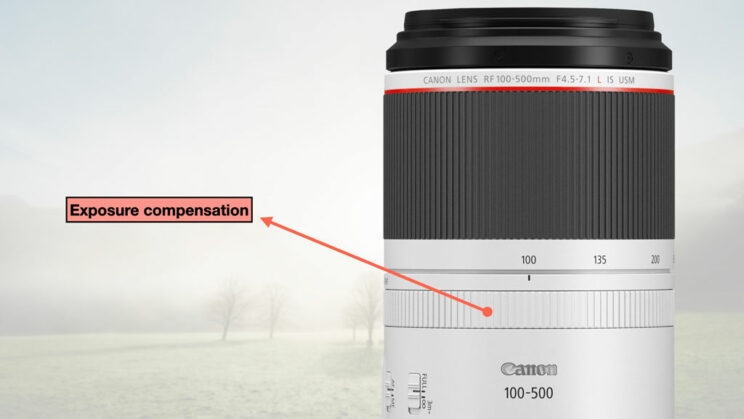
Finally, I take advantage of the control ring found on every RF lenses and assign exposure compensation to it. Note that if you’re using a Canon or third party EF lens with an adapter, you won’t have this possibility unless you have the Canon Control Ring Mount Adapter EF-EOS R.
Tip: AF-ON on the lens
If your lens has a customisable button, you can assign various settings there too. One thing I find useful, if the button is easy to reach while shooting, is to use it to engage focus (AF-ON) rather than pressing the default button on the camera. This works better with prime lenses because you don’t have a zoom ring to operate at the same time.
My Menu
Although the amount of customisation is good, there are few options that can’t be assigned to buttons but that I like to access as quickly as I can. The excellent Quick menu cannot be customised, so the only option left is to use My Menu which allows you to create shortcuts to anything available in the menu system (for a maximum of 4 pages).
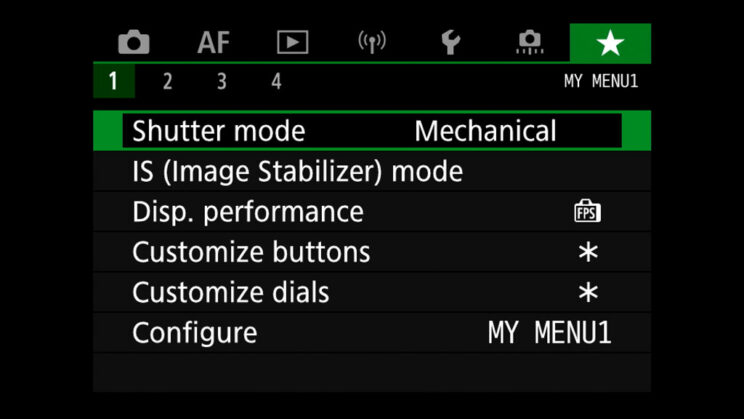
These are the settings I added:
- Shutter mode
- IS mode
- Exposure simulation
- Disp. Performance (I set it to Smooth when doing birds in flight, otherwise to Power saving to preserve more battery)
- Customise buttons and dials (If I wish to change something)
- Custom shooting mode (C1-C3) (see next chapter)
- Subject do detect (to choose animal, human or Auto for the autofocus)
- Servo AF settings
- Format card
- Record functions and card/folder selection (if I need to change how the camera saves files onto the two memory cards – By default I like to use the second card as a back-up)
Finally, I use the Quick menu to change other settings such as white balance and metering.
Custom Shooting modes
Set Up Menu: SET UP 5 > Custom shooting mode (C1-C3)
You can save a whole series of settings from the menu, as well as custom buttons and shooting settings (including the exposure) in three separate custom modes that you can recall at any time.
On the R6, you just rotate the main top dial to C1, C2 or C3. On the R5 or R model, you press the MODE button and scroll to C1, C2 or C3.
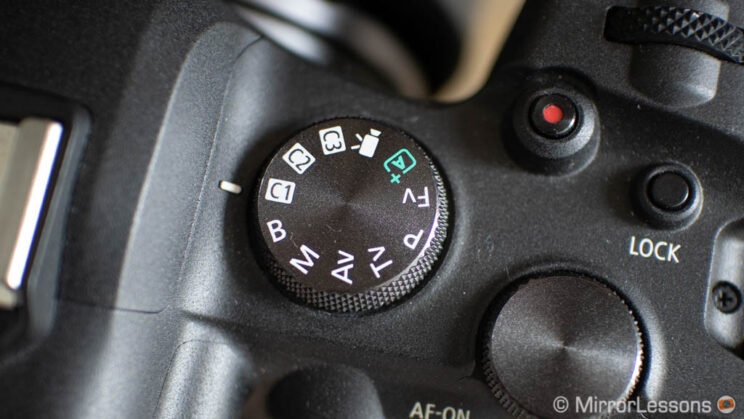
These modes become an alternative to M, Av, Tv, P, Fv or Auto shooting mode, and contain all the settings you have customised and like to use the most.
For example, I use different drive, shutter and exposure settings for when the bird is perched on a tree rather than flying up in the sky. I saved these different settings to C1 and C2 respectively, so that when I go from a static to flying bird, all I need to do is switch from C1 to C2 rather than change all these settings manually one by one.
You can save up to three custom modes, and you can also enable Auto Update. The latter means that if you change anything while working with C1, C2 or C3, that change will overwrite the previous setting, and will appear next time you choose one of the three custom modes.
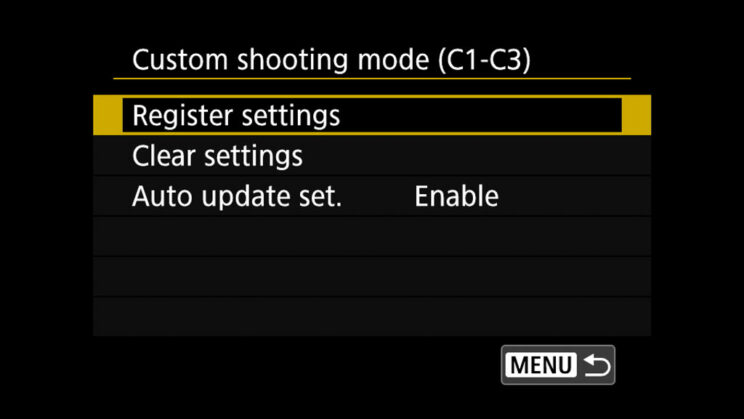
Auto Update can be useful at the beginning, while you’re still trying to figure out the best settings to save and recall. Once you’re happy with your configuration, I would disable it to make sure your settings are not overwritten by mistake.
Canon R5 / R6 Review for Wildlife
The Canon Eos R5 and R6 brought a lot of improvements in comparison to the previous two models, the Eos R and RP. New sensors, a new autofocus system, faster continuous speeds, in-body image stabilisation and an overall feeling of two cameras that are much more reactive.
The autofocus is what surprised me the most. As written above, Animal detection AF works a treat, and it is the best system I’ve tested so far regarding this specific feature (although to be fair, I have yet to try the Sony A1).
When it comes to the keeper rate and birds in flight, the R6 gave me a 93%/97% score, whereas the R5 followed closely with 90%/99% (you can read more about how this score is calculated on our dedicated article). Only the Sony A9 series does better.
The two image sensors (45MP on the R5, 20.1MP on the R6) are also a very good improvement over previous models. In our in-depth comparison with the Sony A7 III, the R6 demonstrated marginally superior capabilities. The R5 sensor has more noise at high ISO, but the dynamic range is good and, obviously, it has more resolution.
The other important improvement is the continuous shooting speed of 20fps. Not only do the cameras handle this speed very well concerning the buffer, but the AF performance doesn’t decrease. Quite the contrary, in fact: I got the best autofocus performance for birds in flight using the electronic shutter.
Another improvement is the viewfinder, especially on the EOS R5 with a super 5.76M dots panel and 120Hz of refresh rate. The R6 has a lower resolution (3.69M dots) but the same frame rate.

The battery life is good but drains more quickly on the R5 than on the R6, especially when using the high frame rate for the EVF/LCD. To give you an idea, after taking 2,600 pictures of the red kites flying, the battery charge went from 100% to about 64% with the R6, and around 52% with the R5. That was during one hour of feeding the birds. For an entire day of shooting, starting early in the morning, I would bring at the very least one spare battery.
I have nothing important to complain about regarding the design. I find these cameras comfortable to hold, even without battery grip, despite their relatively compact design. The buttons and dials are well placed around the body. They are intuitive to use although certain settings in the menu will require the user manual to understand them. I also wish a few more settings could be assigned to function buttons, or that the Quick menu could be customised.
Finally, we have the lenses. Excluding the Canon DSLR lenses (that work well with the Canon EF to EOS R adapter), the choice for the RF system is limited to five lenses at the time of publishing this article:
- RF 100-500mm F4.5-7.1 L IS USM
- RF 600mm F11 IS STM
- RF 800mm F11 IS STM
- RF 400mm F2.8 L IS USM
- RF 600mm F4 L IS USM
Excluding the 400mm 2.8 and 600mm F4 that only a few of us can afford, the remaining options have unique characteristics and some trade-off.
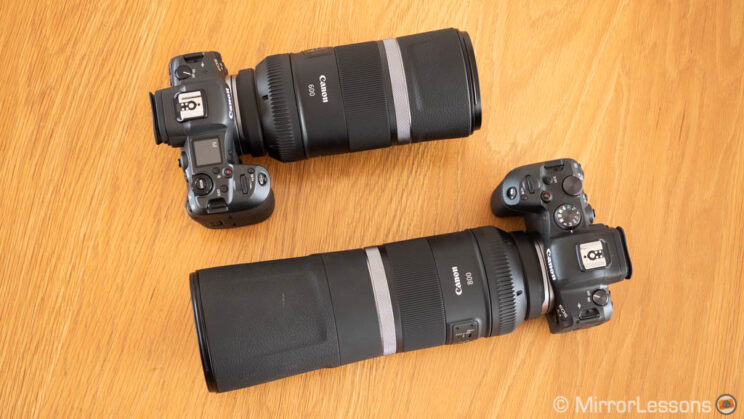
The two F11 lenses surprised me a lot: they’re sharp, lightweight and their AF motors are really fast. The f/11-only aperture bothered me less than expected but of course, it will force you to raise the ISO higher than you want at times. The AF area is also limited to the central zone of the sensor. Check our lens comparison to find out more.
The RF 100-500mm is exceptional when it comes to optical quality and is quite compact. The fastest aperture at the telephoto end is a bit slower than we’d like, and the lens is expensive, but it is the lens I’d recommend if your budget allows it.
All five RF lenses are compatible with the 1.4x and 2x extenders.
Check the price of the Canon EOS R5 on:
Amazon | Amazon UK | B&H Photo | eBay
Check the price of the Canon EOS R6 on:
Amazon | Amazon UK | B&H Photo | eBay
Check the price of the Canon EOS R on:
Amazon | Amazon UK | B&H Photo | eBay
Check the price of the Canon EOS RP on:
Amazon | Amazon UK | B&H Photo | eBay
Second-hand Canon cameras on:
MPB US | MPB UK