Updated on: May 6th 2019
I opened Adobe Lightroom for the first time ten years ago. It was when I bought my first DSLR, the Nikon D90, and I was looking for a powerful software to sort and edit all my photos.
I haven’t looked back since, not necessarily because I believe Lightroom is the absolute best, but because I got so accustomed to it that I wasn’t interested in trying anything else. In a way, this is the best compliment one can give a product. And working with other Adobe software applications such as Photoshop and Premiere has certainly helped me keep faith in the company for as long as I have.
Over the last couple of years though, I’ve realised that the competition has intensified: there is now more choice than ever. While excellent alternatives such as Aperture have disappeared, others have emerged along with many powerful features.
I had the chance to test the first version of Skylum (ex MacPhun) Luminar two years ago. At the time, it was a promising “cheap and powerful” photo editor but was lacking too many things to be a practical replacement for other applications. Now that the app is more mature and has its own library system, I decided to give it another look and see how it compares to Lightroom.
Note: Lightroom exists in two forms nowadays. The recent CC is cloud-based and cross-device compatible (desktop, tablet, smartphone), whereas Classic CC is designed for Desktop use and is the version we’ve known for all these years. In this article, I’m referring to Lightroom Classic.
Ethics statement: a copy of Luminar was sent to us for review purposes. As for Lightroom, it has been our go-to software for the past ten years. We were not asked to write anything about these products, nor were we provided with any compensation of any kind. Within the article, there are affiliate links. If you buy something after clicking one of these links, we will receive a small commission. To know more about our ethics, you can visit our full disclosure page. Thank you!
[toc heading_levels=”2″]
Article Updates
- May 2019: various feedback about the latest version of both softwares
Main Specs
Luminar
- Version: 3.1.0
- Operative system: Mac OS 10.11 or higher, Windows 7 or higher (x64-bit OS)
- Processor: Intel Core i5 or better
- RAM: 8 GB or more
- Hard drive space: 2 GB
- Display resolution: 1280 x 768 or higher
Lightroom Classic CC
- Version: 8.2.1
- Operative system: Mac OS 10.11 or higher, Windows 7 or higher (x64-bit OS)
- Processor: Multicore Intel processor with 64-bit support
- RAM: 4 GB or more
- Hard drive space: 2 GB
- Display resolution: 1280 x 768 or higher
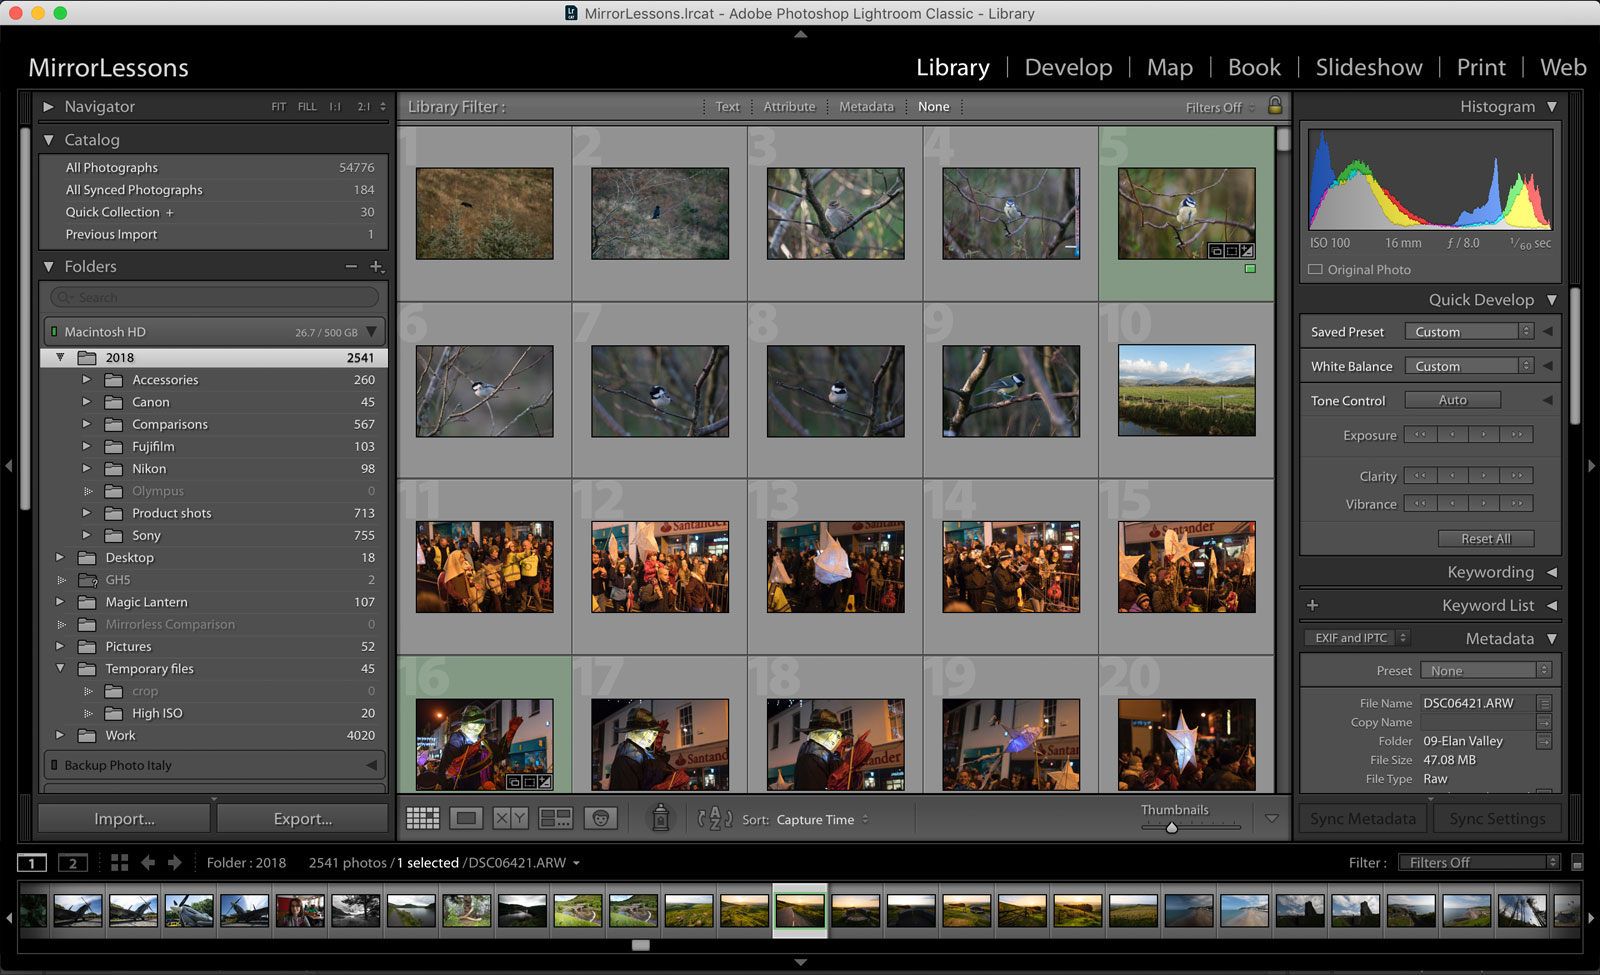
Sorting and organising: Libraries
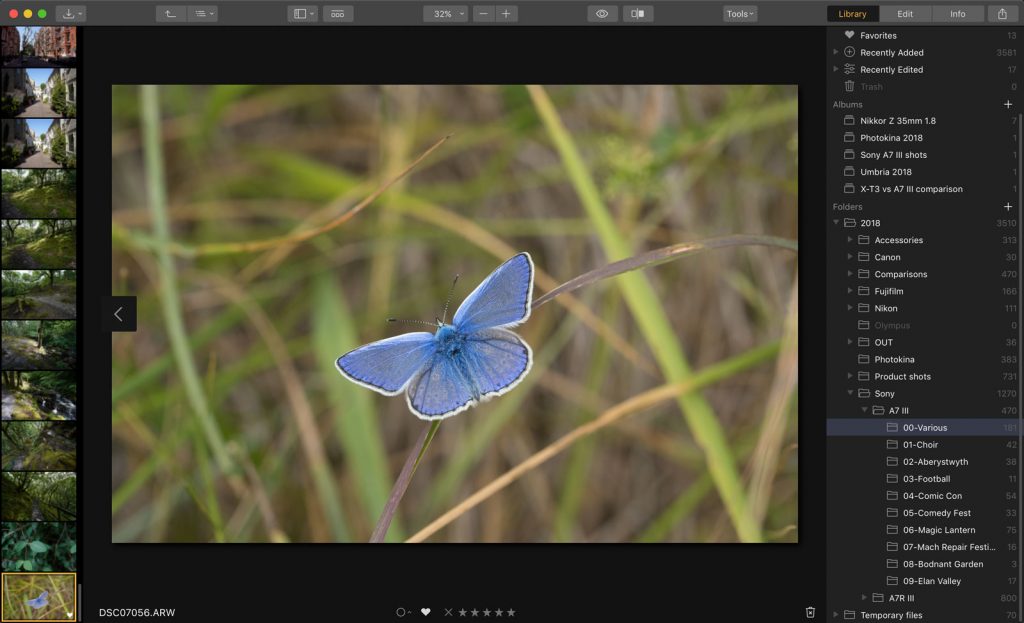
The possibility to organise and sort my photographs is what has kept me with Lightroom for so long. I’ve been using the same catalogue file for all our reviews and comparisons since 2013, which means that when all my hard drives are connected, the software handles more than 40,000 RAW images.
Luminar has introduced its Digital Asset Manager (Library) with version 3.0. Like Lightroom, the images are synced with their physical location on your hard drive, which means that no copy of your photos is created when imported into the software. Any change to the files and folders will be reflected on your disk too.
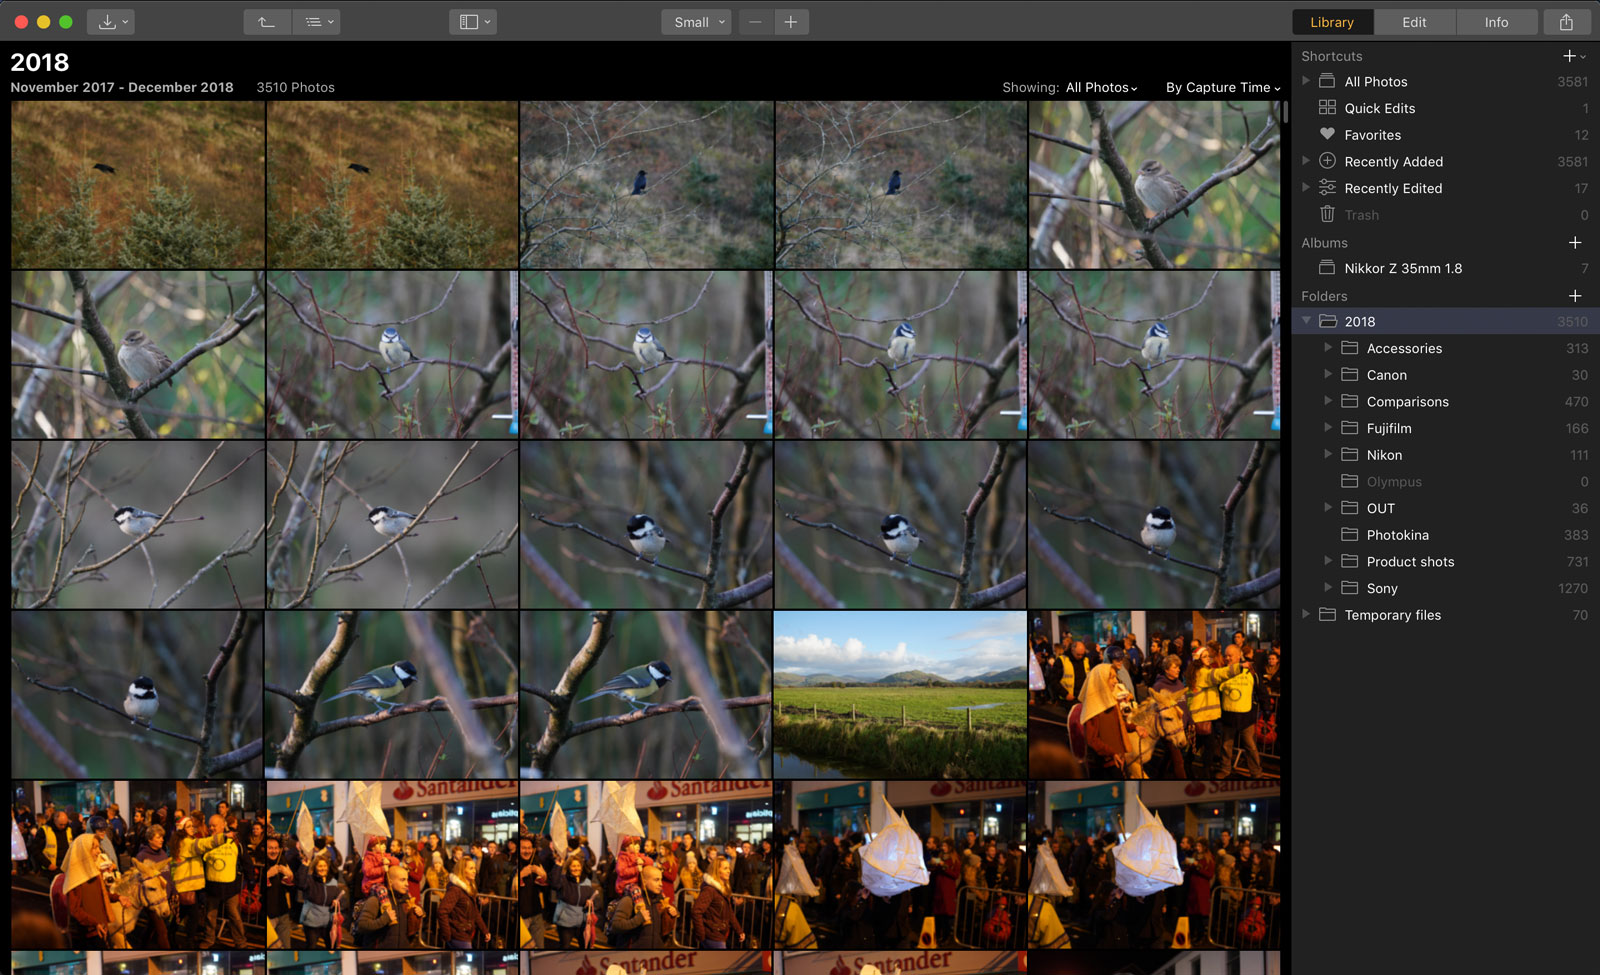
The Luminar Library is an important step forward for the company, but it is more basic in comparison to the Adobe version.
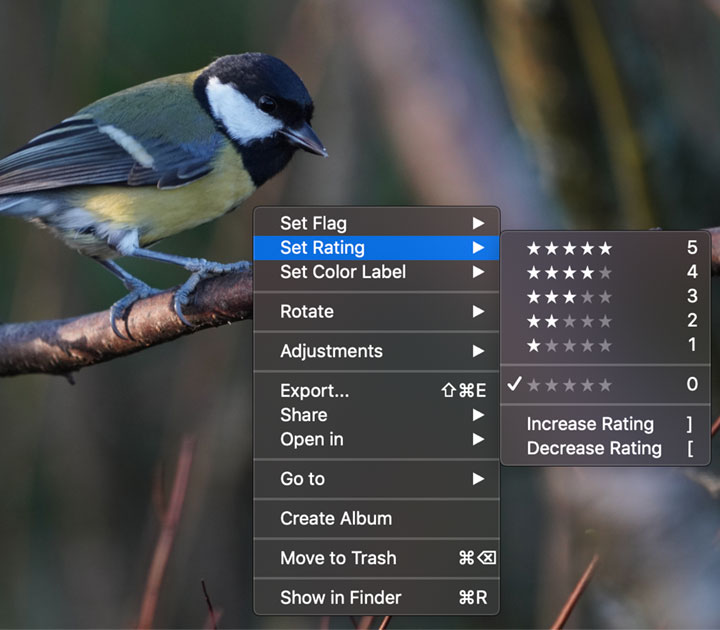
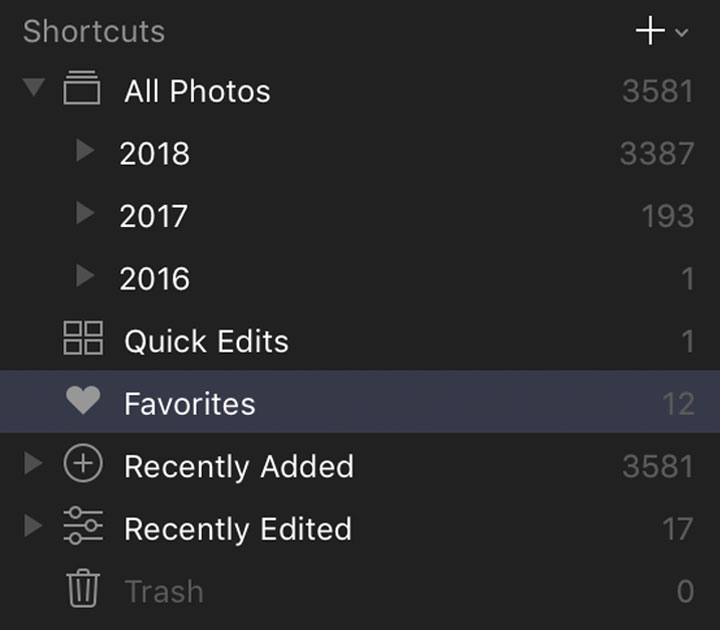
You’ll find shortcuts to images you recently edited or added, as well as the possibility to quickly find photos shot on a specific date. Just like Lightroom, you can flag, label or rate your images for more precise sorting. But this is where its features end.

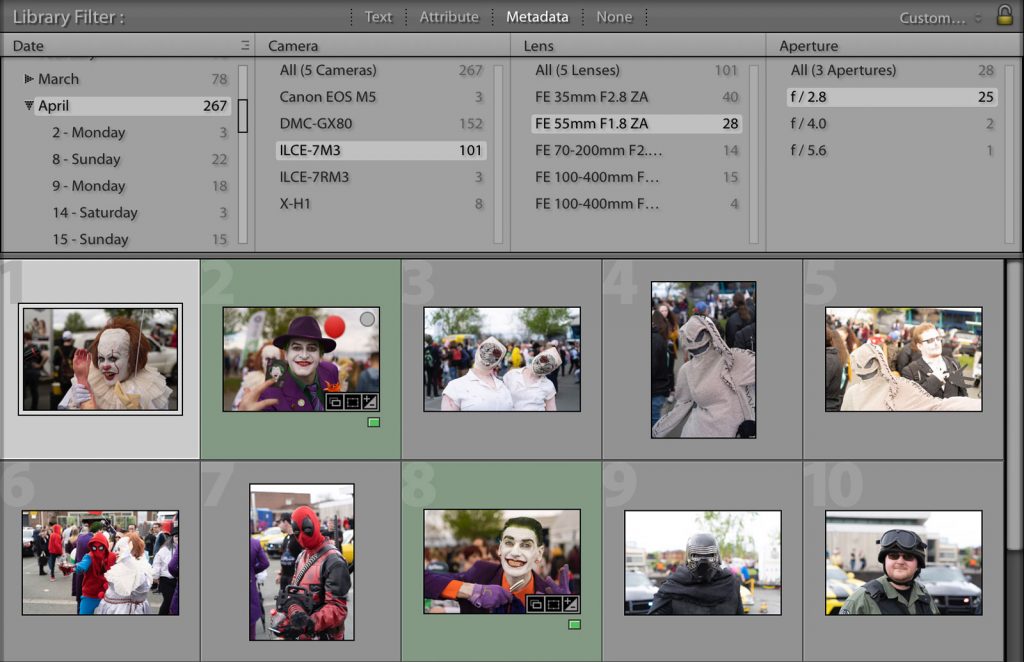
What I miss from Luminar is more in-depth options to sort or search for my images. The Library filter in Lightroom allows you to perform searches based on a specific camera or lens, a precise focal length or ISO value, as well as any text you might have added to the EXIF data (Title, Caption, Copyright name, etc.). For my work as camera tester, this is a big help, especially when I’m looking for a sample taken three years ago with a particular camera and a particular setting.
A welcome improvement with Luminar version 3.1 is the possibility to hide JPG or RAW files when they are captured by the camera at the same time, so you don’t have to go though a lot of duplicates anymore. This was another thing I was missing from Lightroom so I’m glad that the Skylum team has fixed this.
One of the things I use the most in Lightroom is the Quick Collection. While I’m browsing through my images, I just hit the “B” key and my photo is automatically added to the quick collection so that I can review it later. With Luminar you can do something similar by pressing the P key which labels your image as a favourite, and you can then access all the favourites in the dedicated shortcut. Another option is to import images using the “Open images for Quick Edit” option which automatically puts them in the Quick Edit shortcut.
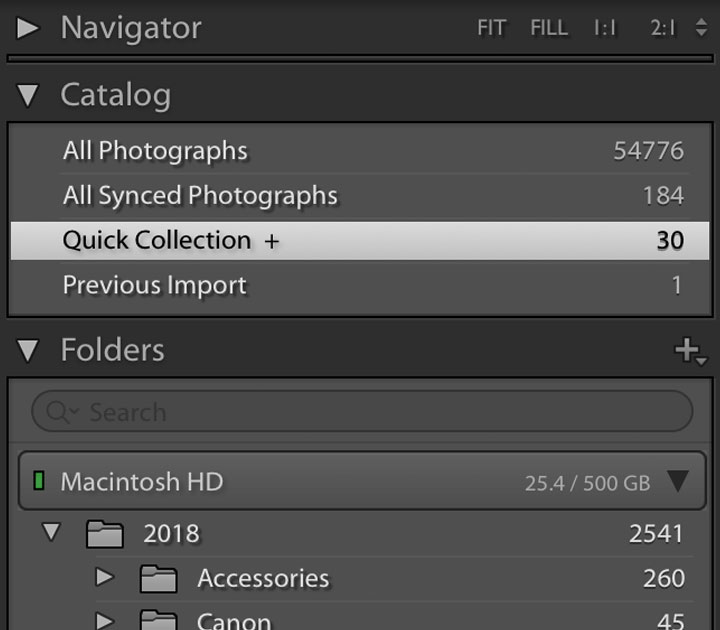
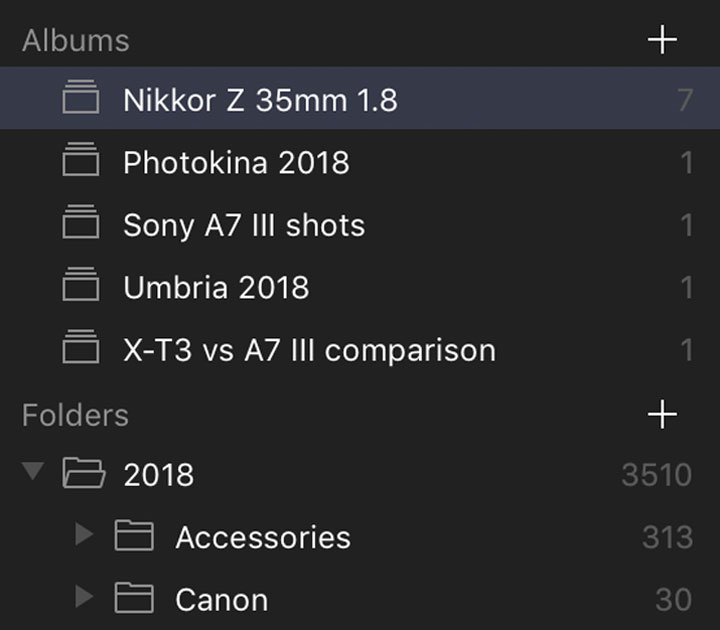
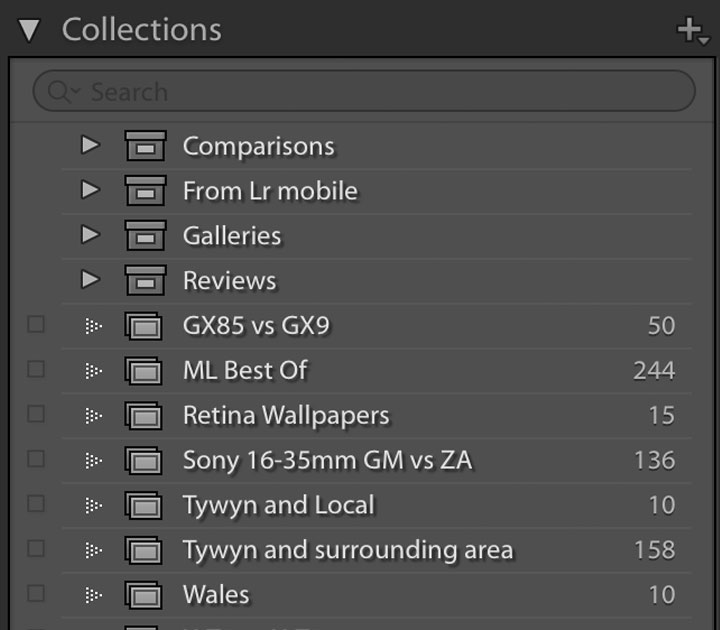
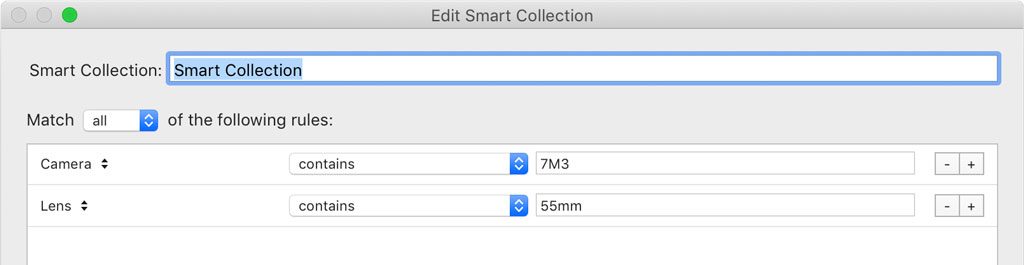
Both software applications give you the possibility to create Albums, but Lightroom also has the Smart Collection which can include any image that matches specific metadata. If your photos contain GPS information, Lightroom can display them on a map. And if you turn on face detection, the Adobe application will index all the images containing human faces so that you can tag them with a name.
Another useful thing when browsing images in Lightroom is that you can overlay some information such as exposure settings and the lens model directly onto the photo itself. In the right column, you’ll find more complete EXIF data. Luminar only shows basic settings such as filename, camera, lens and basic exposure settings, and you need to click the Info Tab to access it.
Design, Import and Export
The Luminar interface is minimalistic, simple and straightforward to use. If this is your first photo manager/editing software, you’ll probably find the learning curve less steep. Lightroom is a bit more complex, but it also displays more information.
Both offer some level of personalisation, starting from the basic background colour that can be made brighter or darker.
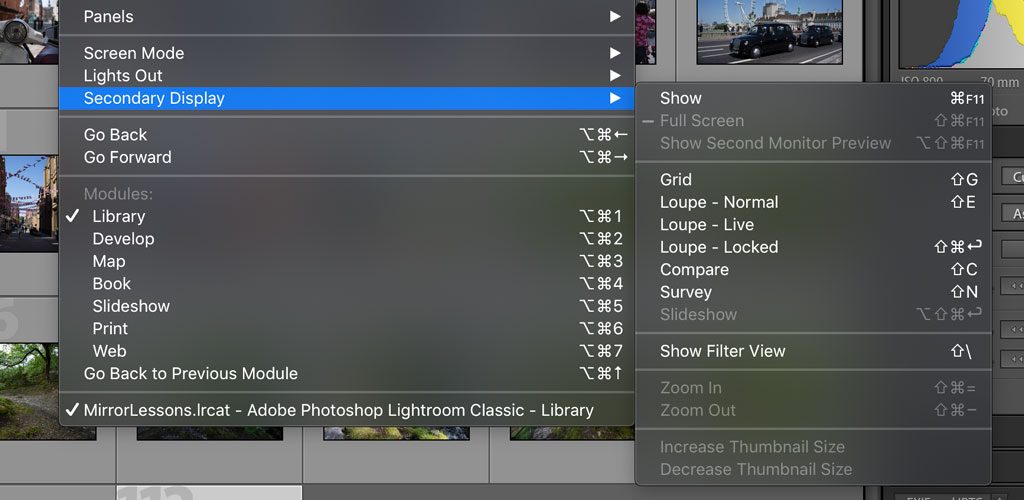
Lightroom has a few cool features such as the Identity Plate that allows you to display your name rather than the software’s in the top right corner, as well as change the font and size of the main text on top. More importantly, the software supports multiple screen set-up, so if you like to work with two monitors or more, Lightroom definitely has an edge here.
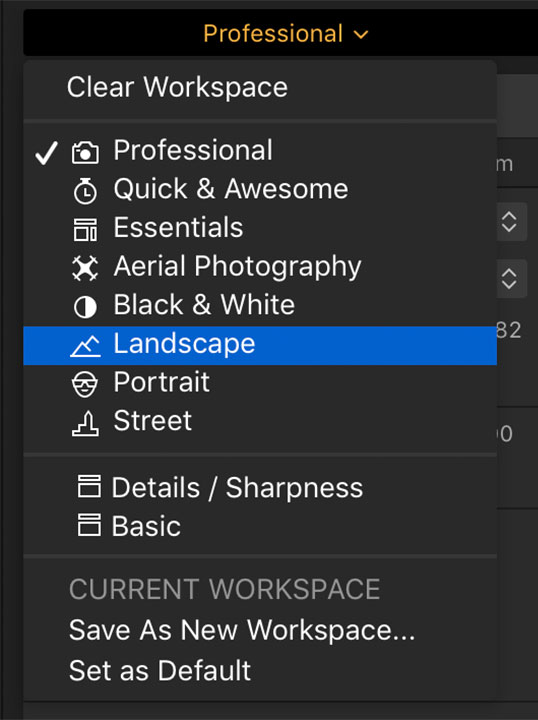
Luminar doesn’t support multiple screens yet but has something else that is quite interesting called Workspaces. You can customise or create your own sidebar with your favourite editing tools (called Filters). For example you can have a workspace with your favourite settings for landscape images, and another one for portraits so that you don’t need to scroll down or add filters every time you edit a new image.
Importing photos is another area where Luminar lacks advanced options. The Import Images function is only useful if you want to copy or move images from another drive, or import files from a memory card. Otherwise you simply add the folder with the images you want with the + button in the Library sidebar.
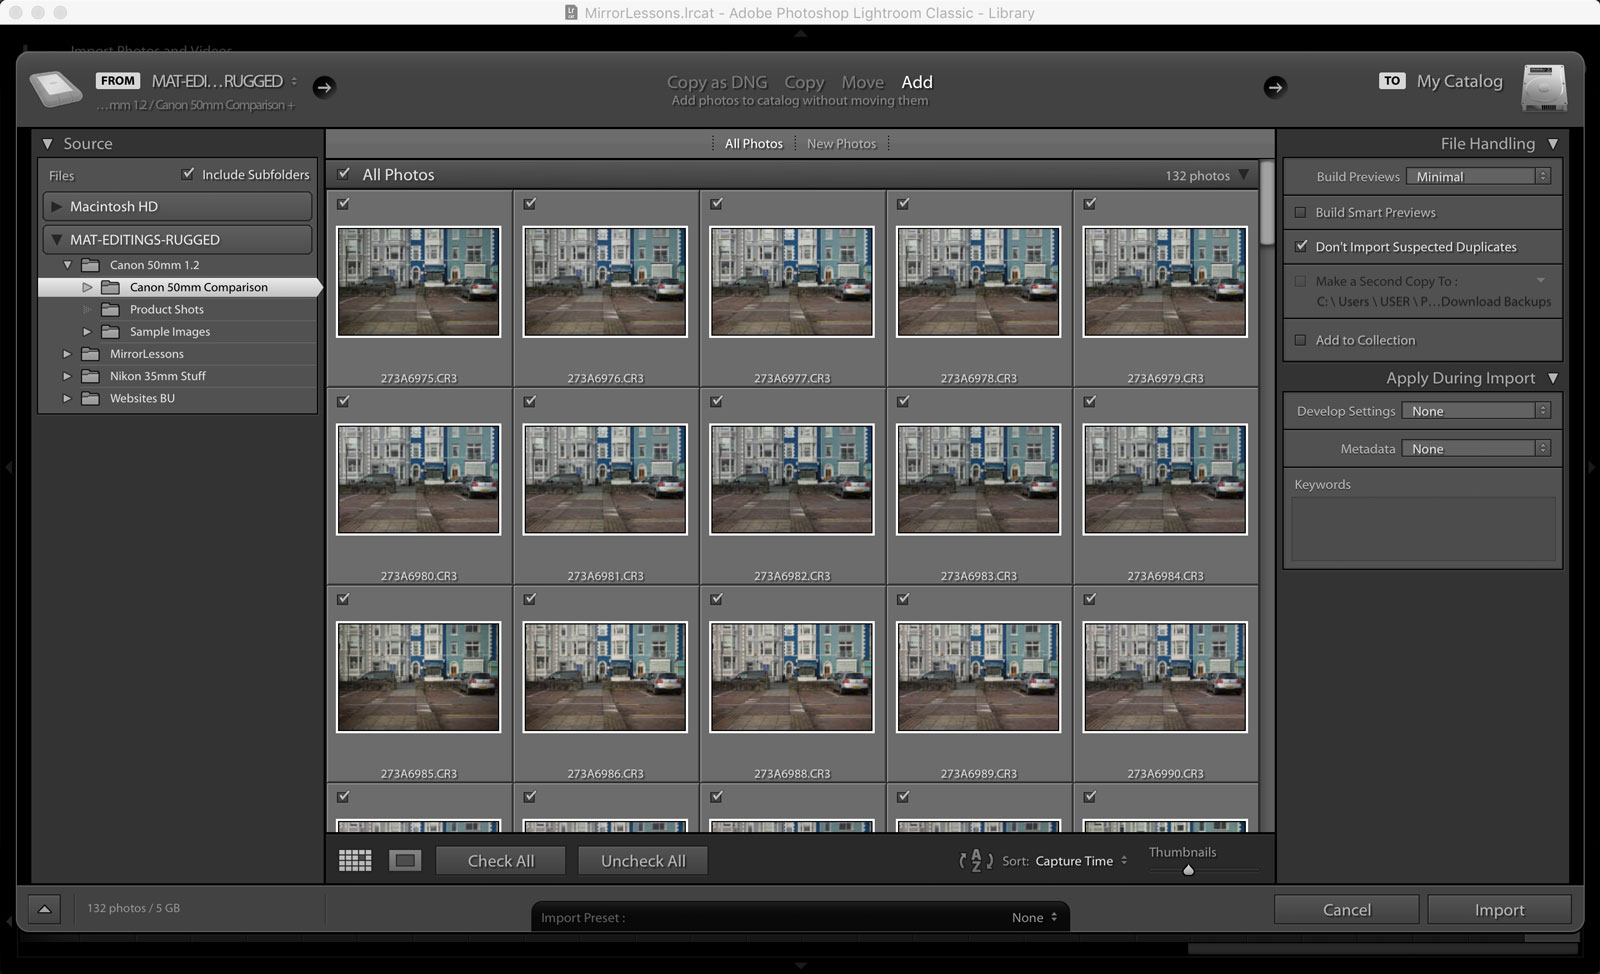
The import window in Lightroom gives you more possibilities. You can import and convert to DNG, apply a preset, add metadata, make a copy of the images in a second location, add them to a collection (album) right away, and rename the files, just to name a few.
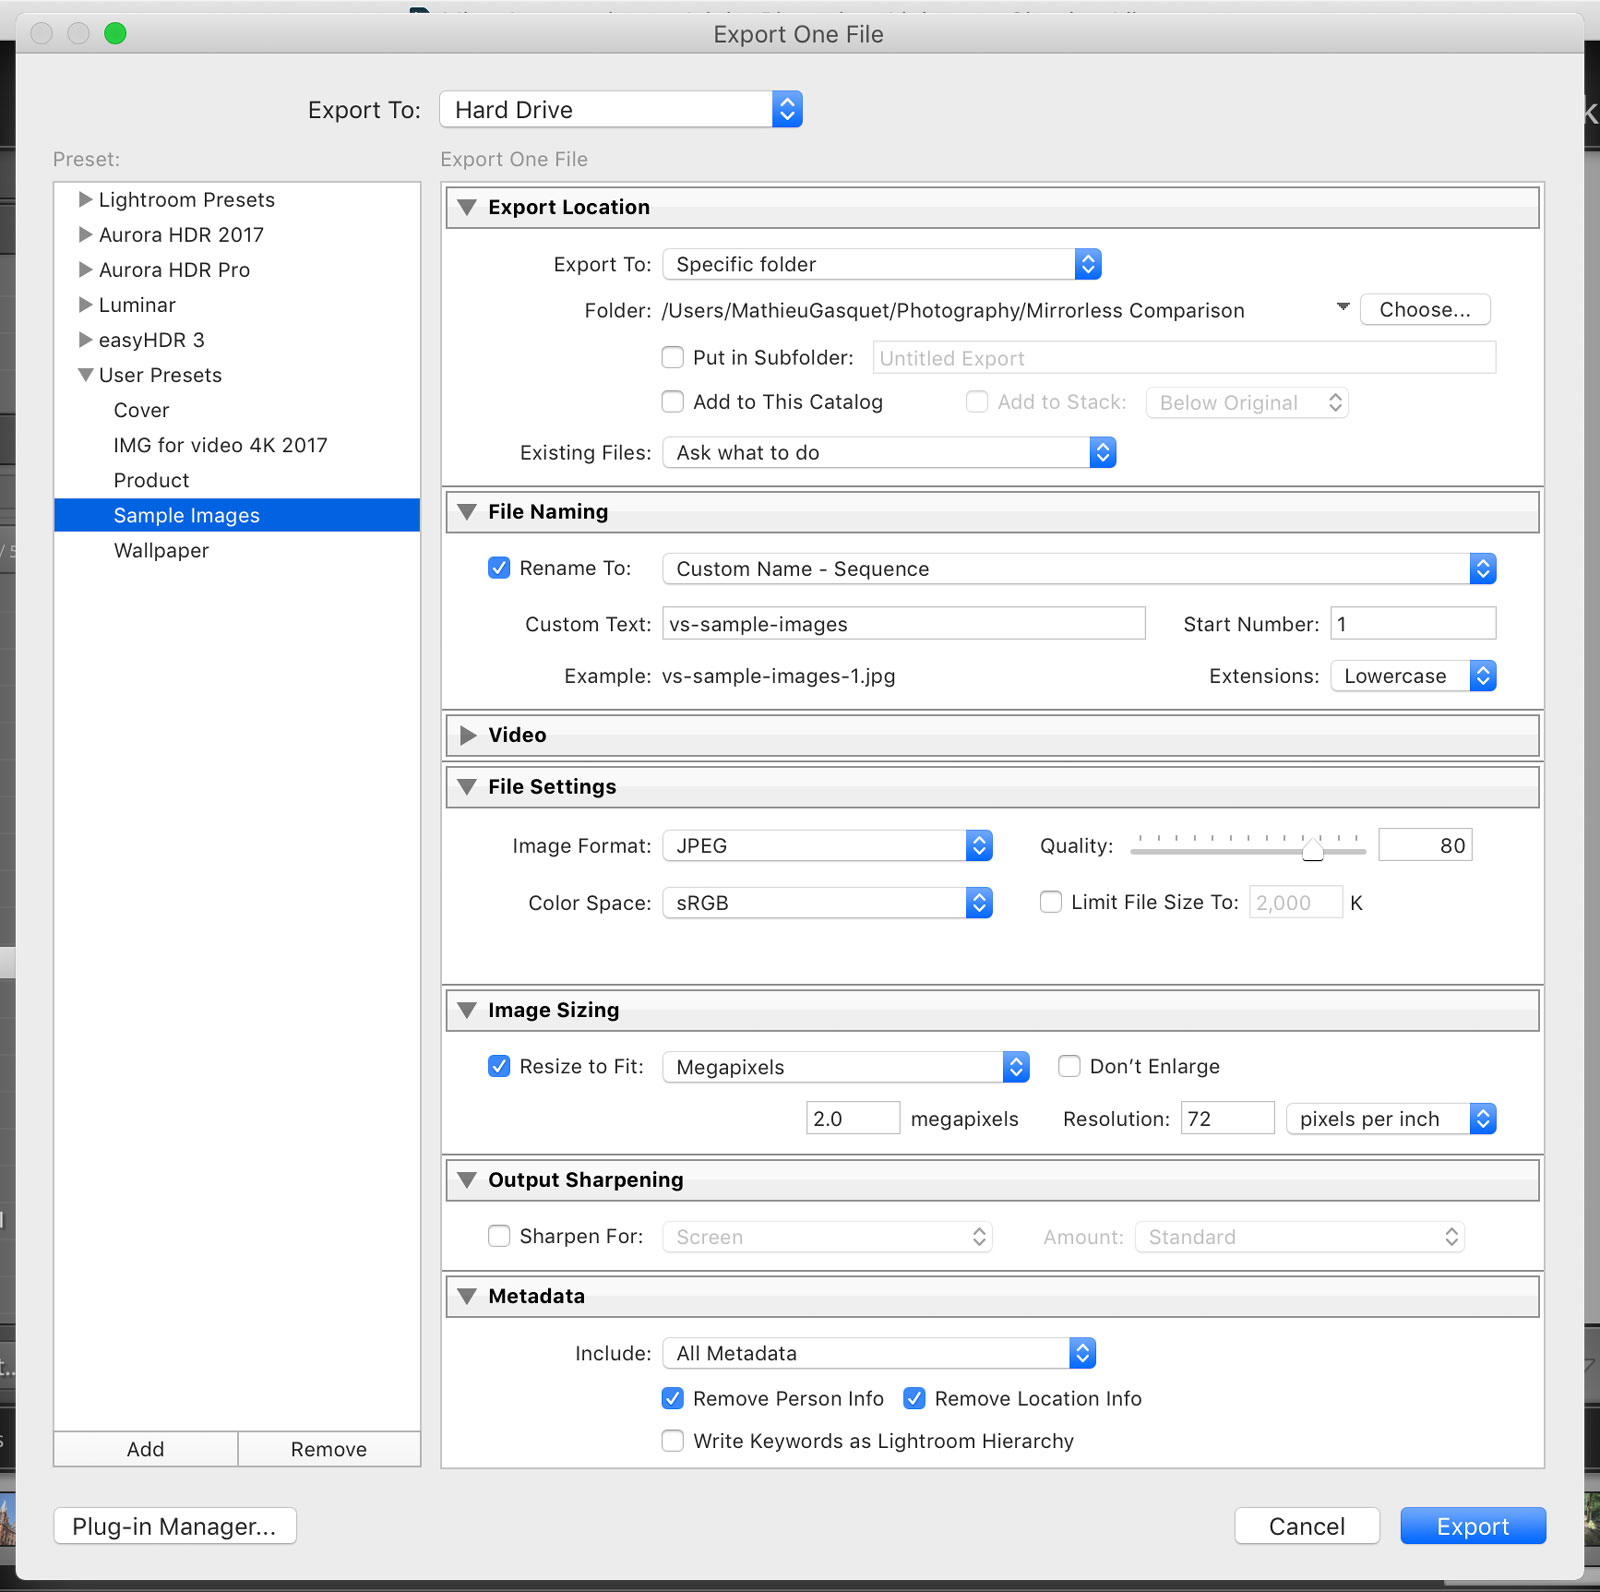
Lightroom also offers more options when exporting the files, including the possibility to add a watermark (text or transparent image), control which metadata to include and create presets with your favourite export settings (for web, email, print, etc.)
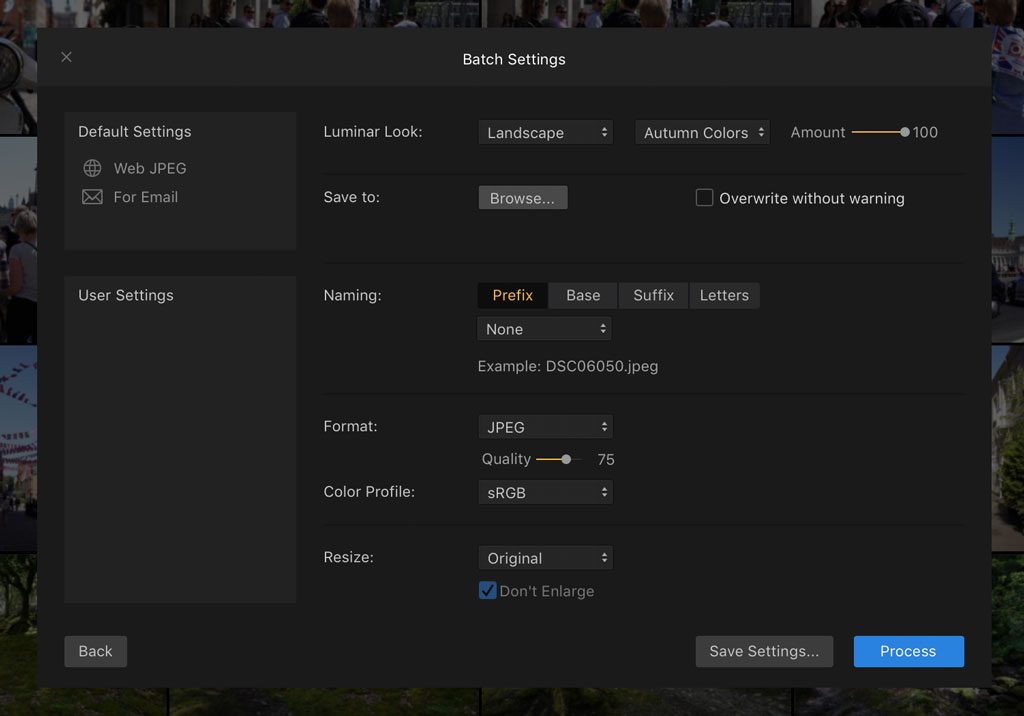
Luminar offers just the basic options such as image size, colour space, file format, etc. with the Export command. However it does have an extra feature called Batch Processing that can convert select RAW files or an entire folder with select settings (including a preset look) without the need to import them into the software first. It’s an interesting option if you’re confident that the settings will work on the files without testing them first. Otherwise, I prefer to import the images into the software, edit the first one, then copy and paste the adjustments onto the other images, just like I regularly do in Lightroom.
You’ll find options to export images to some social media platforms directly, although here as well Lightroom gives you more options.
Additionally, the Adobe software has a section to create a book and send it through Blurb directly. You can also prepare images for printing or create a web gallery to upload to a website.
Photo editing: Tools and features
Lightroom offers a decent number of features to post-process your photographs. In addition to settings to control exposure, colours, details and other parameters, you can correct red-eye, crop, and apply radial, gradient and custom masks (with colour, luminance or manual selection).
You can stitch panoramas or create HDR images with your RAW files, and studio photographers will appreciate the tether shoot mode available with select cameras. There is a decent list of presets built-in as well as tones available to purchase from third-parties.

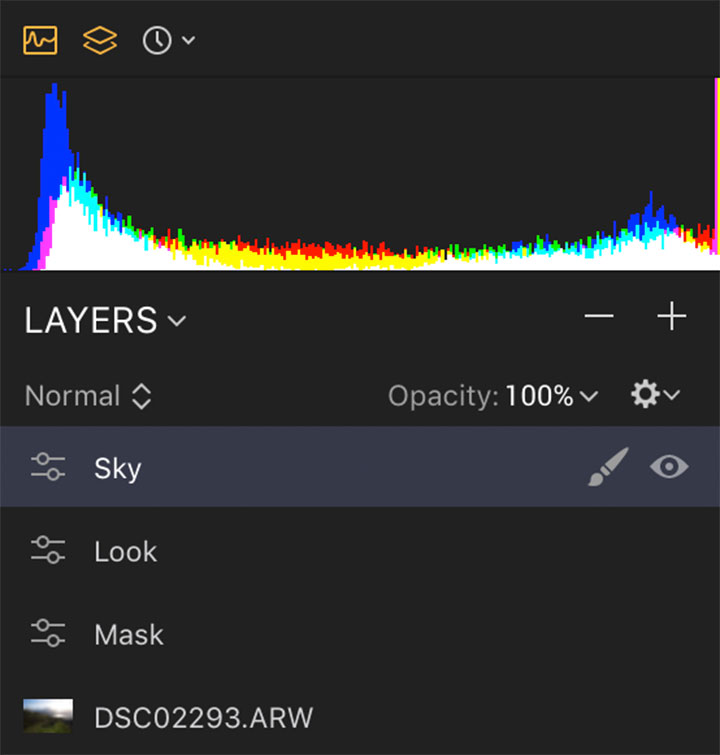
Features such as tethering or panorama stitching are not available in Luminar, and Skylum has a dedicated software for HDR (Aurora). There is one thing however that gives Luminar a significant advantage over Lightroom: layers.
Luminar allows you to add layers directly from the Edit tab whereas with Adobe, you need to open your image in Photoshop. Layers open up new possibilities for advanced post processing. They allow you to separate your adjustments on various levels, apply more filters and masks, or perform advanced post production such as sky replacement.
Another “Photoshop” tool you’ll find in Luminar is Clone & Stamp. Lightroom has something similar called Spot removal which usually works quite well for quick adjustments, but because the software picks the source area automatically, it can sometimes require more time to correct it manually. The setting on Luminar gives you a bit more precision from the start since you have to pick the source manually before starting to clone (just like in Photoshop).
As for settings to adjust the image, Skylum offers more than 50 Filters from basic things such as curves and saturation, to creative ones like Sky Enhancer and Orton effect. Advanced tools for the most demanding photographers are present on both applications (HSL, Sharpening, etc.).
One thing I like about the way Luminar organises all these filters, in addition to the workspaces, is that each filter can be reset, deactivated or turned into a mask (Brush, Radial, Gradient or Luminosity) with just a few clicks.
Another thing to consider is that while Luminar can be used for advanced post production, it has also been designed with amateurs in mind. Most of the presets as well as some automatic sliders (Accent AI filter and AI Sky Enhancer) give a ready-made look to your image in seconds. I don’t like all of them, as I often find them too “overdone” for my taste, but if used in moderation they can certainly help speed up your workflow. Of course just like in Lightroom, presets can be fine-tuned or modified in the Edit panel.

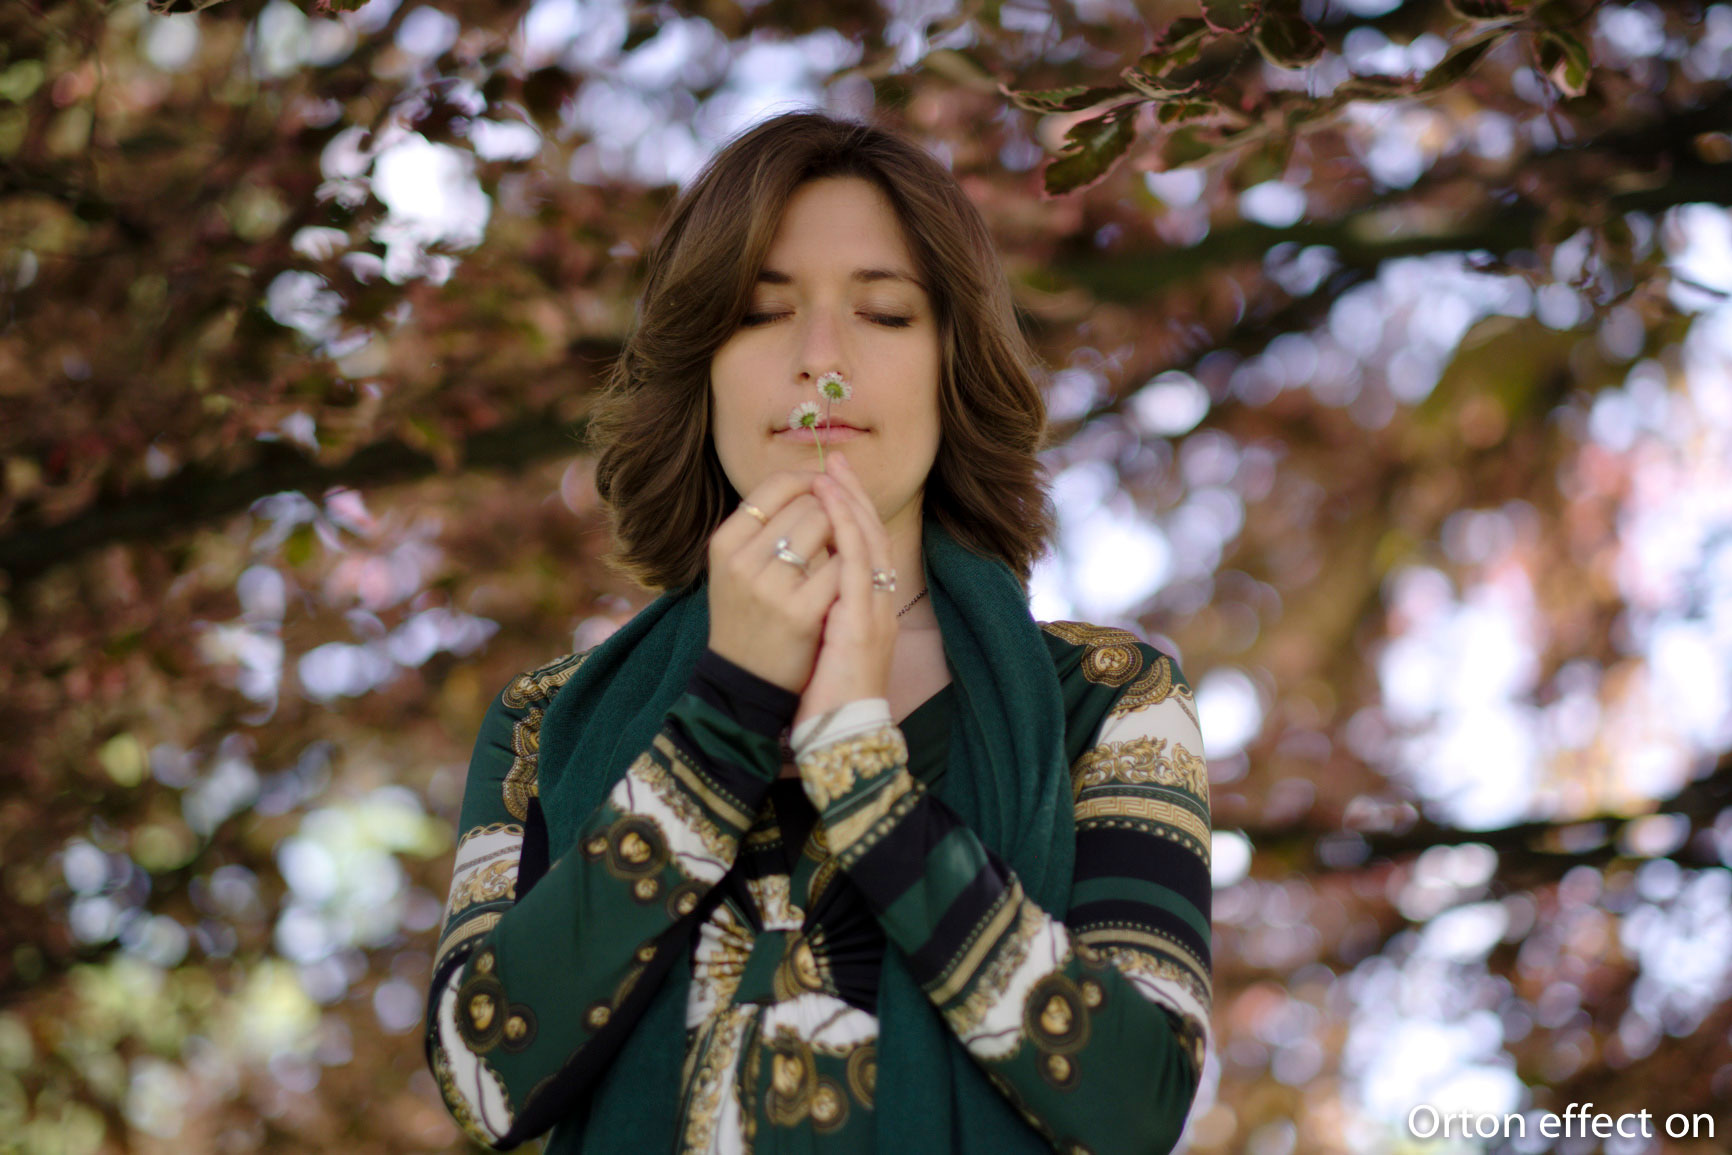
Luminar also includes some special effects like Texture Overlay, Polarisation filter or Sunrays. Sunrays can work surprisingly well if applied to the right image with the right settings.
Interestingly, many Photoshop plugins can be used inside Luminar. A history panel is available in both applications, which is very handy.
Lightroom has a selection of colour profiles as well as the option to apply camera profiles for many brands and cameras. Luminar has one default profile, and a selection of camera profiles but for fewer models (the Fuji Film Simulation modes aren’t present for example).
Finally, the Adobe program has a vast selection of lens profiles. Luminar applies it automatically, but if for example you’re working with an old manual focus lens that can’t transmit data to your mirrorless camera, you won’t be able to select a lens profile manually, whereas there is a high chance you’ll find it in Lightroom.
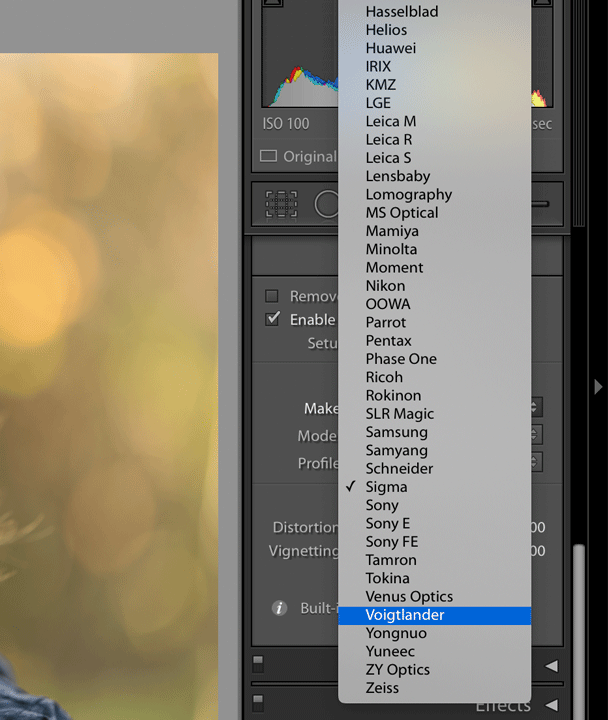
Photo editing: quality and speed
A key aspect of any photo editing software is of course how good it is at actually processing your images and making them look better.
The first time I opened up Luminar two years ago, this was the area where it was lacking the most. RAW development was poor and inaccurate, noise reduction was basically a blur effect and lens profiles were often not included so you would end up with awful distortion.
The Skylum team has made a big effort to improve their software and I have to say that today’s version is much better. You can make make more precise adjustments and with all the filters available, as well as the possibility to work with Layers, I can see myself working with it on a more regular basis.
I didn’t have the time to compare every single feature (also because the article would become too long) but I wanted to see how the two handled three things I always spend time on for my comparison articles: dynamic range, noise reduction and sharpness. I didn’t perform the test with multiple RAW files from multiple cameras, so there could be some variation depending on how well each software handles the different RAW images.
Concerning dynamic range, Luminar can push the shadows much further, although high values result in a clear loss in quality. Even when matching the same brightness in both applications, Luminar does a better job of retaining details in the shadows. However Lightroom does a better job of preserving highlights after recovering the exposure.


Lightroom: +4Ev, +50 shadows, -100 highlights
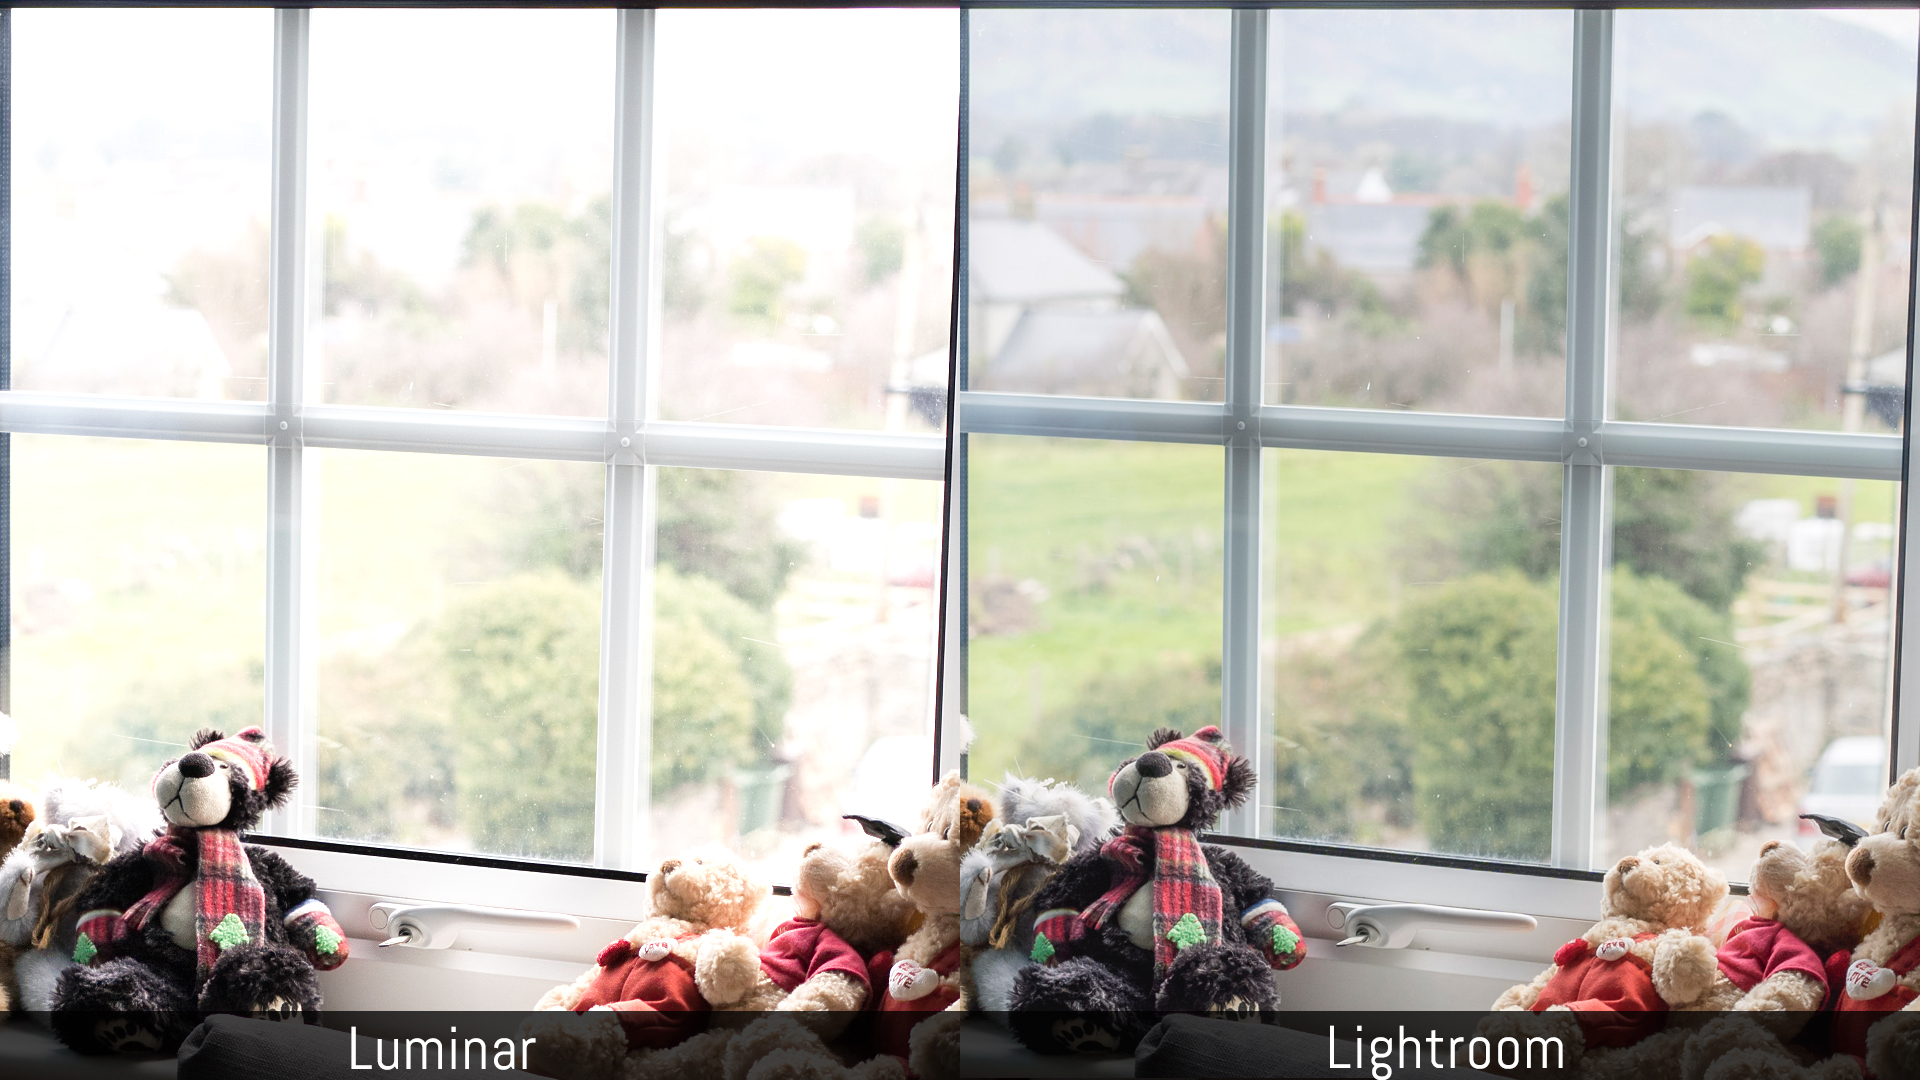
Lightroom: +4Ev, +50 shadows, -100 highlights
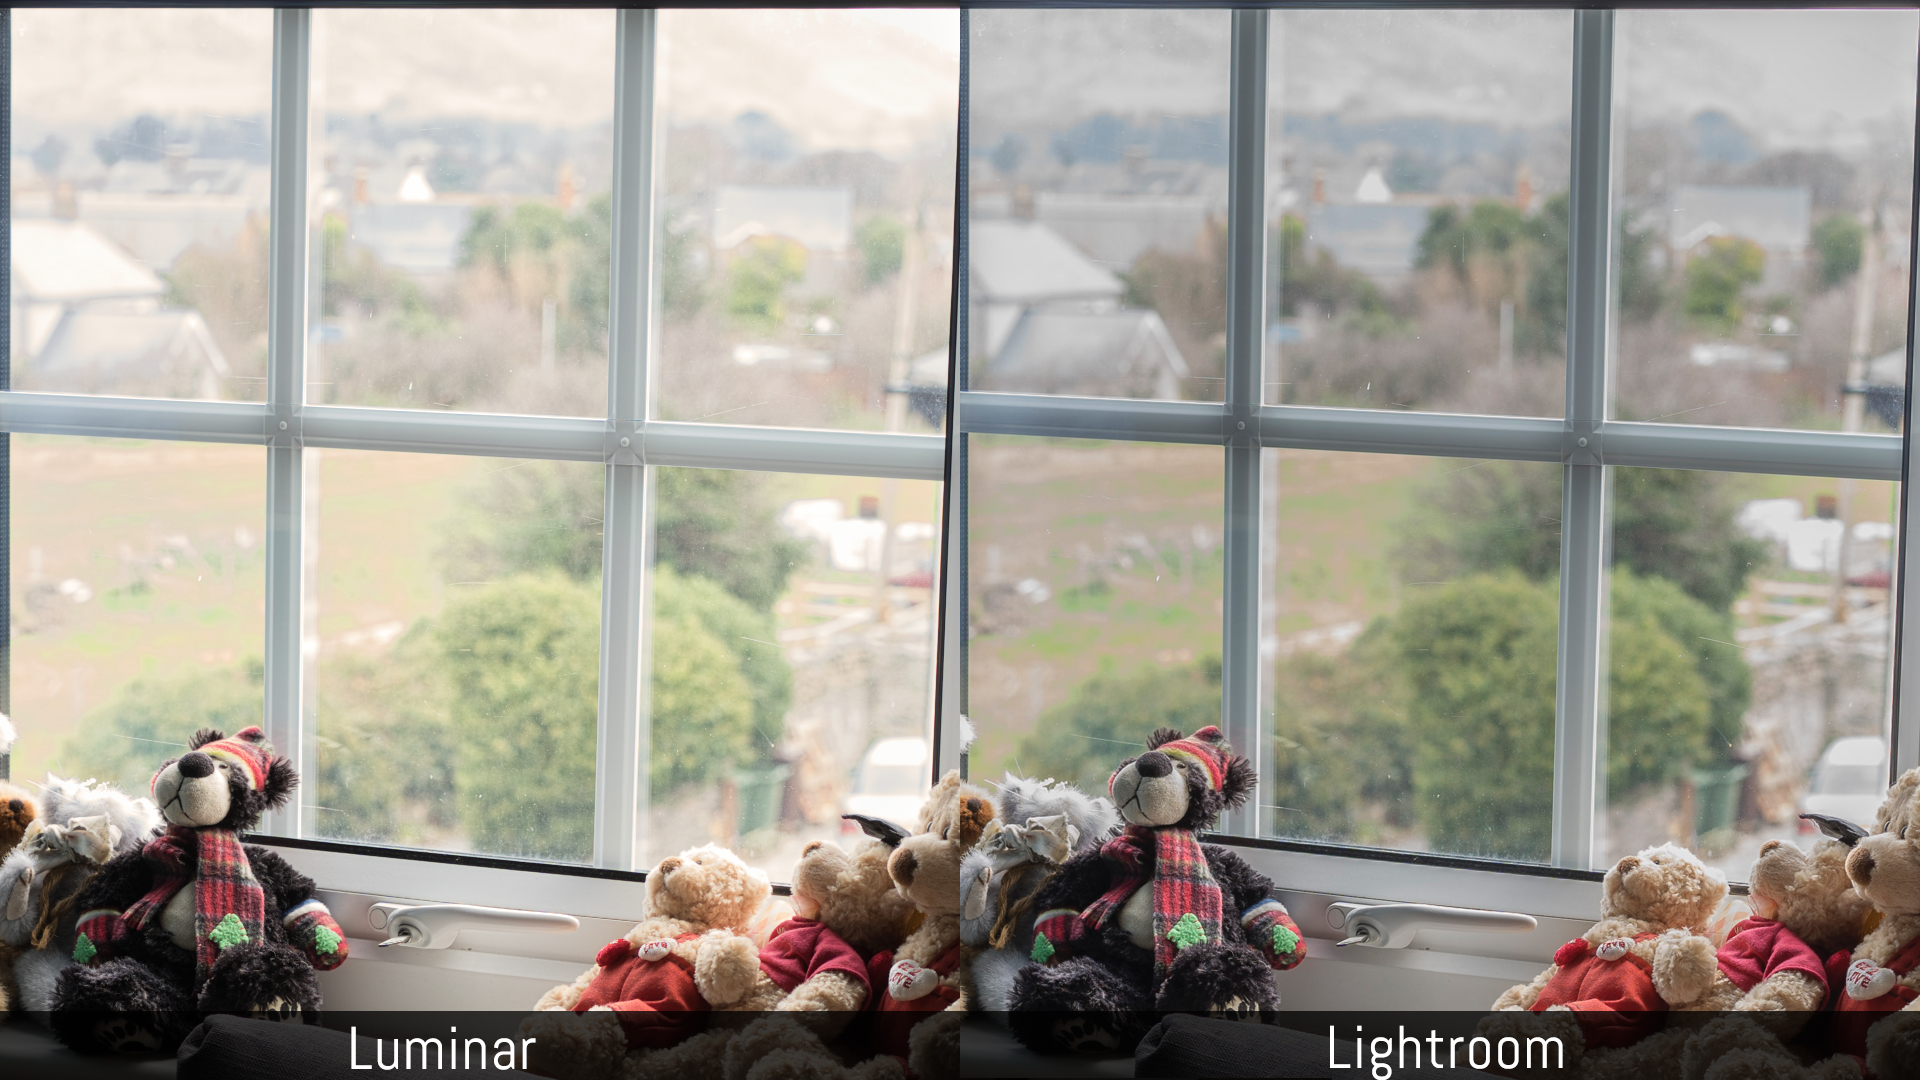
If I try to recover highlight information from an overexposed image, Luminar is better at decreasing the brightness specifically in the bright areas, rather than influencing the medium tones as well.

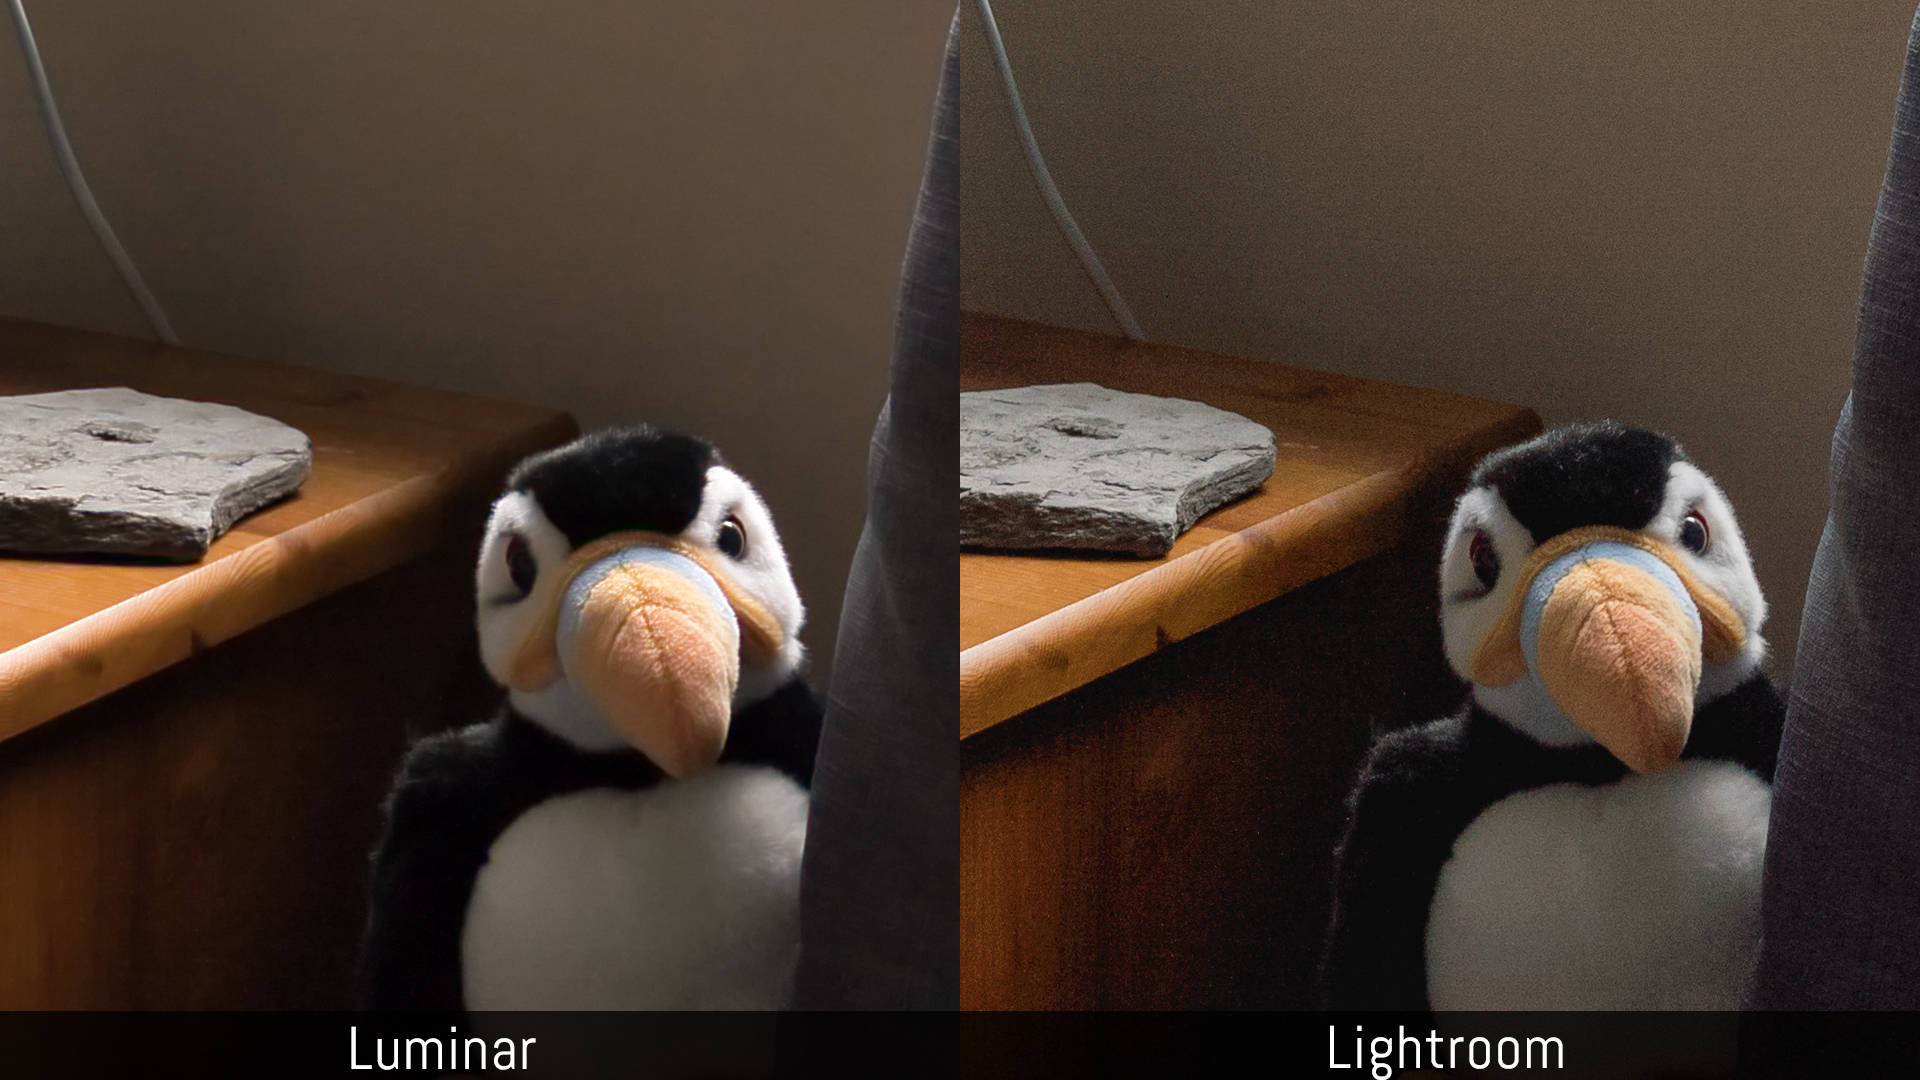
One odd thing I discovered almost by chance is that when you export your image (any format), Luminar applies some noise reduction automatically. As you can see below, the noise is almost gone but so are the many details that were present while editing the picture. I couldn’t find anywhere in the software to turn this off. I suspect that my copy (which is a beta version) has a bug, so hopefully they’ll fix that soon.
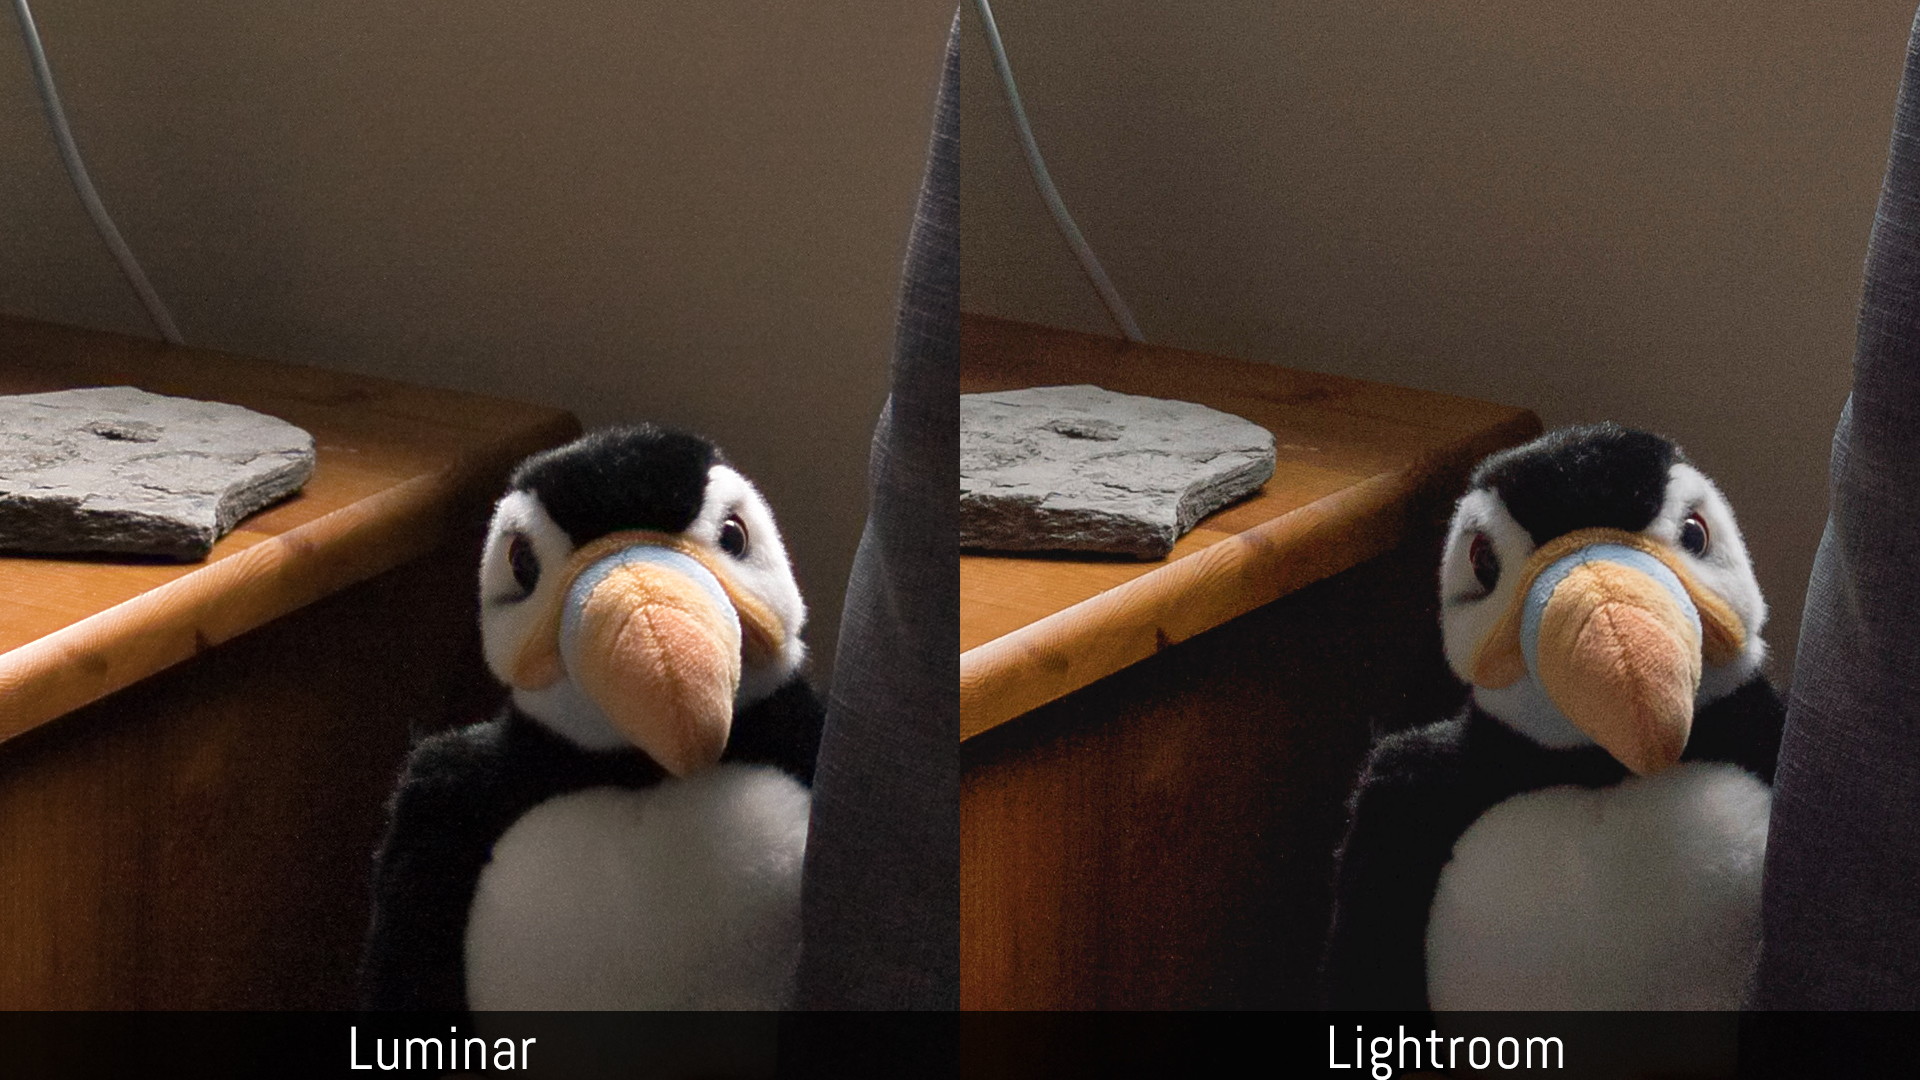
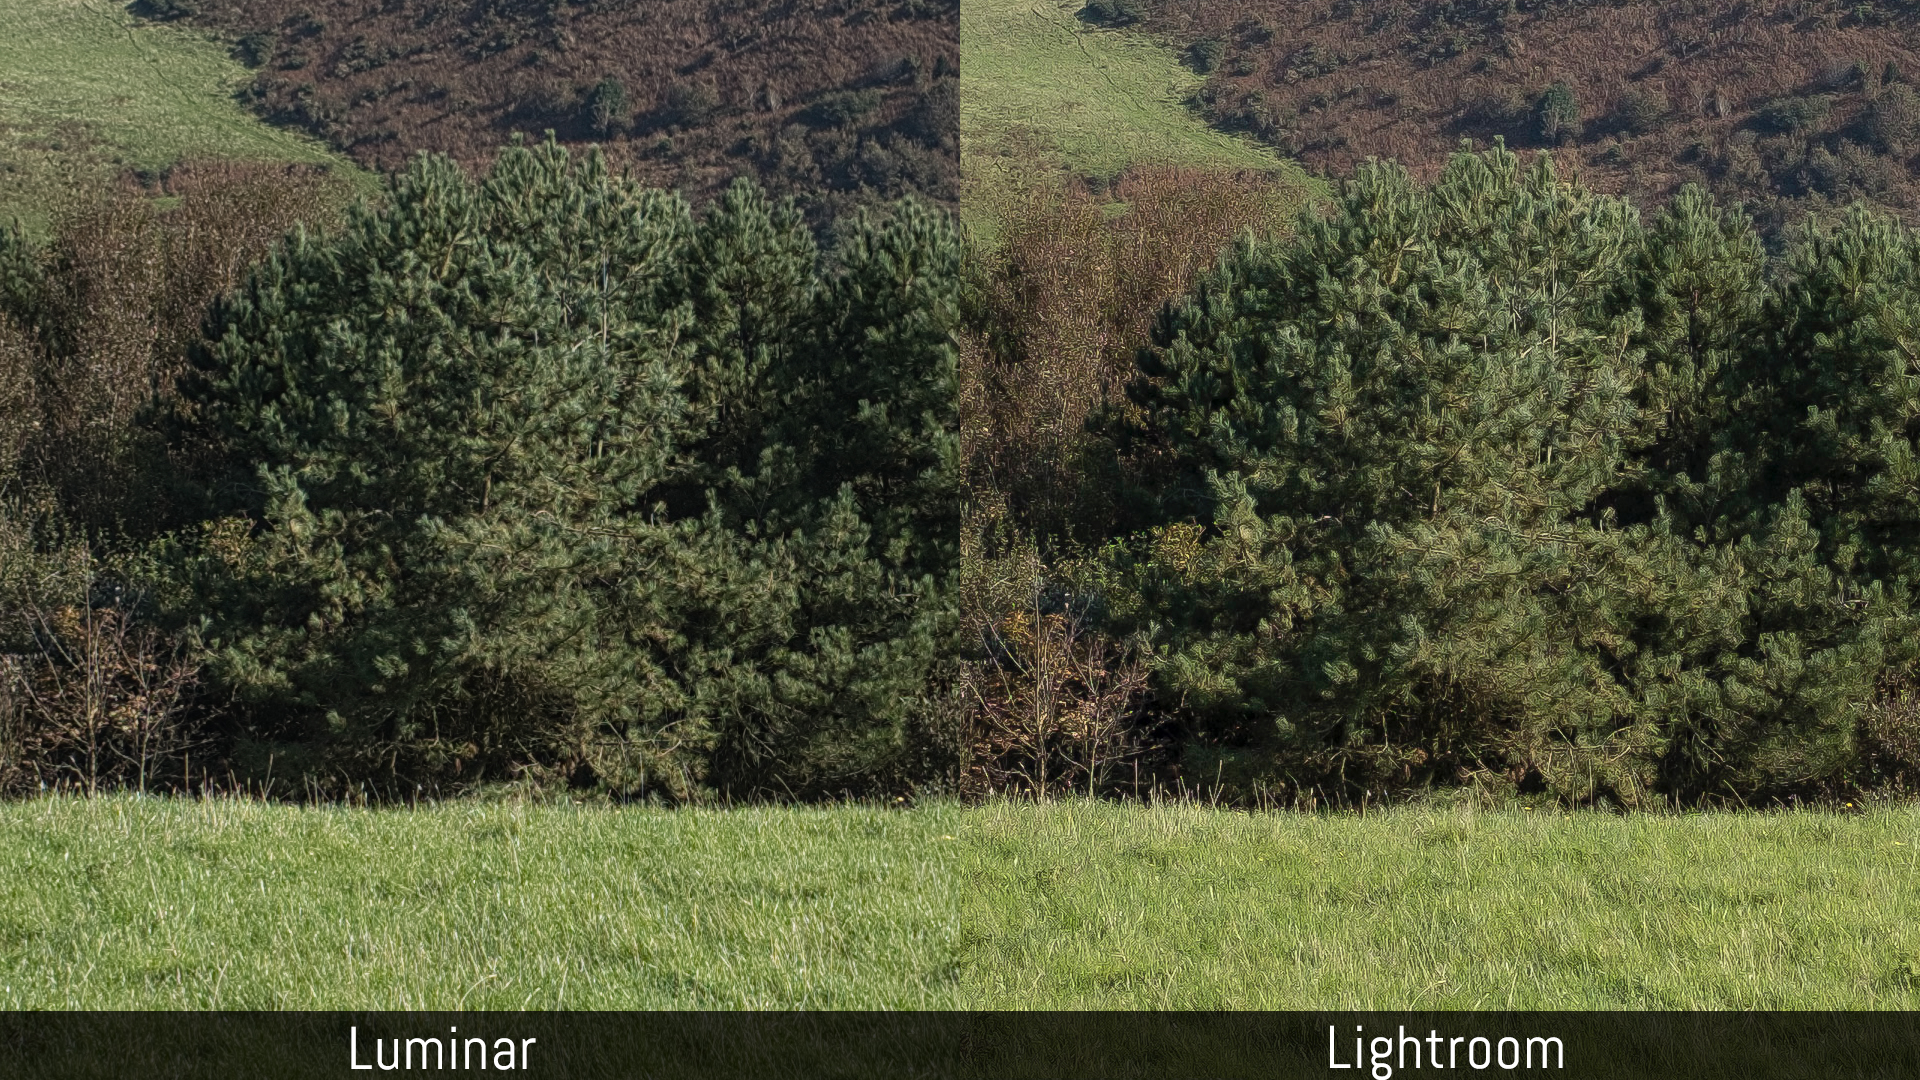
As for sharpness, I think Lightroom still has an edge when it comes to rendering the finest details. Despite Luminar having more settings, it just can’t match the same level of crisp detail without sacrificing the natural look of the image. You also need to spend more time on it to get the best result.


Lightroom: Sharpening +50 with Radius 1.0, Detail +70 (Masking +5)
I was also curious to see how the Skylum software would handle Fuji X-Trans files, an area where Lightroom is known to be weaker than other software. Well, the good news is that there are far fewer “watercolour” artefacts, but here as well, details don’t look as sharp as the Adobe version.

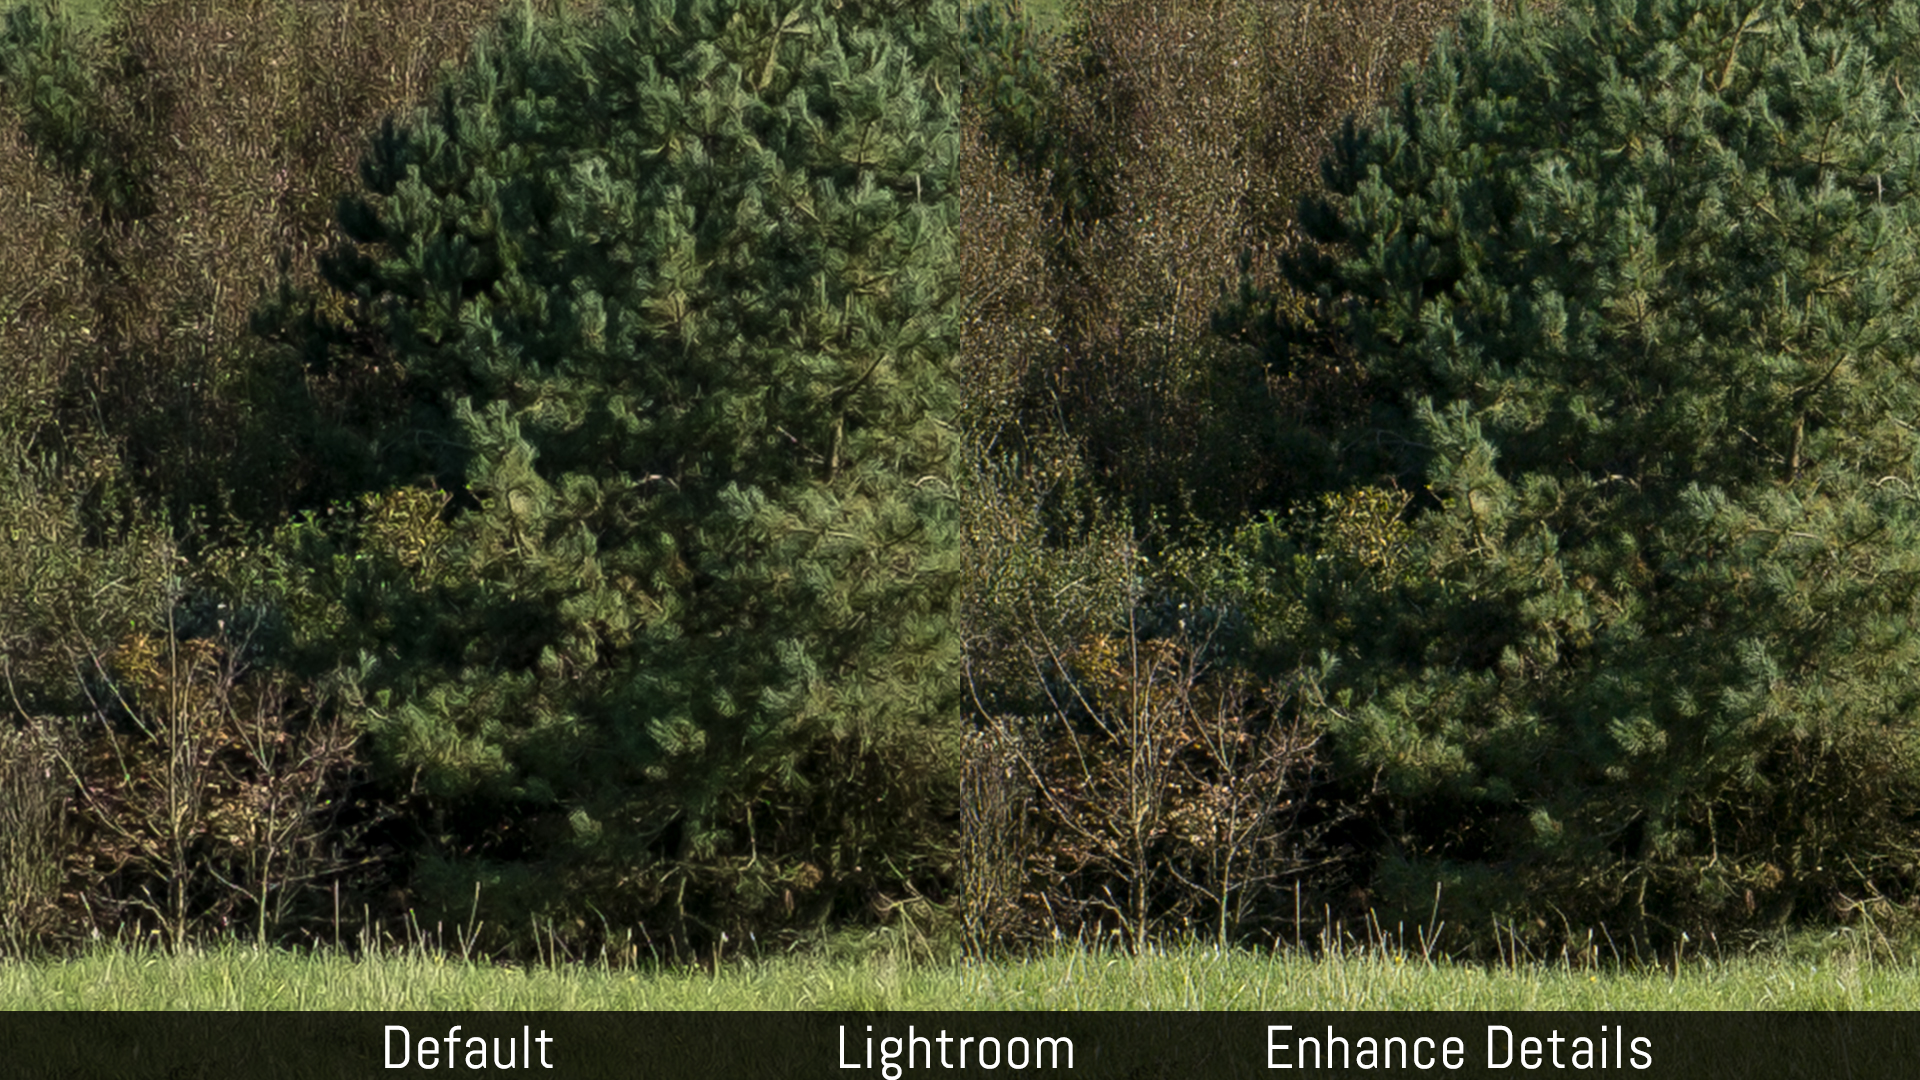
Adobe has introduced a new feature in version 8.2 called Enhance Details. It uses machine learning technology to improve the detail rendering of the image. It uses GPU intensively and creates a separate DNG RAW file, but the difference is not insignificant with the Fuji RAW files.
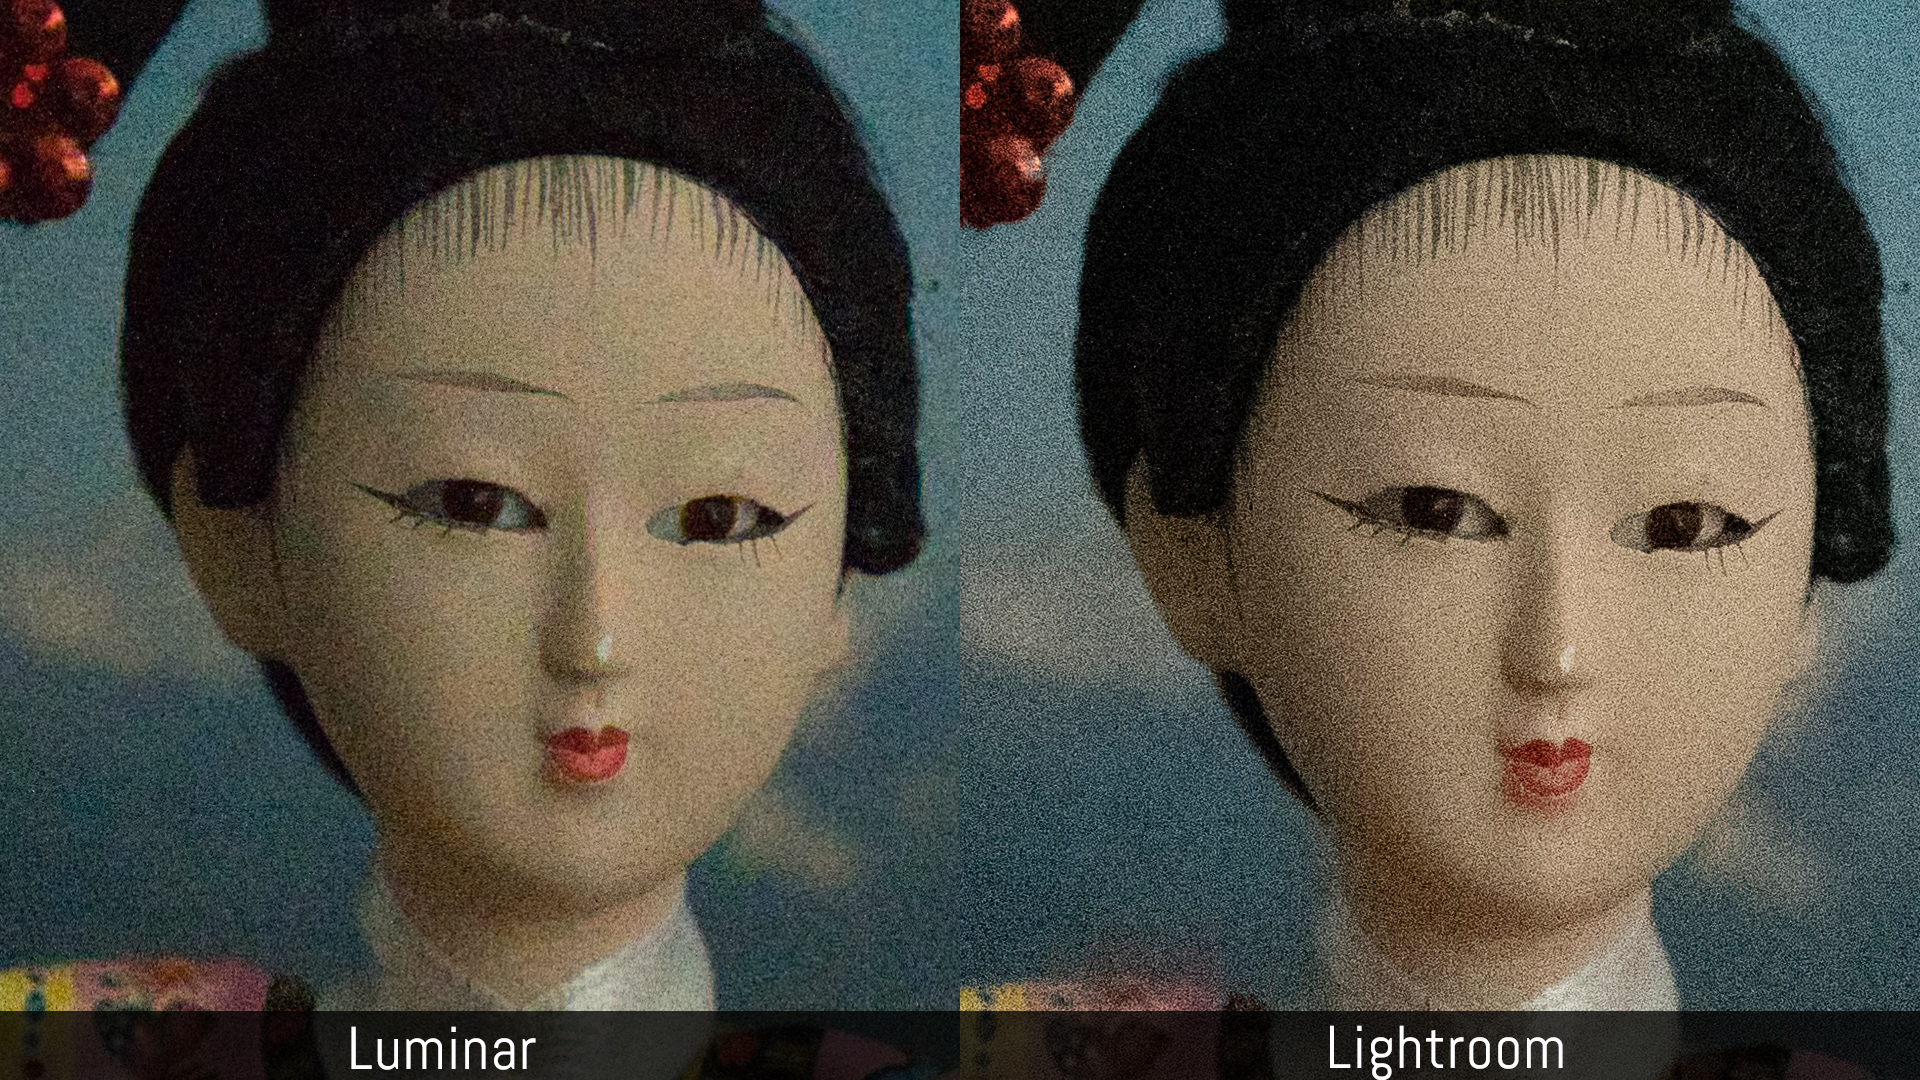
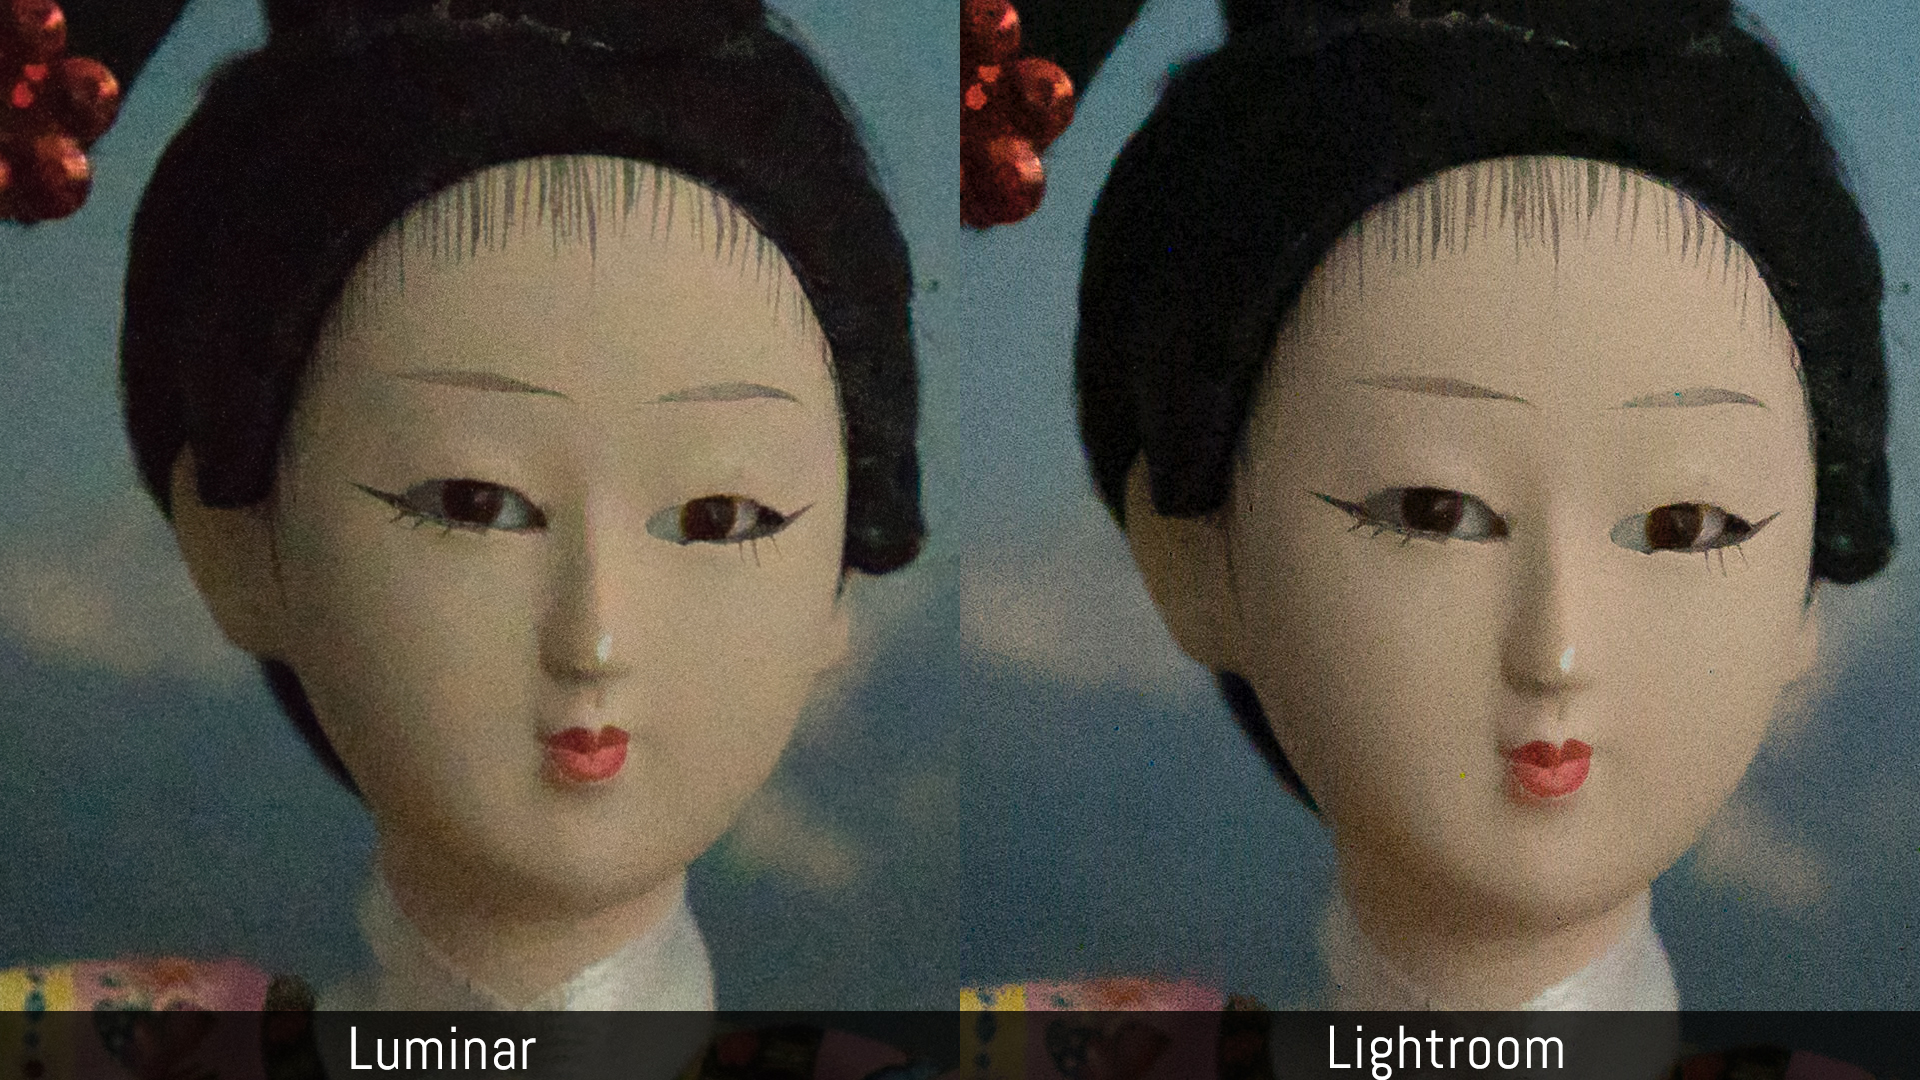
When opening RAW files, each software applies a certain degree of noise reduction by default (+25 of colour NR for Lightroom). Luminar does something similar but doesn’t give you the option of controlling that initial processing. If I keep all the settings to zero in Lightroom, it shows a pure RAW result with lots of luminance and colour noise. In Luminar, you’ll start to work on a file that has already received some NR, which is not necessarily a negative thing.
Lightroom includes a Detail slider in the noise reduction settings to balance the process between softening and not sacrificing too much sharpness, and it works quite well. With Luminar, increasing luminance noise reduction also requires you to add some sharpness back with the sharpening tool. Here as well though, Lightroom preserves more details, can render more “organic” noise (the grain is finer) and can get rid of colour artefacts, unlike Luminar.

If I forget about pixel peeping, and post-process a few images based on what I find pleasing to the eye, I have no problem saying that both applications are able to give me satisfactory results. There are other differences such as the slightly different colour rendering (even with the same profile applied) but at this point, it becomes a question of learning how each app works and what the best settings are, not only to maximise the quality, but also to suit your personal taste.


Concerning speed, Luminar seamlessly goes from Library to Edit modes, although it can take a few seconds before you can start to edit the various filters. It can also take more time to load an image when viewed at 100%. Exporting images is fast and the software doesn’t crash anymore like it did when reviewed the beta copy. There are still a few bugs here and there. The latest I’ve noticed is that high resolution shots taken with cameras such as the E-M1 II don’t load correctly (a cropped version is shown instead without the possibility of resetting to the full width).
What I can say about Lightroom is that over the years it has become more powerful but also slower, especially when importing certain RAW files, or when looking through thousands of images and constantly zooming in and out. But to be fair, my computer isn’t all that new any more and that’s why I’m planning an upgrade soon.
Price
In 2017, Adobe made the decision to stop selling Lightroom as a standalone copy. Instead they offer it via the Creative Cloud subscription plan. The Photographer package (the lowest) includes Lightroom Classic, Lightroom CC, Photoshop and 20GB of cloud storage for $10 / £10 / €12 / month. Further upgrades can be made (more cloud storage or more Adobe apps).
Luminar costs $69 as a standalone copy, minus the endless discounts, special deals and affiliate discounts Skylum proposes on a regular basis (you’ll find one here as well at the end of this article).
If we do some quick math, the Lightroom subscription will cost you $120/year, which is more or less the same price as two copies of Luminar. The Skylum software is without a doubt the cheapest option here. Those who don’t like the idea of a monthly or yearly subscription won’t think twice.
Personally I’ve never minded the Creative Cloud plan since I started to pay for it years ago but in my case, I use other Adobe software applications too. As such, I found the subscription offering more convenient than buying expensive programs and then having to pay for major updates.
Luminar seems to release free updates more and more frequently, so most likely you won’t have to pay often for a major upgrade (this new version with Library is free for current customers).
Conclusion
I should start this conclusion by saying that it was more difficult than usual for me to be 100% unbiased in this comparison, considering that I’ve been working with Lightroom for the past ten years. And if I wanted to be even more honest with you, I could also add that the main reason I decided to give Luminar a try is because Skylum offered me the chance to test it. However I’m glad they did because it gave me the opportunity to pull my head out of the sand and consider other options.
To be fair, I do use other programs for my comparisons (Capture One and Iridient Developer) when I need to see how specific RAW files are handled by multiple programs, but in this case, I wanted to see if I would find Luminar a suitable replacement for Lightroom. The Adobe program has been the leader for many years now, but not everyone has welcomed some of the recent changes.
For example, Adobe’s decision to stop selling the standalone version and offer subscription plans instead caused quite a stir in the photography community, especially among those who don’t need to upgrade all the time. Competitors jumped on the opportunity to use this as a marketing strategy to promote their own products and Skylum was one of them. Not only did they announce that they were working on a DAM system (now called Library) but they even plan to offer a migration tool from Lightroom to Luminar in the future.
So, is Luminar a true replacement for Lightroom? Not quite yet, but I can see it becoming one soon.

The Library offers basic functionalities to organise your photos but lacks the extended options Lightroom has. I personally missed the possibility to sort my images by metadata and hide the JPG or RAW version. That alone is enough for me to remain faithful to Lightroom for now.
Still, I have to credit Skylum for all the efforts they have made over the past two years. The processing quality is much better and the RAW development tool is way more precise than before. There is still room for improvement in some areas, particularly regarding sharpening and noise reduction, but I could see myself using it more often to edit some of my photos.
Another thing to consider is that Luminar is very beginner-friendly. There are tons of presets and one-slide adjustments that make life easier for photographers who are just starting out with post production, or who don’t want to spend too much time editing.
Don’t assume that Luminar isn’t designed for professionals too though. It offers layers (something Lightroom can’t do without sending your file to Photoshop) and includes all the advanced settings you could possibly need for extensive post-production.
Yes, the Library module is basic, but it’s still an important upgrade because you no longer have to open your images one by one. Add to this the less expensive price, and it becomes easy to see how Luminar is starting to become a serious alternative.

With all that said, Lightroom still remains a more complete product overall for professionals or enthusiasts who want more control from the moment they import their images to the moment they publish them. It’s true that it doesn’t have built-in layers, but there is Photoshop for that, just like there is Aurora HDR for Skylum. And let’s not forget that having Photoshop included in the plan isn’t a small thing for those dealing with heavy post-production.
Strengths of Adobe Lightroom Classic:
- more options to select and sort your images as well as create albums
- advanced settings for exporting and publishing
- more powerful noise reduction and sharpening tools
- supports dual monitor set-up
- more camera and lens profiles available
- Built-in HDR and Panorama merging tools
- Photoshop is included in the plan
- RAW file compatibility is updated more quickly
Strengths of Skylum Luminar:
- less expensive and standalone license
- more intuitive and simple for beginners
- workspaces offer a great level of personalisation
- can work with layers
- more presets and creative filters to edit your photos
- easy one-step processing options
- excellent for shadow recovery
Choose Skylum Luminar if:
- you want to spend less and have a standalone license
- you’re new to post production and want to work with a straightforward software
Choose Adobe Lightroom Classic if:
- you want a more complete solution to catalogue your images
- you do advanced post-processing and will take advantage of Photoshop and all its features in addition to Lightroom
If you’re interested in Luminar, you can buy with it at the link below and use the code to get a discount. You can also try it for free for 30 days (always my recommendation).
Check price of Luminar on the Skylum website
As for Lightroom, you can visit the Adobe website to check the price and conditions. A free trial is available as well.