Before you rush to the comments to ask me why I’m comparing an F4 lens to an F11 lens, know that it’s actually thanks to you. Or more precisely, it’s thanks to readers of this website and viewers of my YouTube channel who suggested a comparison of this kind. Let me explain.
At the end of last year, I got the chance to be among the first to test the Olympus 150-400mm F4.5 TC1.25x Pro. It’s a very expensive super telephoto lens like nothing we’ve ever seen before for the micro four thirds system. While testing it, I compared it to a legendary “beast”, the Canon EF 800mm F5.6 (you can read all about it in our dedicated article).
I received a lot of positive feedback about that review, as well as suggestions for other lenses to compare. The most quoted were, to my surprise, the Canon RF 600mm F11 and 800mm F11. Many of you were curious to see if the slower but less expensive Canon lenses, mounted on a full frame camera, could compete with the “ultimate” Olympus lens.
Now, the title of this article doesn’t say 150-400mm because the zoom is not easy to come by and I believe there is still a long waiting list. Plus, we’re talking about a $7500 lens versus a $700 or $900 lens.
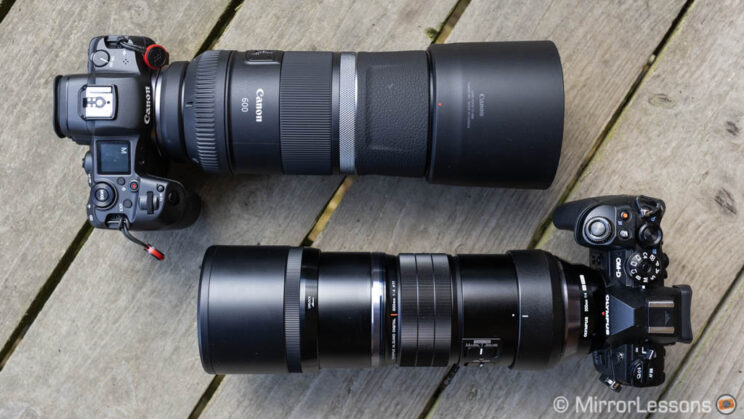
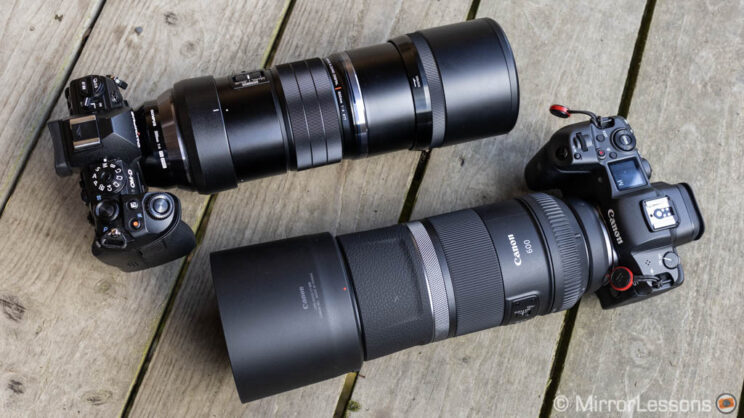
What I did instead was focus on the next best thing: comparing the Olympus 300mm F4 Pro with the RF 600mm F11. On their respective camera bodies, they’re similar when it comes to size and weight, which means they both fall into the category of compact solutions for wildlife photography. But of course, there are more things to talk about.
Ethics statement: we rented the Canon gear whereas the 300mm F4 was loaned to us by OM Digital Solutions UK. We were not asked to write anything about these products, nor were we provided with any sort of compensation. Within the article, there are affiliate links. If you buy something after clicking the link, we will receive a small commission. To know more about our ethics, you can visit our full disclosure page. Thank you!
TABLE OF CONTENTS
1. Meet the equipment: the lenses
2. Meet the equipment: the cameras
3. Sharpness
4. Equivalence, depth of field and ISO
5. Feedback from the field
6. 45MP vs 20MP: how much can you crop?
7. Cost breakdown
8. Conclusion
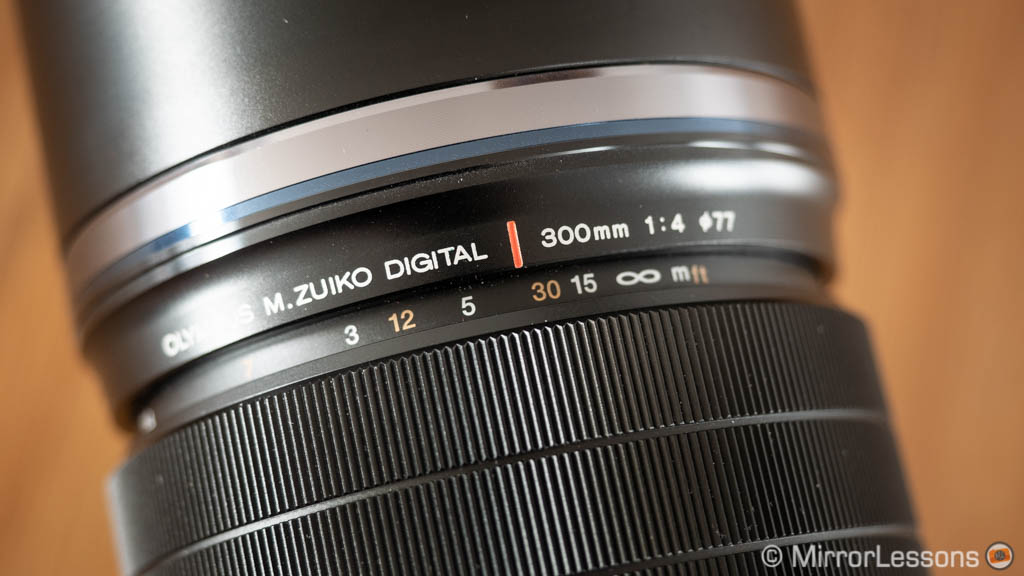
Meet the equipment: the lenses
The Olympus 300mm F4 and Canon 600mm F11 have two things in common. The first is that they share similar dimensions, especially when it comes to the diameter. The 300mm is heavier but the 600mm is longer when in use (it has a retractable design and needs to be extended to work).

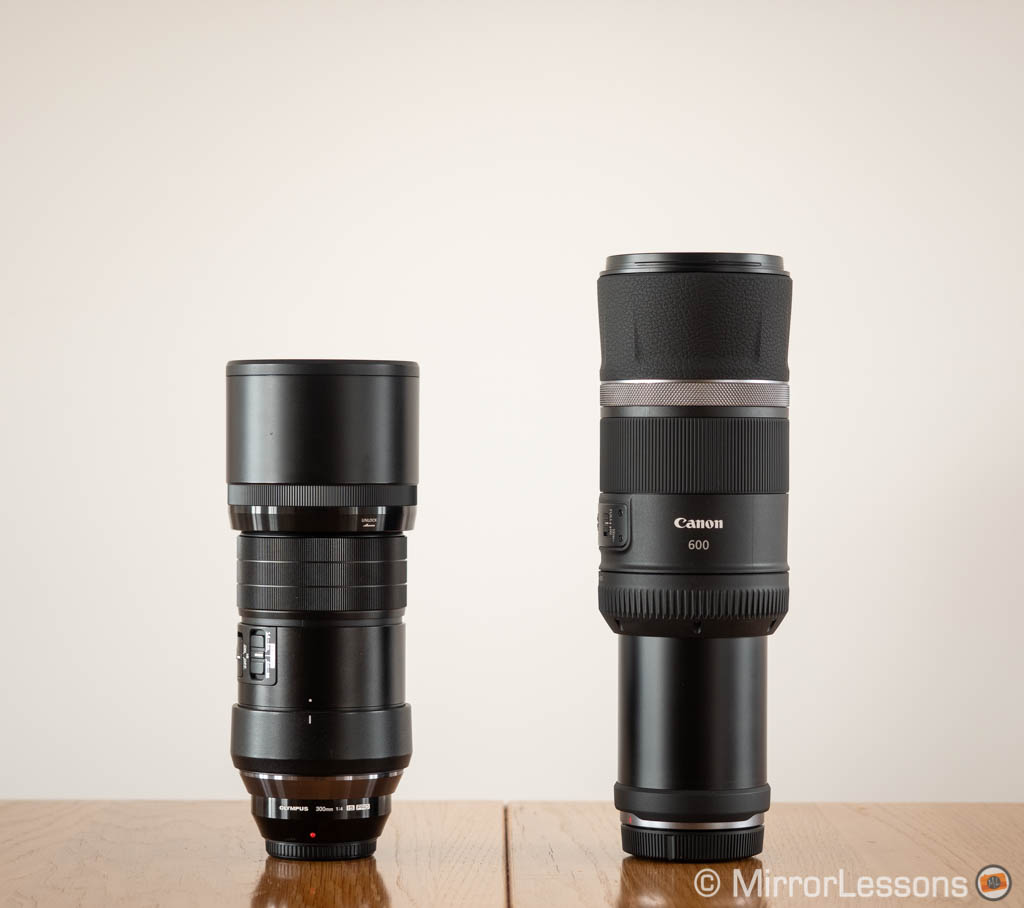
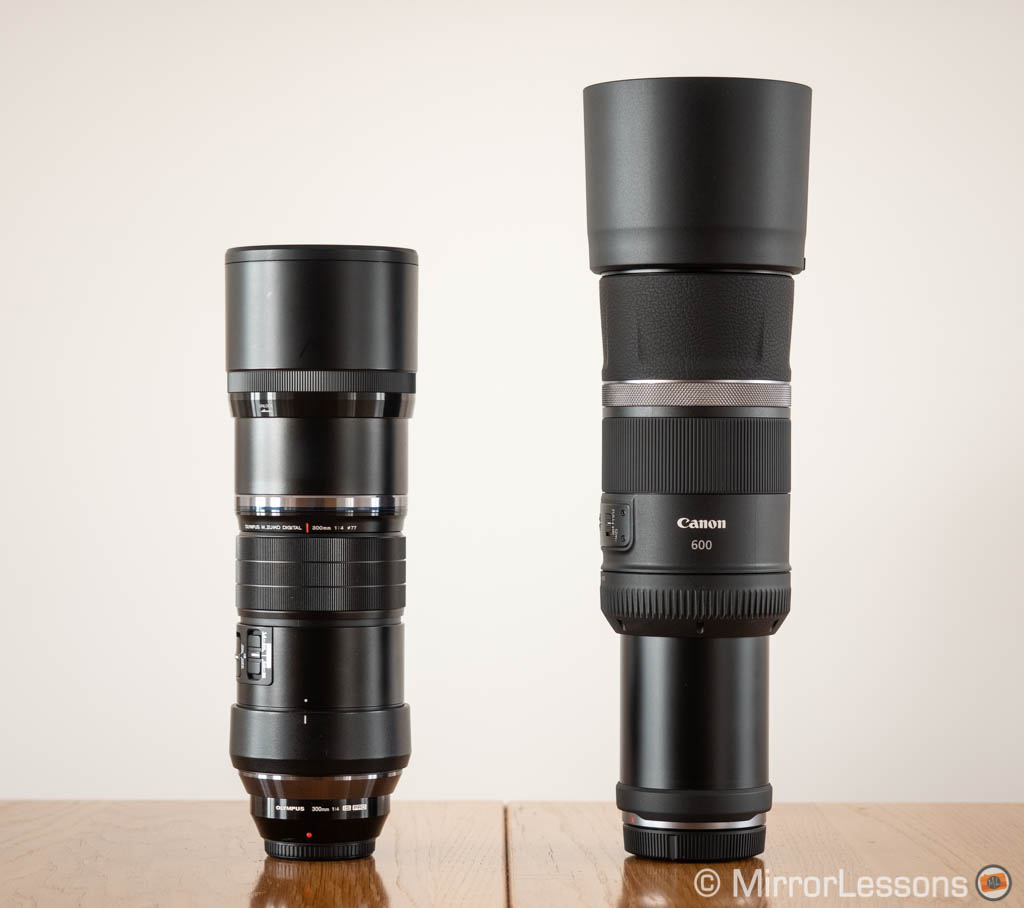
- 300mm F4 Pro: 92.5 x 227mm, 1270g (without hood and tripod collar)
- RF 600mm F11: 93 x 199.5mm (269.5mm when extended), 930g (without hood)
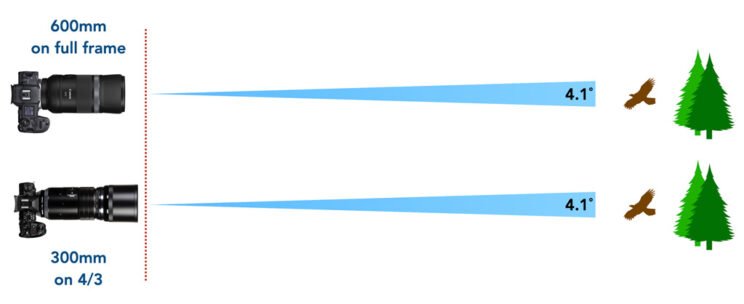
The focal length is different, with the Olympus being precisely half that of the Canon, but this is because they are designed for two different sensor sizes (four thirds and 35mm/full frame). What matters, and the second thing they have in common, is that they deliver the same angle of view of 4.1˚. That’s why you’ll often read that the Olympus lens is a 600mm equivalent to a full frame lens.
Both lenses feature optical stabilisation and work in conjunction with sensor stabilisation on compatible camera bodies. The Canon lens has a rating of 5 stops of compensation (CIPA), which becomes 6 stops when used with IBIS on the R5 or R6. The Olympus 300mm works up to 4EV alone, or 6EV when combined with 5-axis stabilisation
The 300mm F4 has much better close focus capabilities (1.4m) with a maximum magnification of 0.48x. The Canon 600mm can’t focus closer than 4.5m (0.14x).
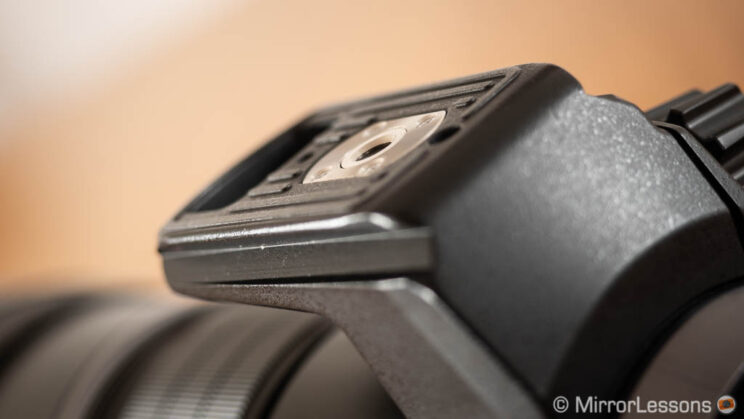
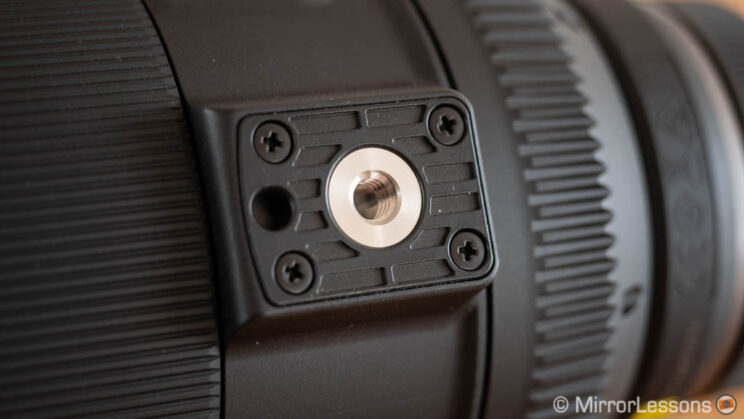
The Olympus is completely weather sealed and has a built-in hood that retracts over the barrel so you don’t need to take it off or reverse it to save space. There is a rotating tripod collar that is directly compatible with Arca Swiss heads.
The 600mm F11 has a less premium, more plasticky construction and is not weather sealed. It comes without a hood in the box and has a fixed tripod mount.
The Canon has one extra switch on the side: in addition to focus limiter and stabilisation on/off, you can also switch between AF and MF. There is a silver control ring that can be customised with different functions. The Olympus lens has a programmable button and you can switch between AF and MF by sliding the focus ring back and forth.
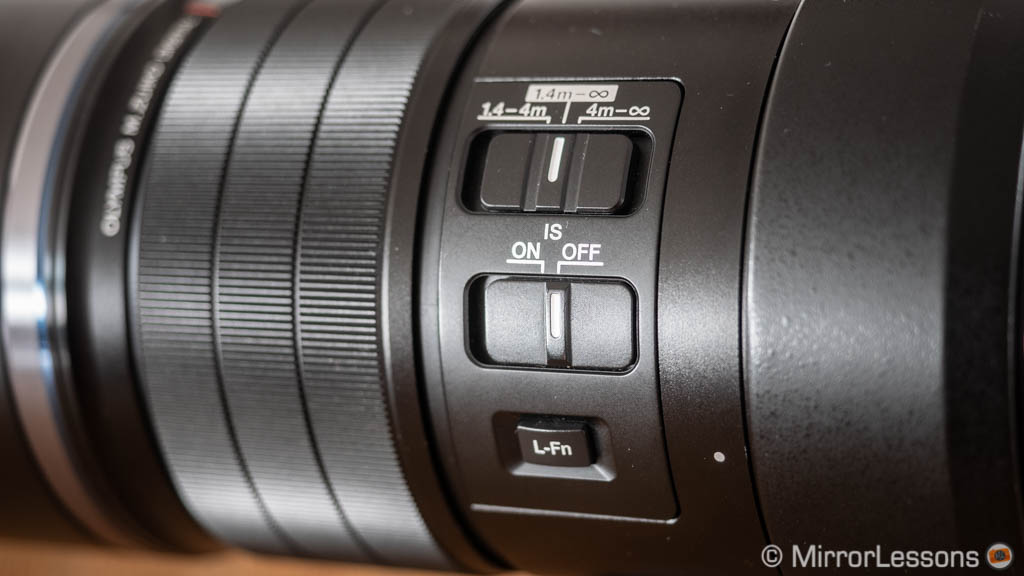

I’ve kept the major difference for last: the Canon lens has a blade-less and fixed aperture of F11. In other words, you don’t need to worry about the aperture when setting your exposure, because you only have one option. The Olympus lens goes from F4 to F22.
Both are compatible with the Olympus MC and Canon RF teleconverters respectively, and give you the following focal length and aperture:
- Olympus: 300mm F4 > 420mm F5.6 with MC-14 > 600mm F8 with MC-20
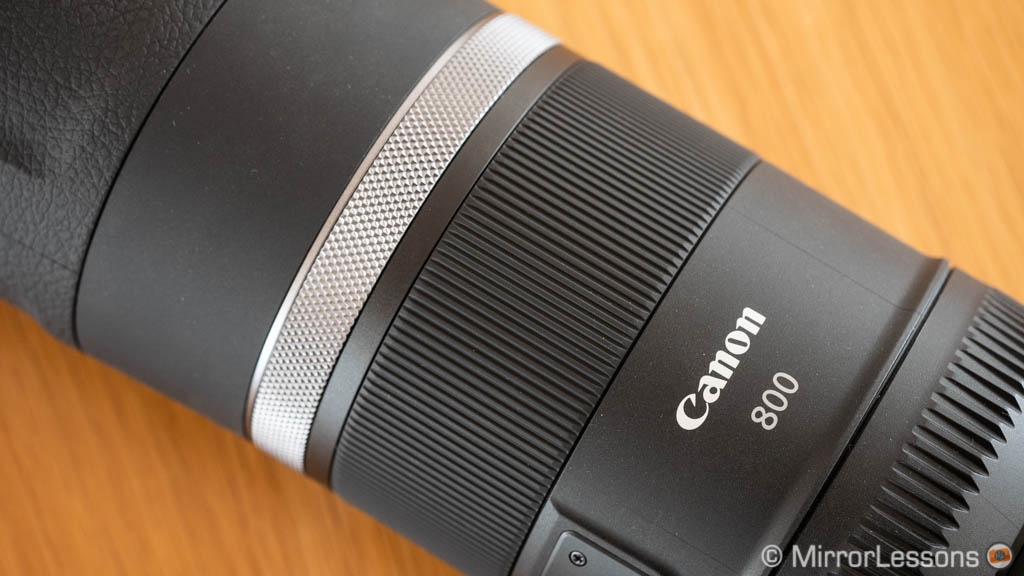
- Canon: 600mm F11 > 840mm F16 with E-1.4x > 1200mm F22 with E-2x
Unfortunately, the Canon extenders were not available at the time of renting the equipment, so I couldn’t include them in my side-by-side tests.
Meet the equipment: the cameras
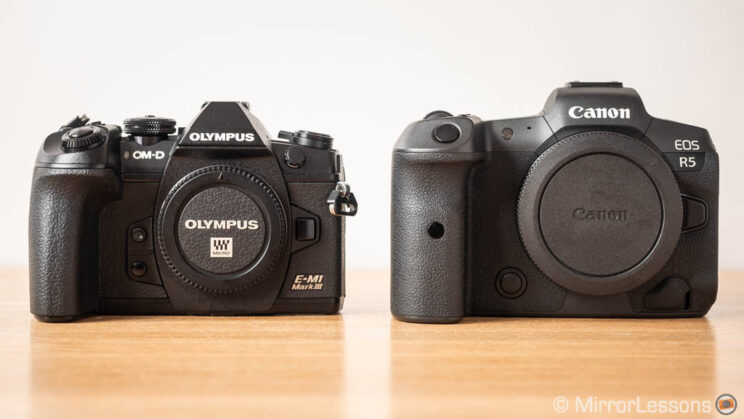
I did my comparison with the Olympus OM-D E-M1 III, the Canon Eos R5 and Eos R6.

The E-M1 III uses a 20.4MP four thirds sensor. It share the same sensor and autofocus system (minus a few features) as the flagship E-M1X.
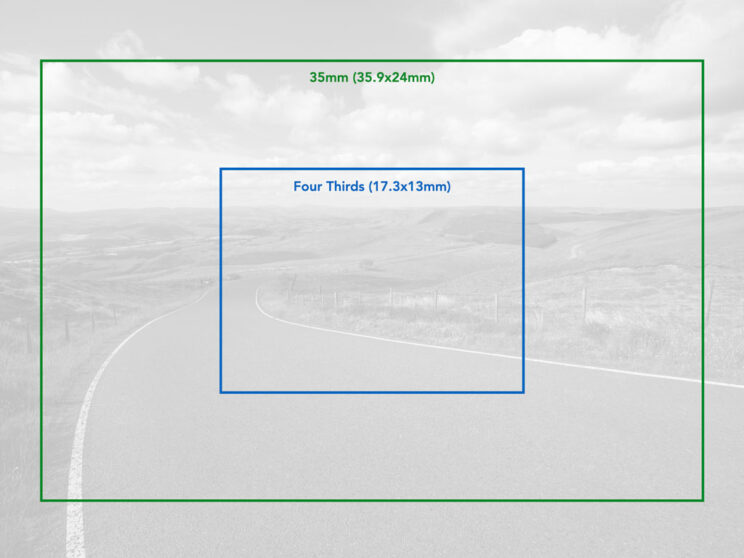
The Canon R5 and R6 have a full frame / 35mm format sensor which is about 4 times larger than the 4/3 sensor present in the OM-D model.
The Canon R5 and R6 are a bit heavier and larger, but overall the dimensions are not too far from those of the E-M1.
- E-M1 III: 134.1 x 90.9 x 68.9mm, 580g
- EOS R5: 138.5 x 97.5 x 88mm, 738g
- EOS R6: 138.4 × 97.5 × 88.4mm, 680g

Why use two Canon cameras, you might ask? Well, it’s because they have a different sensor resolution: 45MP on the R5 and 20.1MP on the R6. That is a choice micro four thirds customers don’t have at the moment (all the recent Panasonic and Olympus bodies have a 20MP sensor).
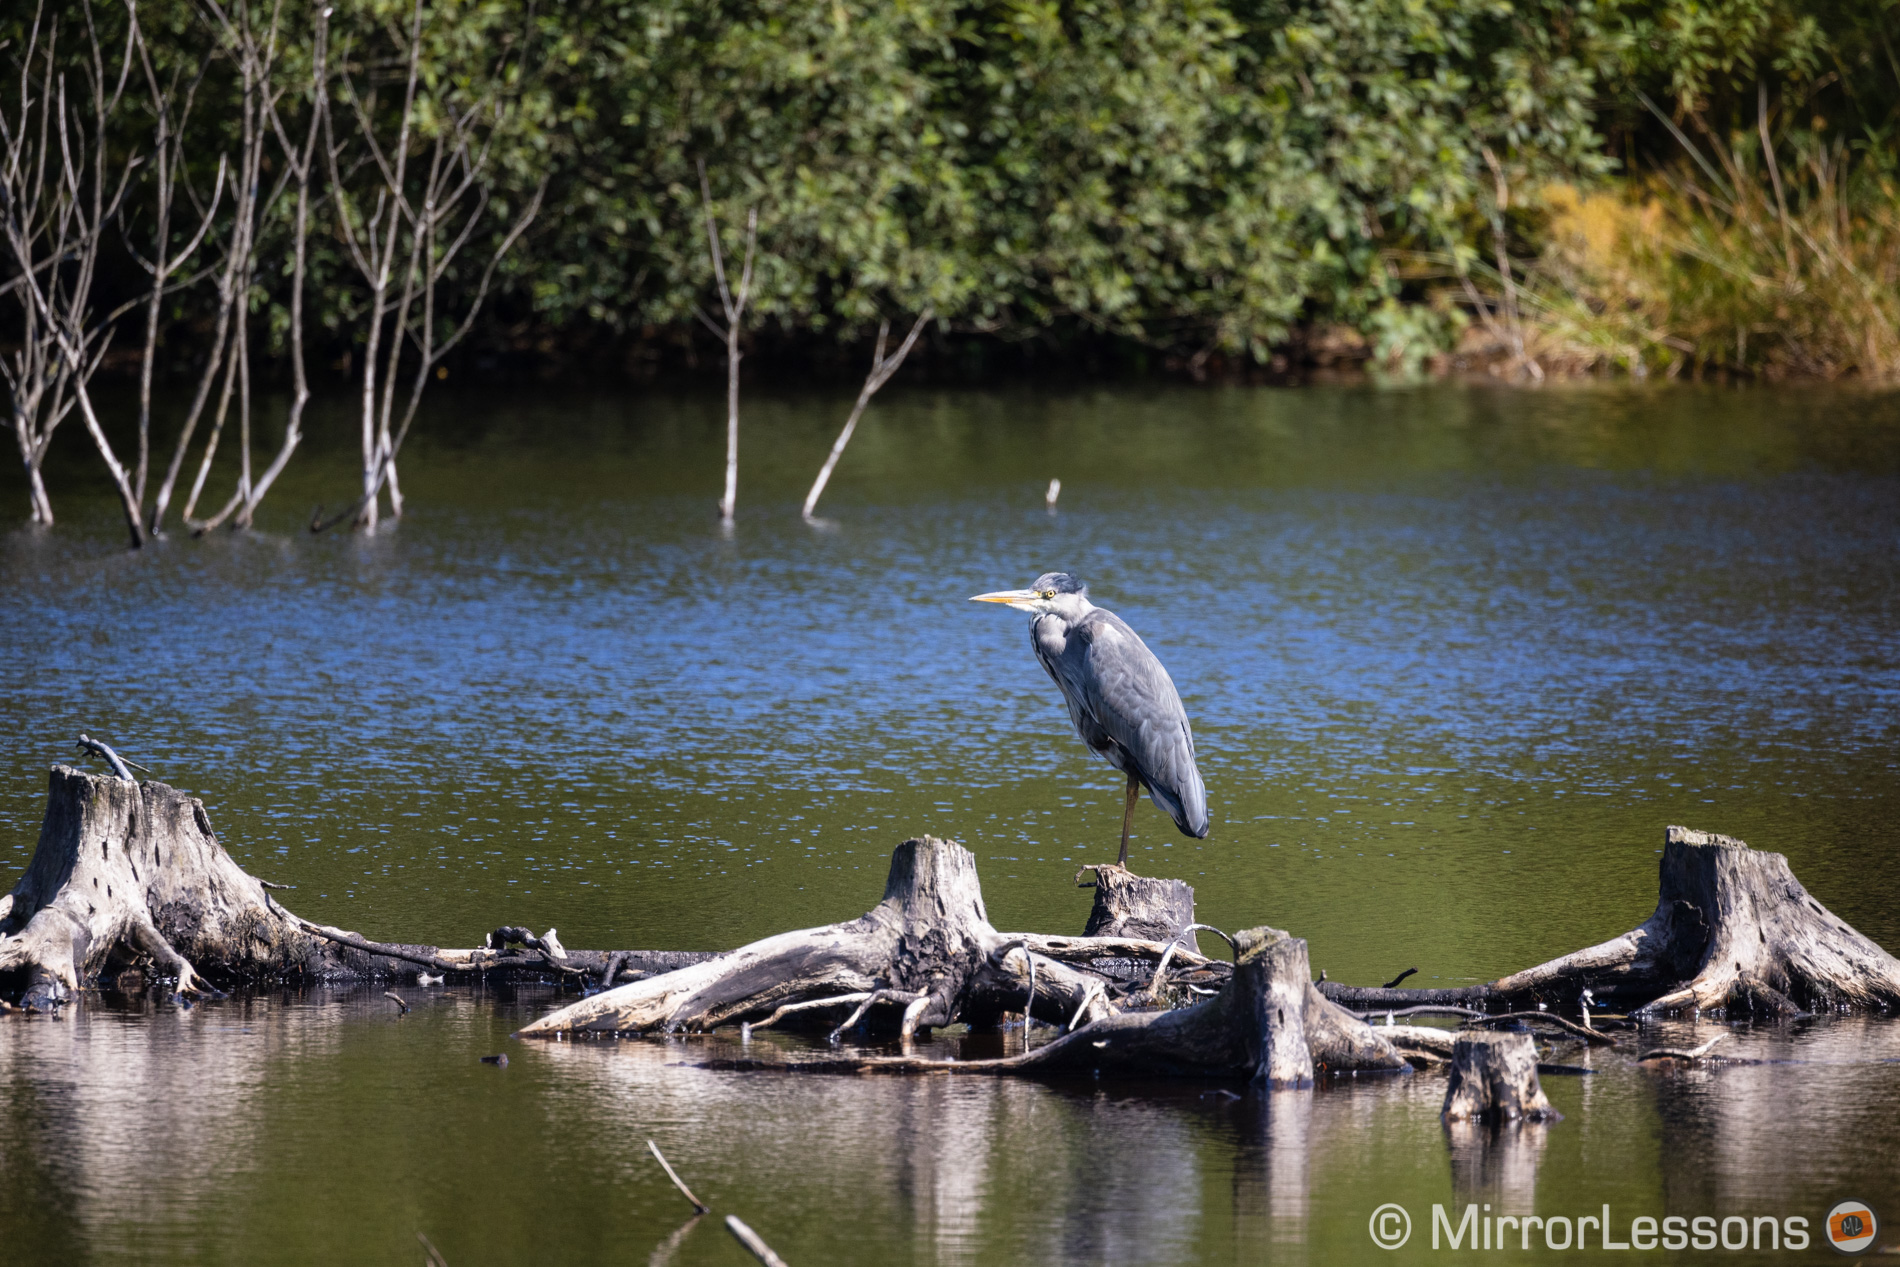
More resolution is welcome for wildlife photography, because often the longest telephoto is not enough and you need to crop your images in post to get closer to the subject, or adjust the composition.
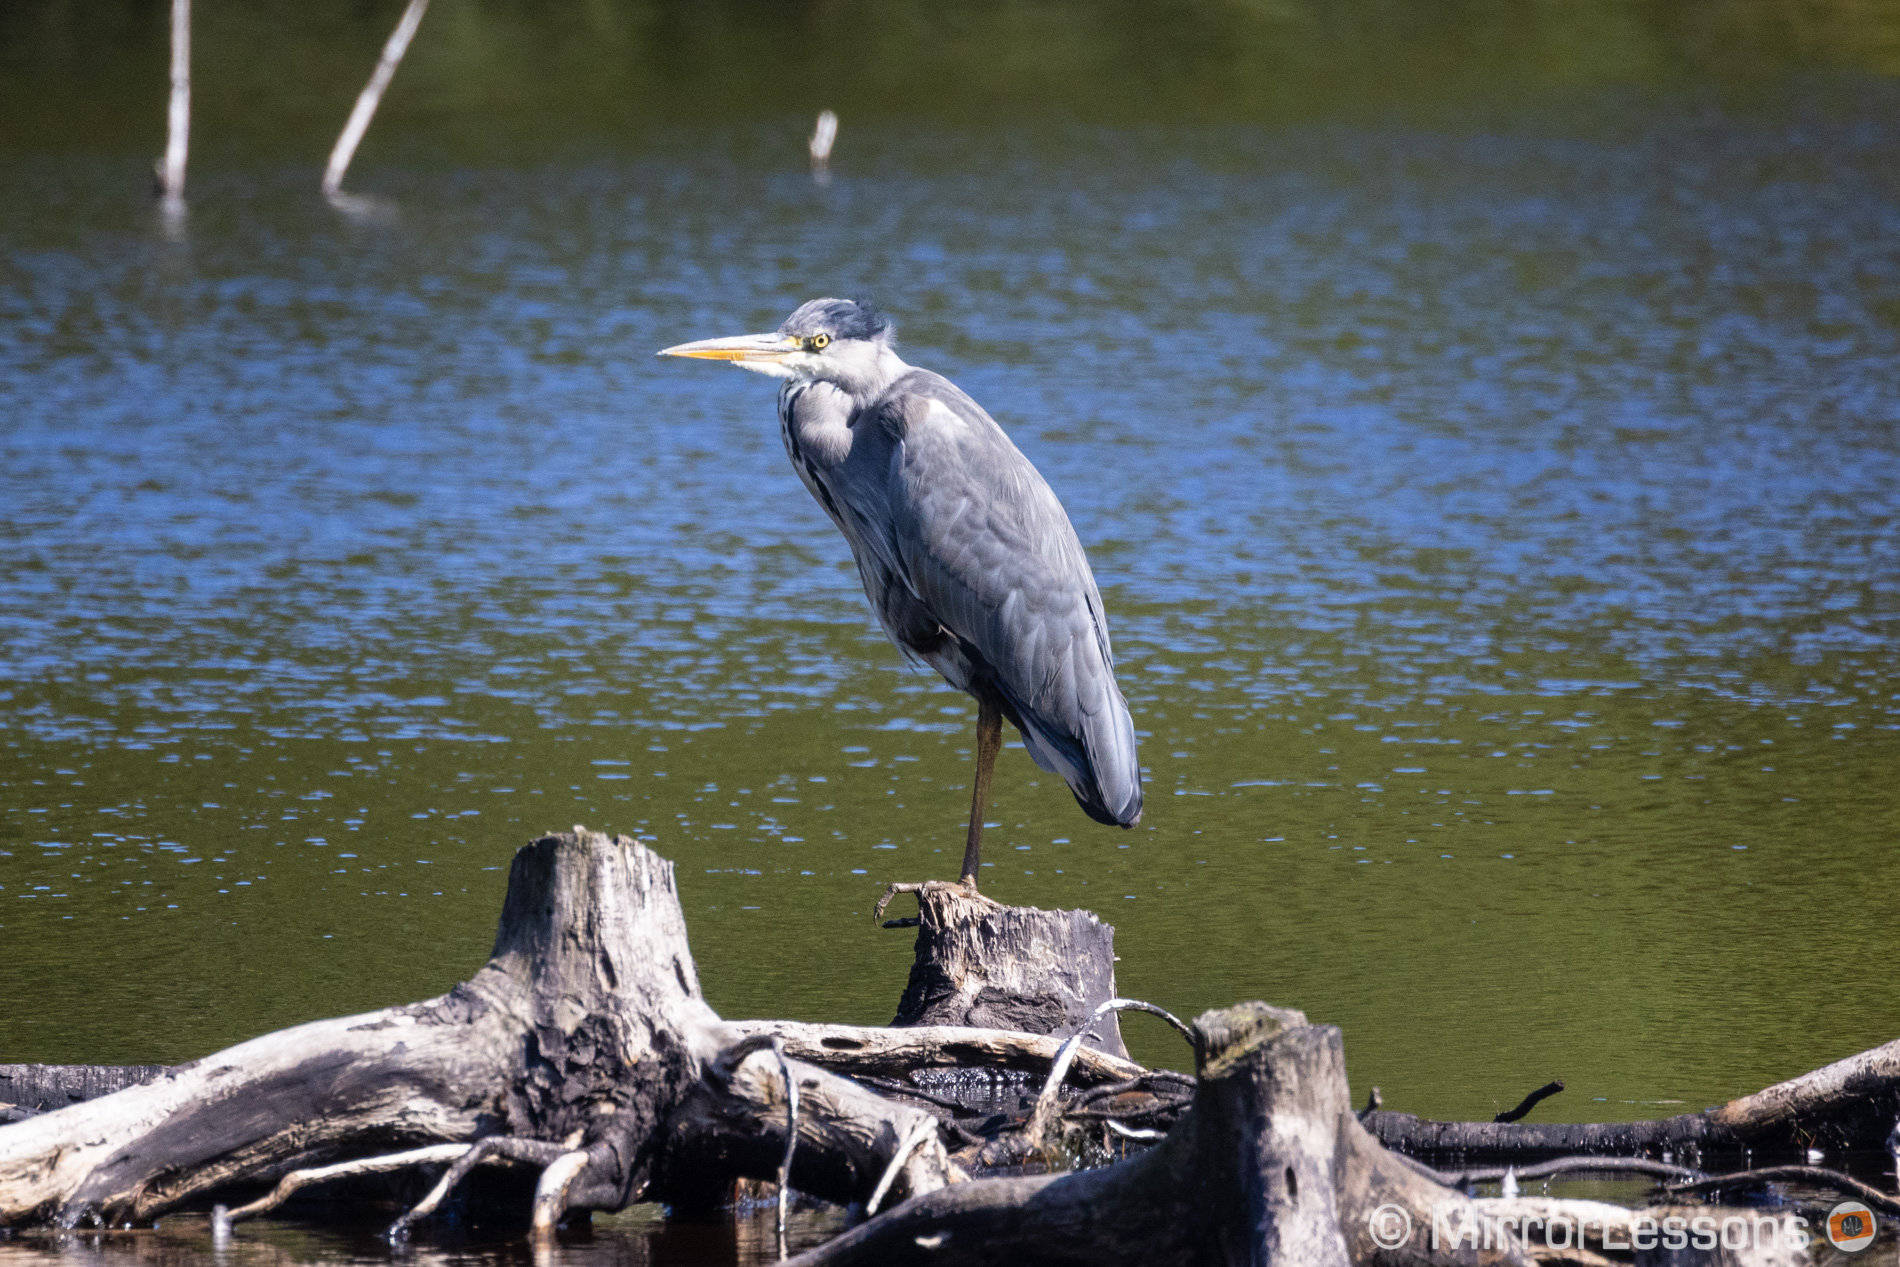
For example, the 800mm F11 was too short to capture the beautiful grey heron below. After cropping, I still had a decent resolution of 11MP. With a 20MP sensor, the same crop would have resulted in a 4.8MP image.
It’s worth mentioning that the E-M1 III has a High Resolution mode that delivers an 80MP file by combining 8 or 16 shots (using the sensor shift technology). It works hand-held and photographer Thomas Stirr proved that it is possible to use such a function for wildlife, but the animals need to be very still. Small movements inside the frame can cause artefacts or a loss of sharpness at the very least. Bigger movements will produce unpleasant ghost effects.
I discuss other relevant features and specifications in the “Feedback from the field” chapter further down.
Sharpness
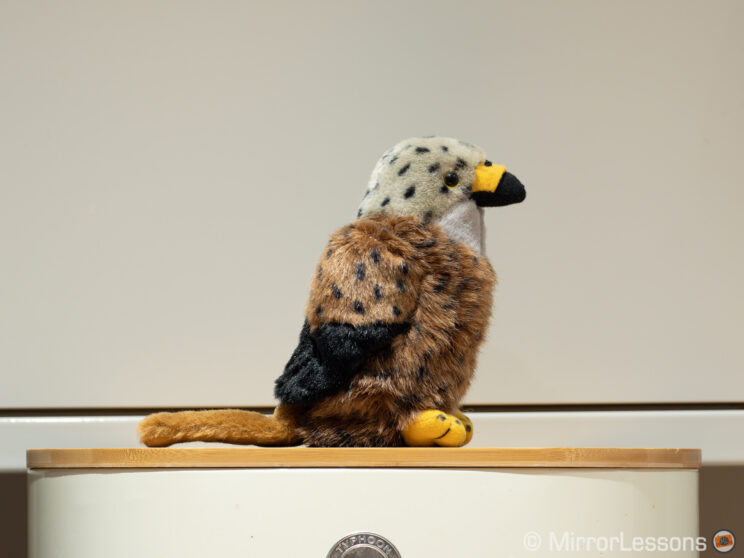
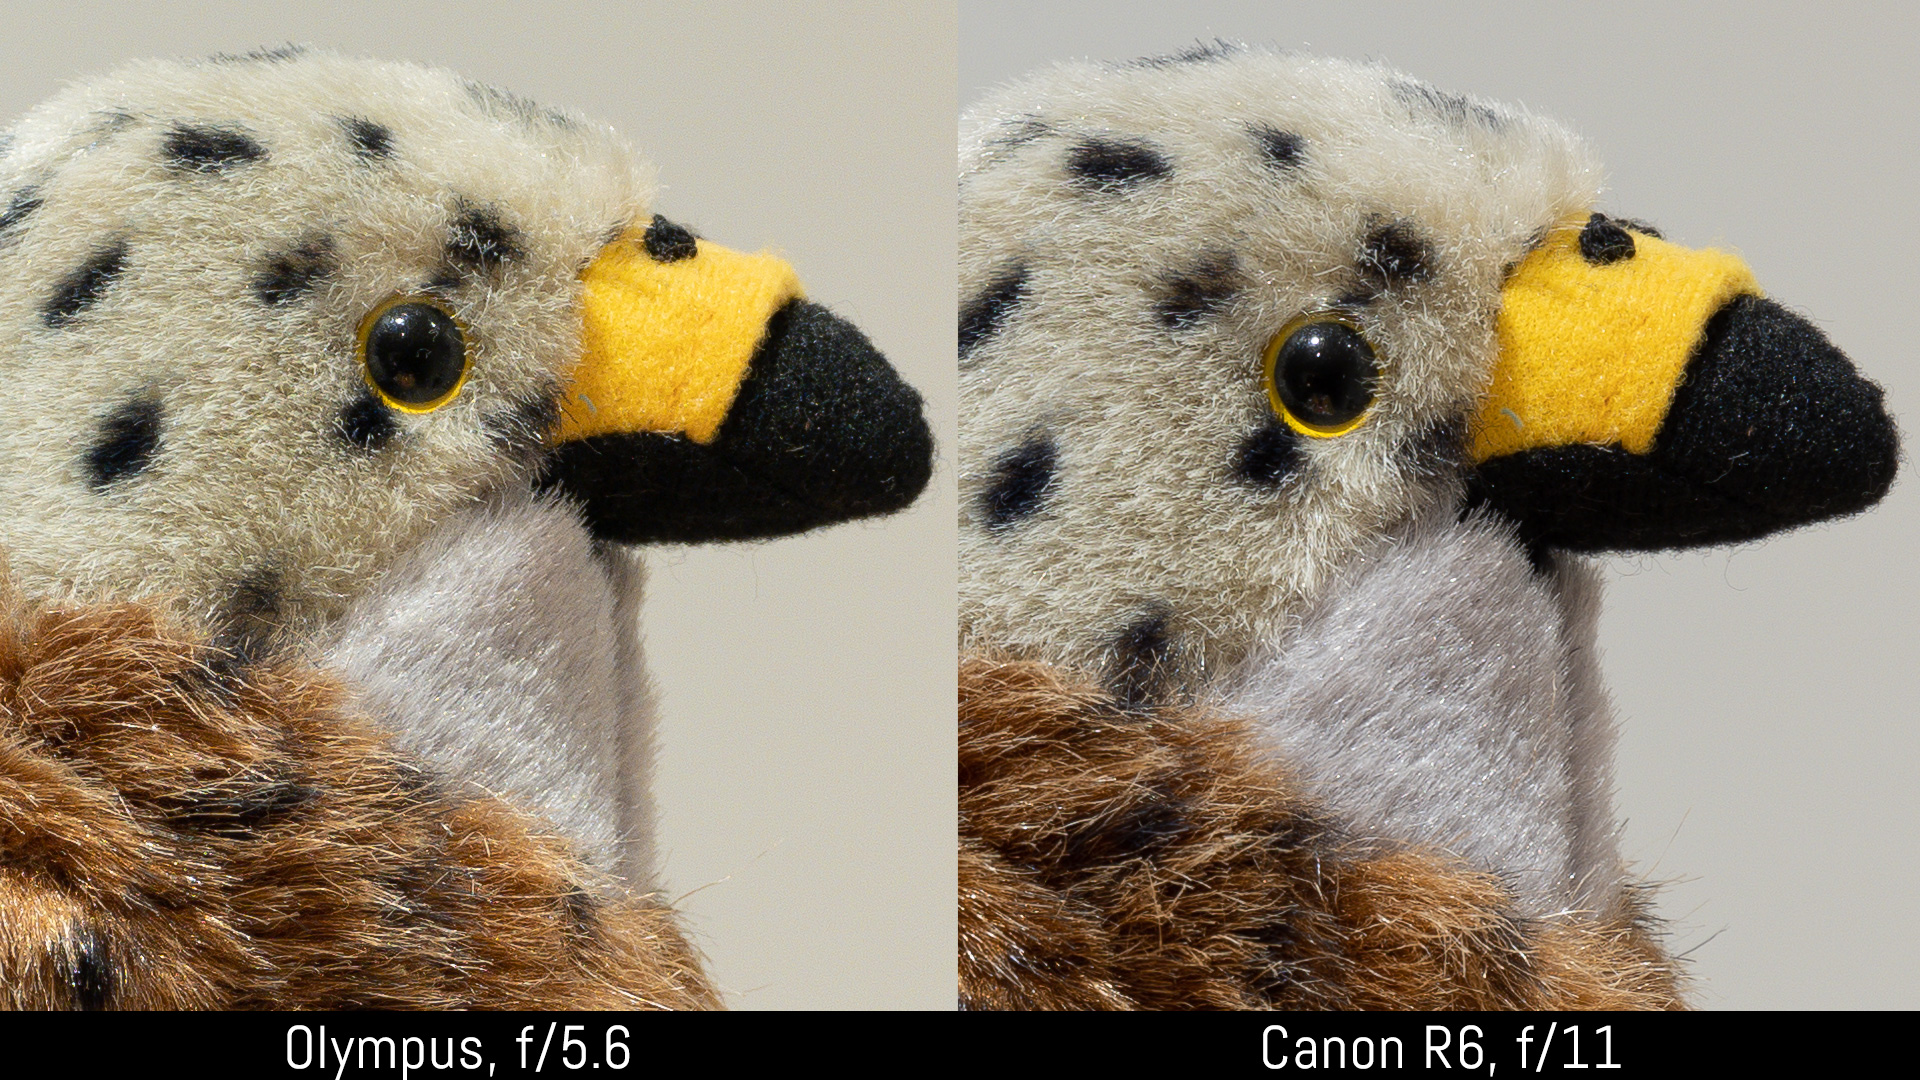
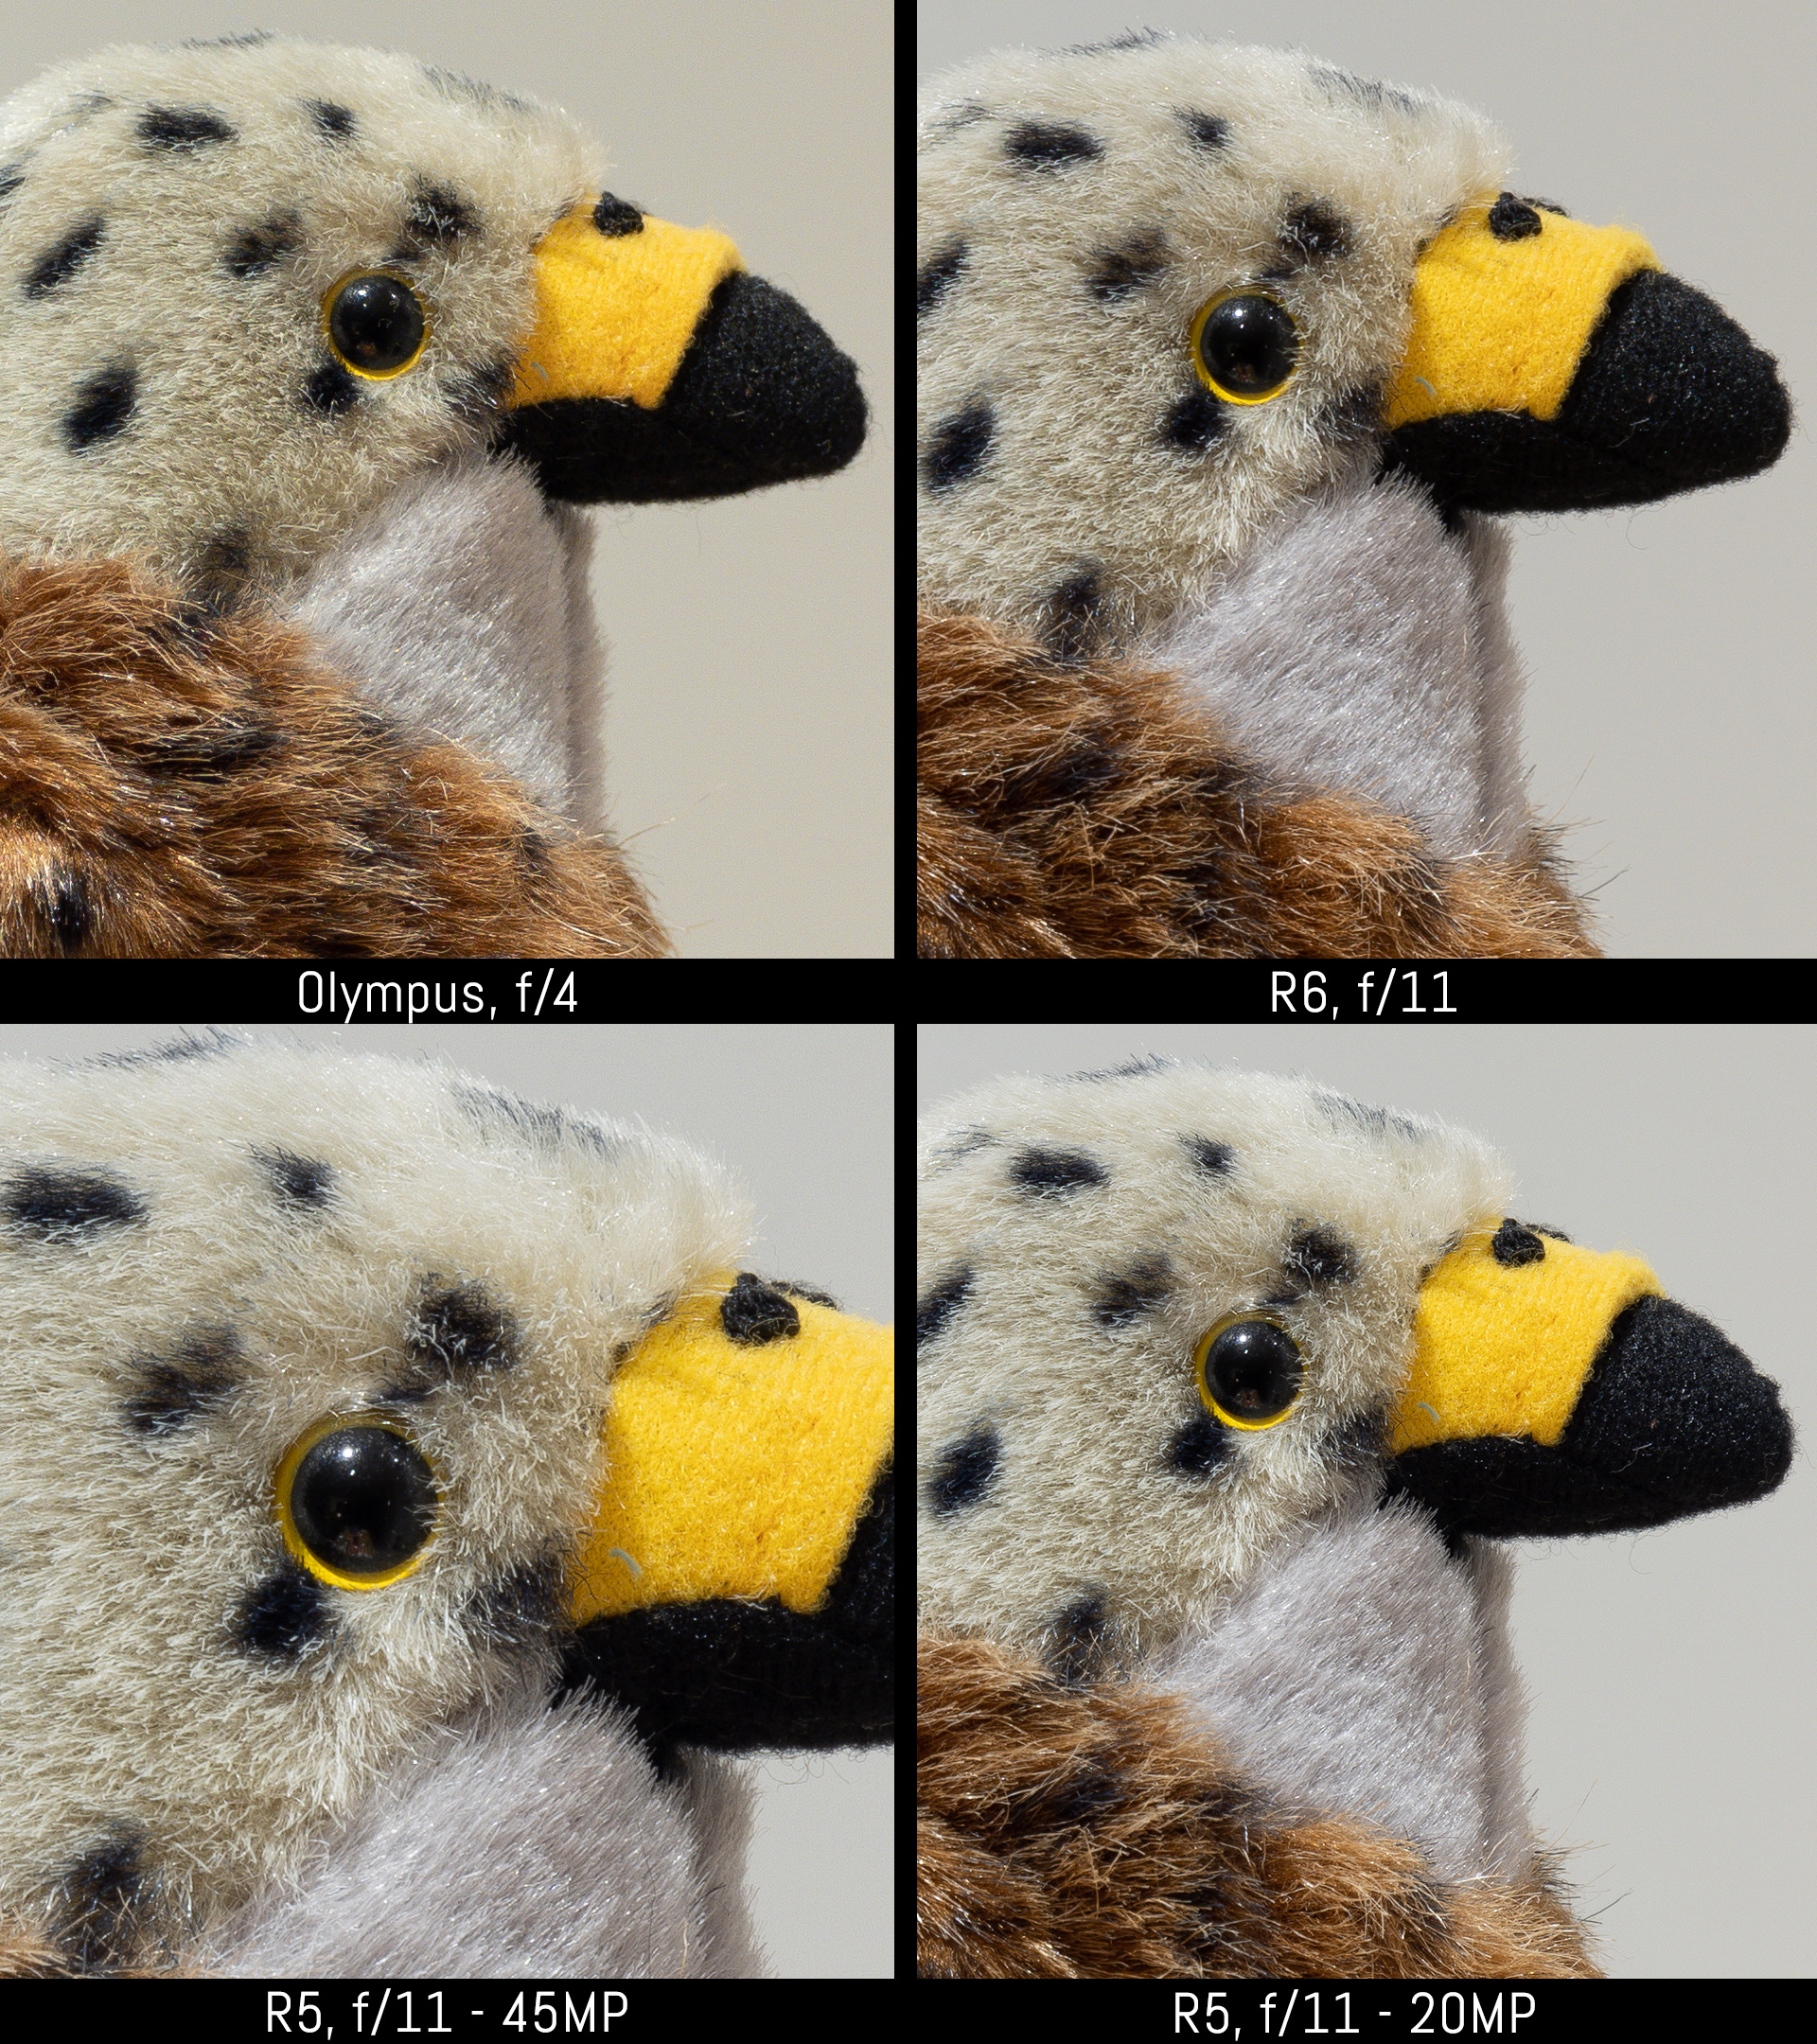
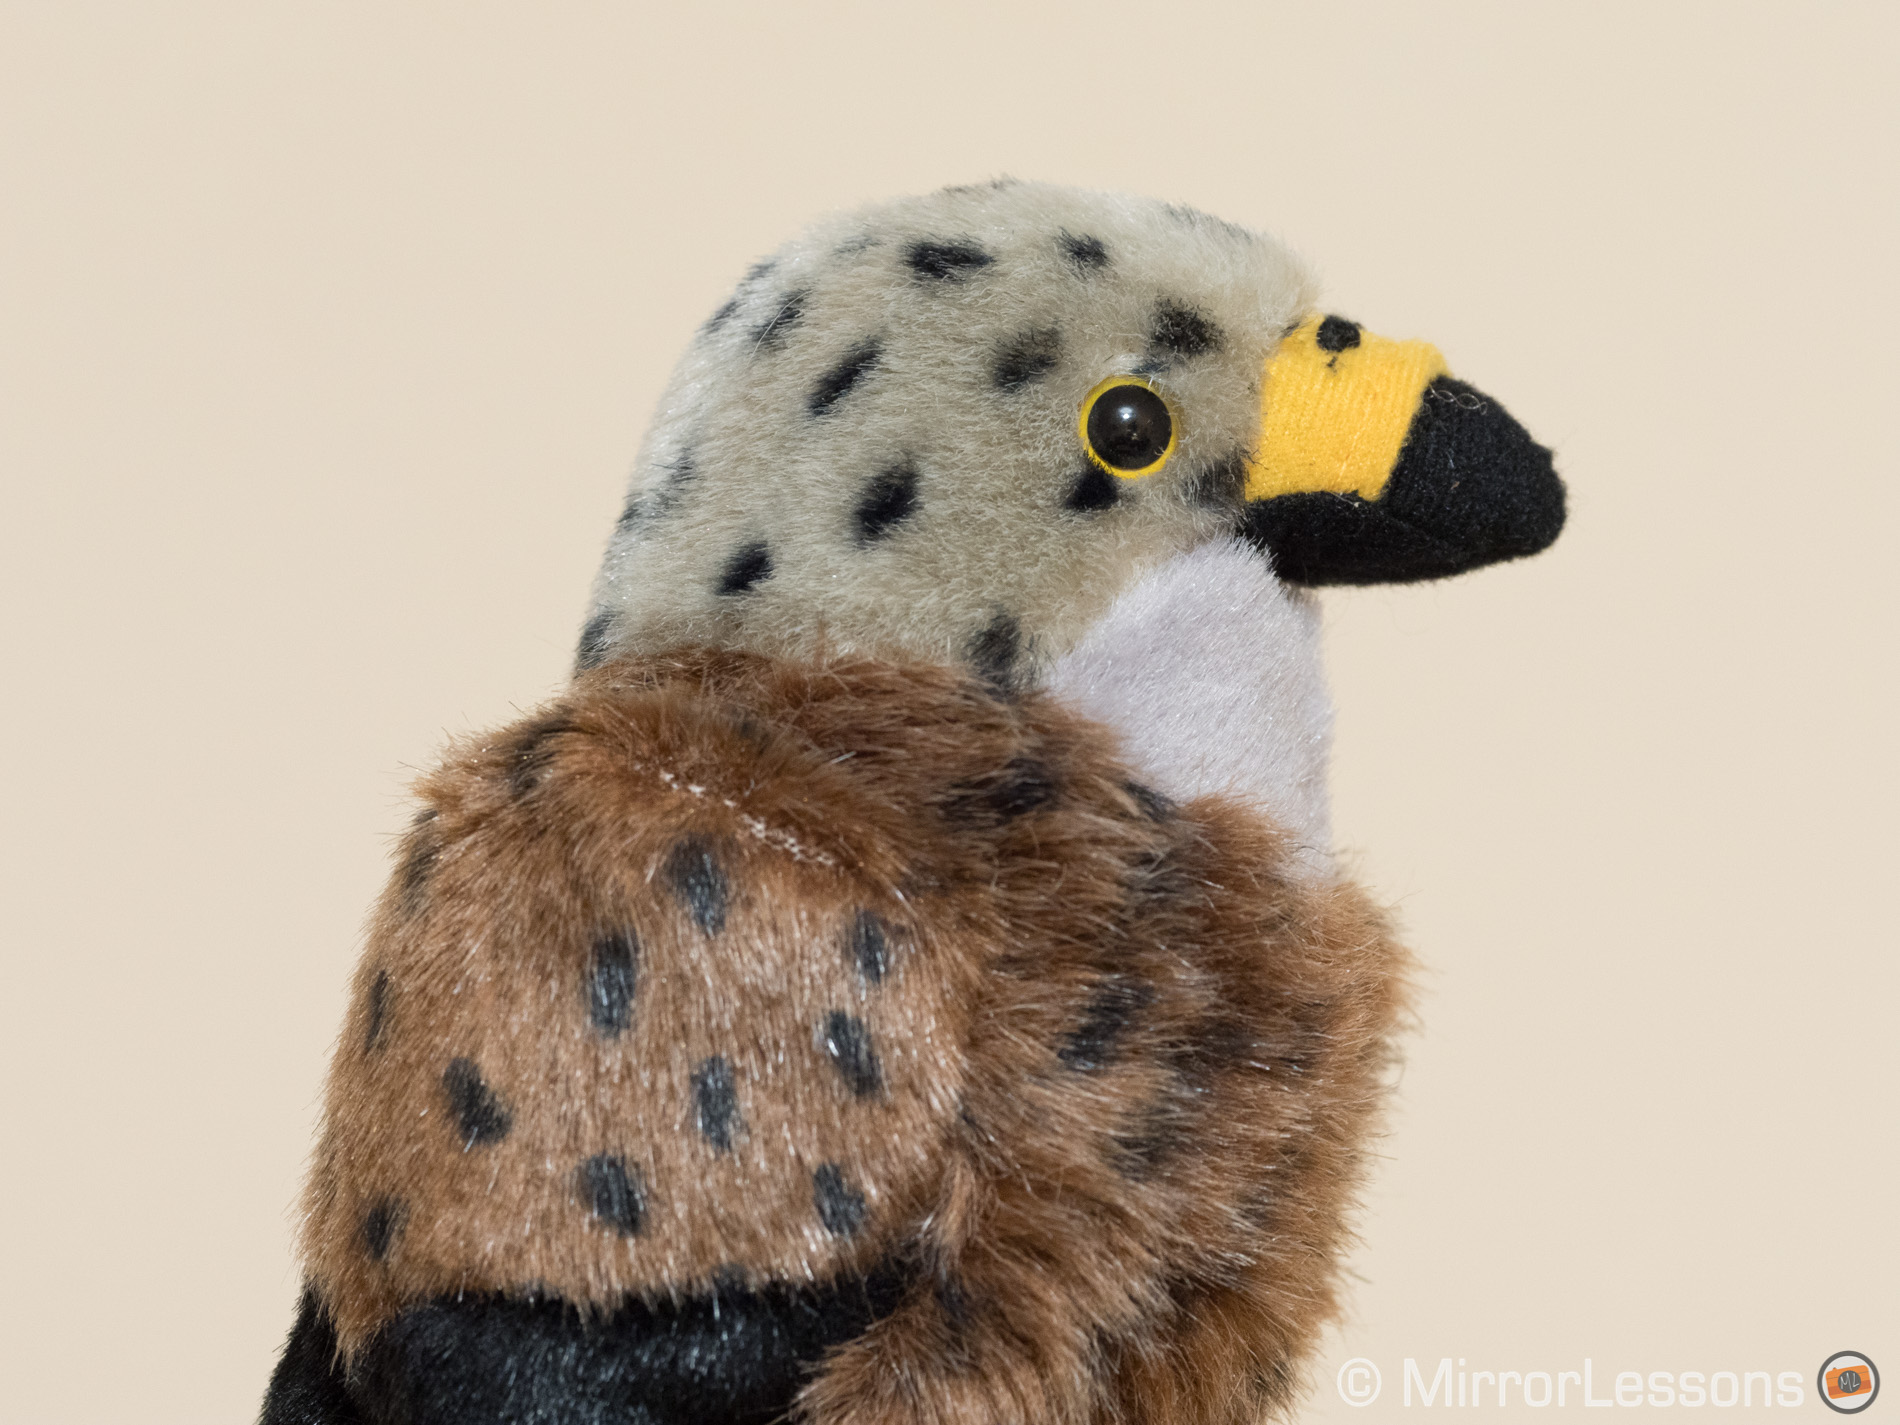
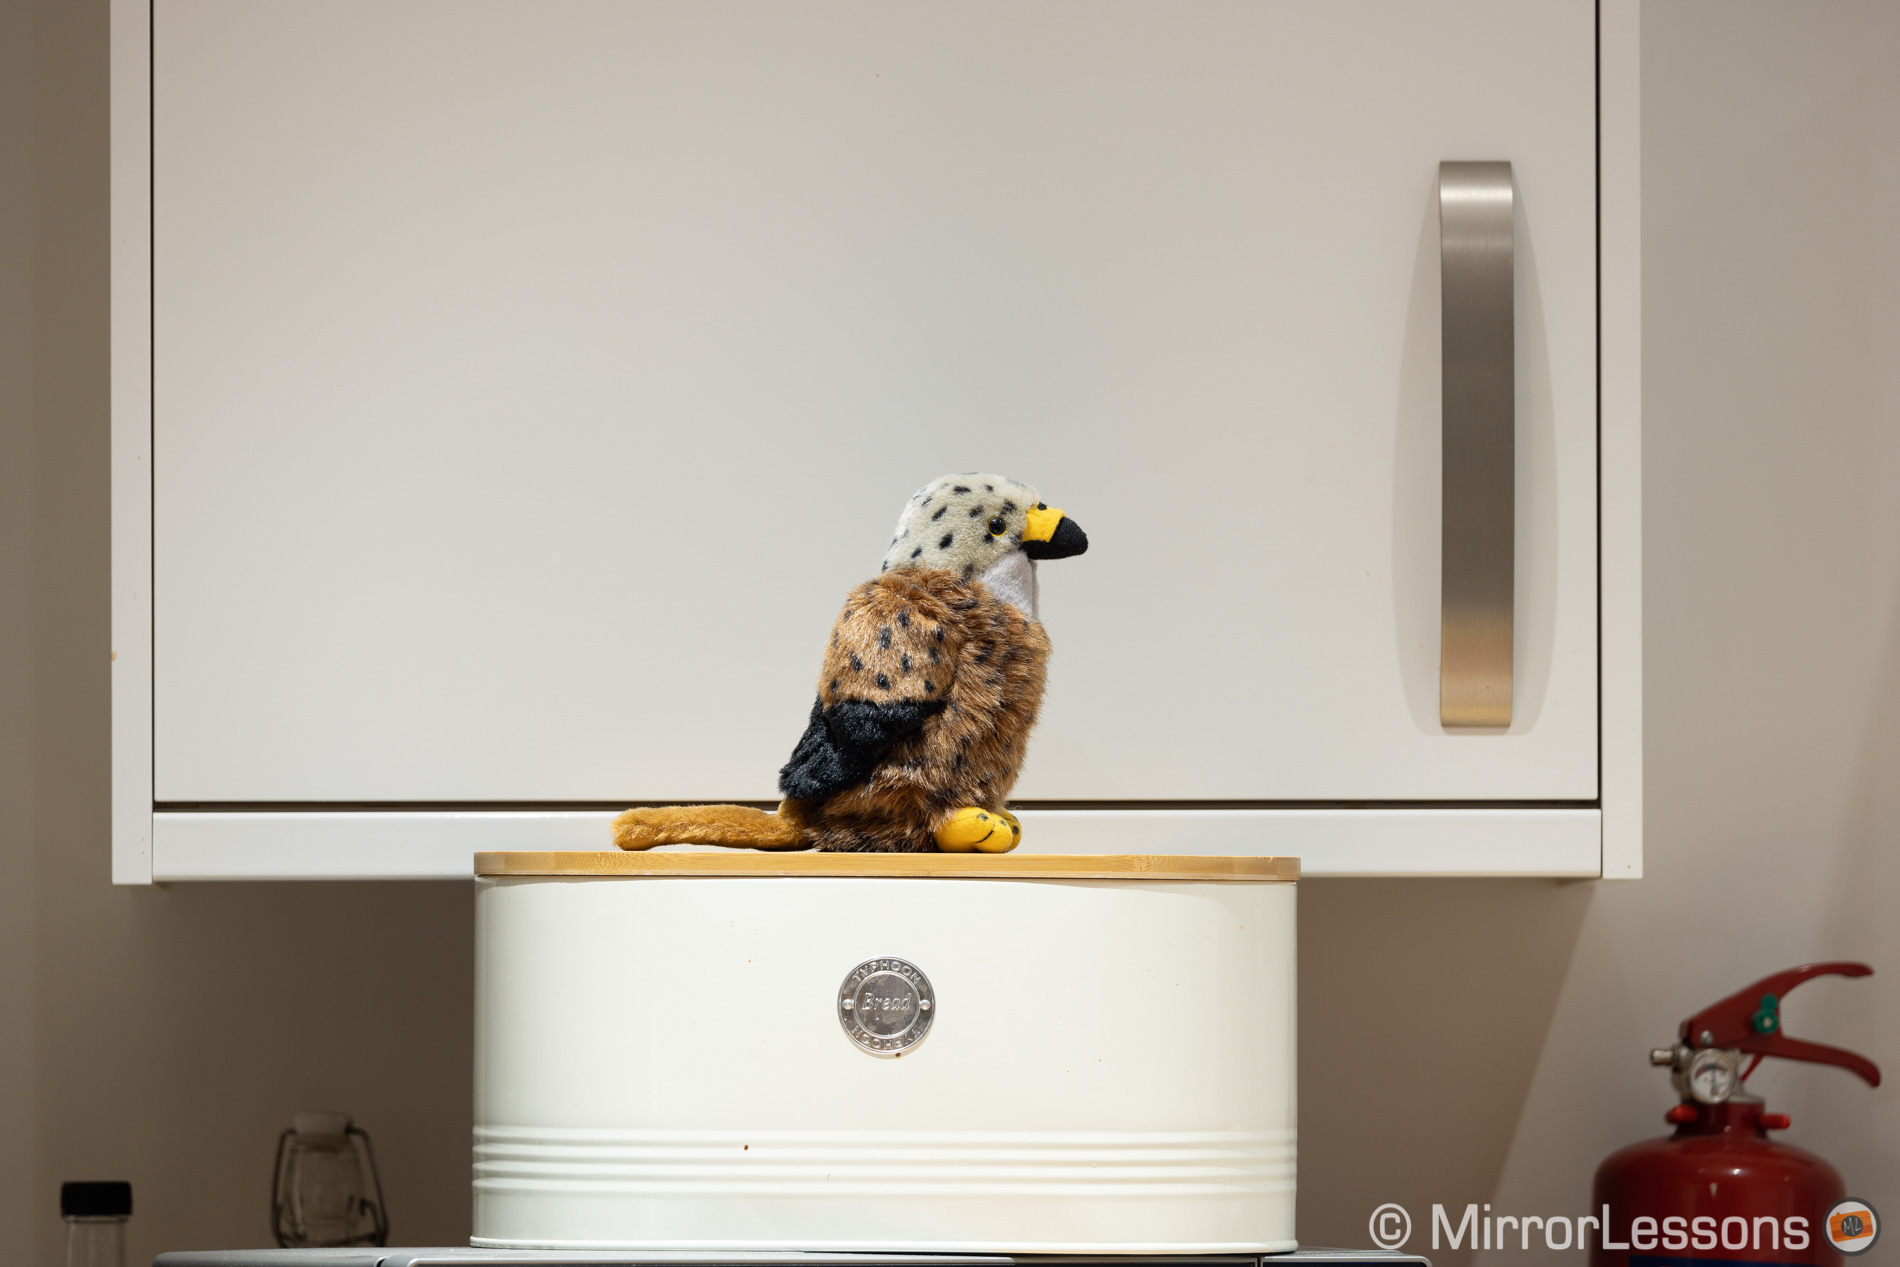
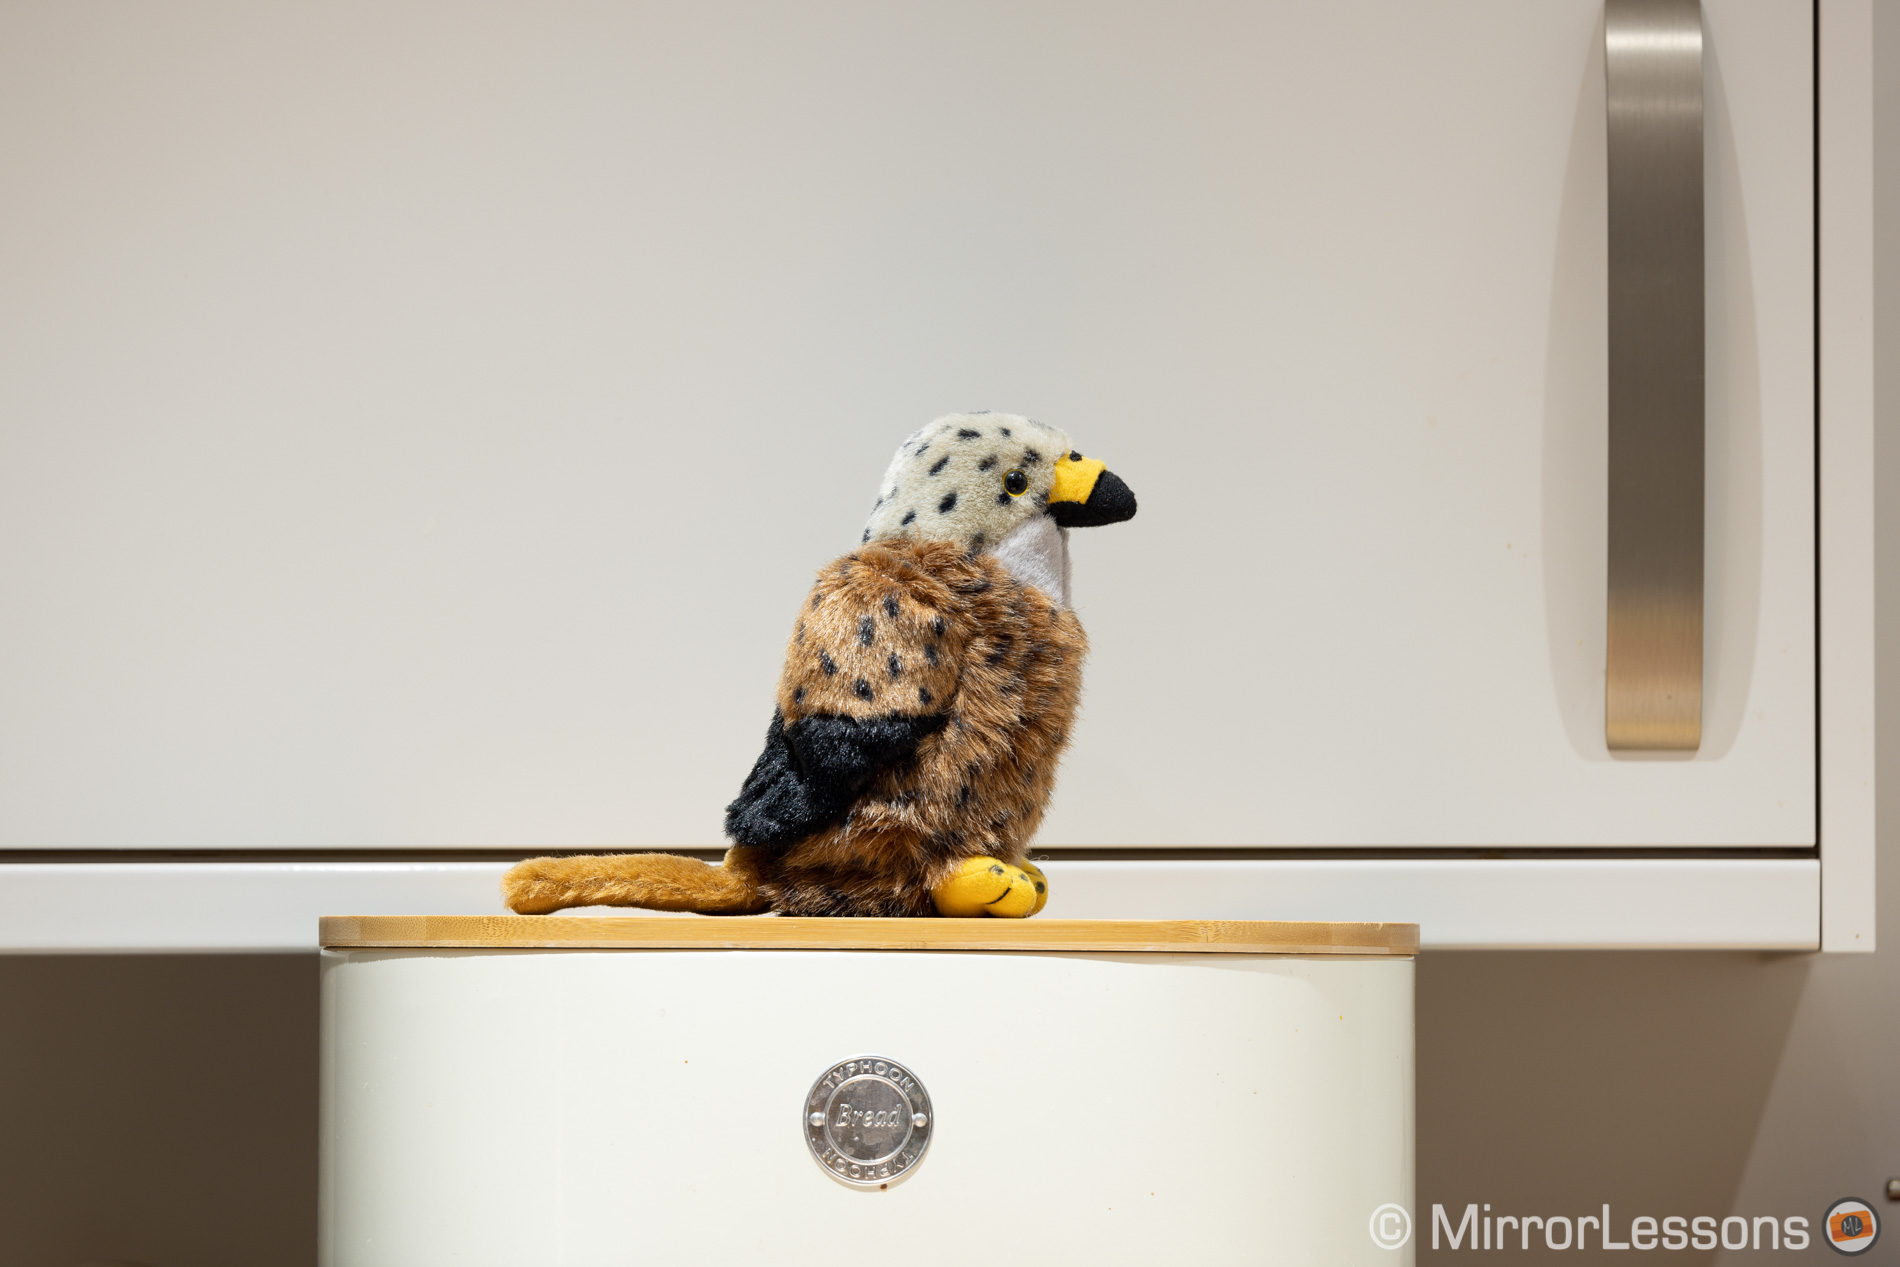
Let’s begin with a series of side by side photos taken at the base ISO level for each camera (200 for the Olympus, 100 for the Canon) to assess the quality of the two lenses, sharpness in particular.
I started with the R6 because it shares the same sensor resolution as the E-M1 III. Keep in mind that the Olympus sensor doesn’t have a low pass filter (neither does the R5), whereas the R6 has one, although I find it quite weak.
I tweaked the sharpening settings in Lightroom Classic a little to make the details crisper without losing the natural look. For reference, they are as follow:
- E-M1 III: sharpening 40 (default), Detail 50, Radius 1.0 (default), Masking 0 (default)
- R5: sharpening 50, Detail 75, Radius 1.0 (default), Masking 0 (default)
- R6: sharpening 50, Detail 50, Radius 1.0 (default), Masking 0 (default)
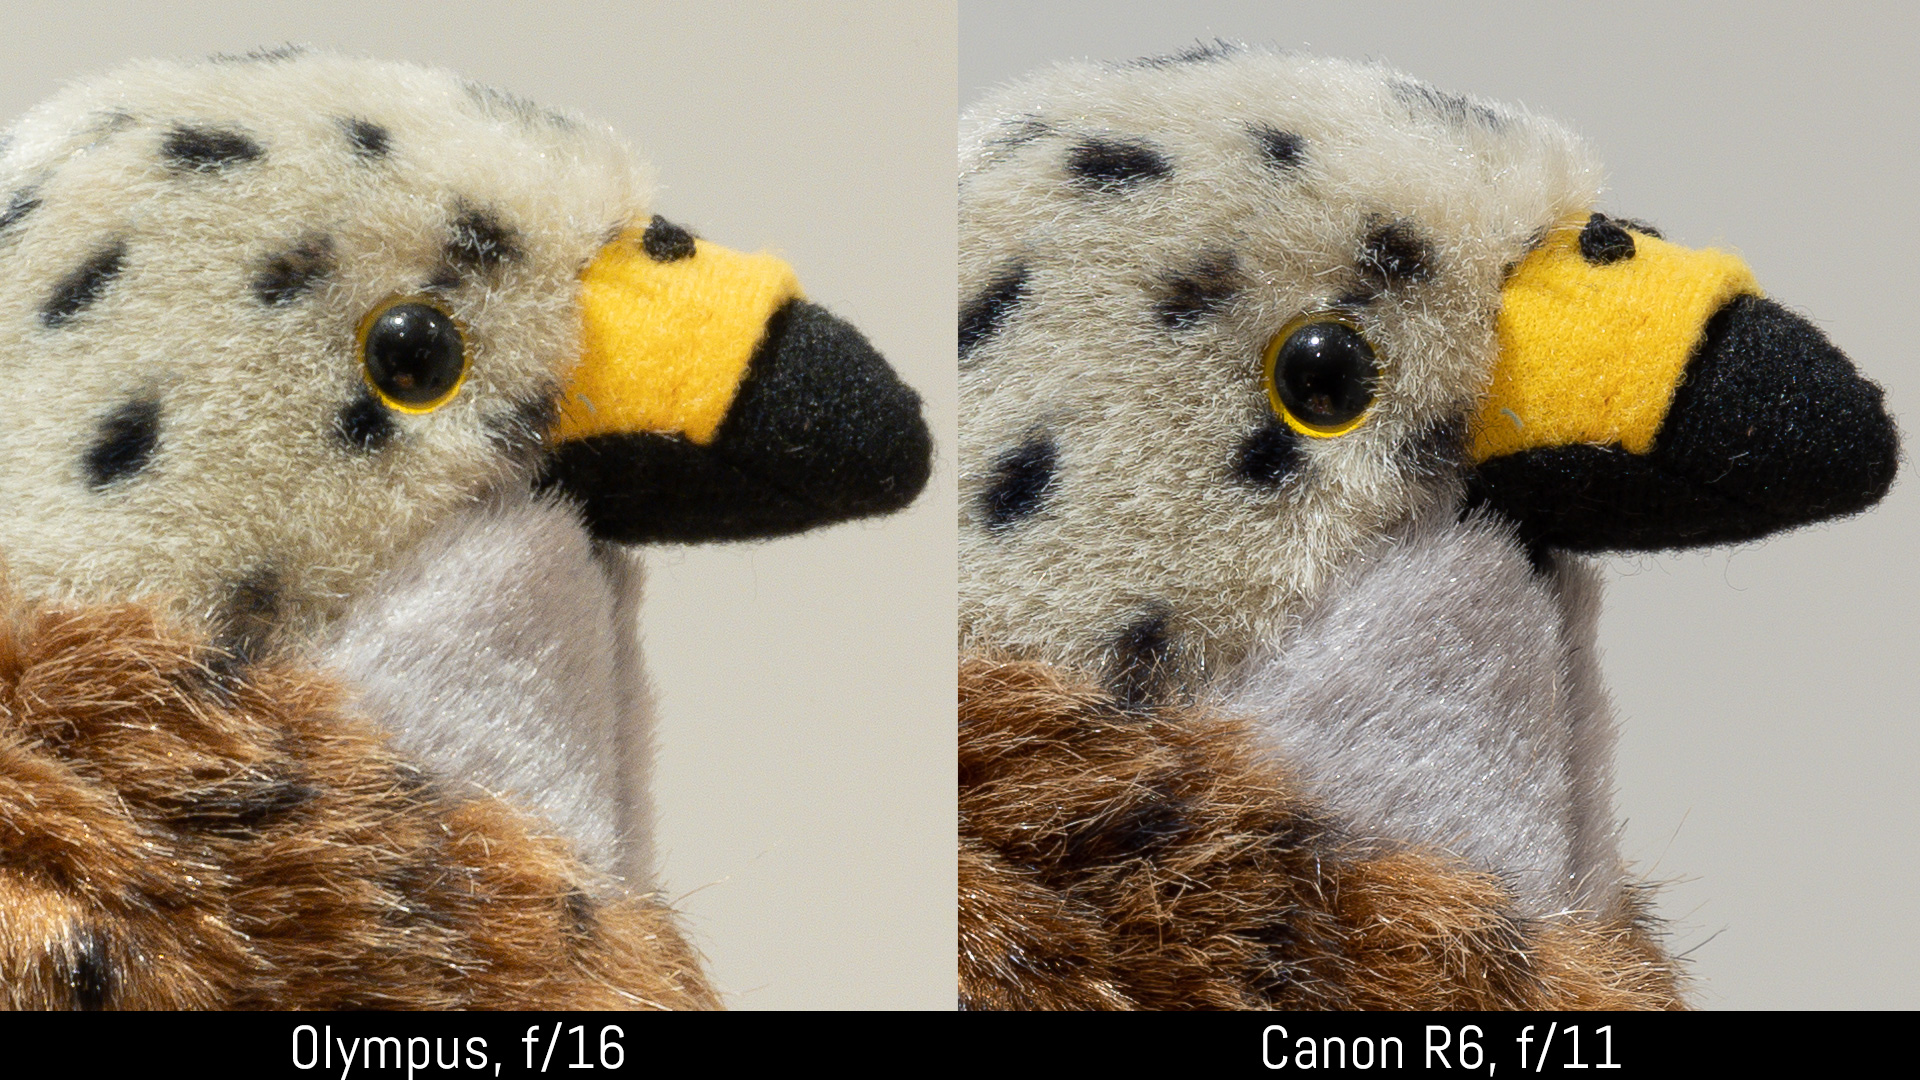
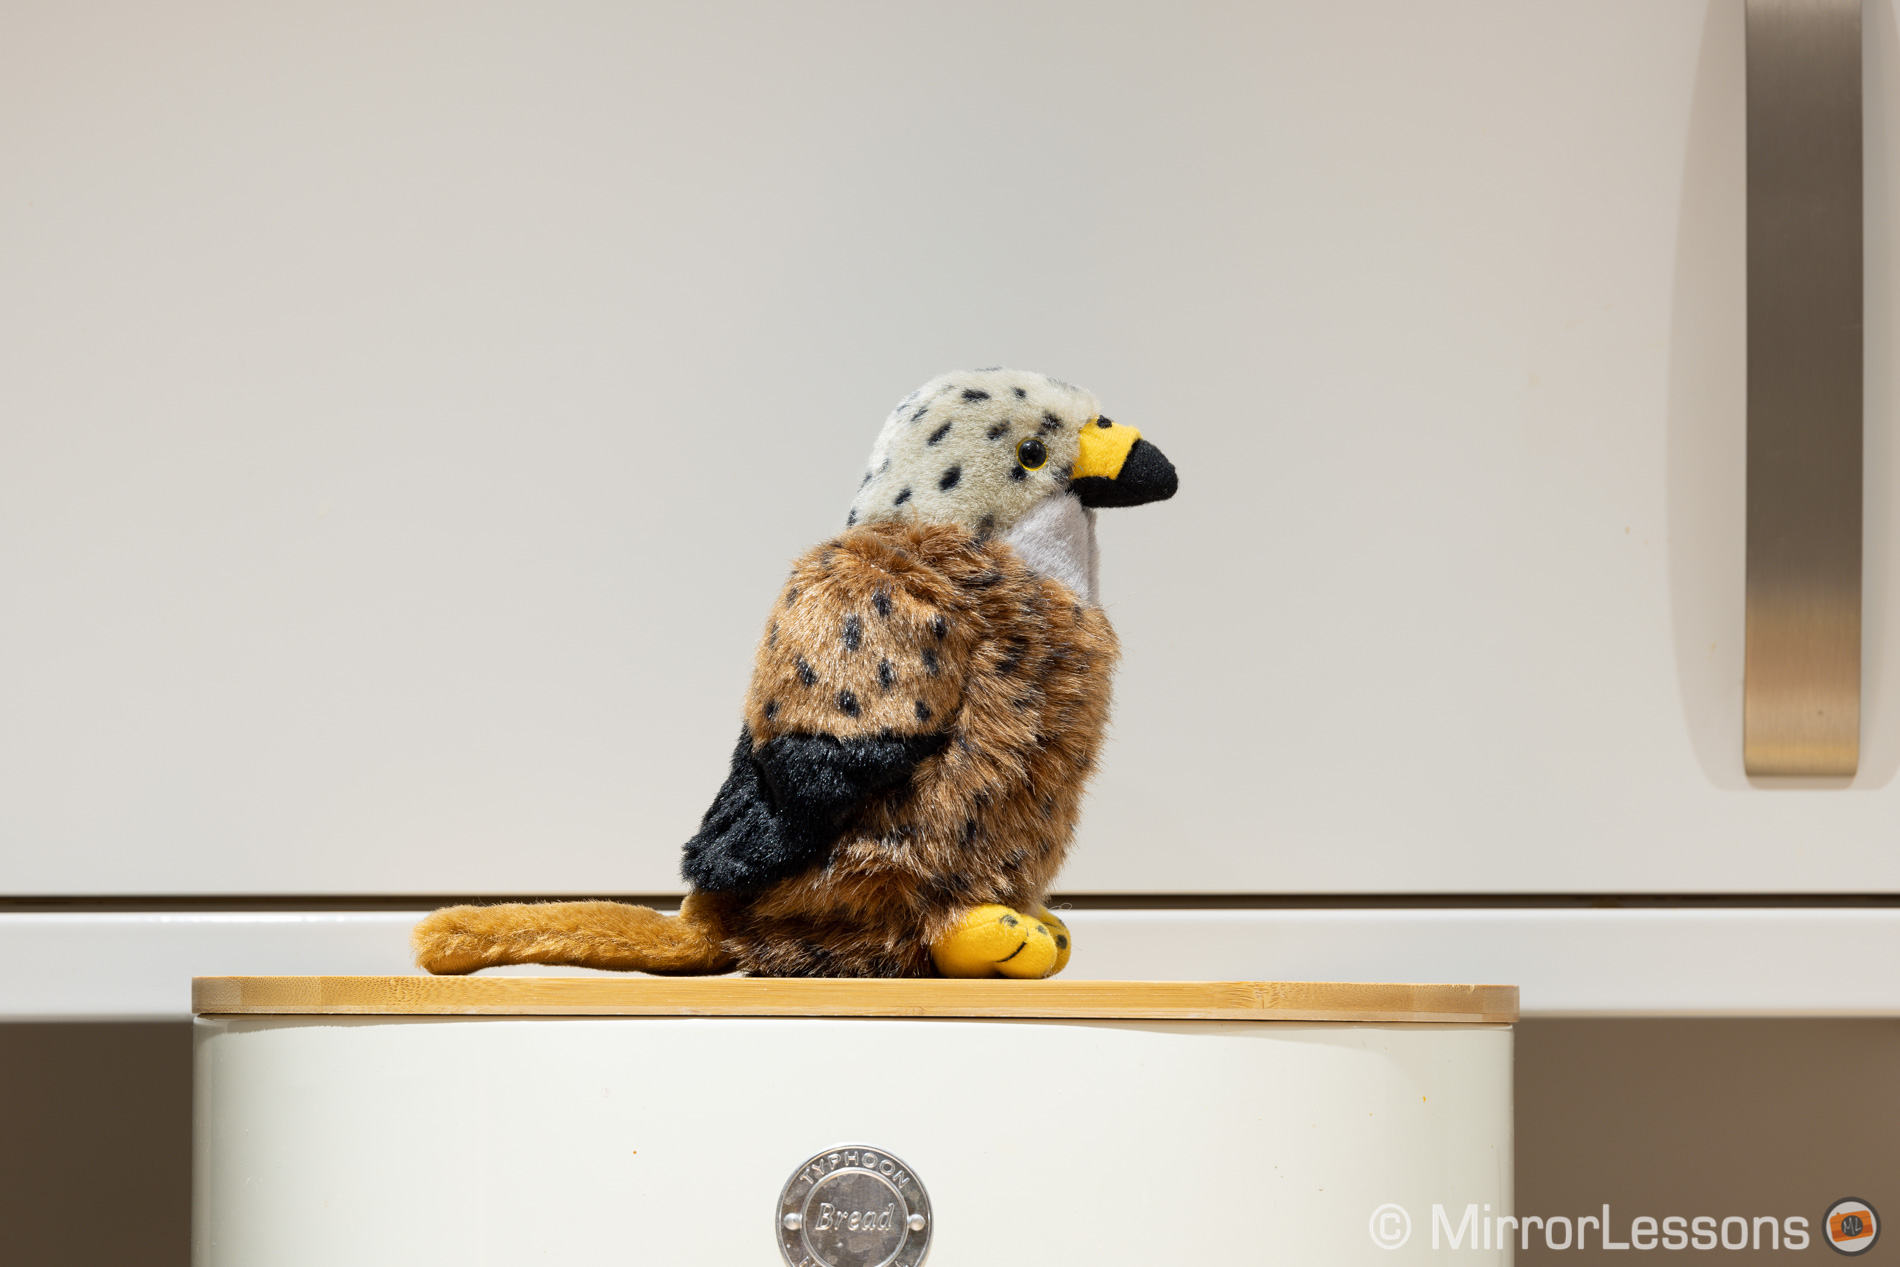
As you can see, the results are comparable. The Olympus lens already peaks at its fastest aperture, and maintains the same level of details until f/11, where there is a small loss in sharpness. From f/16, diffraction becomes more visible.


Below I included an example with the Eos R5 so that you can appreciate the extra resolution, first with a crop taken from the 45MP file, then a second one after resizing the image to 20MP to equal the resolution of the other two cameras.
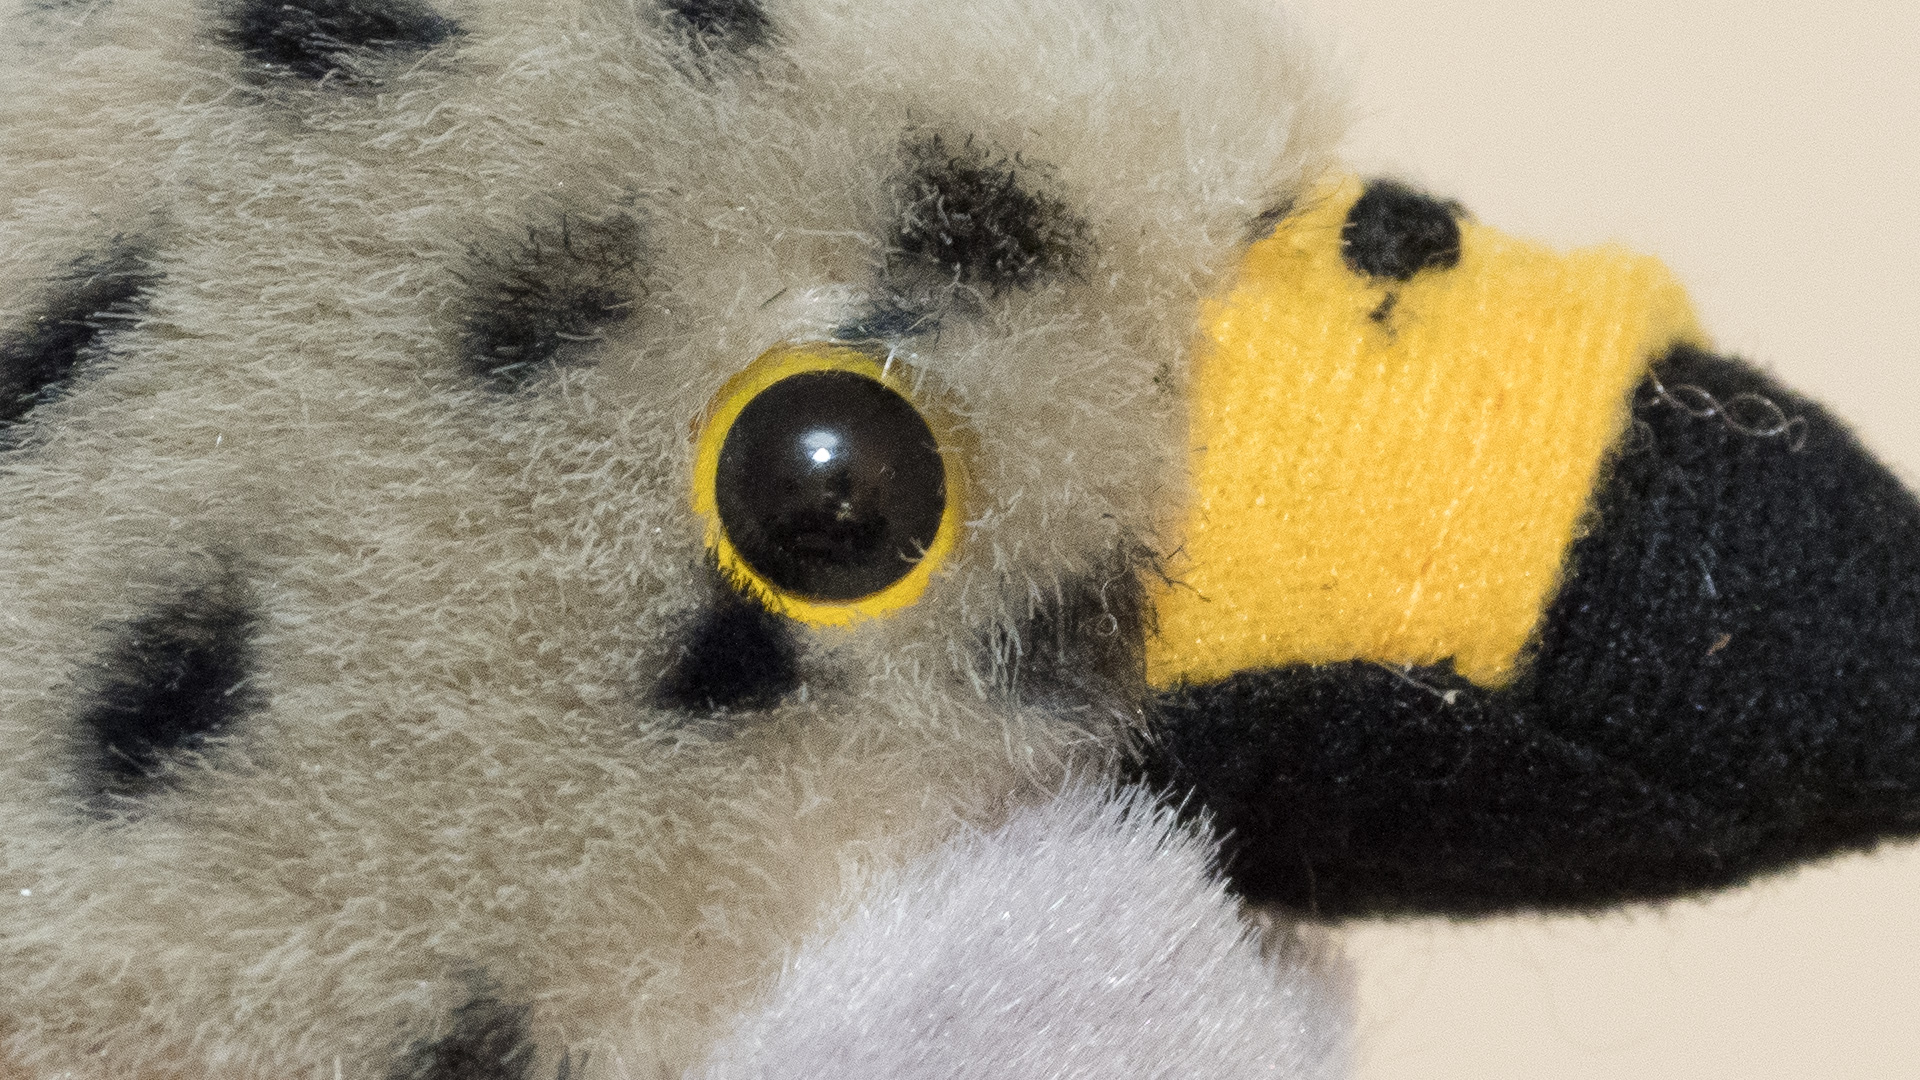
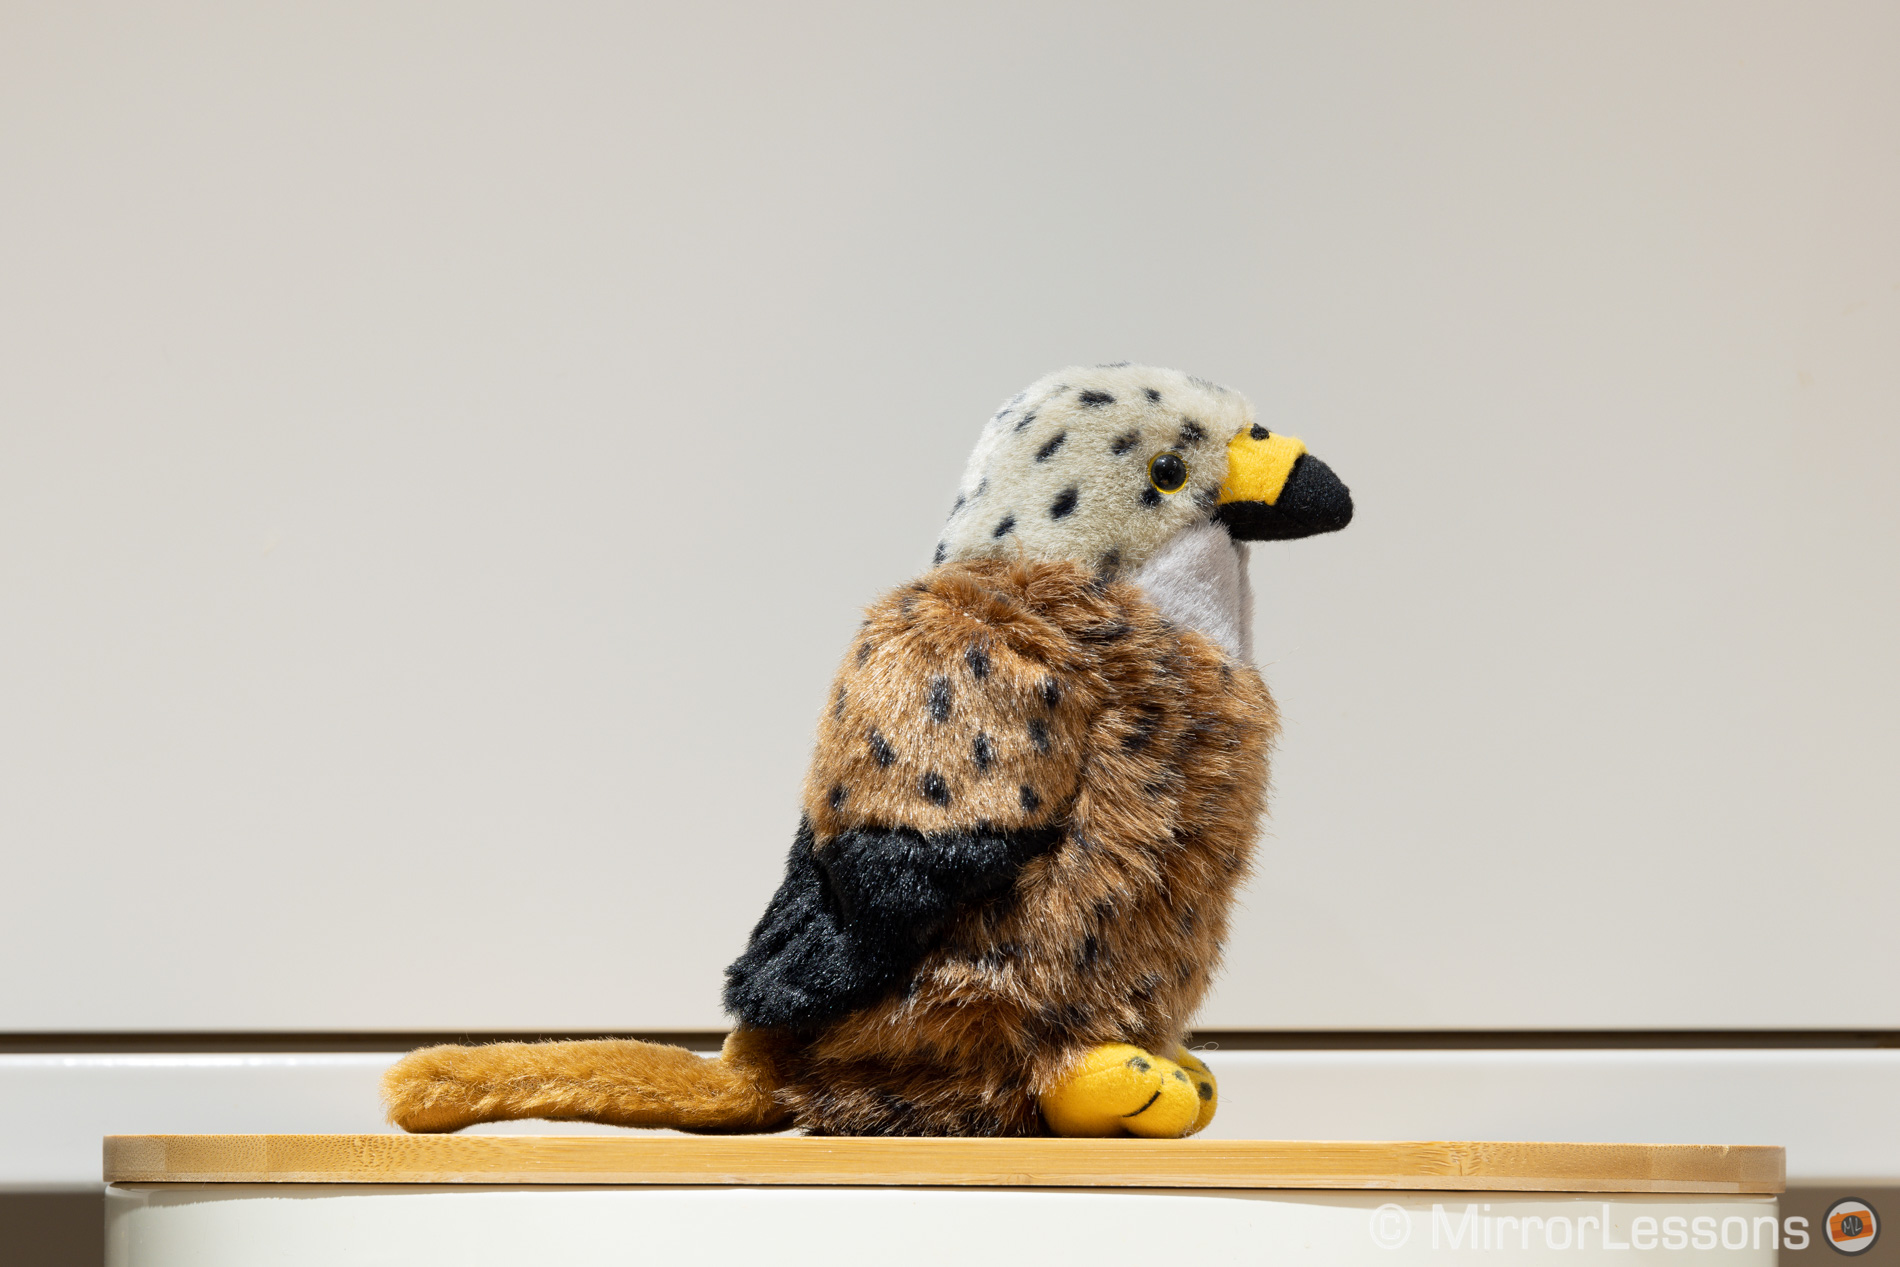
A quick note about sharpening in post. Based on my experience over many years, you have to be more careful with the Olympus RAW file (or any micro four thirds image) because digital grain can appear more easily. You’ll notice especially in zones with a plain colour (the blue sky for example). You can see below how the image looks as if I applied the same amount of sharpening as the R6 file.
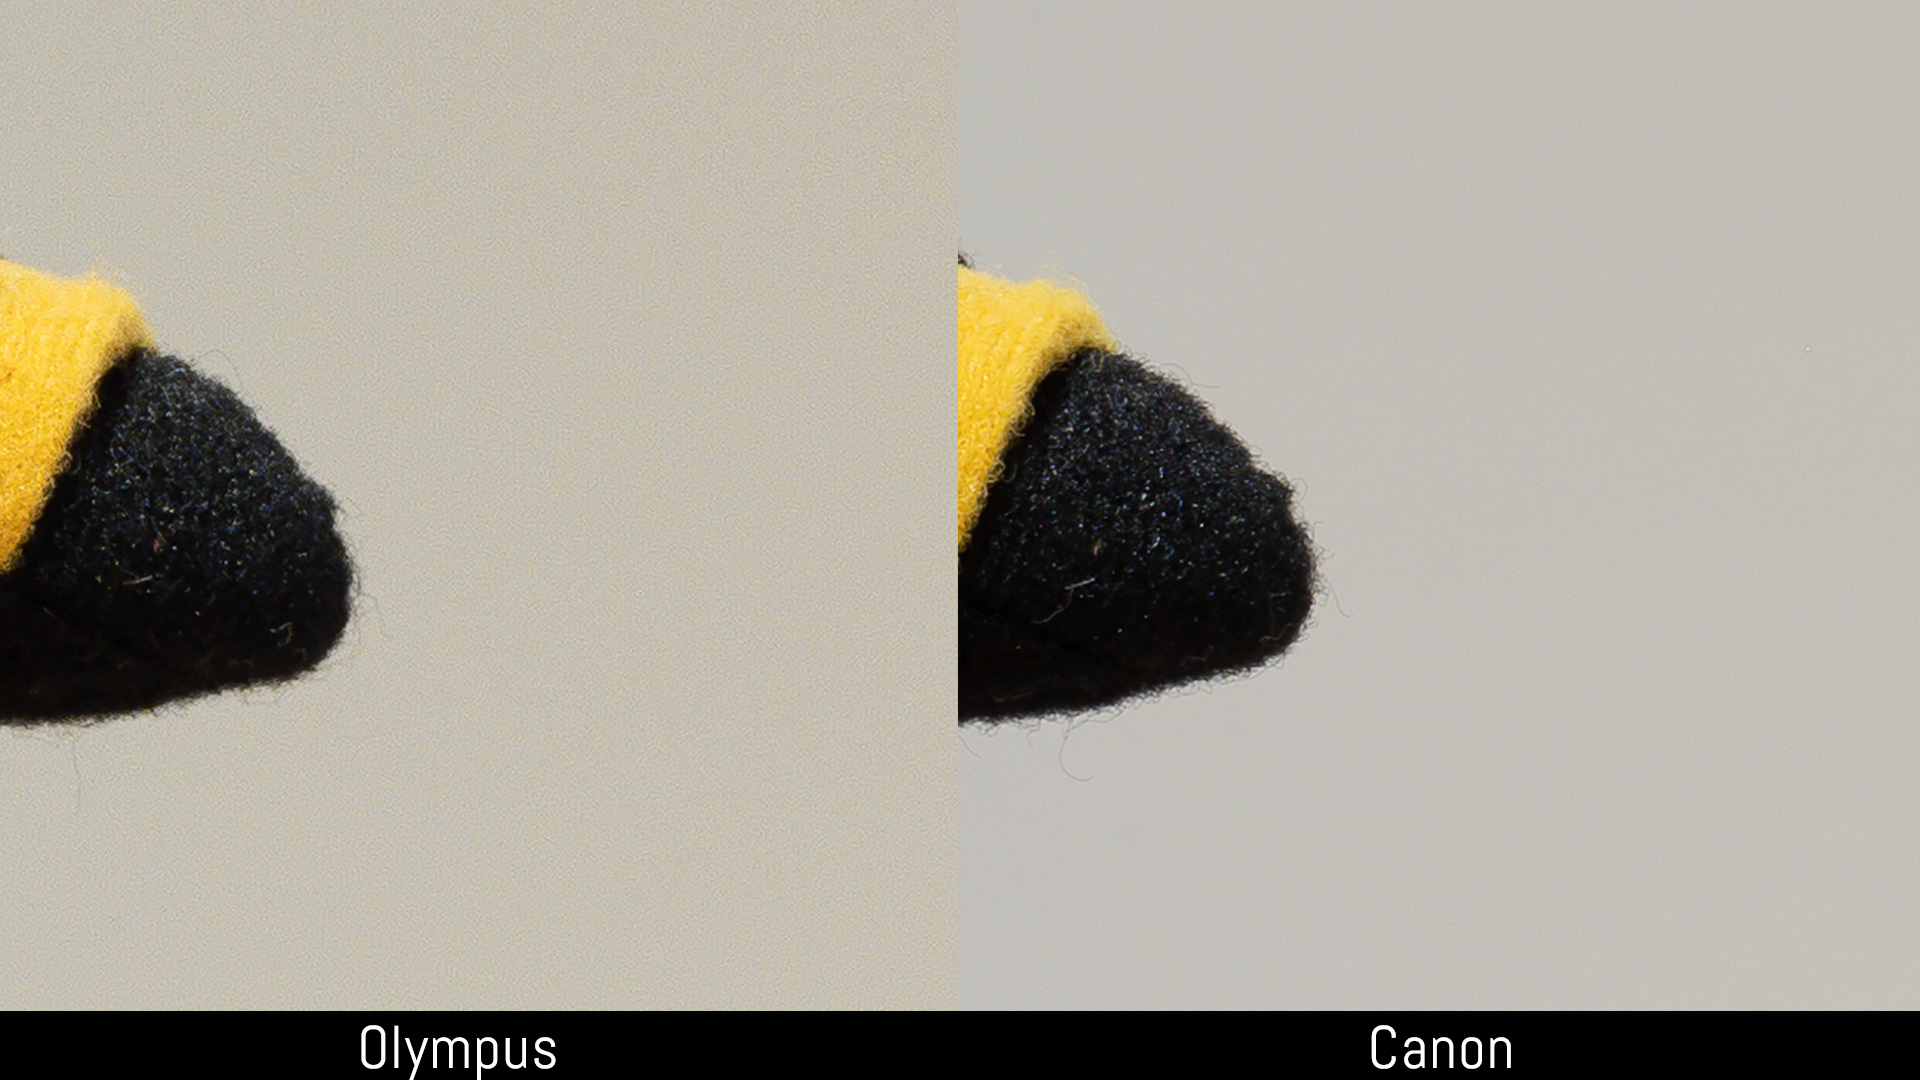
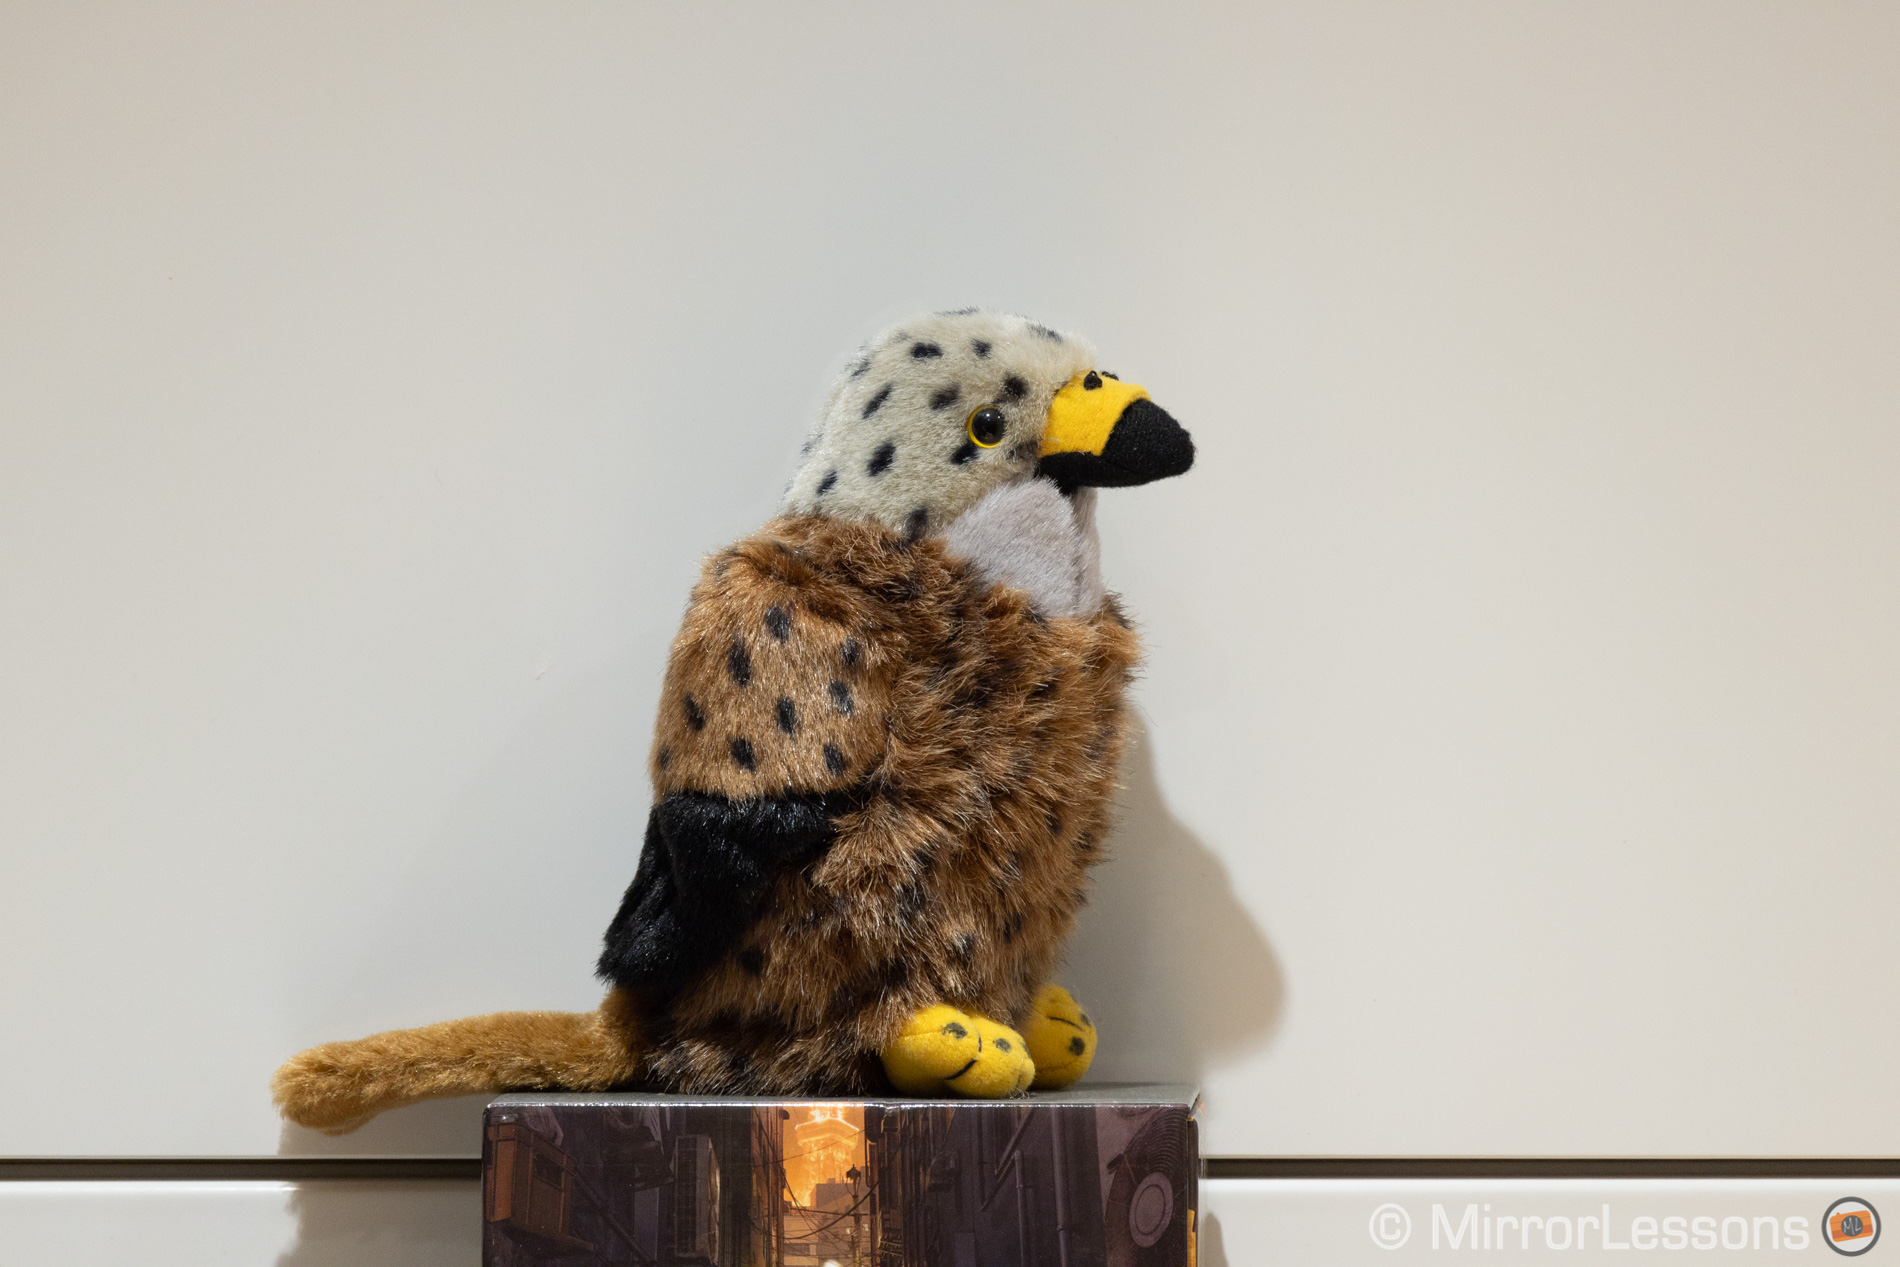
Of course, you can dig further and use other parameters such as masking and noise reduction to improve the result, or even a completely different software. For this specific test, I concentrated on the detail of the stuffed toy, so consider the settings I shared earlier as a starting point.
Equivalence, depth of field and ISO
A focal length of 300mm on the four thirds sensor produces, at f/4, the same amount of depth of field that 600mm does on a full frame sensor at f/8 (with same camera-to-subject distance). Or in our specific case here, f/5.6 on the Olympus corresponds to f/11 on the Canon lens.

For this reason, the Olympus lens is often referred to as a “600mm F8”, but keep in mind that this definition can be misleading unless given with the proper explanation. For example, a beginner could wrongly assume that the Olympus gives you a darker exposure, which is not the case.
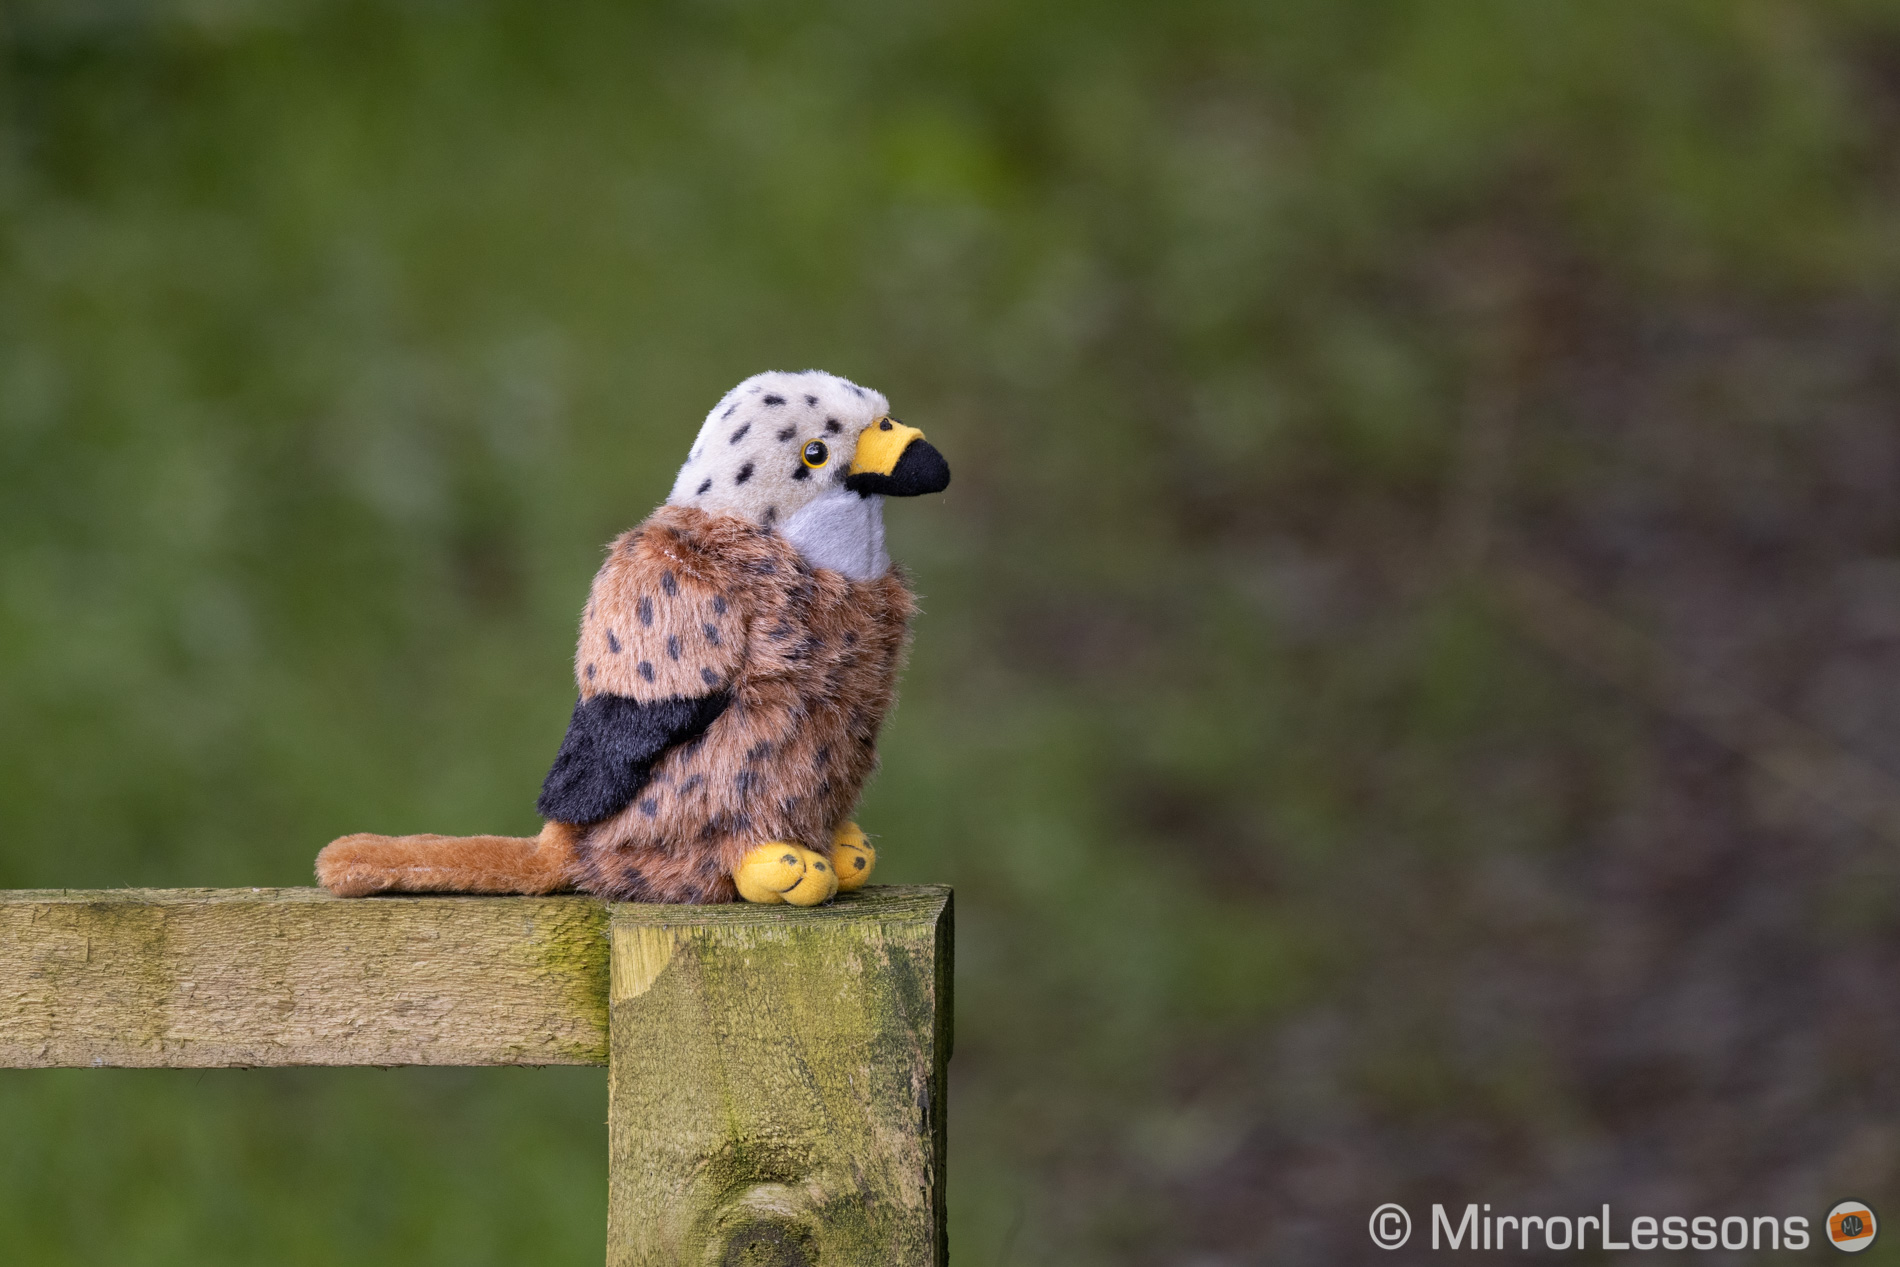
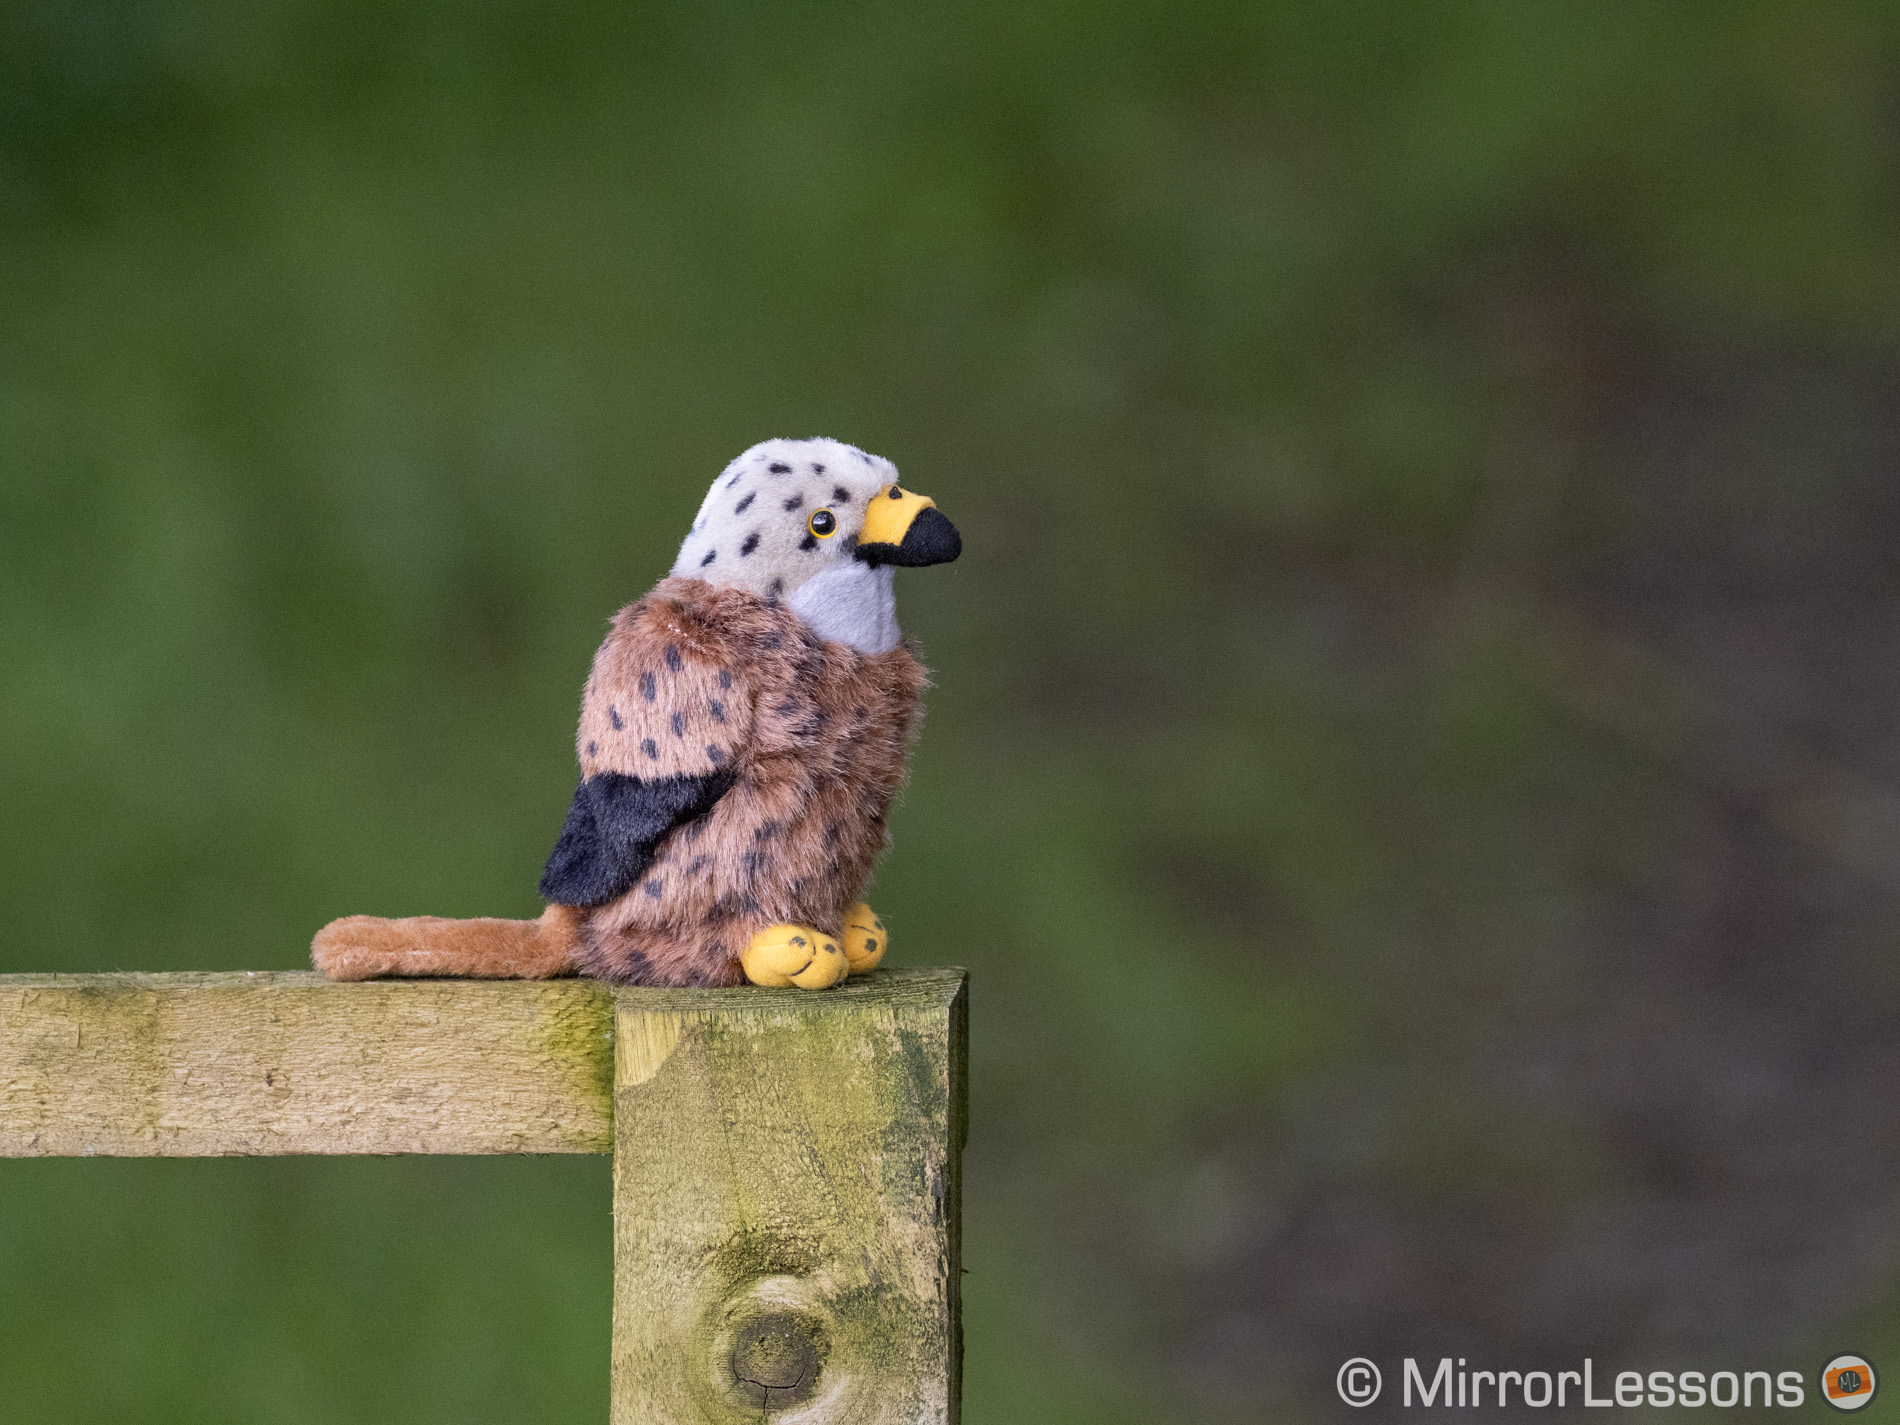
Both the E-M1 III and R5/R6 produce the same brightness when using identical exposure settings (aperture, shutter speed and ISO), as you can see below. There can be slight variations if, for example, a lens has better light transmission or if the ISO levels of a sensor are calibrated differently, but you’ll rarely see a major variance.

The key point here is that the Olympus 300mm opens to f/4, which is a 3 stop advantage when compared to f/11. This means a shallower depth of field and more subject separation for the micro four thirds combo.
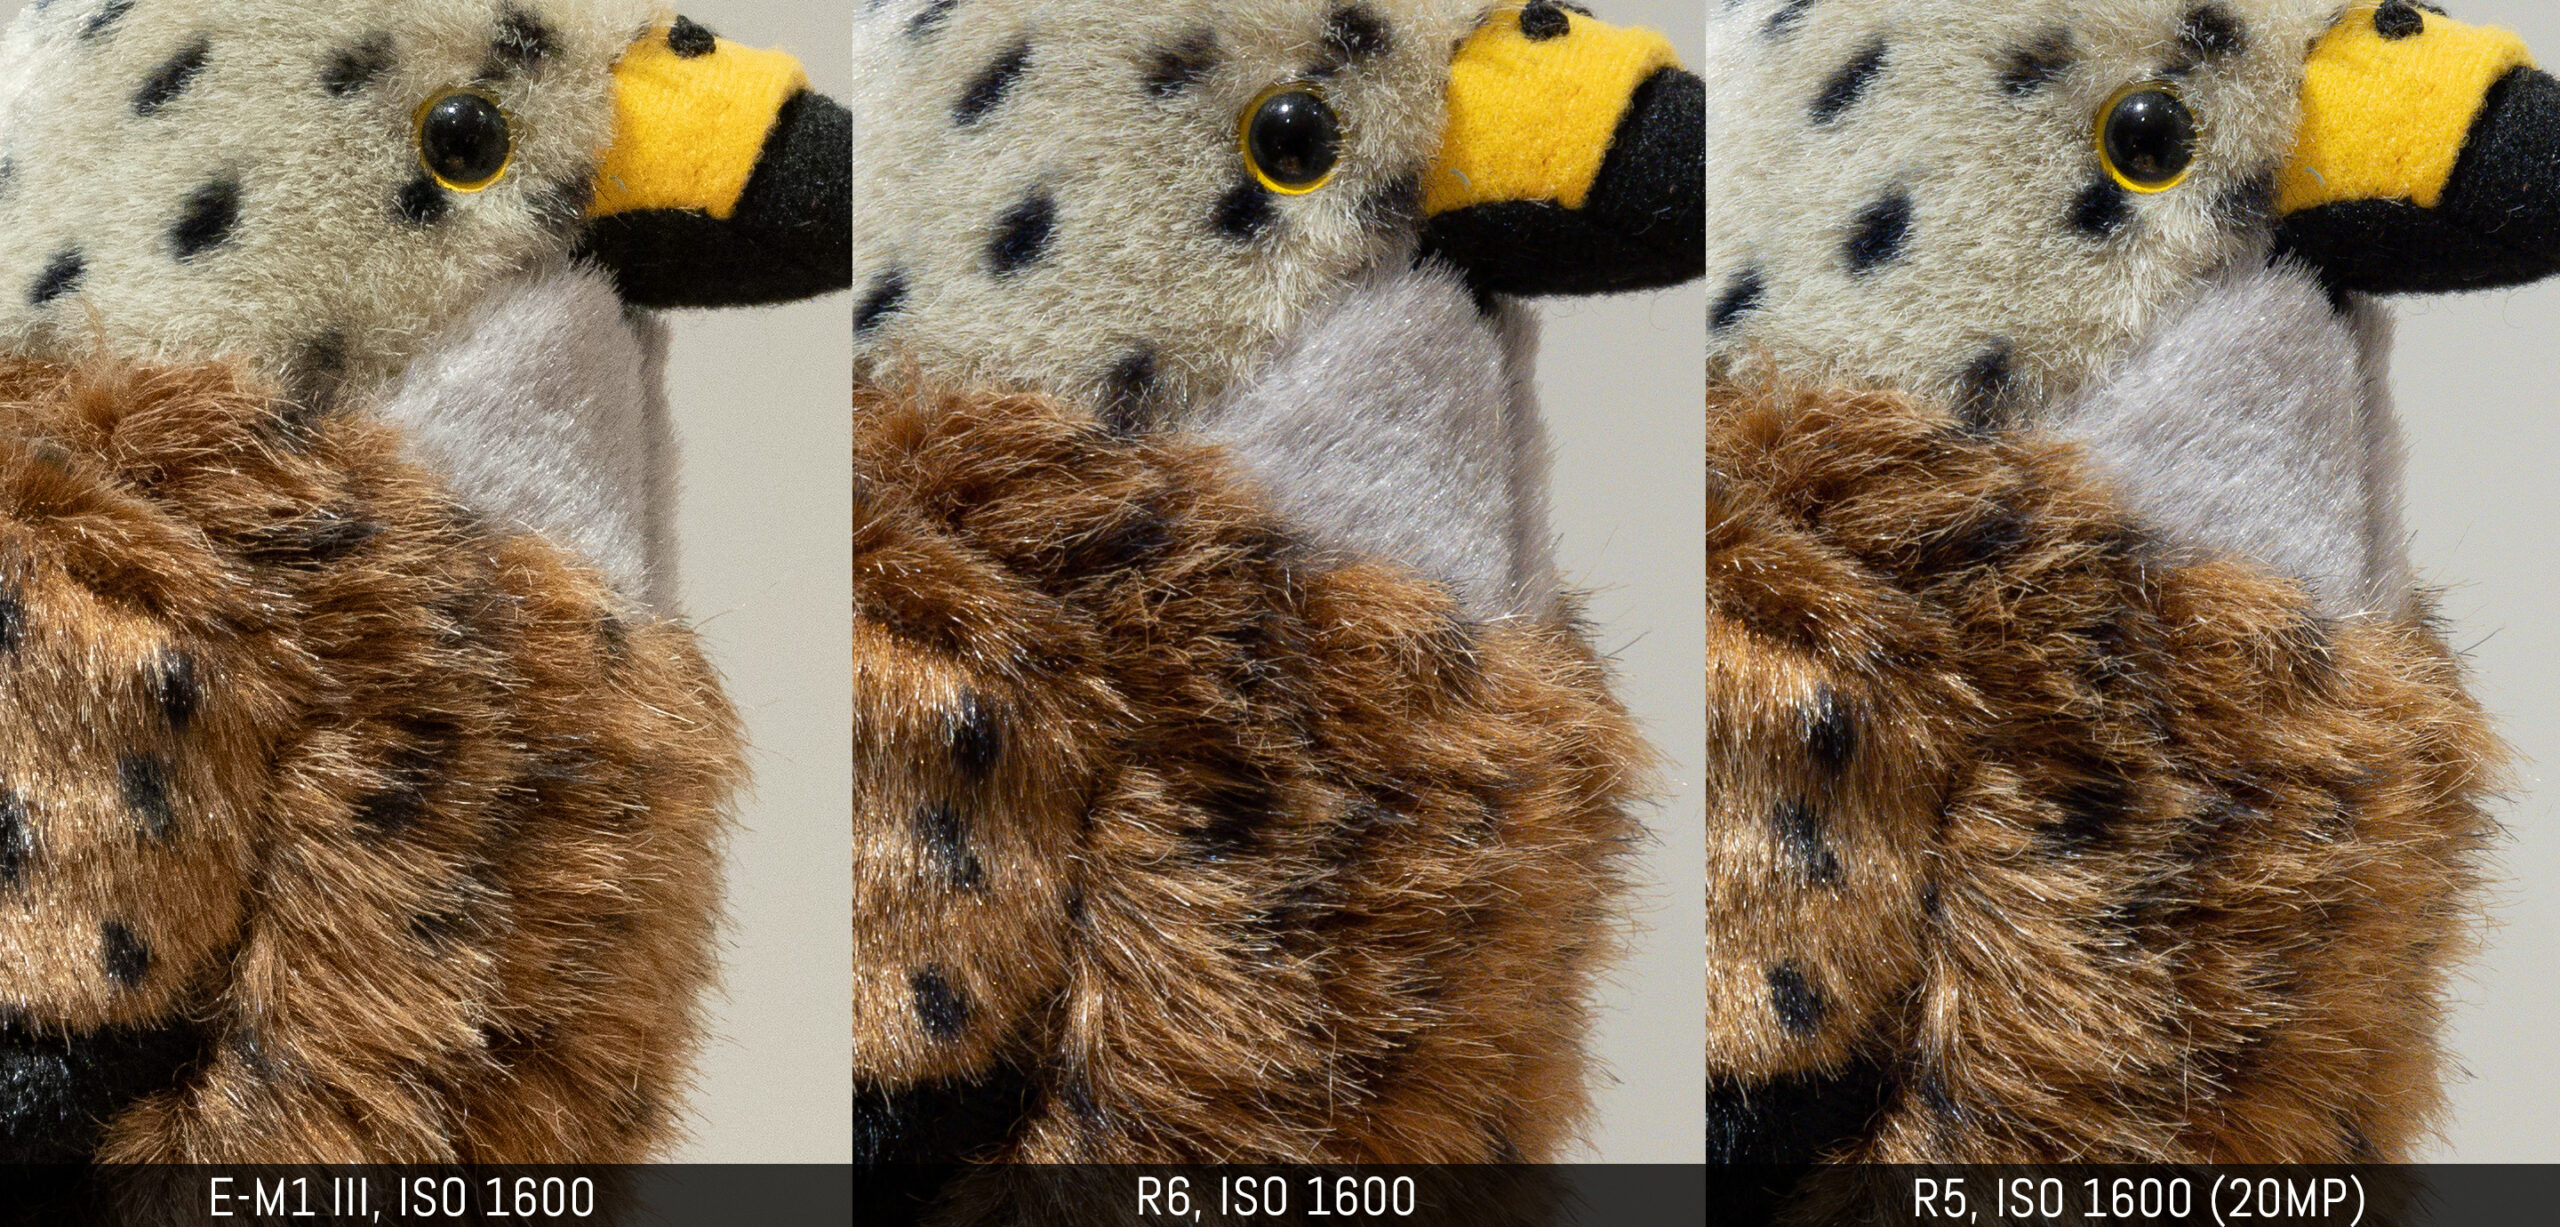
Some of you will point out that saying “600mm F8” is also a way of highlighting the difference in light gathering between the two sensors and, with that, the difference in noise-to-signal ratio. Following this logic, it would mean that 200 ISO on the E-M1 corresponds to 800 ISO on the R5 / R6. Let’s see a few examples.
Below you can see three enlargements of images taken at ISO 1600 with each camera. The R5 and R6 versions are cleaner, with less noise and mushy details in some areas, but I don’t find the difference in quality as big as one might expect in this case.
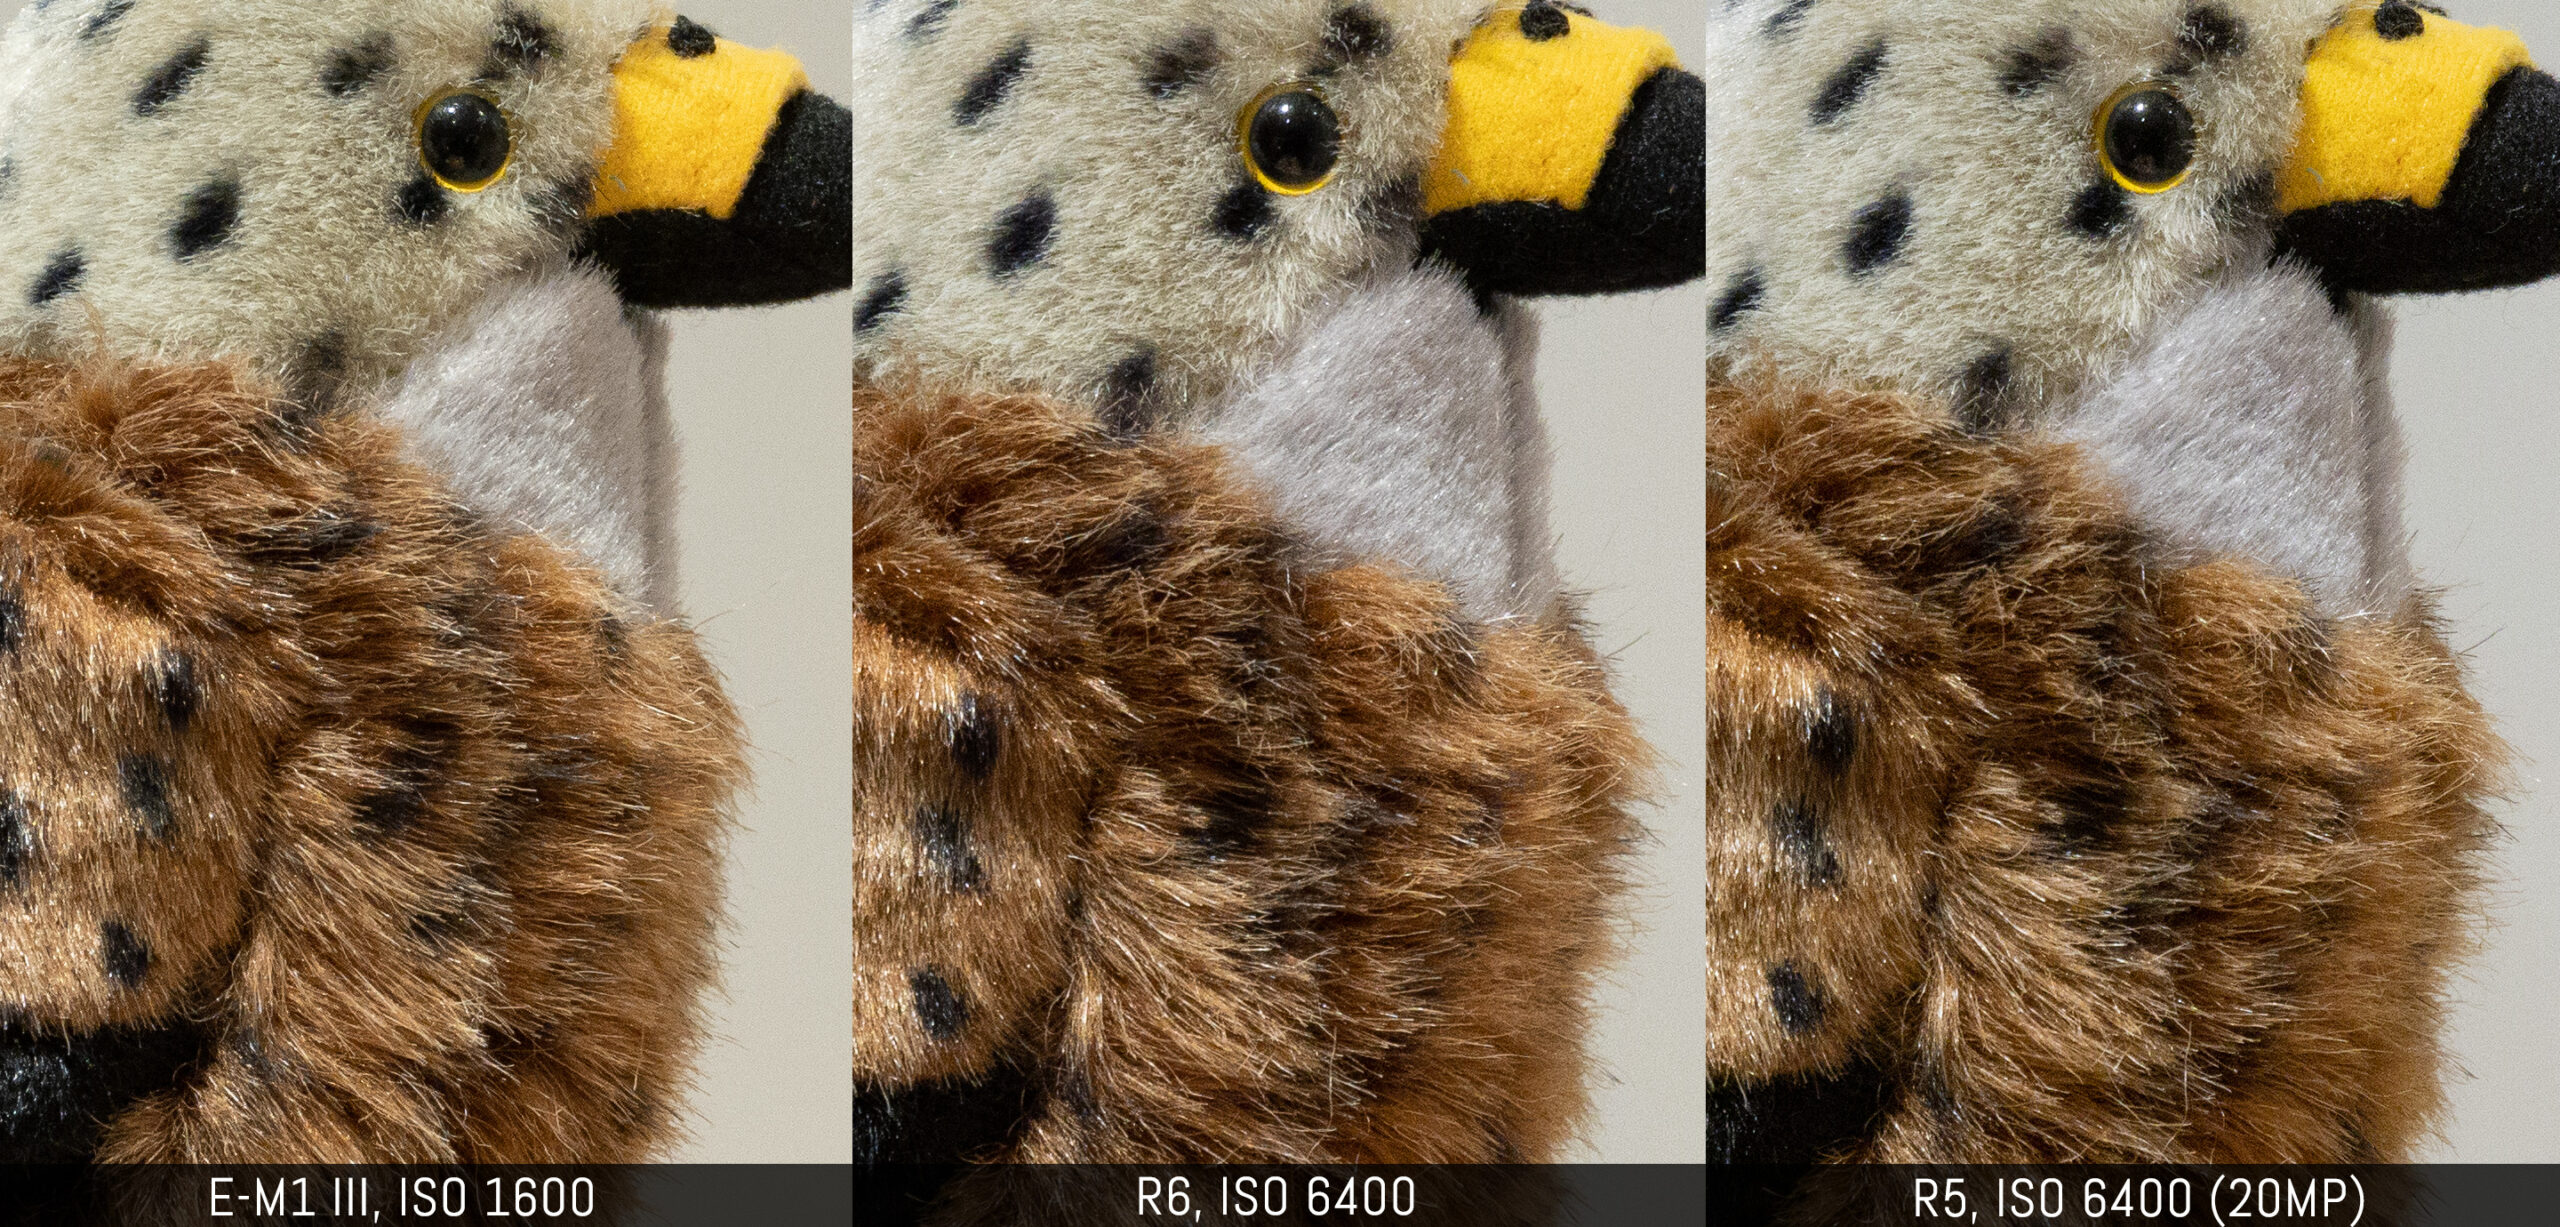
In the second example, I raised the Canon camera’s ISO to 6400 to have a two stop difference, as per my previous explanation. Here the three images look similar.
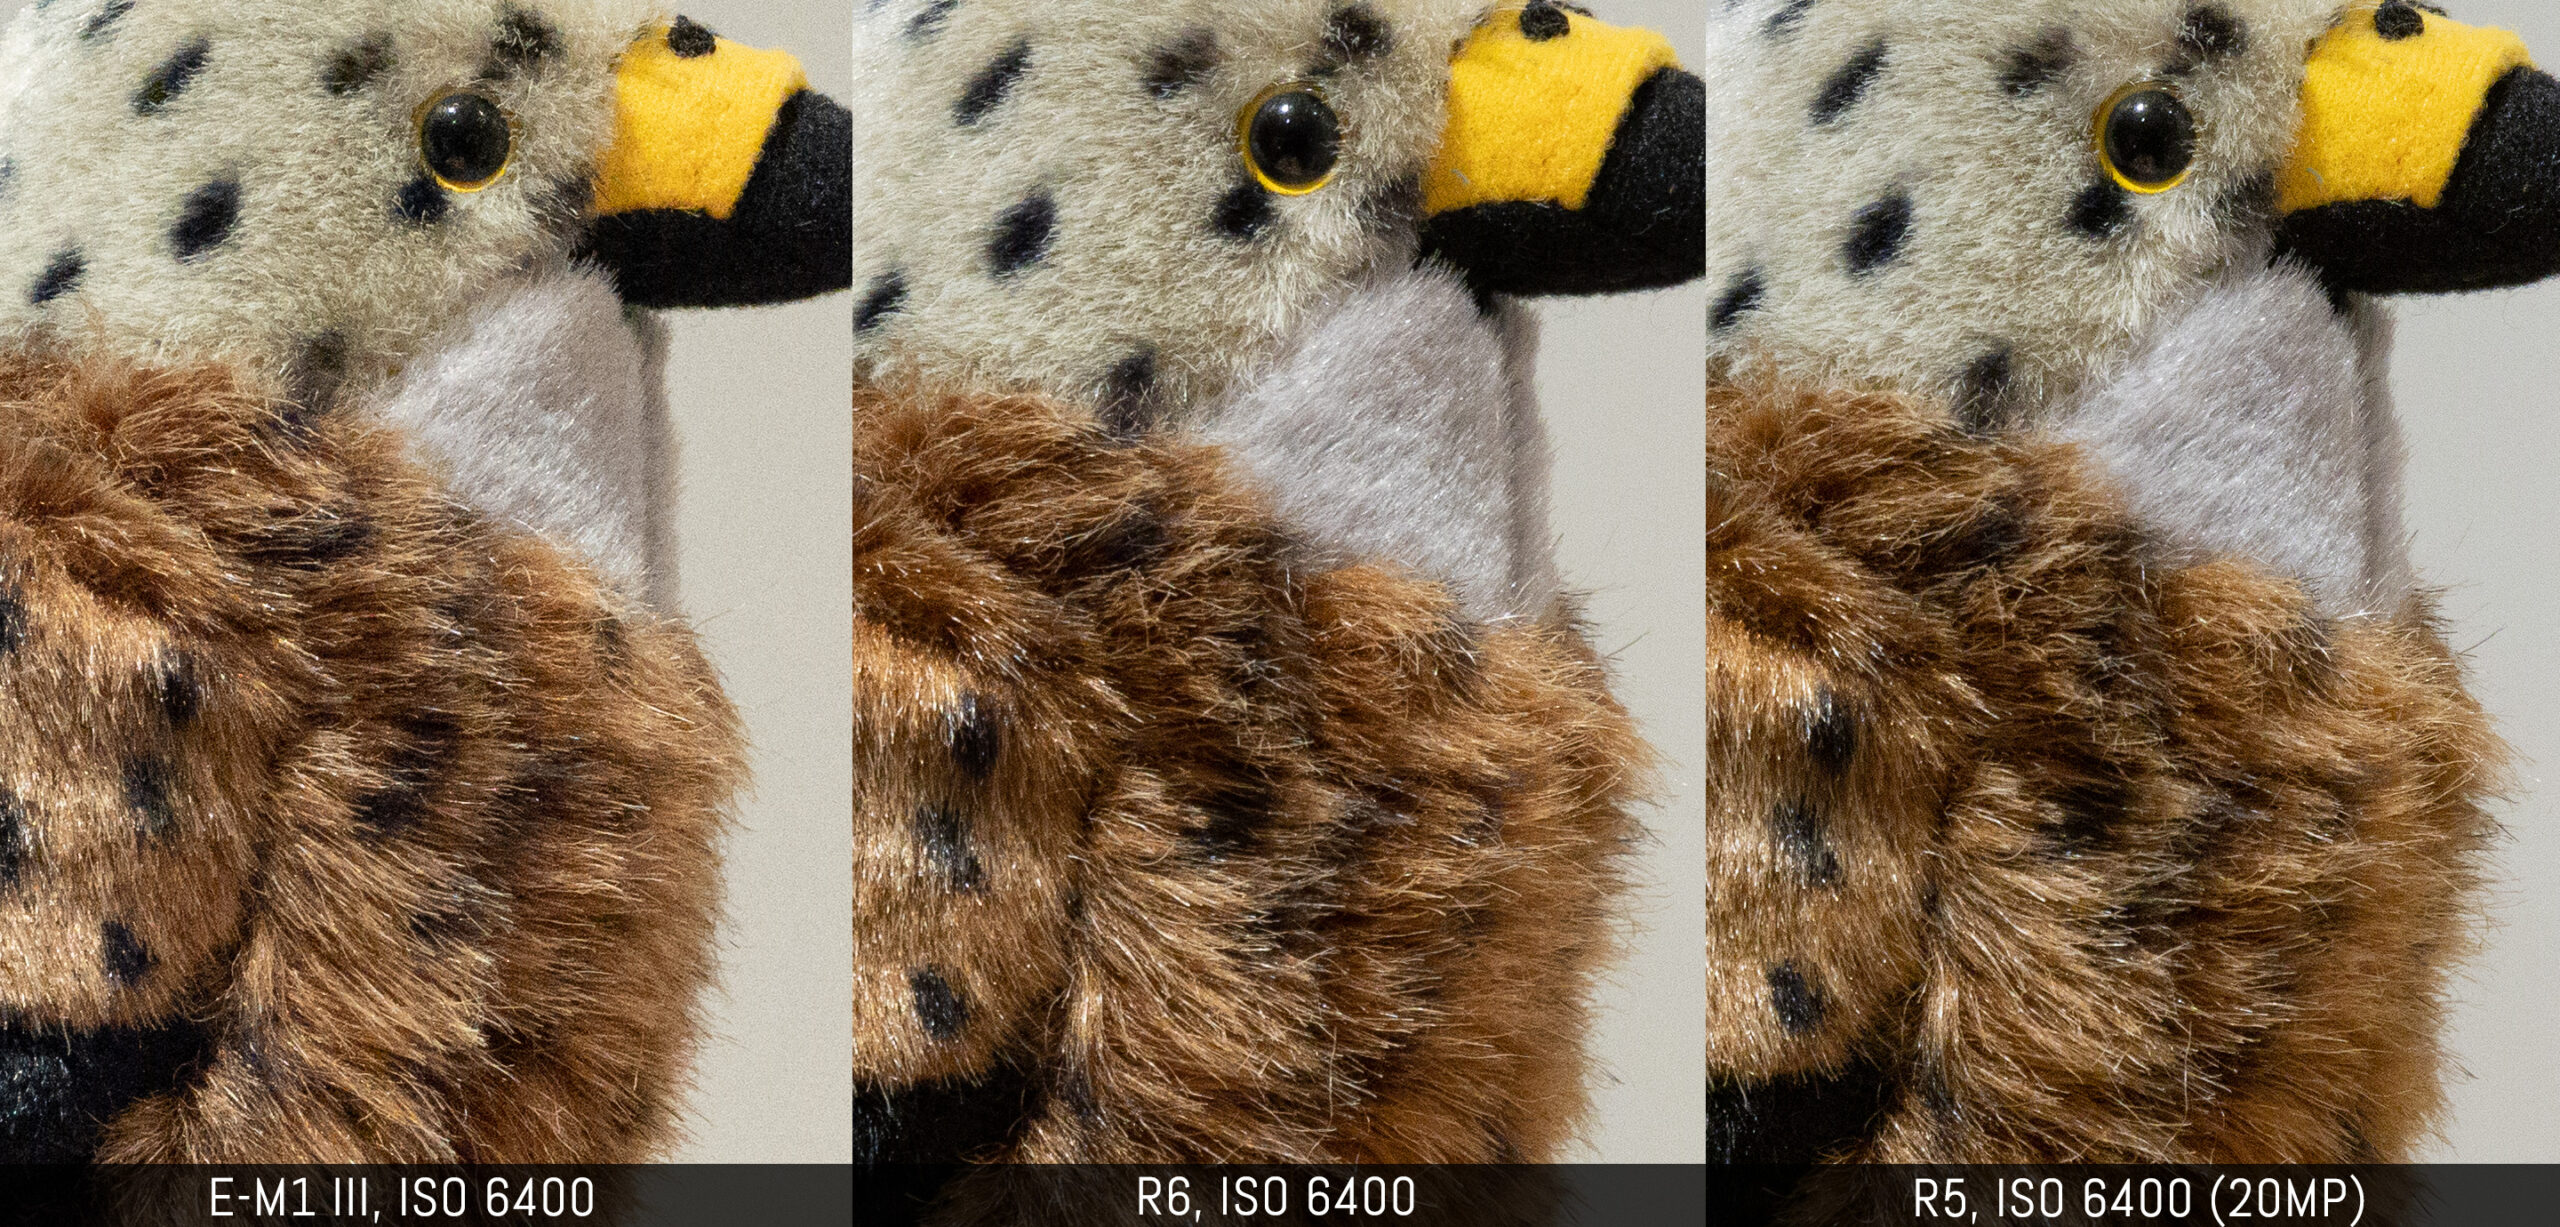
The third example starts from ISO 6400. With the three cameras at the same level, the Olympus looks worse with more visible noise. The R6 remains a bit cleaner than the R5.
When raising the exposure on the two Canons to 25600 ISO, it is the Olympus that shows a bit less noise, while the R5 starts to show some colour cast.

The bottom line is: “600mm F8” oversimplifies the difference between these two systems. Yes, a smaller sensor produces more noise as the ISO level goes up but, as we just saw, it is more about shades of grey than a black and white difference. And there could be even more things to analyse if we had included other sensors in this comparison.
With all the above said, let’s get back to the main topic of this article!
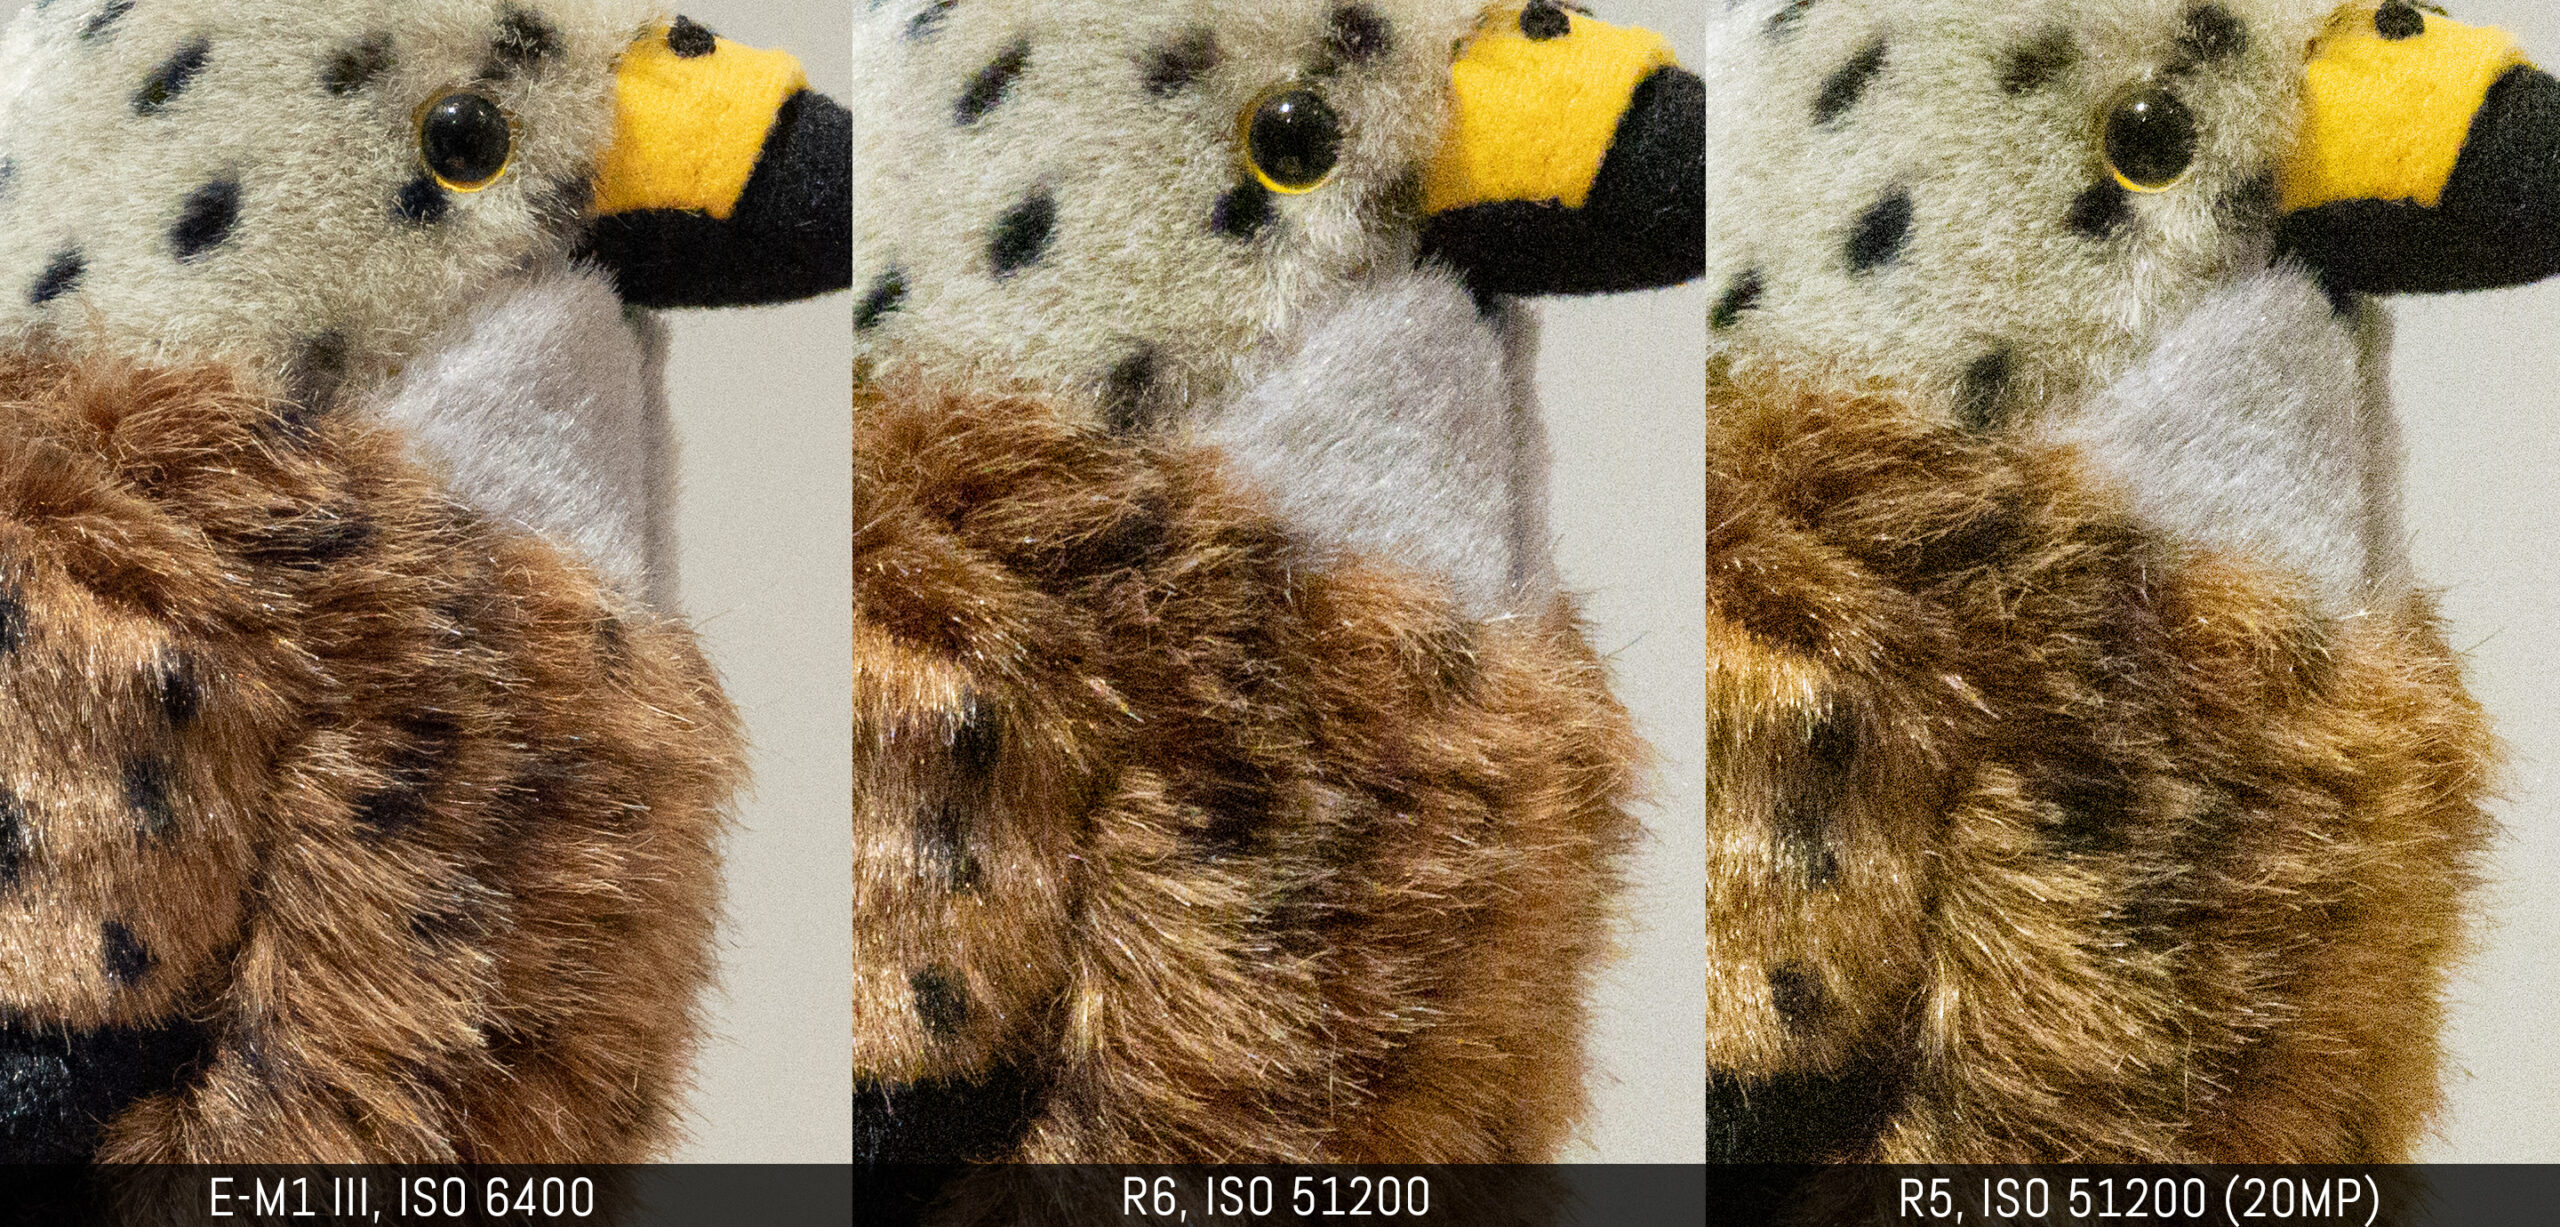
If I expand my ISO comparison further, the Olympus has a 3 stop advantage over the Canon, and the difference becomes more evident. I have to say that the R5 and R6 hold up well at 12800 ISO vs 1600 ISO on the Olympus, but the next image (6400 vs 51200) clearly shows the m4/3 model has an advantage.

The last point to mention is dynamic range. A large sensor has more DR than a smaller sensor and that can give you a bit more freedom in how to handle your exposure. One method is to underexpose to keep the ISO lower and bring the brightness back in post. Let’s see how that would work in our specific situation, taking into account the 3 stop difference at each lens’ fastest aperture.
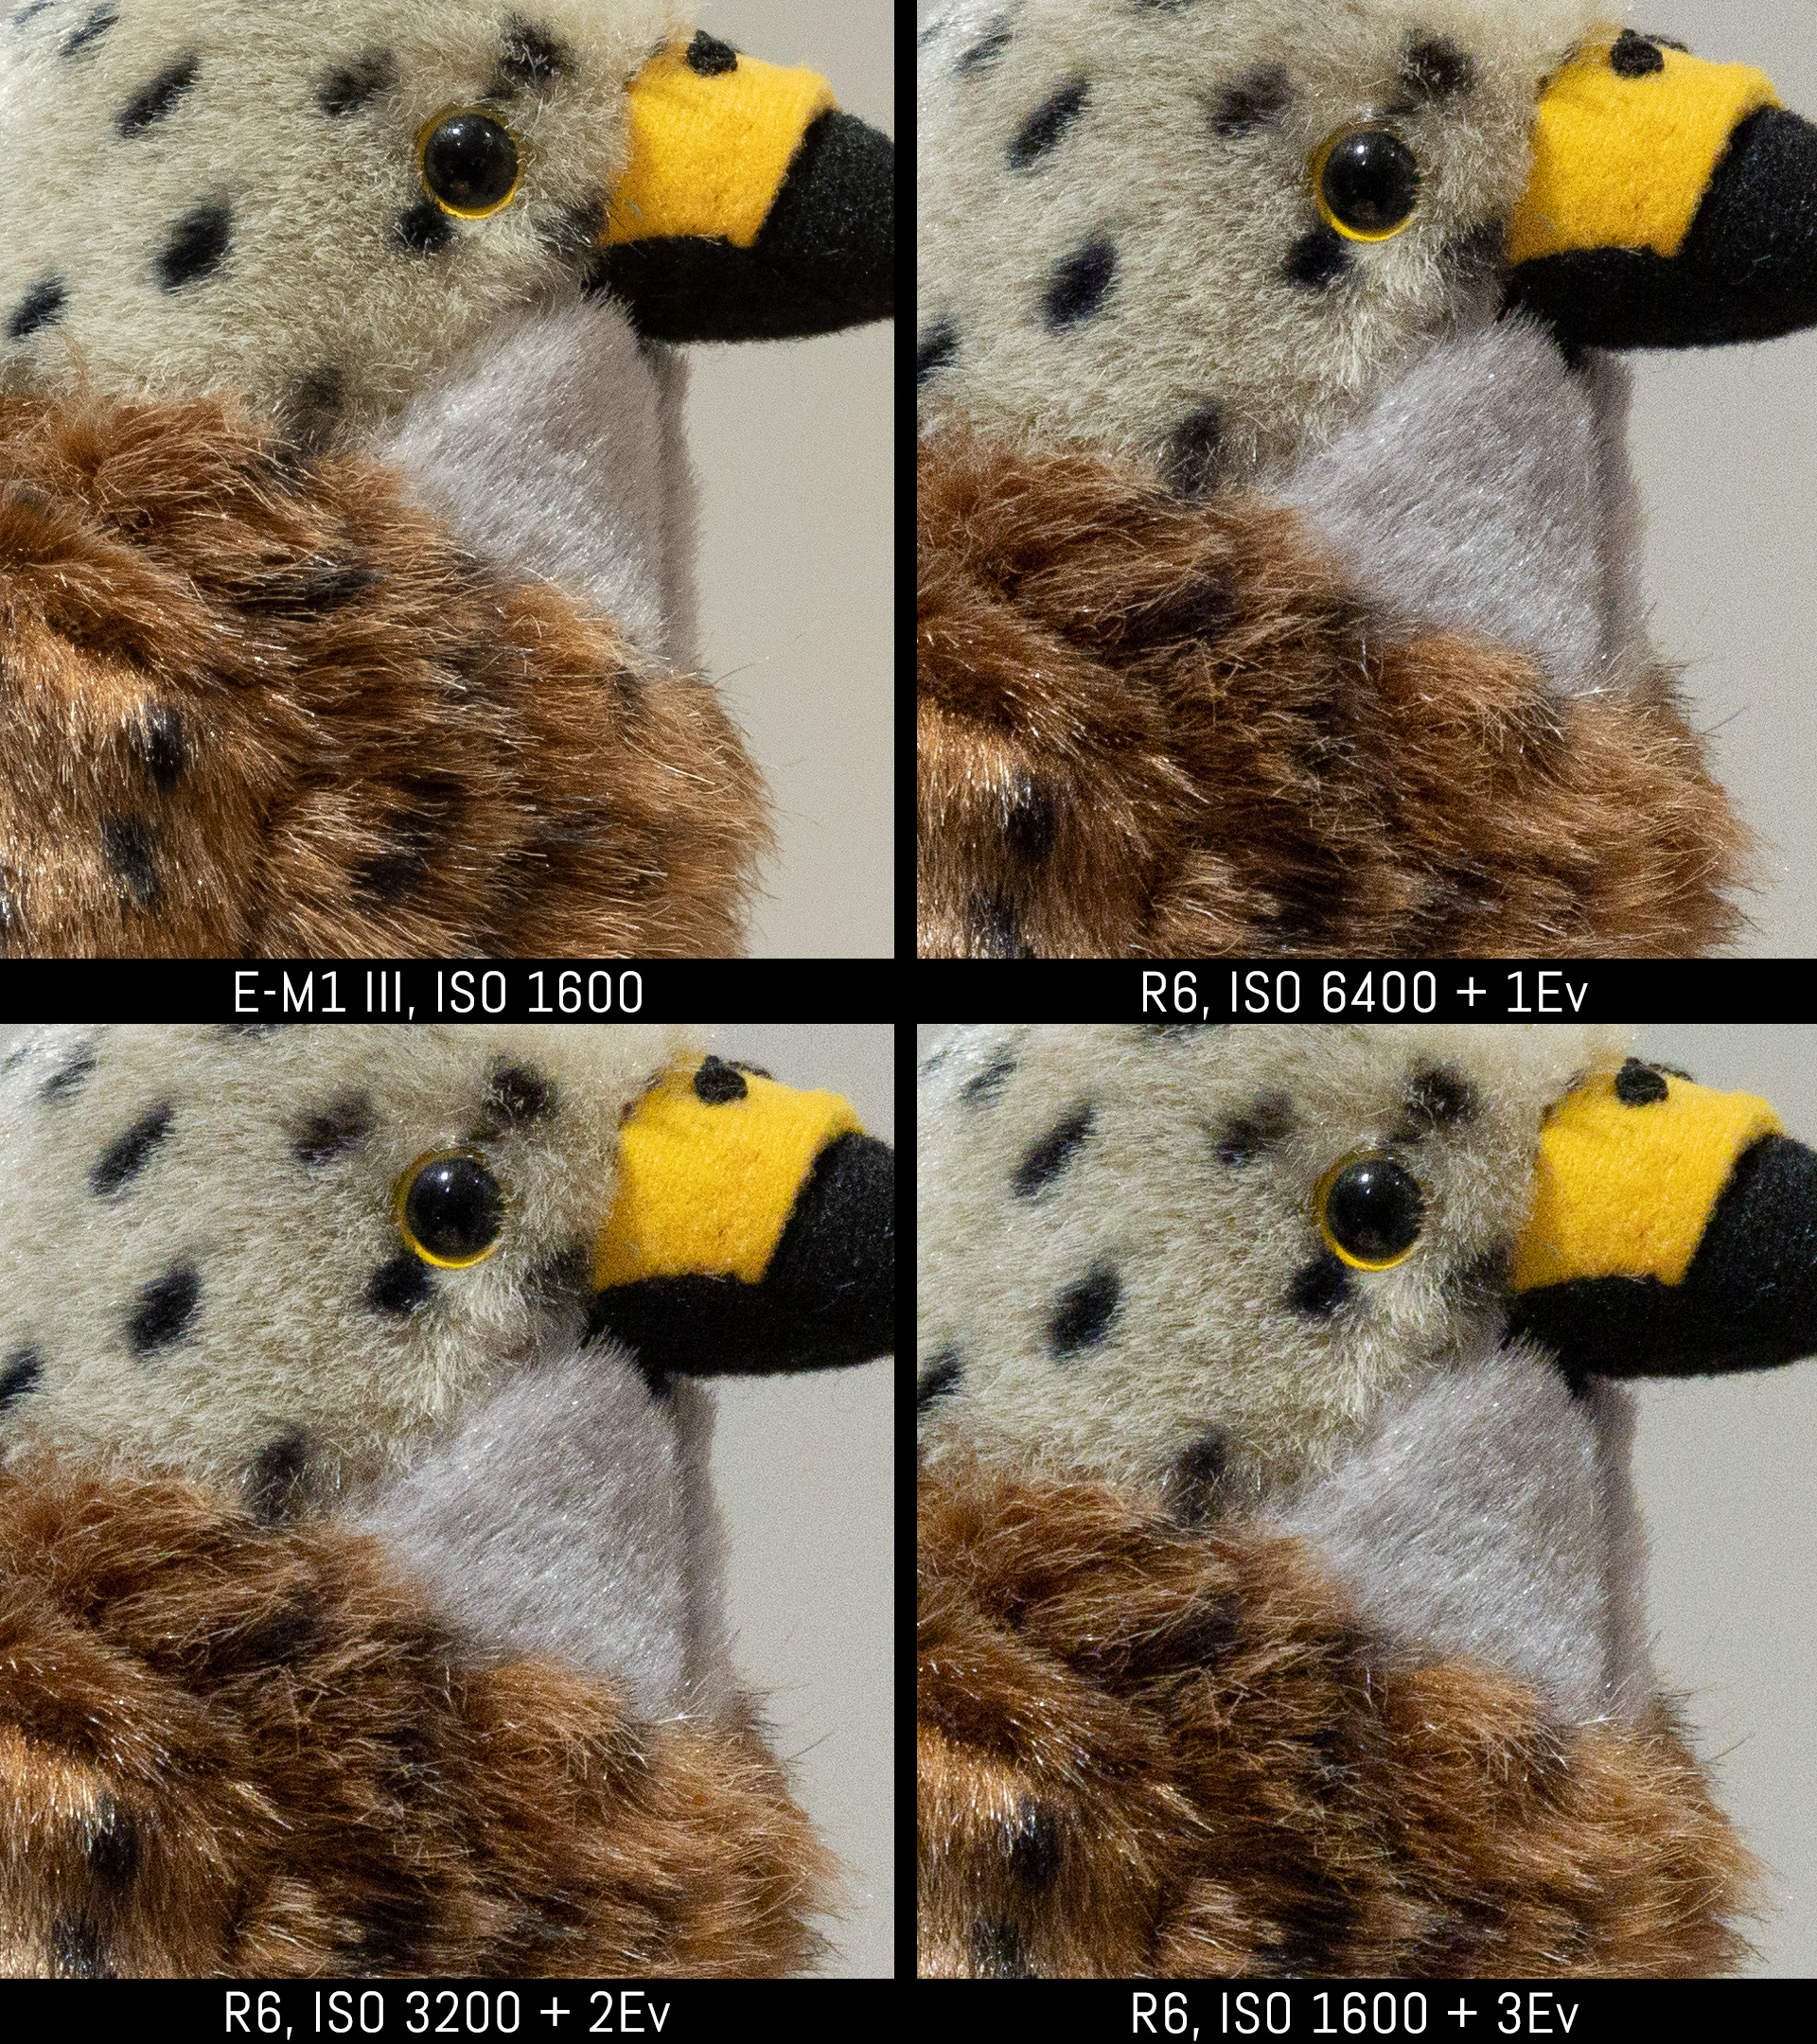

The good news is that the Canon files maintain a similar quality if you underexpose, then recover by 1, 2 or 3 stops, but the Olympus file remains cleaner. The R5 manages to stay close to the quality of the E-M1 photo, whereas the R6 suffers more from the exposure recovery in post.
Feedback from the field
I hope that all the tests above give you a good idea of the difference in quality between these two systems, and how two lenses with different characteristics but a similar size can compete.
Side by side images taken at home are only one part of the story however. There is more to talk about after being in the field with each set-up.
How much of a handicap is the F11 aperture?
When doing wildlife photography the ISO can rise easily, influenced by the light conditions (shade vs direct light, sunny vs cloudy) and the shutter speed needed (still vs moving subject).
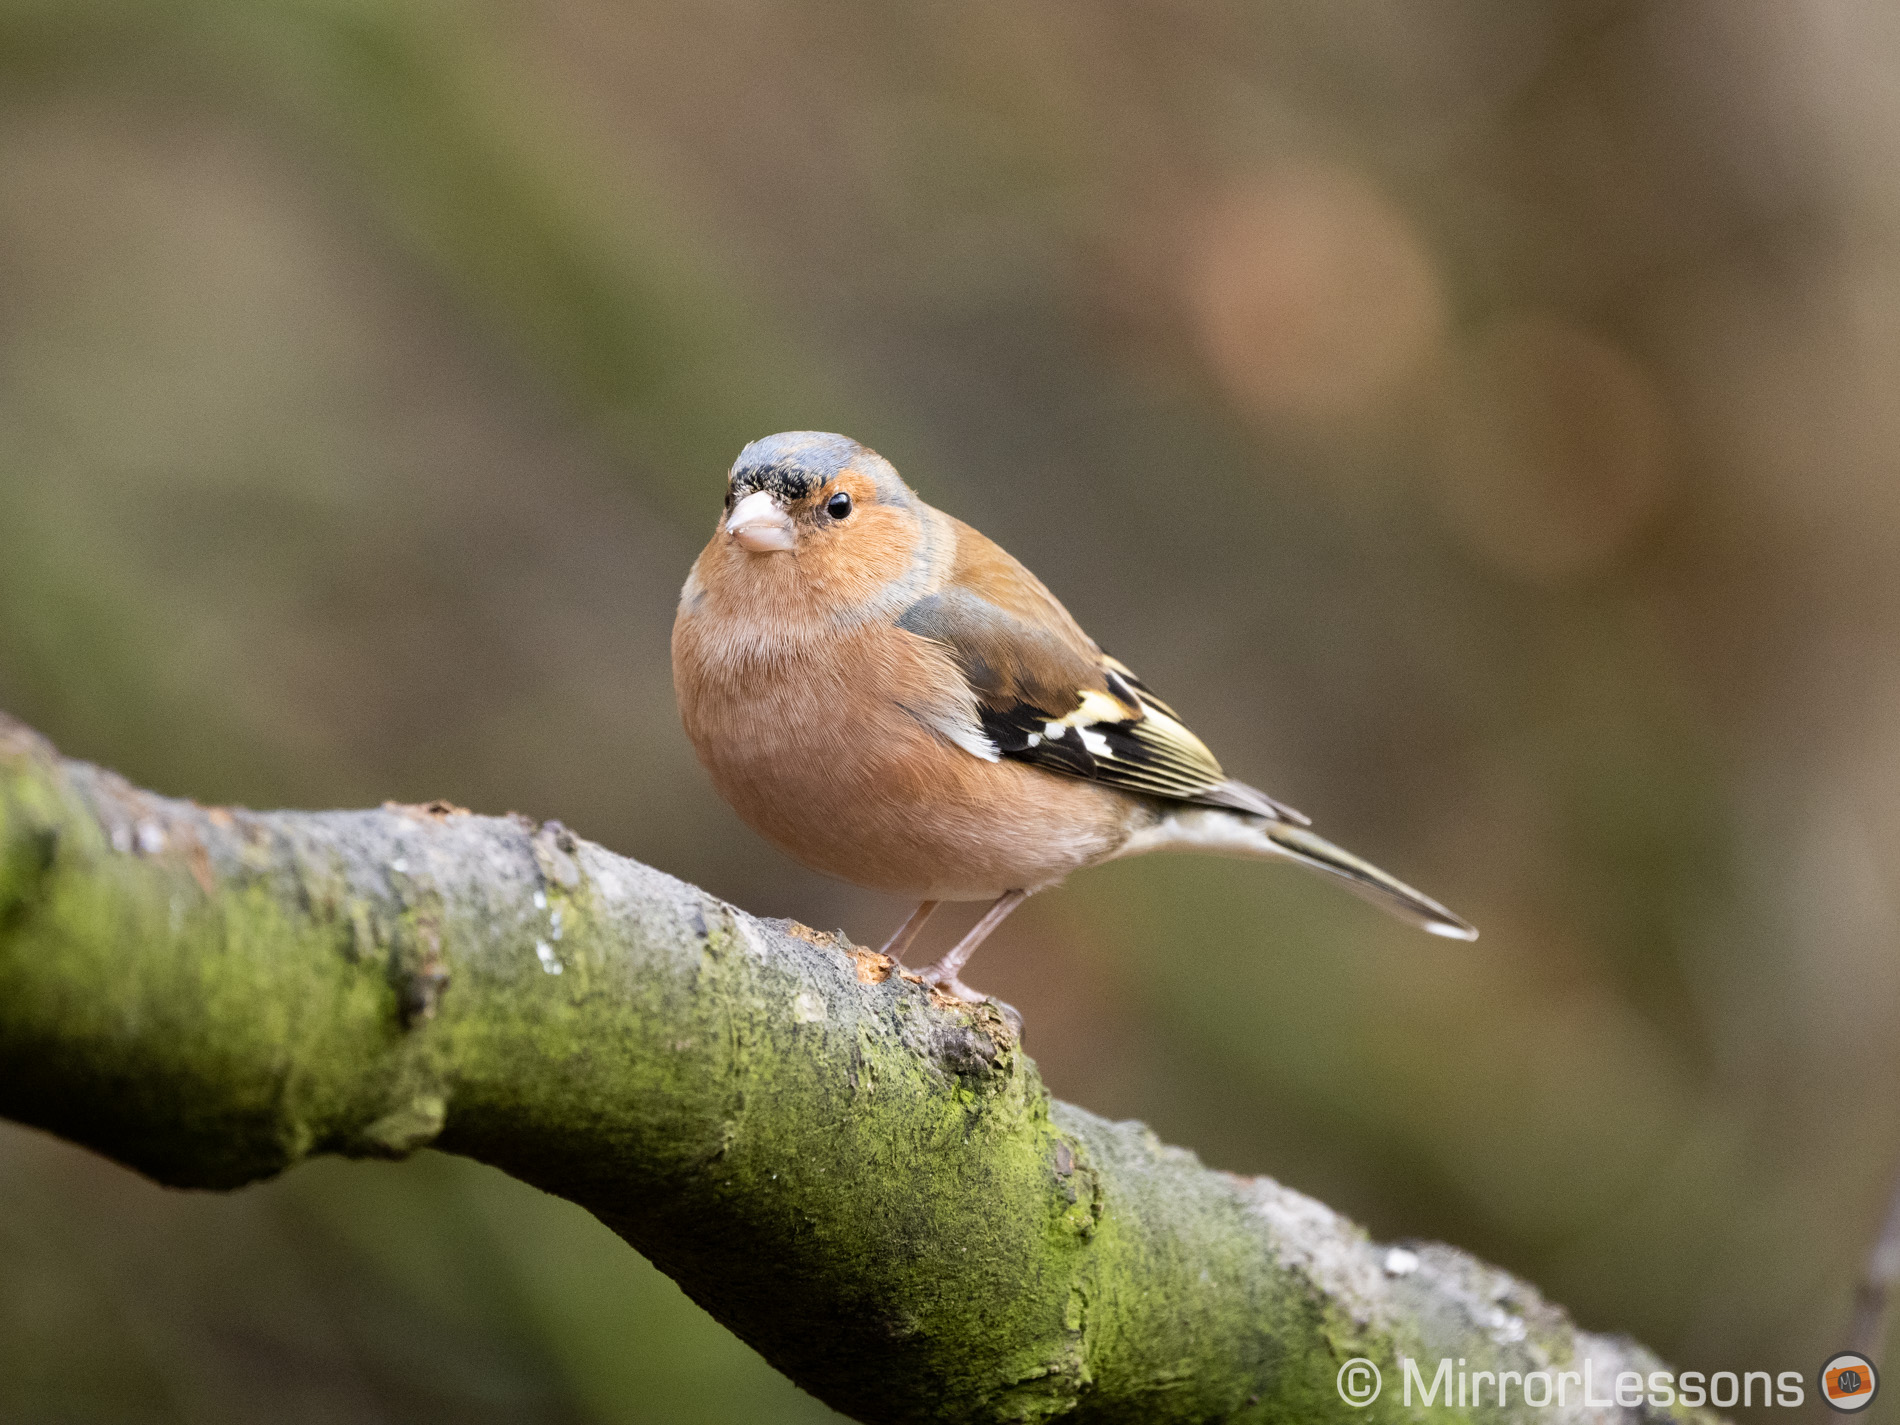
For example, a perched bird captured in the shade of a tree on a sunny day, can give you anything between ISO 400 and ISO 1000. A cloudy day can raise the sensitivity up to 2000 depending on how dark the clouds are.

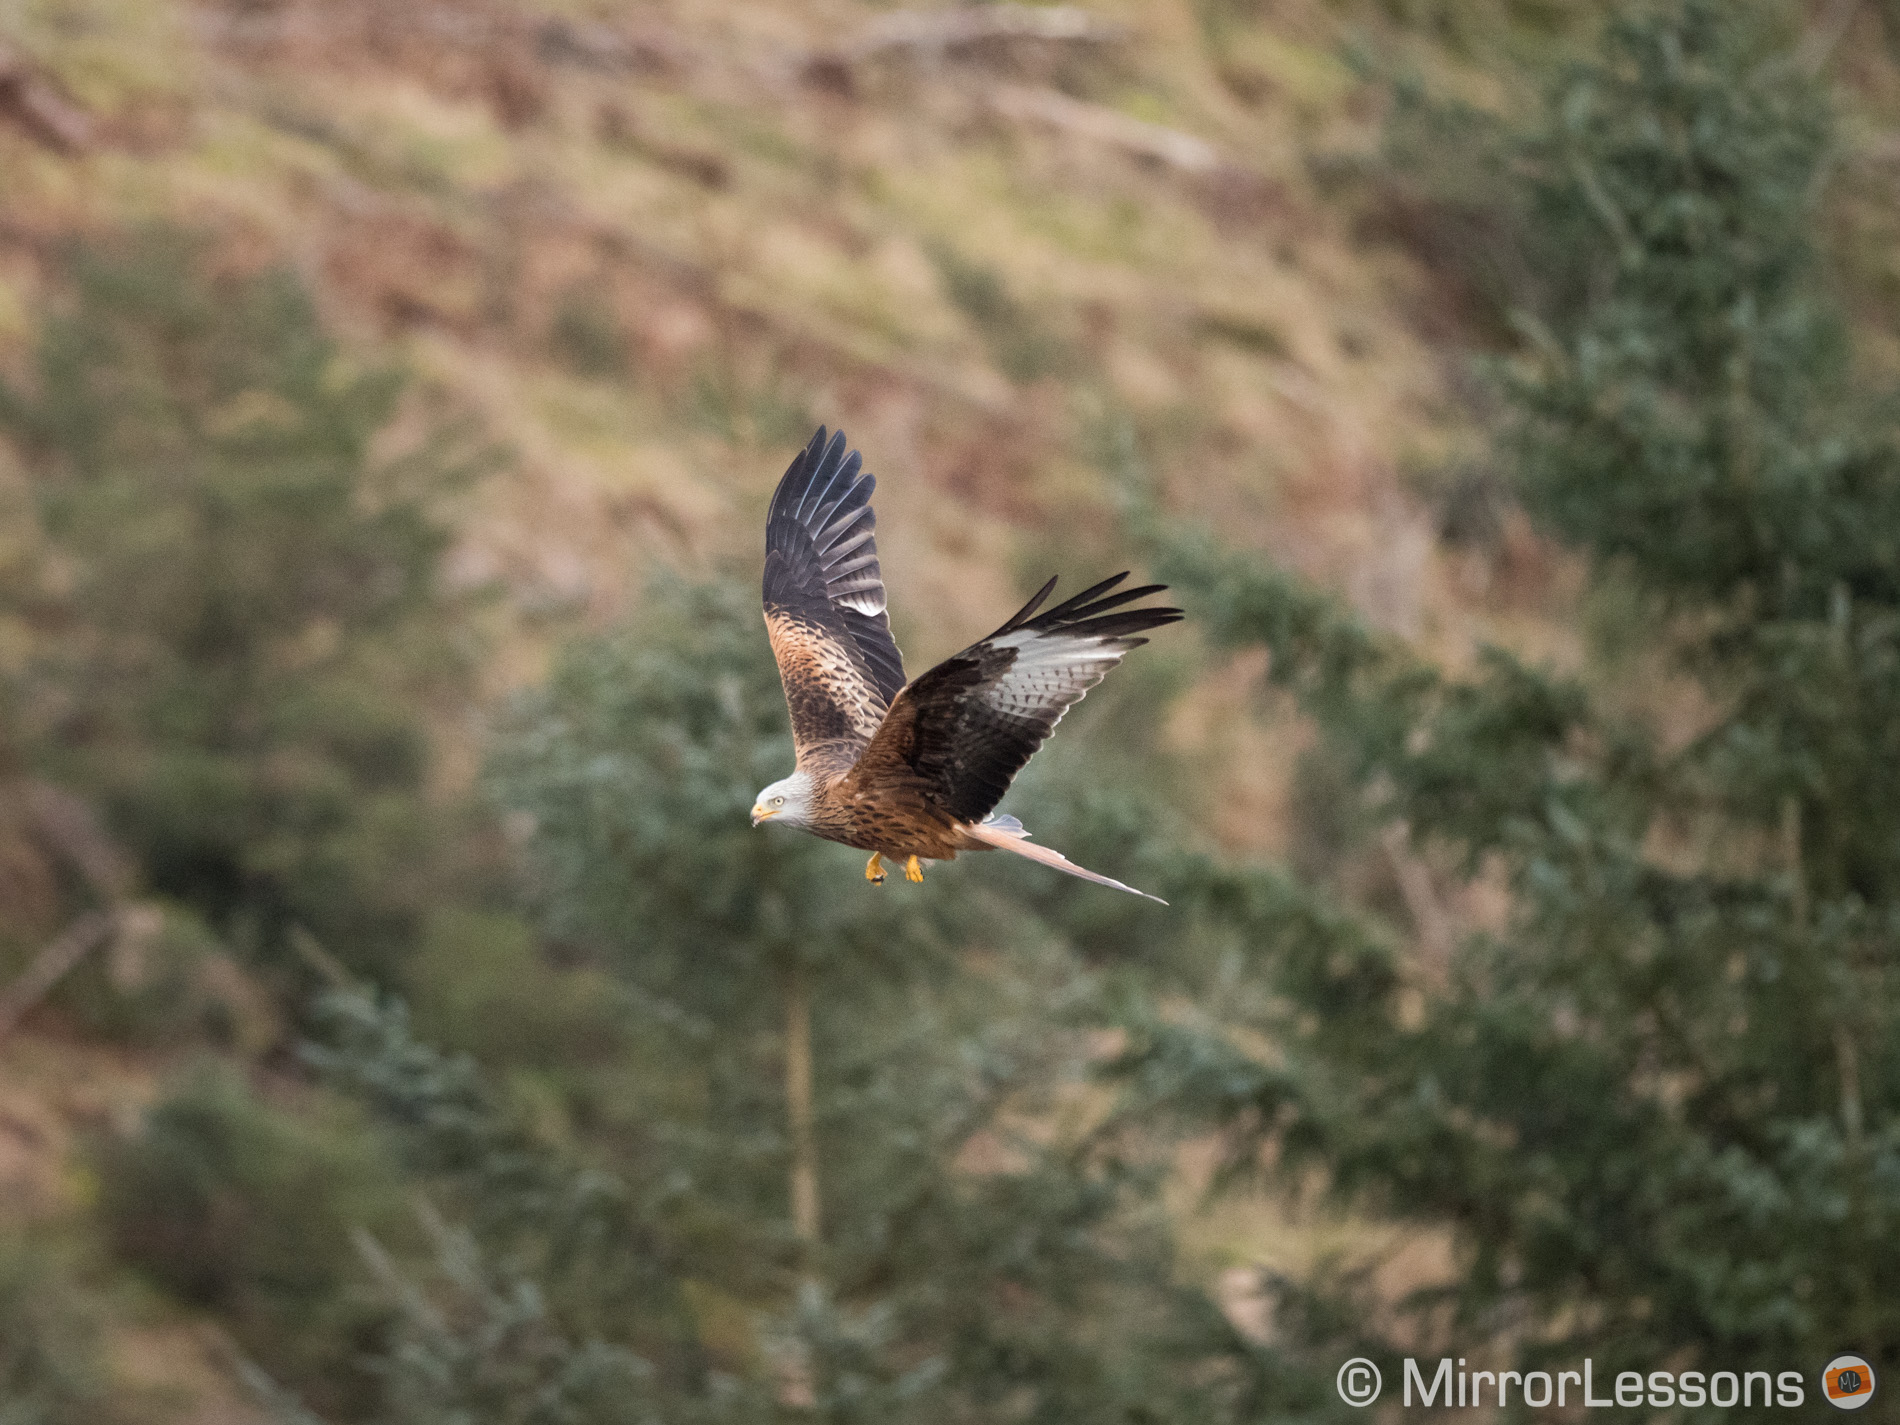
With a flying bird against the blue sky, the ISO levels stay low, but a cloudy day can easily raise the level to 3200 if not more, especially if the bird flies against a busy background.

With that in mind, I initially thought that the F11-only aperture of the Canon 600mm lens would pose a greater challenge to capturing clean and low ISO images. It turned out I was being a bit pessimistic.
I’ve used the lens paired with the R5 in sunshine and cloudy conditions, for static and flying birds, and only about 10% of the photos were taken above ISO 5000 (I worked in Manual exposure mode but with Auto ISO).
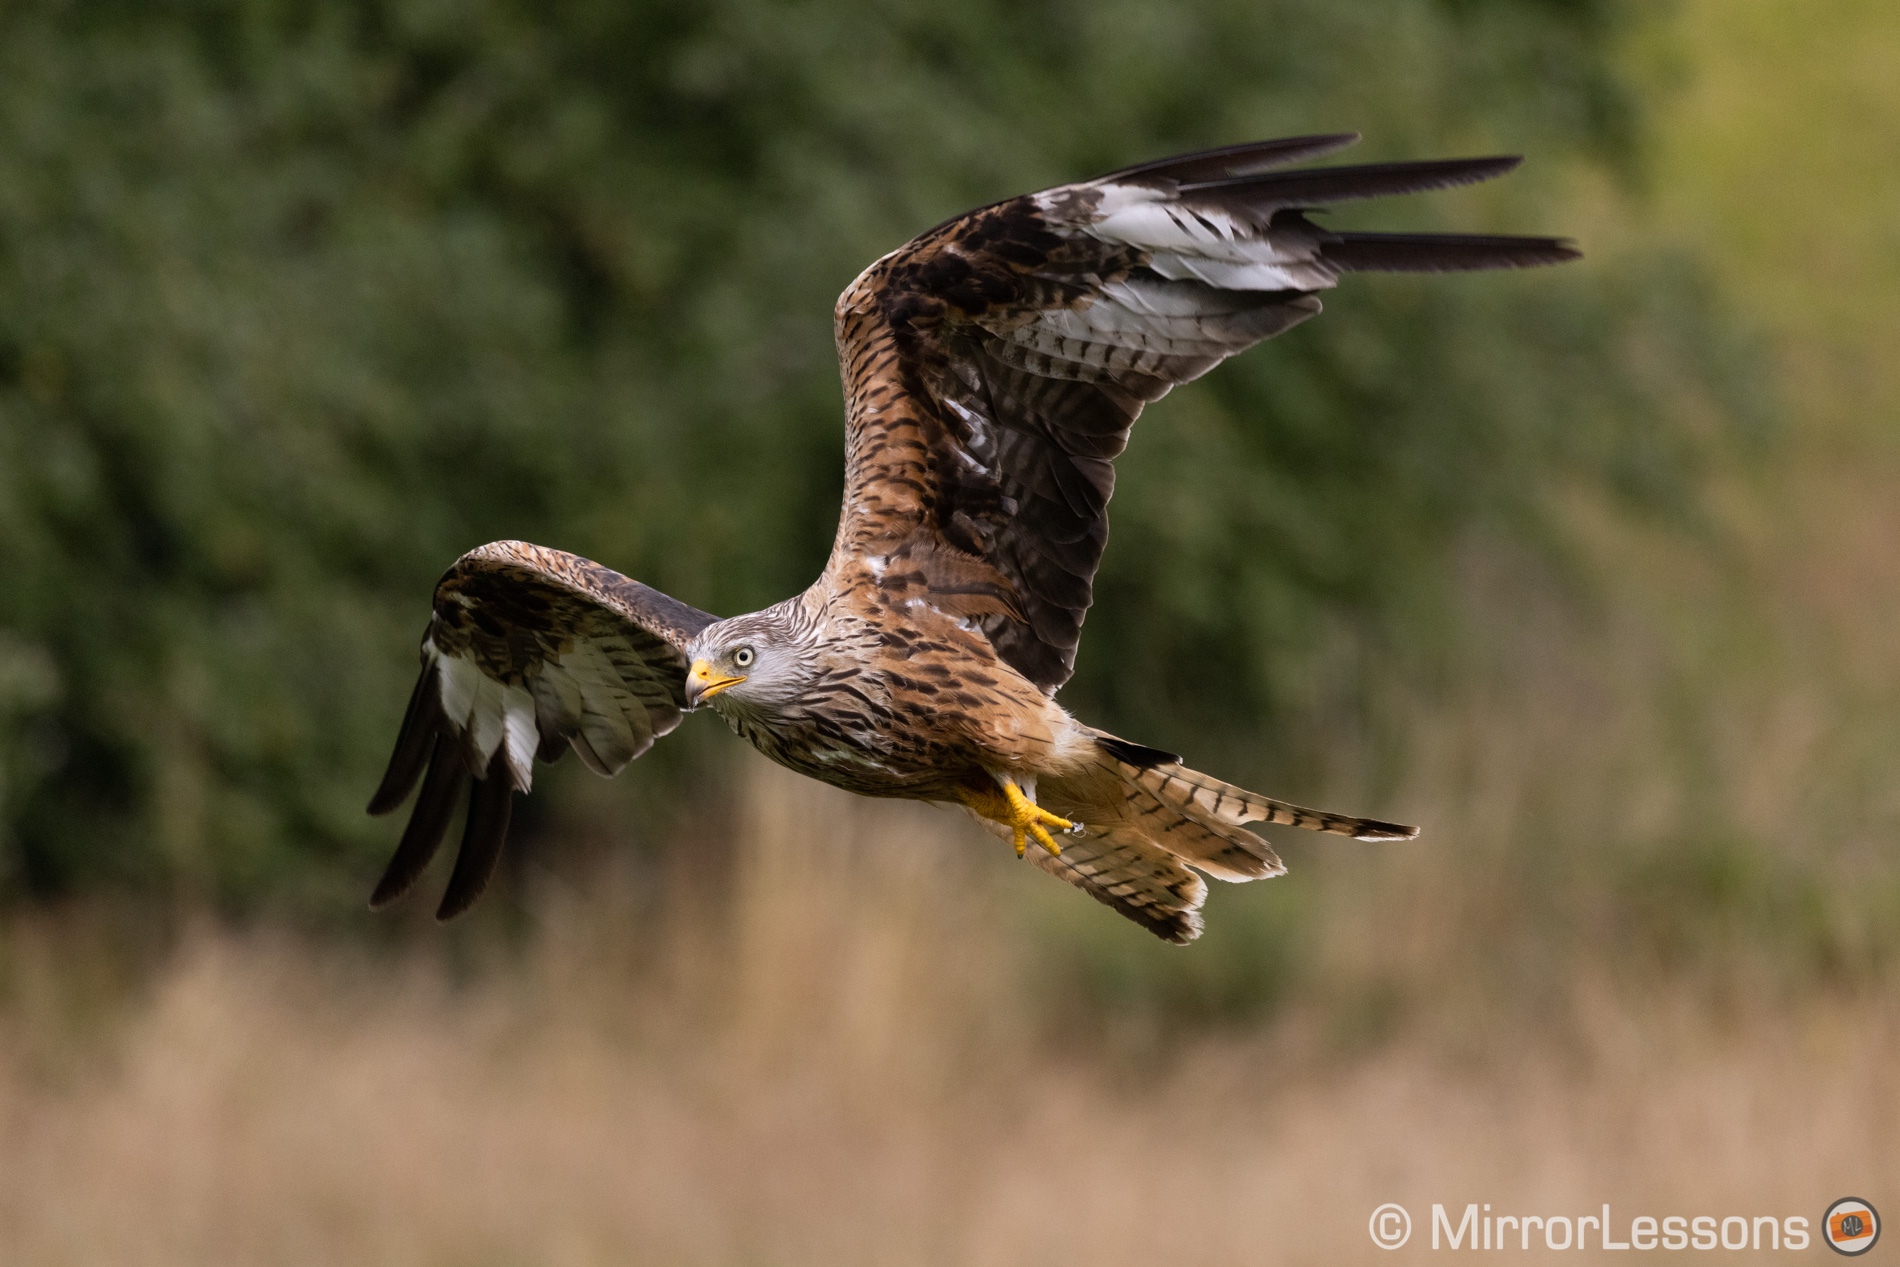
Granted, I didn’t find myself in very poor light conditions, like being under very dark clouds or in the woods on a rainy day but, overall, the sensor of the R5 (and R6) are very capable of handling these sort of situations even with a slow aperture such as f/11. And we must not forget that f/11 is not uncommon for wildlife photographers if you’re using a F5-6.3 zoom and a teleconverter for example.
Of course, when you are in the field, there are other factors that can influence which ISO is selected. Metering is one of them. For example, I find the three cameras meter about the same when using the Multi setting, but the E-M1 III tends to overexpose by 2/3Ev in comparison to the R5/R6 when using Spot metering.
Last but not least, there is your own judgement. If the light conditions are tricky, you may decrease the shutter speed and keep it at the minimum required to capture a sharp shot, in order to lower the ISO, or take better advantage of image stabilisation if the subject is not moving a lot.
Stabilisation is a great ally
Speaking of image stabilisation, I was pleasantly surprised to see how well the R6 and R5 work with the 600mm F11 and even the 800mm F11. Slow speeds such as 1/20s can give you decent results, although the keeper rate improves from 1/80s.

The Olympus stabilisation system remains the best you can find, and I can push the 300mm Pro down to 1/4s when combined with the IBIS on the sensor, which is very impressive.
Tip: remember that using the electronic fist curtain shutter (EFCS) helps to reduce micro vibration and motion blur.
Granted, such slow speeds will be useless most of the time for wildlife, but it means you can take advantage of stabilisation in moments when the animal remains very still. Settings such as 1/50s or 1/100s will certainly help keep the ISO level down.
Autofocus
The Dual Pixel CMOS AF of the R5 and R6 is very impressive. These are among the best cameras I’ve tested for birds in flight (check my complete ranking for BIF) and Animal AF in particular is very reliable, so much in fact that I always keep it activated.
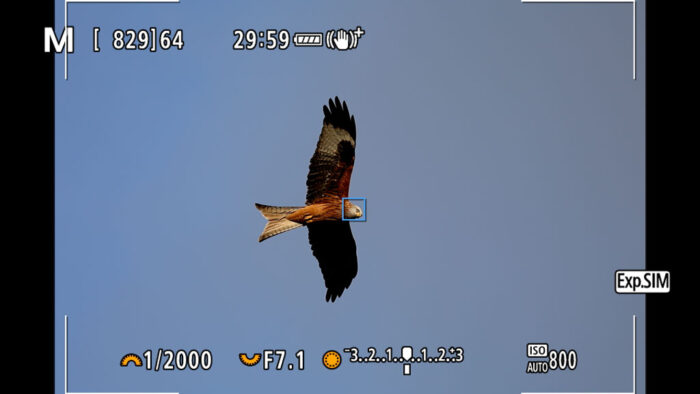
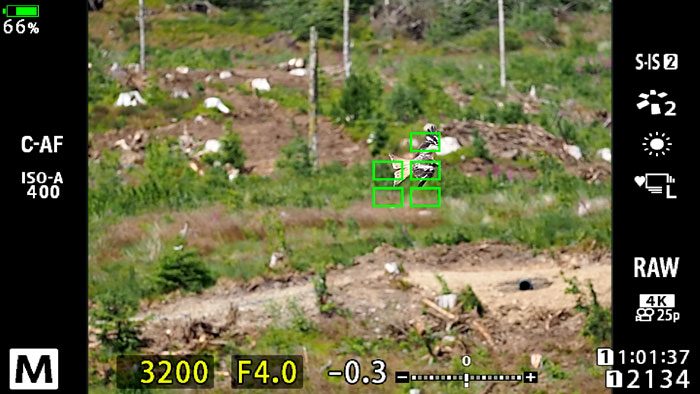
The only drawback is that with the 600mm F11 (and 800mm F11), the camera doesn’t use all the AF points available on the sensor, but only the central area. I believe this is because the central points have better low light sensitivity (-6.5Ev).
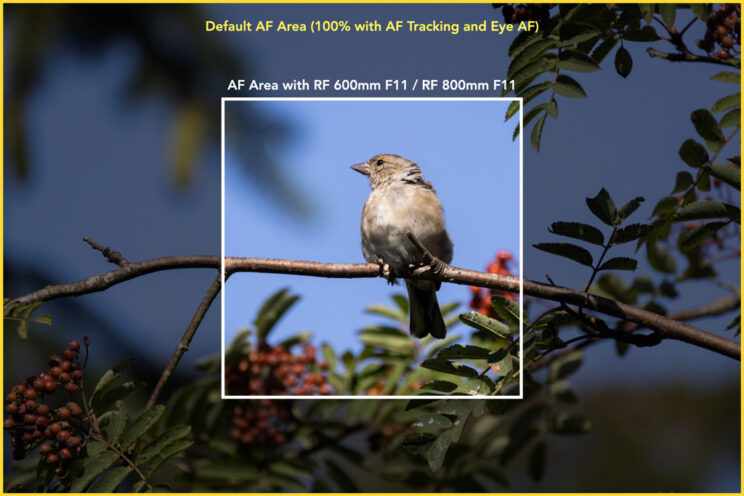
I thought the smaller AF area would limit the tracking of erratic birds that may not always stay at the centre of the frame, but the cameras seem to work really well with predictive AF when this happens, and I never had serious problems with it, as long as you quickly reframe the bird in the centre.
The limited AF area can be more annoying when you want to recompose your shot, for example when you’re taking pictures of a bird perched on a branch, and then you move it to the left or right part of the frame because a second bird has landed. If the subjects are too far apart, you risk having both of them outside the AF area and the AF can become less accurate.
The E-M1 III uses all the AF points available (121) but overall the autofocus system is not at the same level as the Canon. It is certainly enough to take good shots, but the keeper rate is lower by 16 / 18% for birds in flight. There is no animal detection either (only the flagship E-M1X has bird detection AF).
Additional reading material:
Continuous shooting
Both cameras are capable of stunning continuous shooting capabilities.
The R5 and R6 can do 12fps with the mechanical shutter, or 20fps with the electronic shutter, while maintaining continuous autofocus. The 20fps drive mode is what gave me the best score for birds in flight (about 10 to 15% better).
The small annoyance is that with the electronic shutter, the Canon always shoots at 20fps regardless of the drive mode selected (except single shooting). So even in situations where you don’t require such a high frame rate, you’ll end up with a lot of photos to sort out.
The E-M1 III can do 18fps with C-AF, which also gives me a better keeper rate for BIF than when using the mechanical shutter. It also does an impressive 60fps with the AF locked on the first frame. The fps can be changed for each drive mode (H and L, mechanical and electronic shutter).
Then we have the Pro Capture mode where the Olympus starts loading and refreshing the last 35 images in the buffer memory before the shutter button is pressed all the way down. When you start taking pictures (shutter button fully pressed), you already have 35 images ready to be written on the SD card, which is very helpful to capture unpredictable moments.
Size and ergonomics
The E-M1 III is a camera I’ve used multiple times, and I know its predecessor, with whom it shares many things, very well. It’s one of my all time favourites when it comes to the ergonomics because, despite the relatively compact size, it is extremely comfortable to hold, even with large lenses.
Paired with the 300mm F4 Pro, the E-M1 III is easy to carry around and you’ll never feel tired. But, and it’s not every day that I can write this, the Canon combination is actually lighter.
- E-M1 III + 300mm Pro: 1,850g
- R5 + 600mm F11: 1,668g
- R6 + 600mm F11: 1,610g
The R5 and R6 have very nice ergonomics too, and I also find them very intuitive to use.
What you trade in weight does come at a cost though: one of them is build quality. The 300mm F4 Pro is dust, moisture and freeze proof (down to -14˚C) and feels much more robust than the Canon lens, and you’ll notice this as soon as you lay your hands on it.
The 600mm F11 is very plasticky. I get that Canon wanted to deliver a lightweight lens for amateurs and beginners, but I feel they could have made an extra effort here. It is a lens designed to be used outside at all times, and you shouldn’t have to worry about rain while walking around a nature reserve. I would have happily accepted an increase in price to have weather sealing. It would still remain a very interesting and unique product.
At the very least, Canon could have included a hood in the box which I’m sure wouldn’t make the company go bankrupt, but would show a bit more care for the customer. And I know you’re going to say that Canon excludes hoods for most non-L lenses, but it’s 2021 and I find the decision a bit tightfisted.
45MP vs 20MP: how much can you crop?
Before wrapping up, I wanted to answer another series of comments that I received on my Olympus 150-400mm Pro review.
Some of you were curious to know if a high resolution sensor such as the one found in the R5 (45MP) would allow you to use a shorter focal length and crop in post to match the same field of view as the Olympus lens.
To evaluate this, I took a series of pictures with the R5 and RF 100-500mm F4.5-7.1 at 300mm, 400mm and 500mm. Then I cropped the R5 images to get more or less the same magnification on the stuffed toy that the Olympus 300mm delivers. Finally I calculated how much resolution is left after cropping. Here are the results.
- 300mm: 10.8MP after crop to match 600mm (equivalent)
- 400mm: 19.2MP after crop to match 600mm (equivalent)
- 500mm: 27.9MP after crop to match 600mm (equivalent)


The question was initially related to the use of the 150-400mm Pro at 400mm (800mm equivalent) versus 400mm or 500mm on full frame. Although I didn’t have the Olympus Pro zoom with me, using the Canon RF 800mm F11 allowed me to make the same calculations:
- 400mm: 10.4MP after crop to match 800mm (equivalent)
- 500mm: 15.2MP after crop to match 800mm (equivalent)
Using the same focal length on both systems certainly penalises you more when cropping on the R5, although an average of 10/11MP is not terrible. The result at 400mm (to obtain 600mm equivalent) is more interesting, because after the crop you’re almost matching the same resolution as the micro four thirds sensor.
One thing to keep in mind is that with a shorter focal length, there will be less shallow depth of field and consequentially less subject separation than using a longer focal length.
The cost breakdown
Before heading to the conclusion, I wanted to compare prices because there are few interesting points to make here too.
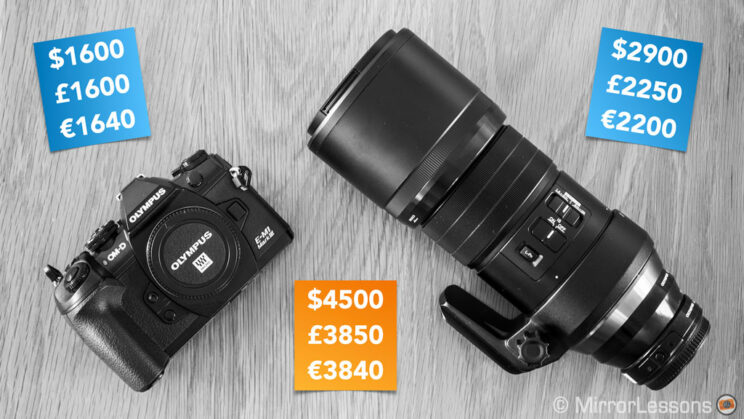
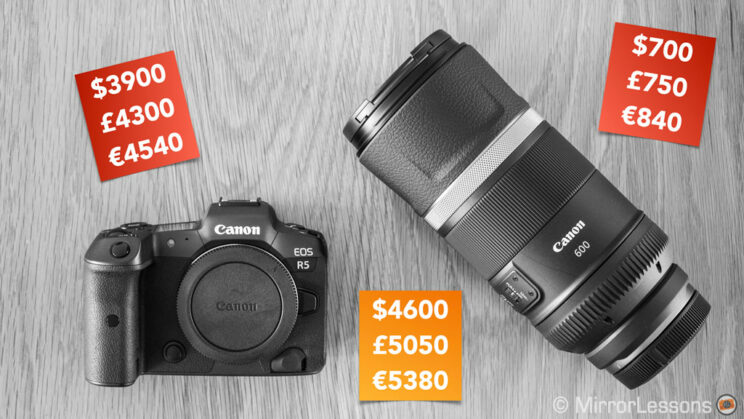
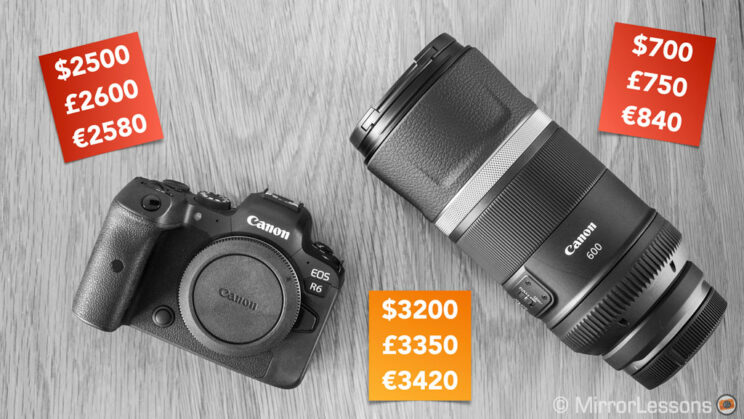
Note: prices are as of early August 2021.
In locations like the U.S., the Olympus kit requires a similar investment to the Canon gear if we’re talking about R5. In various geographical areas, including the UK and Europe, the m4/3 gear is more expensive when compared to the R6 combo. If you ever hesitate between these two systems, the cost breakdown could be key in helping you decide, depending on where you live.
A few extra things to consider: the Canon extenders are more expensive than the Olympus teleconverters. Also, consider an additional 50 bucks for the Canon lens hood.
Of course, these differences in cost can easily change when we bring other lenses to the table. For example, the Canon RF 100-500mm F4.5-7.1 (the only super tele zoom as of now) is much more expensive than the Olympus 100-400mm F5-6.3 or the Panasonic 100-400mm F4-6.3.
The list of examples could go on forever if we include more lenses, different camera bodies and DSLR lenses with the EF to EOS R adapter. But I’ll leave that for another day.
Conclusion
I don’t know how many photographers are seriously hesitating between these two combinations for wildlife photography. I imagine most of you arrived here out of curiosity more than anything else. But I hope this article shows you that things are not always what they seem on the surface.
Traditionally, micro four thirds has always been the system we mention when talking about travelling light and reducing size and weight. On the other hand, full frame is supposed to be the system with the big heavy lenses, but also superior image quality. Well, in our case here, some of these claims can be challenged (with a few catches).
The RF 600mm F11 (and 800mm F11) is a brilliant idea from Canon. I was interested when they announced it, then I was skeptical about the aperture, but now I’m happy to say I really enjoyed taking pictures with this lens, and I quickly forgot about the slow aperture. I was using something very light, with excellent quality, autofocus and stabilisation. I thought there would be more tradeoffs than that.
Granted, there are compromises: the lack of weather-sealing is hard to swallow when you think about the purpose of this lens. Also, the f/11 aperture does bring some limitations with subject separation, when the light condition is poor or when you have to work at F22 with the 2x teleconverter.
But nevertheless, if you want something affordable, compact and with excellent quality for wildlife photography, the Canon RF 600mm F11 makes a strong case for itself. The investment will vary depending on the body you want to use it with, but the fact that it performs really well on the high-end R5, with its demanding 45MP sensor, is proof of the lens’ value.
Where does that leave the Olympus solution then? Well, rest assured, it is still a very strong competitor. The faster aperture of the 300mm Pro easily makes up for the smaller sensor, you get a premium build quality with weather sealing, state of the art stabilisation and a few welcome features like being able to focus much closer to small subjects, which adds to the lens’ versatility.
Finally, this comparison reminds us that the difference in image quality between the two sensors, while undeniably there, is not always as huge as one may think.
Reminder: the links below are affiliate links. If you decided to buy something after clicking the link, we will receive a small commission.
Check the price of the Olympus OM-D E-M1 III on:
Amazon | Amazon UK | B&H Photo | eBay
Check the price of the Olympus 300mm F4 Pro on:
Amazon | Amazon UK | B&H Photo | eBay
Check the price of the Canon EOS R5 on:
Amazon | Amazon UK | B&H Photo | eBay
Check the price of the Canon EOS R6 on:
Amazon | Amazon UK | B&H Photo | eBay
Check the price of the Canon RF 600mm F11 on:
Amazon | Amazon UK | B&H Photo | eBay