Updated on: May 5th, 2019
The Sony A7R mark II is probably the mirrorless camera I’ve used more than any other since I began reviewing photography gear five years ago. When it was announced in June 2015, it looked like it was going to be a real game-changer, so I vowed to dedicate as much time as possible to testing it in every possible condition, while also enjoying it as my go-to camera.
I wasn’t expecting its successor to be as much of a game-changer, but rather a more mature product that would focus on fixing flaws and limitations, and addressing issues found on the previous model in order to give the photographer a better experience. And I have to say that the A7R mark III does exactly that.
Now, whenever a new camera model replaces an older one, there is almost always a relevant difference in price and such is the case with the A7r II and A7r III. The question is: should you pay the extra money for the mark III model when we know that the sensor – the star feature of the A7R series – remains the same as its predecessor? Well, my job is to try and answer this for you. Let’s get started!
Ethics statement: We bought the A7R II for personal use and review purposes, then traded it in for the mark III version. We were not asked to write anything about these cameras, nor were we provided any compensation. Within the article, there are affiliate links. If you decided to buy something after clicking the link, we will receive a small commission. To know more about our ethics, you can visit our full disclosure page. Thank you!
Table of Contents
1. Article Updates
2. Main Specs
3. Design and Build Quality
4. Buttons, Dials and Interface
5. Menu system and customisation
6. Viewfinder and LCD monitor
7. Image quality
8. Autofocus
9. Shutter, Continuous shooting and Buffer
10. Sensor shift
11. Video
12. Flash and extra features
13. Battery life
14. Price
15. Conclusion
16. Sample images and additional content
Article updates
- May 2019: feedback about EyeAF for animals (firmware 3.0 for the A7R III)
- October 2018: report about the A7R III firmware 2.0 and the compatibility issue with third party batteries
- January 2019: firmware 2.10 fixes a compatibility issue with third party SD cards on the A7R III
Sony A7R II vs Sony A7R III – Main Specs
A7R mark II
- Sensor: 42MP 35mm format BSI Exmor CMOS
- Lens system: E-mount
- Weatherproof: Yes (dust and moisture)
- Internal Stabilisation: Yes (5-axis)
- Autofocus: Hybrid with 399 phase and 25 contrast detection points
- Continuous shooting: 2.5 to 5fps with AE/AF Tracking
- ISO Sensitivity: 100 – 25600 ISO (pull 50, push up to 102400)
- Shutter Speeds: 1/8000 to 30s
- Viewfinder: 0.5in OLED with 2,360k dots, 23mm eye point, 0.78x magnification and 60fps refresh rate
- Rear monitor: Tilting 3″ LCD (1.23M dots)
- Movie recording: 4K up to 30fps, Full HD up to 60fps, HD up to 720p, S-Log gamma
- Built-in Flash: No
- Extra Features: WiFi, Bracketing, Tethering
- Dimensions: 126.9 x 95.7 x 71.7mm
- Weight: 625g (including battery and memory card)
- Firmware version: 4.00
A7R mark III
- Sensor: 42MP 35mm format BSI Exmor CMOS
- Lens system: E-mount
- Weatherproof: Yes (dust and moisture)
- Internal Stabilisation: Yes (5-axis)
- Autofocus: Hybrid with 399 phase and 425 contrast detection points
- Continuous shooting: 3fps to 10fps with AE/AF Tracking
- ISO Sensitivity: 100 – 32000 ISO (pull 50, push up to 102400)
- Shutter Speeds: 1/8000 to 30s
- Viewfinder: 0.5in OLED with 3,686k dots, 23mm eye point, 0.78x magnification and 120fps refresh rate
- Rear monitor: Tilting 3″ LCD (1.44M dots) with touch sensitivity
- Movie recording: 4K up to 30fps, Full HD up to 120fps, S-Log and HLG gamma
- Built-in Flash: No
- Extra Features: WiFi, Bluetooth, Bracketing, Pixel Shift Multi Shooting, Tethering, Dual SD slots
- Dimensions: 126.9 x 95.6 x 73.7mm
- Weight: 657g (including battery and memory card)
- Firmware version: 3.00
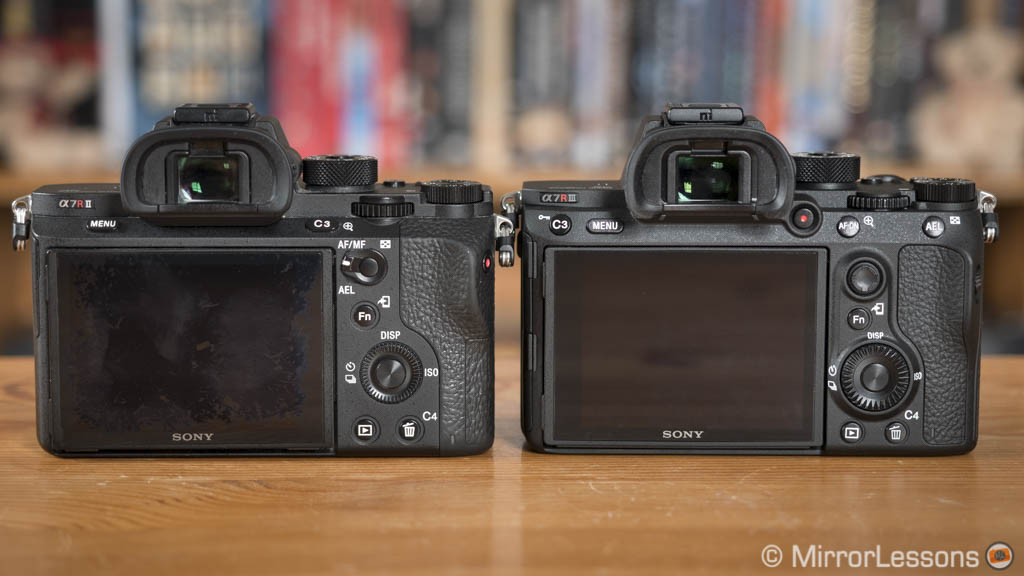
Design, build quality and comfort
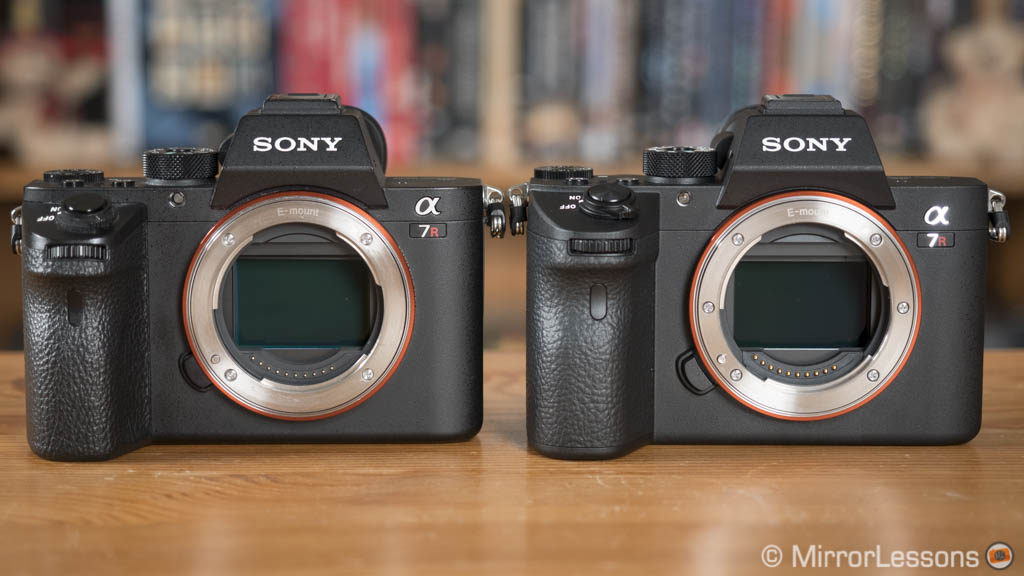
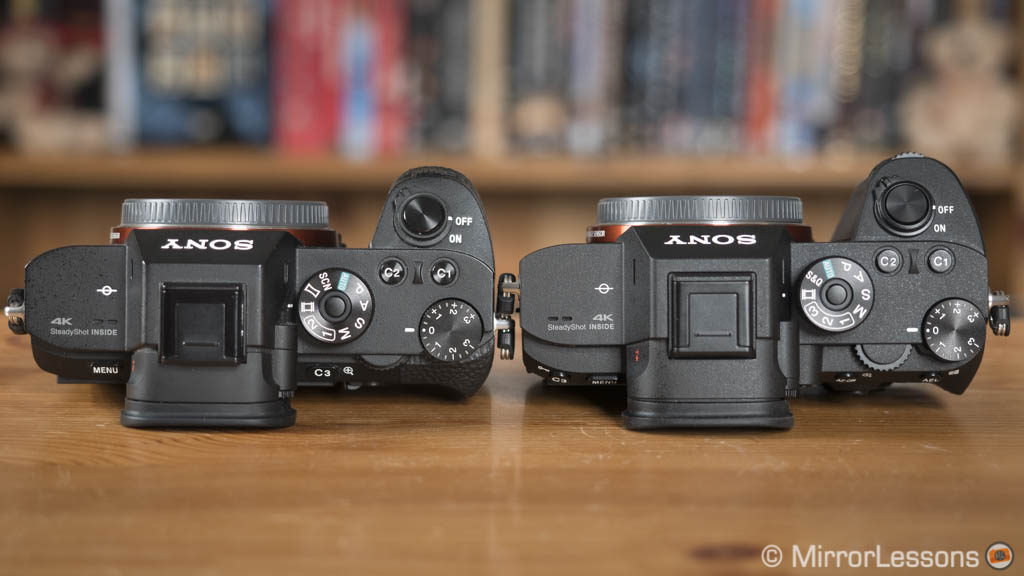
Despite all the technical improvements such as the larger battery, Sony managed to keep the dimensions of the A7R mark III pretty much identical to its predecessor. It is a few millimetres deeper and 32g heavier but the width and height remain basically the same.
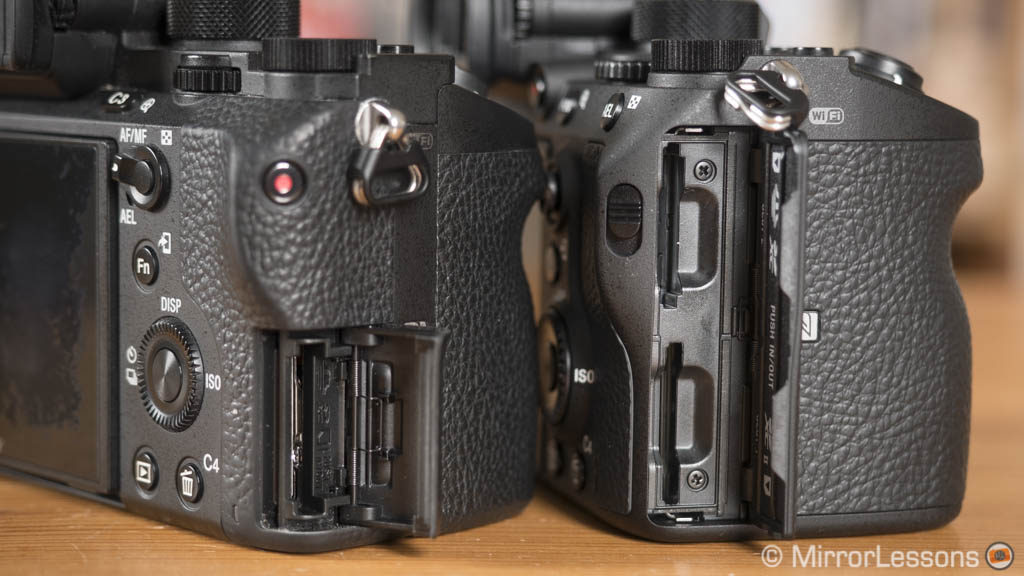
Both cameras have a tough magnesium alloy body and are protected against dust and moisture. On the A7R III you will notice that the mount is now attached with six screws rather than four. The SD card door feels more robust on the new model and the unlock button prevents it for opening inadvertently.
Concerning the weather sealing, I never found myself shooting in very harsh weather conditions, barring the occasional rain shower, so I never experienced any problem with either camera. Plus if the rain gets really intense, I tend to protect my gear unless it’s absolutely necessary to continue shooting.
However some torture tests like the one you can find on Imaging Resource show that the Sony is not the most reliable in extreme conditions. I’m not saying you shouldn’t buy one because of this, but I think it’s fair to include this extra piece of information.
Both cameras are comfortable enough to hold and use with small to medium sized lenses. Despite the compact size, the buttons are well-organised and easy to reach.
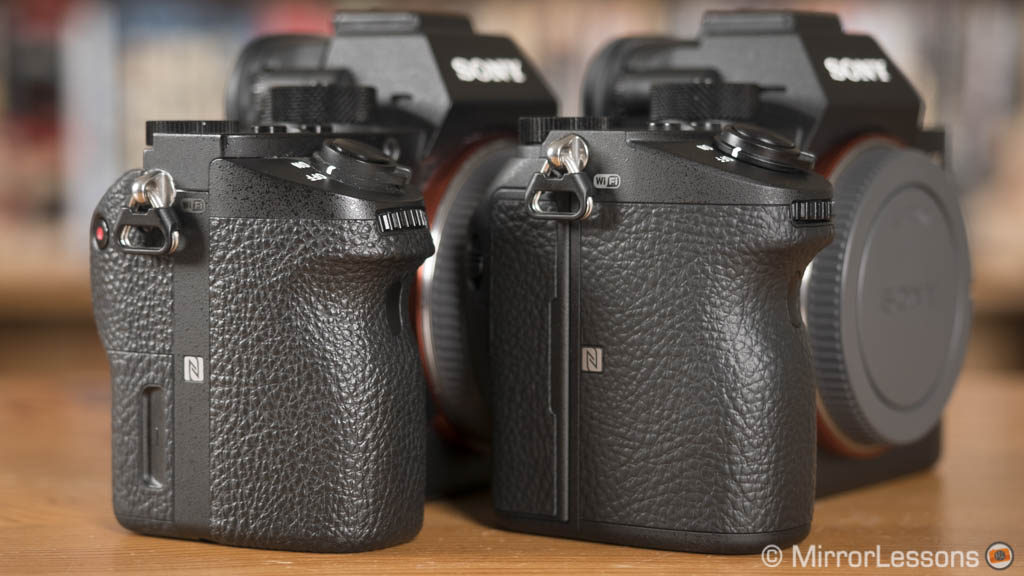
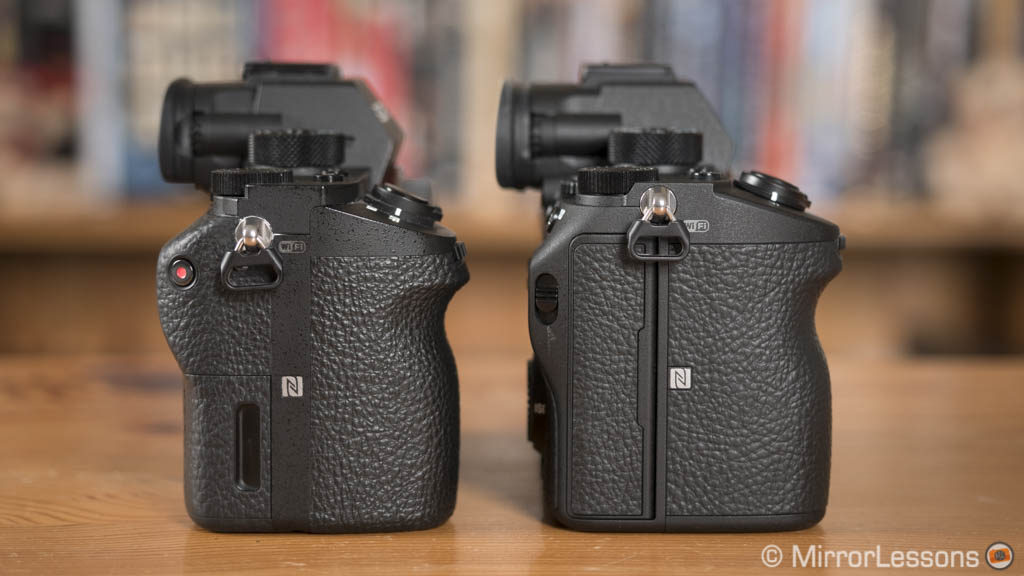
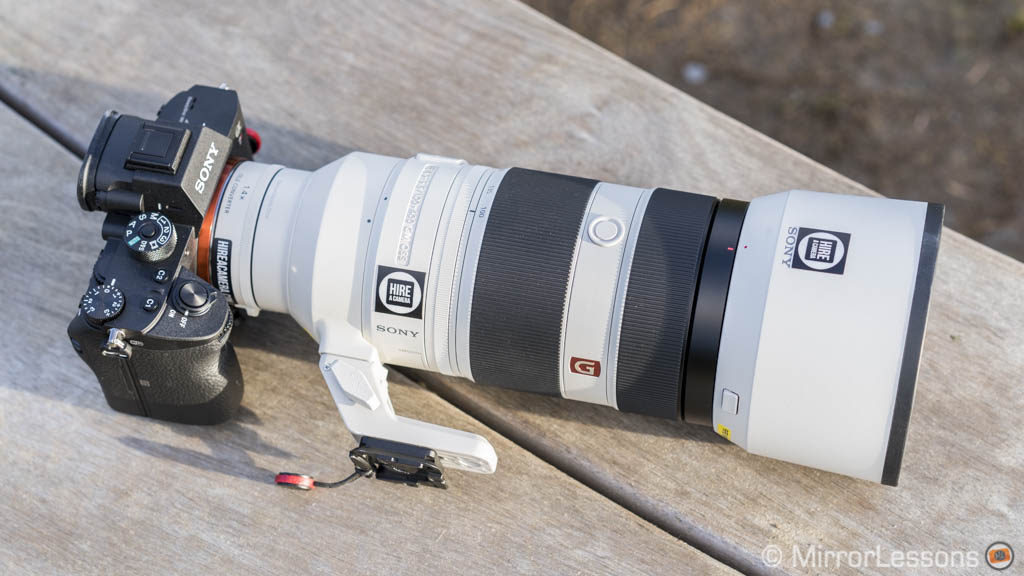
The only flaw is the same I already highlighted in my A7R III vs A9 comparison: the grip. Although the one on the A7R III is slightly larger and taller than the one on the mark II model, I still find it too small when using large lenses such as the FE 24-70mm f/2.8 or the FE 100-400mm GM, in part because all the weight rests on your middle finger.
The compact dimensions of the camera don’t leave any space for your little finger at the bottom of the grip, and there isn’t much space between the lens barrel and the grip either, so your hand can easily come in contact with the lens when you grab the camera.
The A7R II isn’t much better so this remains an aspect that Sony should consider improving on future releases. I don’t think the camera needs to be much bigger but increasing the dimensions ever so slightly could significantly improve the handling.
One way to enhance comfort is to buy either the optional GP-X1EM horizontal grip or the battery grip. With the former, keep in mind that you’ll need to remove it whenever you need to change batteries.
Buttons, dials and interface
There are a three things that set these two cameras apart when it comes to practicality:
- battery size
- memory card slots
- AF area control
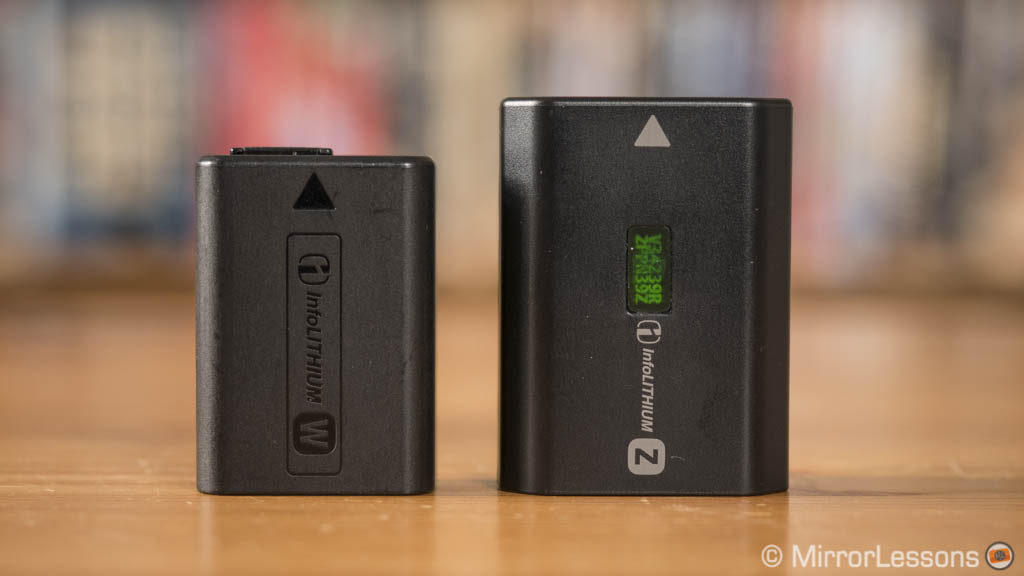
I’ll talk about the battery in the dedicated chapter at the end of the article, but it’s safe to reveal that it is way better on the new camera because the new NP-FZ100 is larger and offers a longer battery life.
Then we have the two SD card slots on the A7R III, the first of which is UHS-II compliant. This is another welcome improvement that allows you to do a number of things such as assign JPG and RAW files or still and video files to two separate cards. You can use one to back up whatever is being recorded on the other card, as well as switch to the second when the first becomes full. The A7R II only has one UHS-I slot.
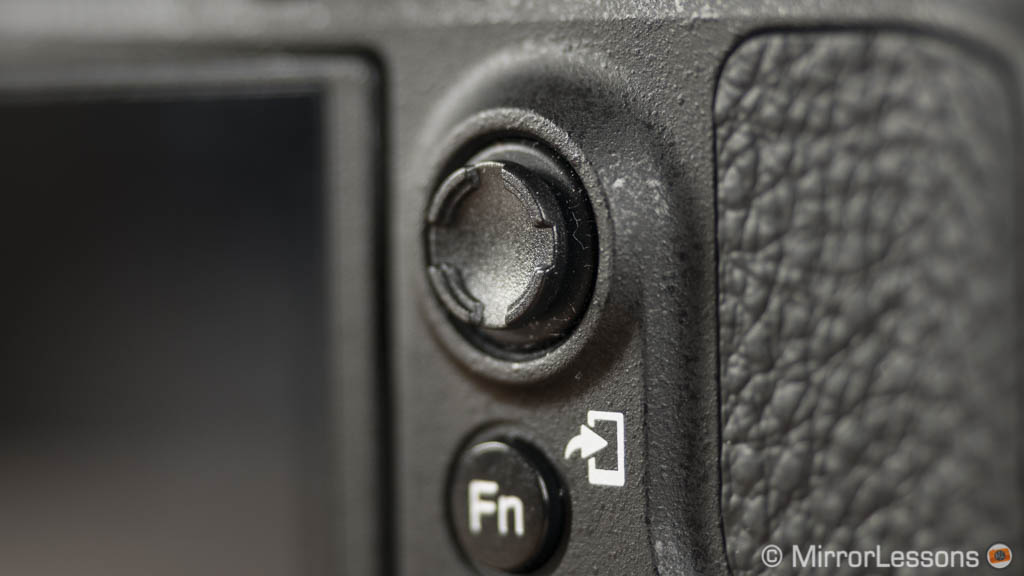
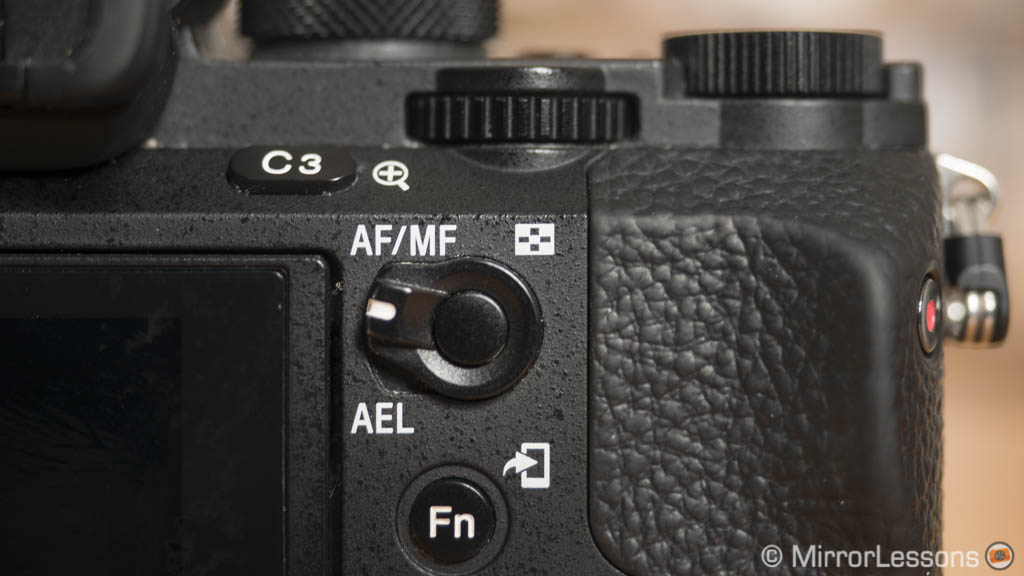
The way you control the autofocus area is another great improvement. The A7R III gives you more options, the most noteworthy being the AF joystick on the rear. It has an excellent tactile feel and is precise to use, albeit a little slower than I would like. You can also use the touch screen, which we will discuss in the next chapter.
The best way to move the focus point on the A7R II is to assign the Focus Standard setting on the centre rear wheel button, and then use the four-way wheel buttons to move it around. It’s a solution that has worked just fine up until now but it definitely isn’t as intuitive as the joystick.
In order to make room for the joystick, however, Sony had to eliminate the useful lever you can find on the A7R II. It allows you to switch between two different functions and I always found it very handy.
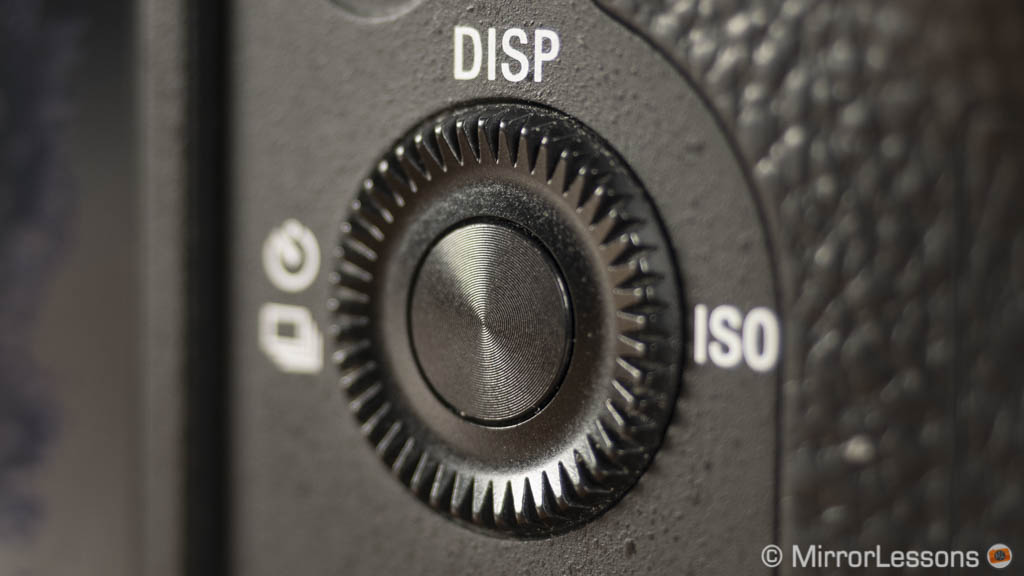
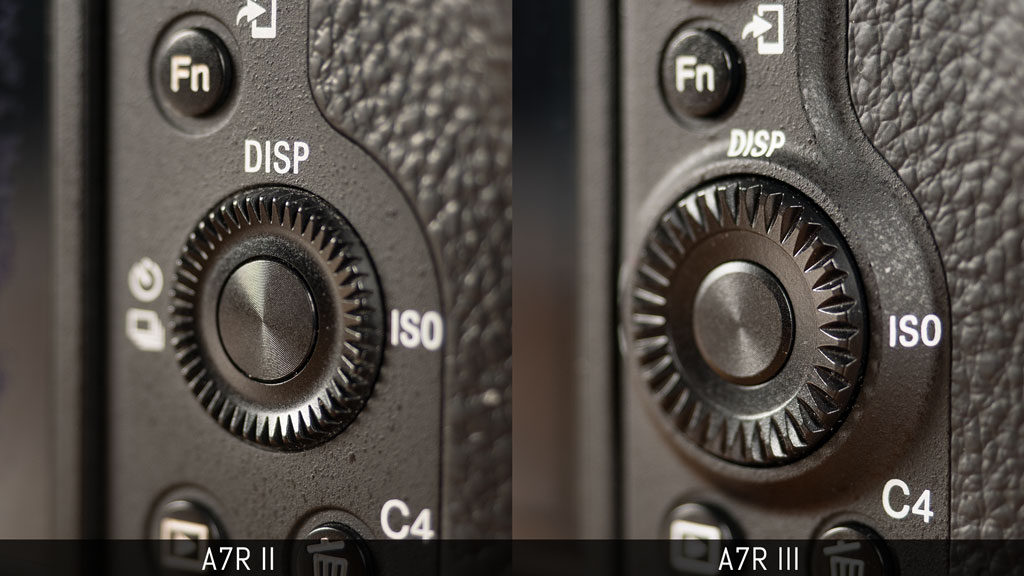
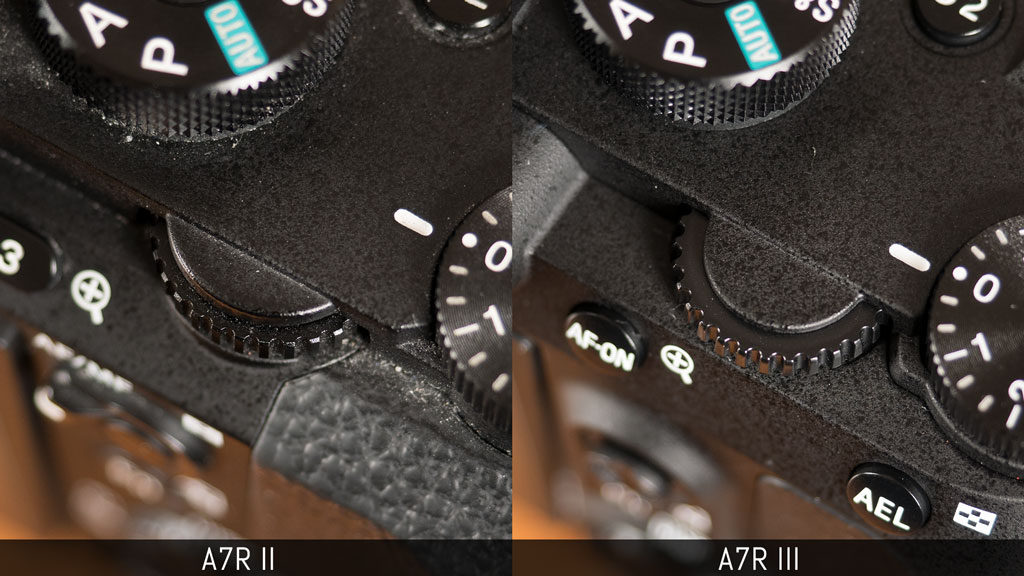
There are other small changes concerning the buttons and dials. The most welcome improvement concerns the rear control wheel: it doesn’t move about as freely as the one found on the A7R II and the added thickness improves its precision and tactile feel.
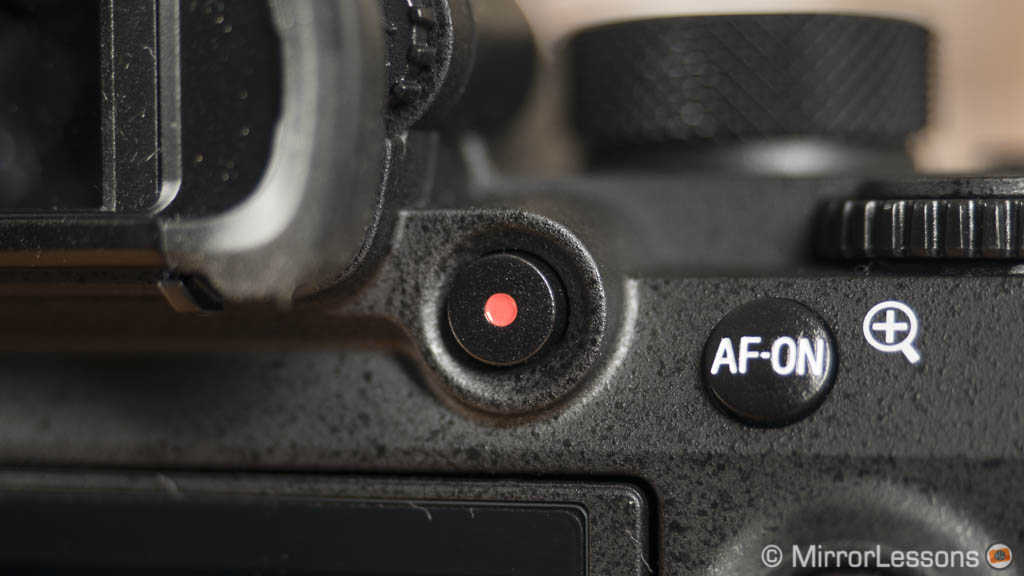
The video recording button has been moved near the viewfinder where it is easy to reach and operate. It is ever so slightly larger but is more responsive and softer to press.
The twin front/rear dials to control the exposure remain very similar, although the one on the rear benefits from added space on the mark III model which makes it easier to rotate.
Not a lot has changed otherwise, excluding the C3 button which is now on the left side near the Menu button. We also find two custom buttons on top next to the exposure compensation and mode dials.
The mode dial has an unlock button at the centre that needs to be pressed and held every time you turn it. I still think that a manual lock/unlock button would be a better option.
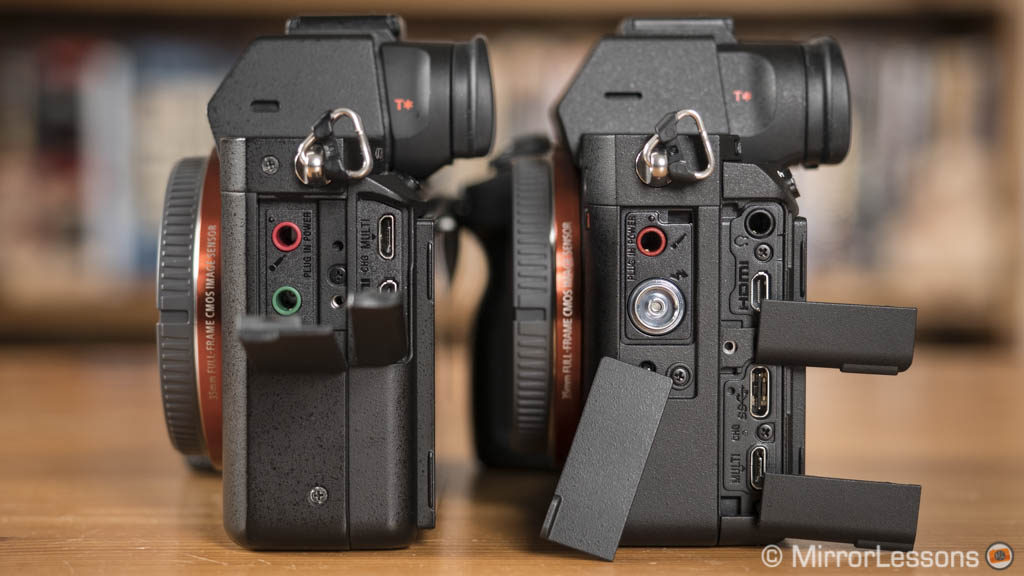
As for the connections, the A7R III retains a mic input, headphone output, micro HDMI and Micro USB/Multi just like the A7R II but also gains USB Type C and flash sync ports.
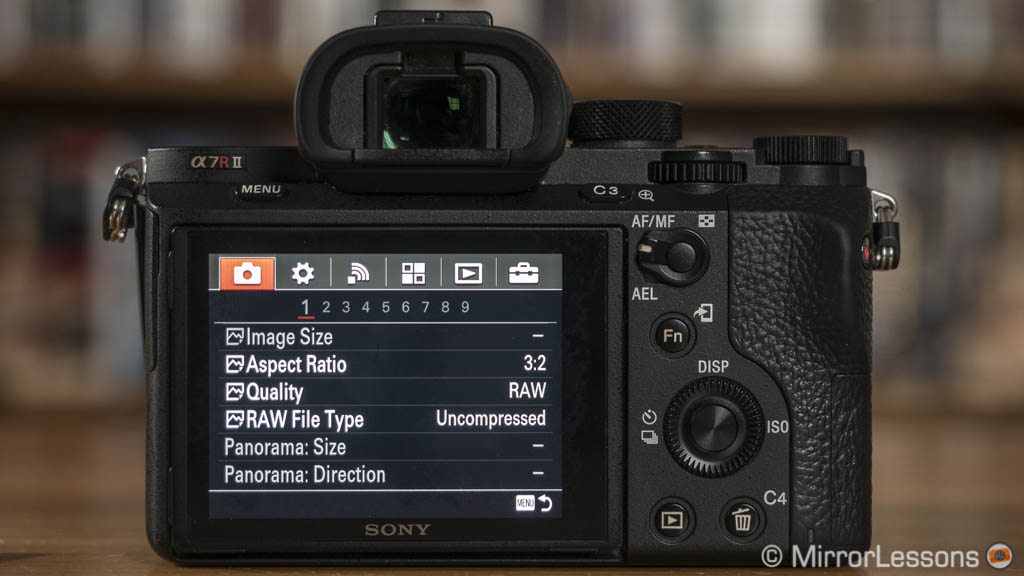
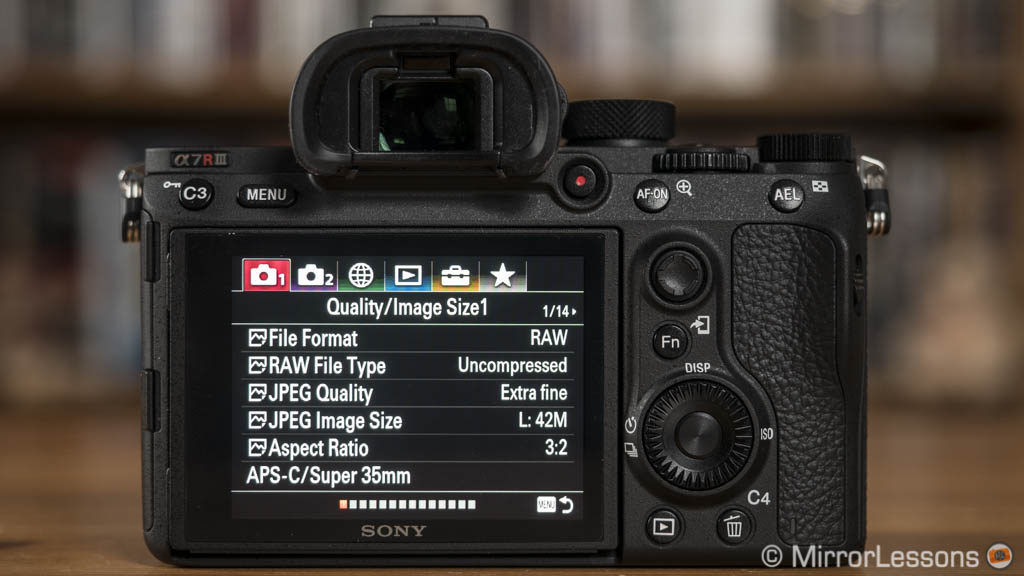
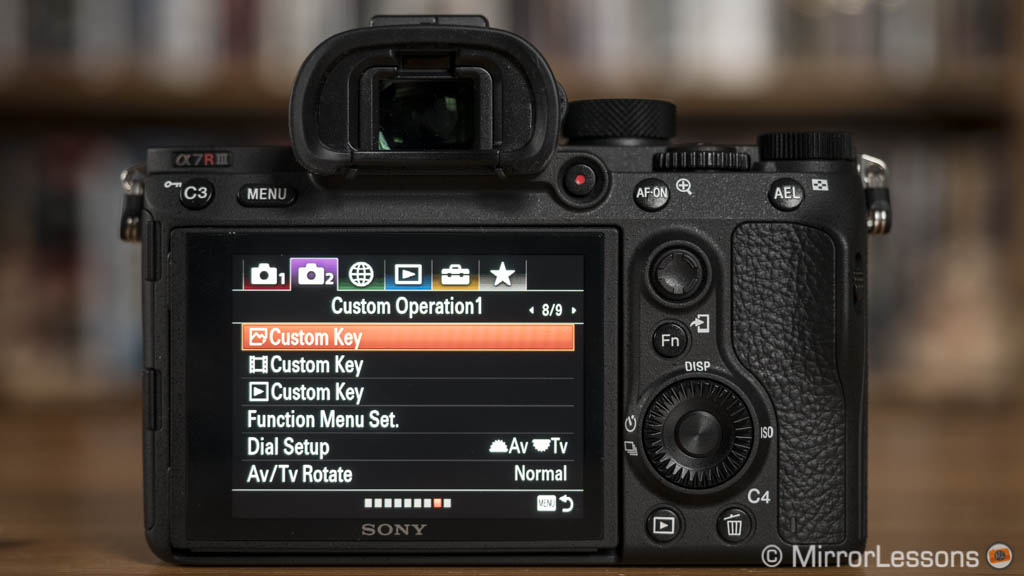
Menu system and customisation
The A7R III features the latest version of Sony’s extensive menu system. If you’re not familiar with Sony cameras, it requires some getting use to: some functions are hidden, the names of settings aren’t always clear at first, and the logic behind its organisation is still a little bit confusing.
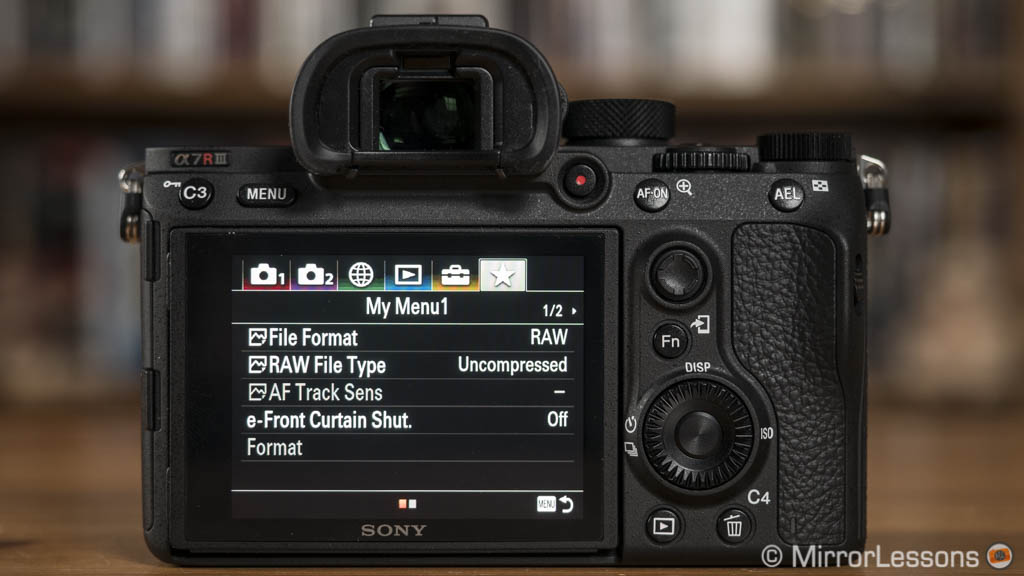
If you are already familiar with E-mount cameras, however, you will certainly appreciate the improvements made to the new camera. By comparison, the menu on the A7R II is much more confusing and offers less customisation. For example, my favourite update to the mark III is the My Menu page where I can add shortcuts to my frequently used settings.
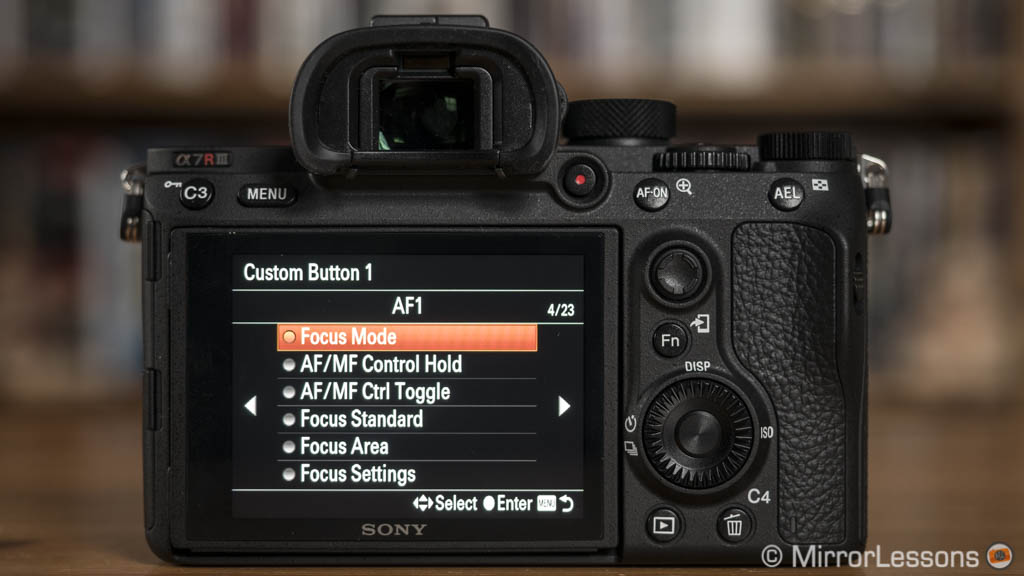
There are 10 custom buttons on both cameras plus the wheel rotation, but the A7R III lets you configure the AF Joystick as well (when pressed). Personally I prefer to keep it set to the Focus Standard setting, which is useful to bring the focus area back to the centre.
One advantage of the A7R III is that you can configure the buttons differently for stills, movies and playback mode. The mark III model gives you more options to choose from for each custom button (102 versus 62 on the A7R II). It is also easier to make a selection because you can browse left or right through the different categories rather than just scroll up and down.

Another new option on the mark III is the possibility to lock the AF joystick, dials or rear wheel (or all of them) by pressing and holding the Fn button for a few seconds.
Other customisation options include the 12-slot Fn menu that can be configured as you wish, and the memory recalls (two on the mk2, three on the mk3) that you can select from the main dial on top. Note that on the A7R III, you can recall one of the three memories via a function button as well (Reg. Cust. Shoot Set).
It can take some time to find the optimal configuration but once you do, the A7r III becomes very quick and easy to operate, and that’s one of the main differences you will notice in the long run when comparing it with the previous model.
To learn how to customise your Sony Alpha A7 camera, check out dedicated guide below.
Viewfinder and LCD monitor
The viewfinder is another upgrade I really love on the A7R III. Although the magnification of 0.78x remains the same, it has more resolution (3,686k dots) and a faster refresh rate that can be set to 100fps or 120fps (depending on whether you are working in PAL or NTSC mode).
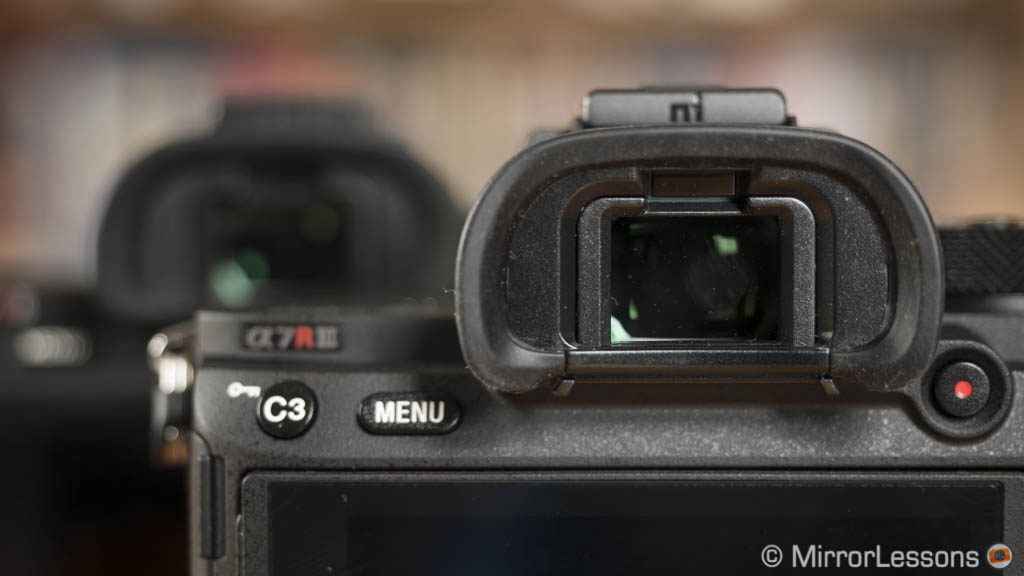
The increased resolution is what surprised me the most – not just the sharpness of the OLED panel itself, but also how much easier it is to manually focus. Magnification in particular is wonderful to use when you want to fine-tune your focus in still mode because it is much sharper than on the A7R II. In video mode, the resolution is not as good but still better than the mark II model.
The A7R II has an OLED panel with 2,260k dots and the refresh rate doesn’t go higher than 60fps. Both feature a 23mm eyepoint which is excellent but a little short if you wear glasses as I do.
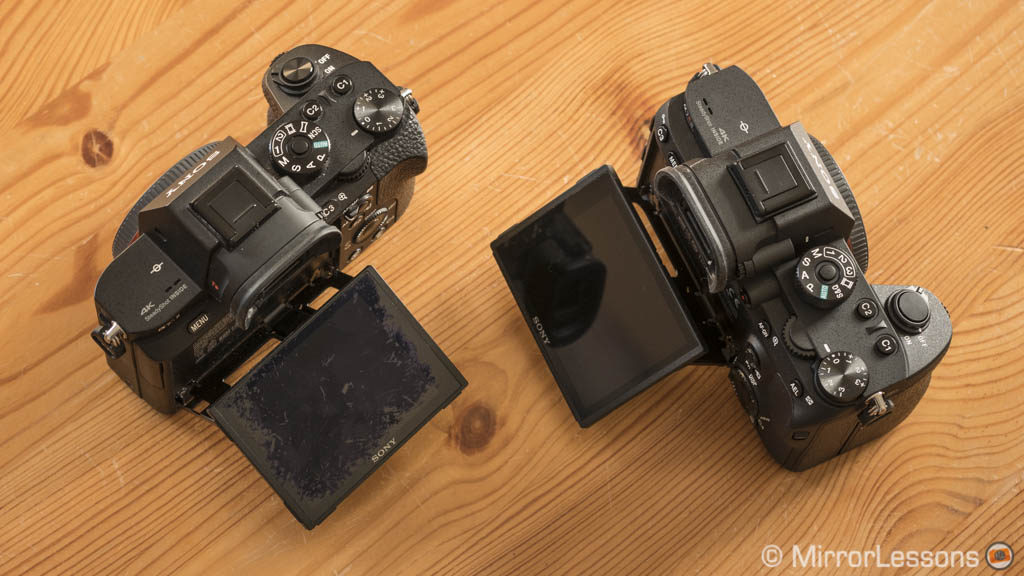
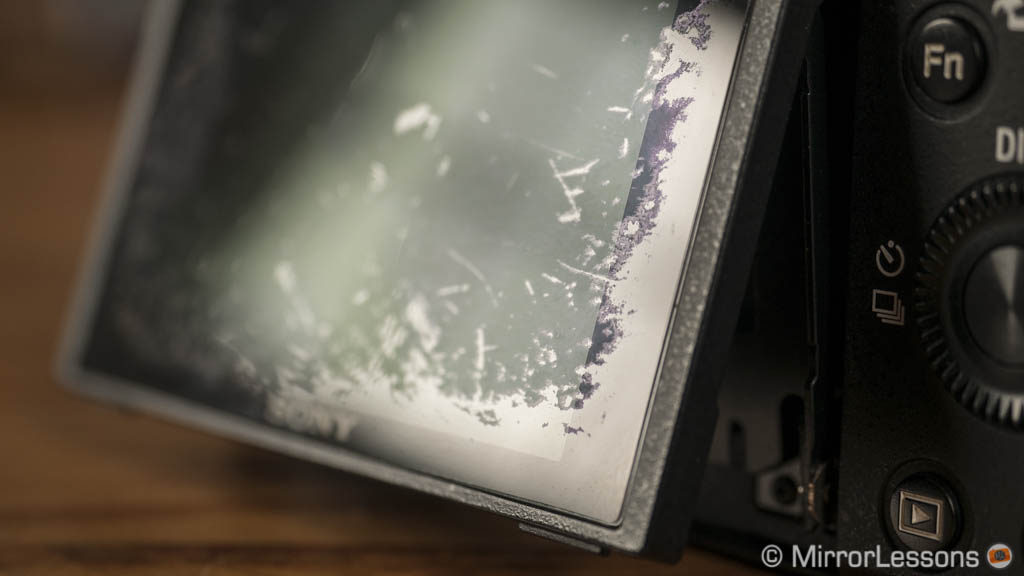
Then we have the rear LCD monitor, and I would like to start by showing you how ugly the one on my old A7R II looks today. The coating peeled off in quite a few places, so when I received our A7R III, I made sure to buy a screen protector right away.
It’s hard to tell if the A7R III has a stronger coating (I would hope so since it is a well-known problem) but given that screen protectors don’t cost a lot, I prefer to protect the monitor in case I decide to sell the camera in the future.
Concerning the tech specs, the resolution of the A7R III screen is slightly higher (1.44M vs 1.23M) but the real update is touch sensitivity, something that the A7R II lacks.
The touch screen can be used to enlarge an image in playback mode and move the focus point. The latter is definitely the most interesting thing you can do as it offers several possibilities.

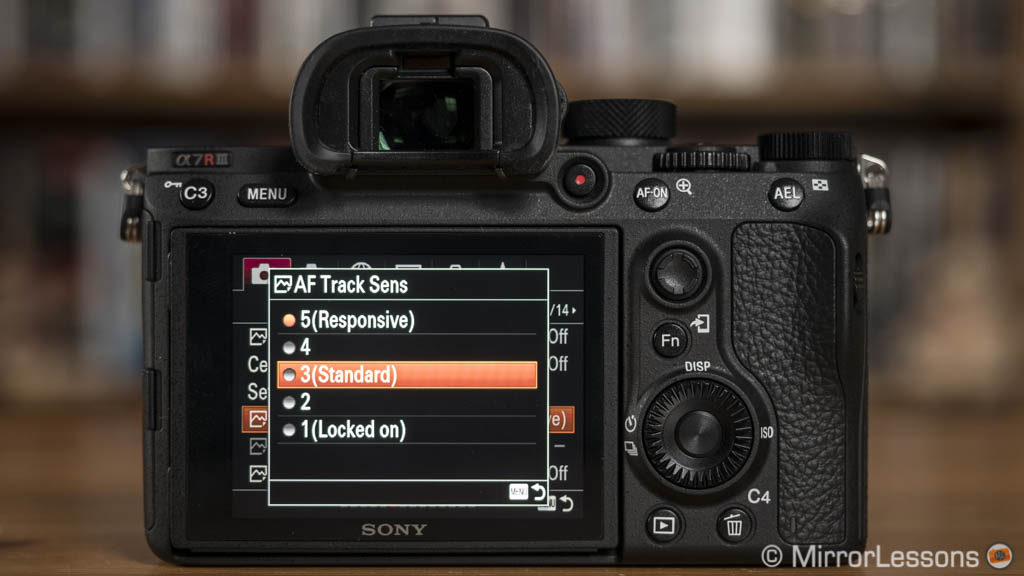
The most obvious is being able to move the focus point while composing with the rear screen. It is reactive and precise but won’t trigger the AF in still mode. In truth, I find it more interesting in video mode because it remains active during the recording. If you tweak the AF settings so that they deliver the smoothest response (AF Drive Speed to Slow, AF Track Sens to Normal), you can get very nice results.
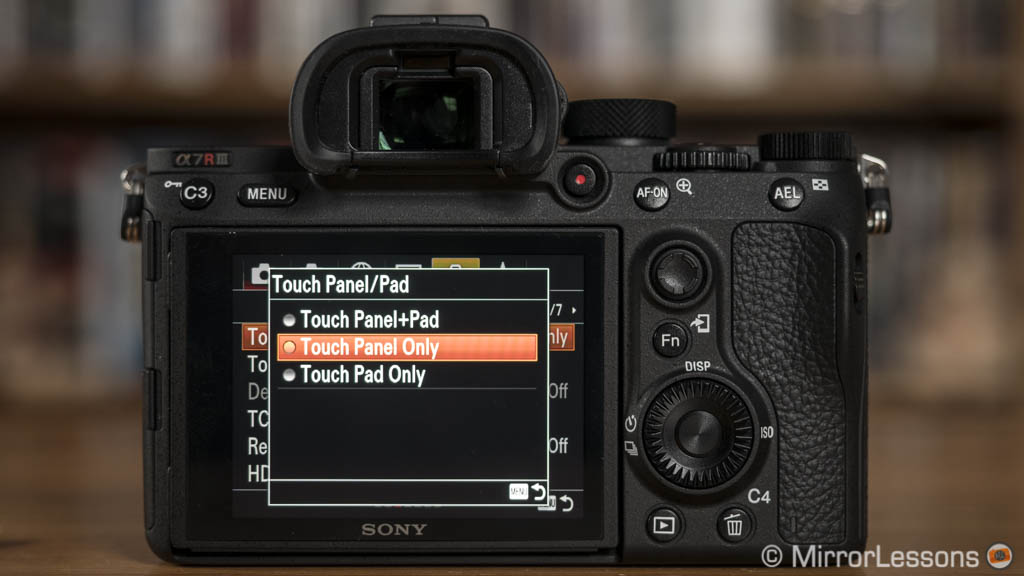
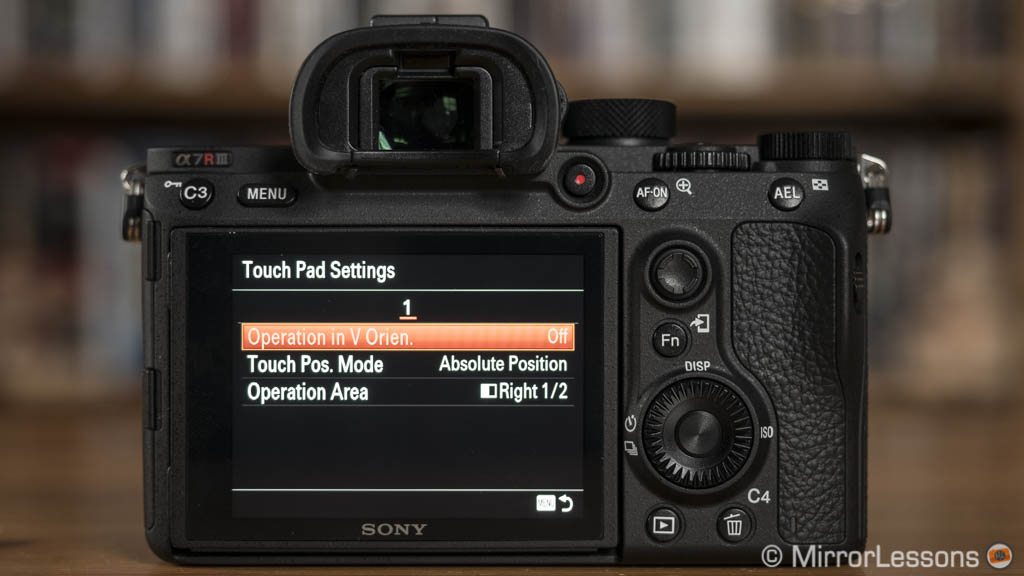
If you don’t fancy using the AF Joystick, you can use the LCD screen to move the AF point when composing with the viewfinder. You can choose to keep the entire area, the left / right part or just one of the four corners active. Once you touch the selected area, the entire screen becomes active. This helps you avoid having the entire screen active all the time and stops you from accidentally moving the focus point when you touch the screen by mistake.
To learn more about the viewfinder and display settings of your Sony A7 camera, check out the guide below.
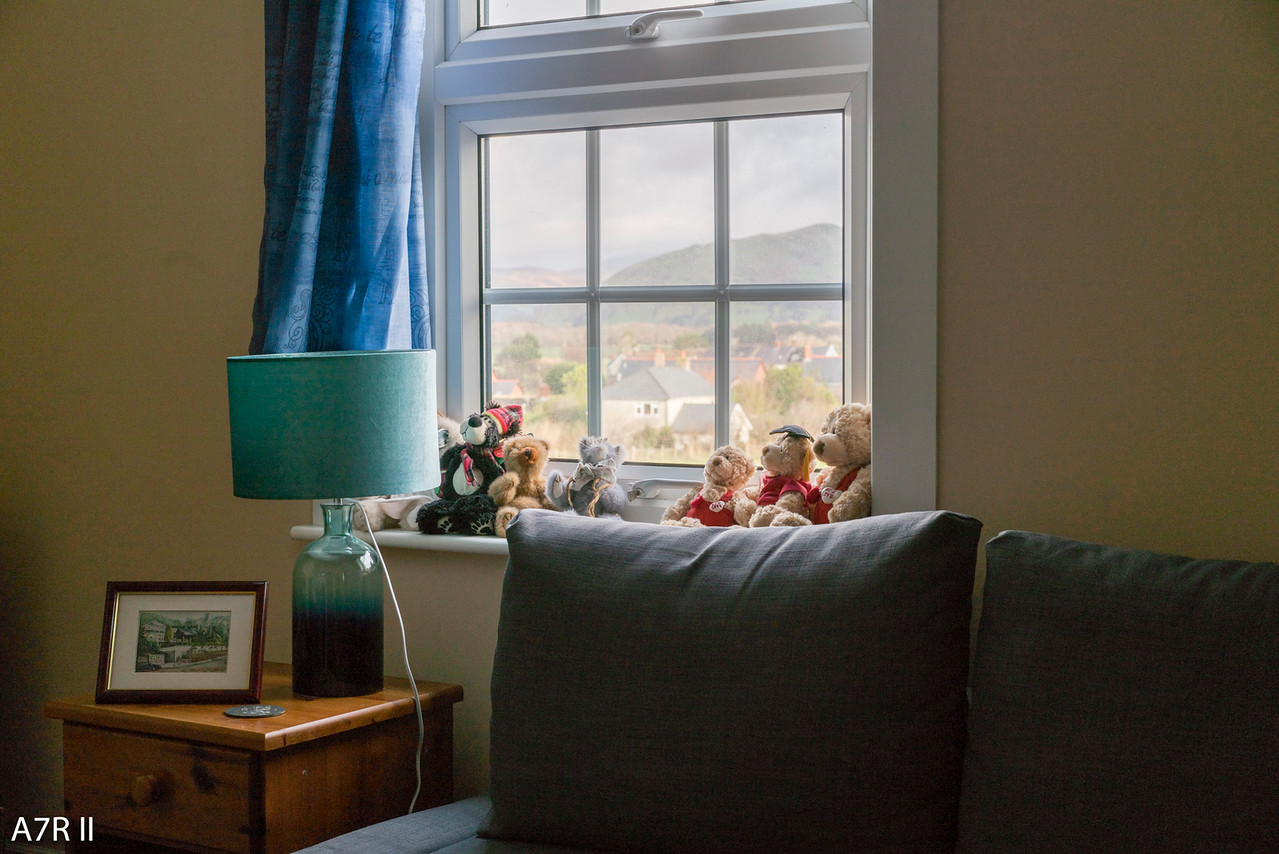
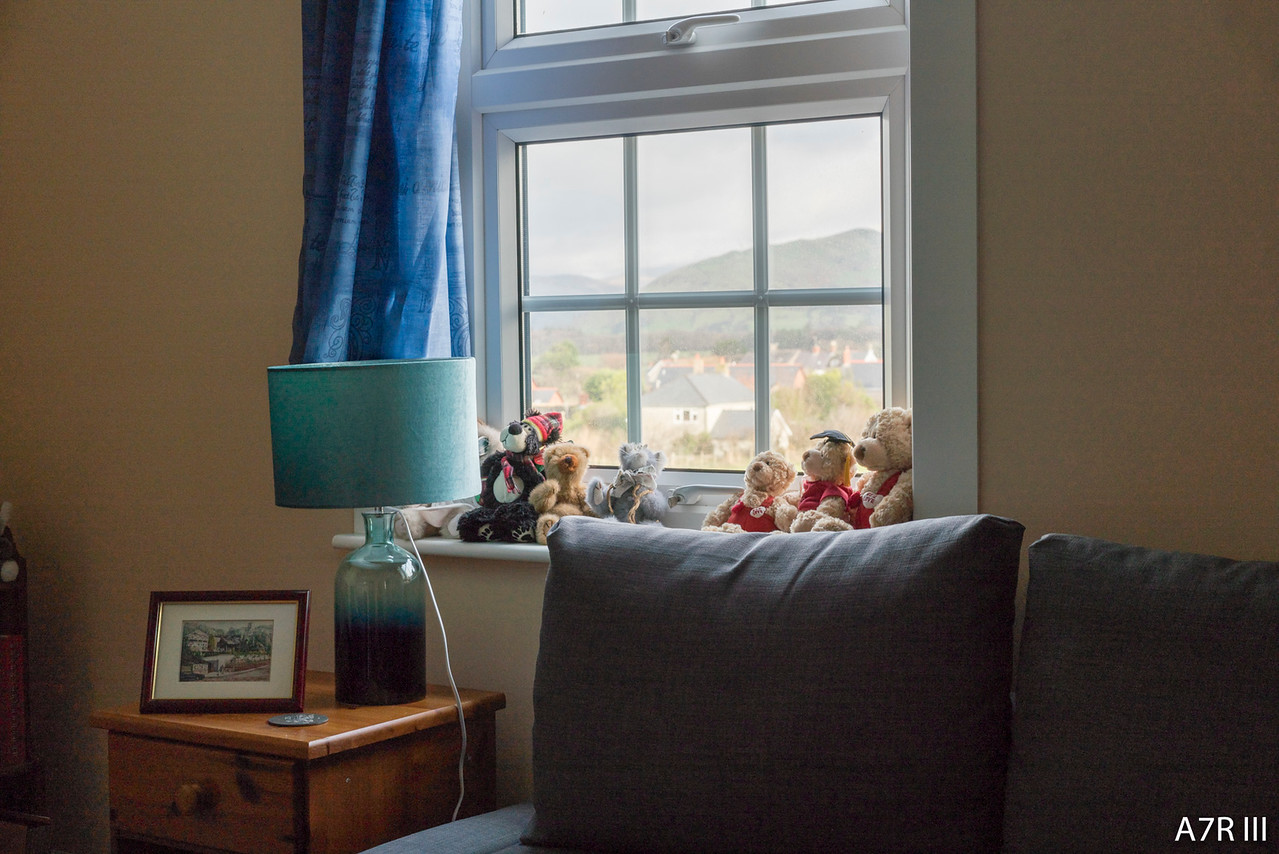
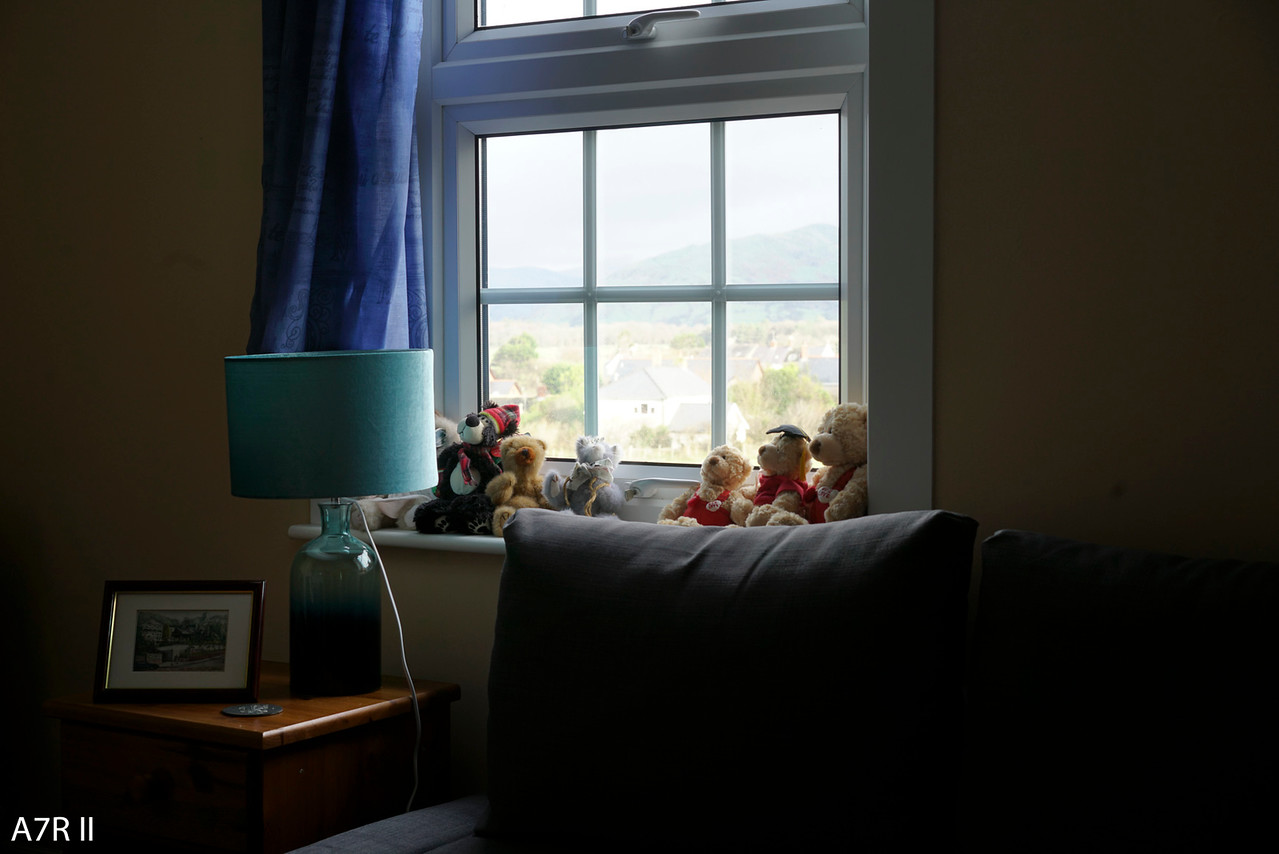
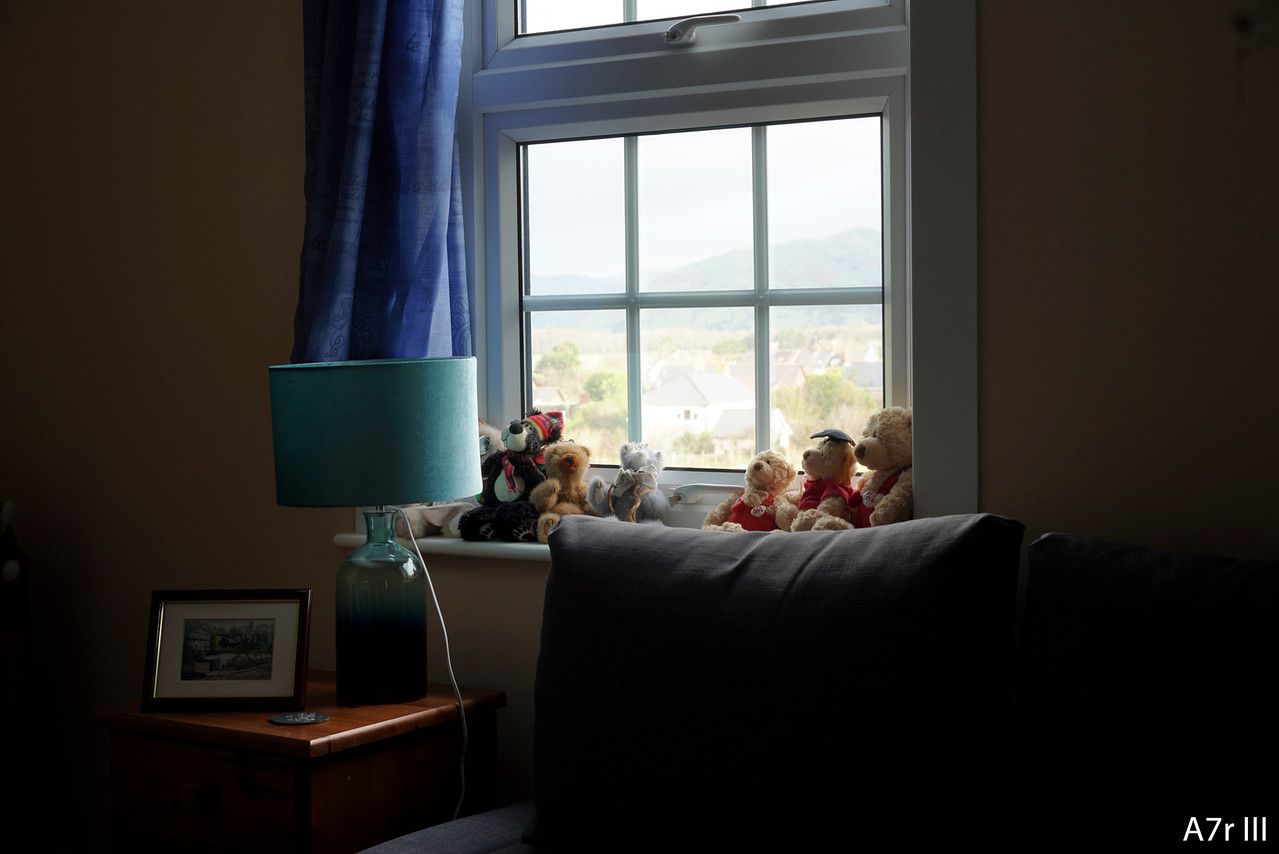
Sony A7R II vs A7R III – Image quality
Let me start by saying that image quality is not the main reason to upgrade, or choose the A7R III over the A7R II. There are minor improvements here and there that make the new camera more interesting for certain purposes but none of these are game-changing in comparison to the previous model.
Both products feature a full frame/35mm sensor with 42.4MP, no AA filter and BSI (Back-Illuminated) technology. The latter means that the photodiodes are closer to the surface and can collect more light in comparison to conventional structures. You can shoot in 14-bit RAW with uncompressed or compressed options.
Sony A7R II vs A7R III – Dynamic Range
Despite the sensors being the same, the updated Bionz X image processor brings a few improvements to the mark III camera concerning dynamic range and sensitivity.

In our first example we attempted a strong recovery in the shadows with the RAW files and the only thing to notice is that the A7R II tends towards a greener colour cast, while the A7R III remains more natural. However the colour cast can be minimised with post processing so we’re talking about a minor difference in this case.

The performance with less severe processing (up to 2Ev/3Ev) doesn’t reveal any significant differences and highlight recovery remains more or less the same on both cameras.

+3Ev and +50 shadows recovery in Lightroom

-100 highlights recovery in Lightroom
The same conclusion applies to the SOOC JPGs and DRO (Dynamic Range Optimiser) set to the maximum level of 5. The two images below were shot at 1/13s.
It really takes a more extreme example to reveal some differences that favour the new camera. The same scene captured in the evening and purposely overexposed by 5 stops shows that both cameras generate lots of noise when recovering the exposure in post production, but the A7R II loses more colour information.

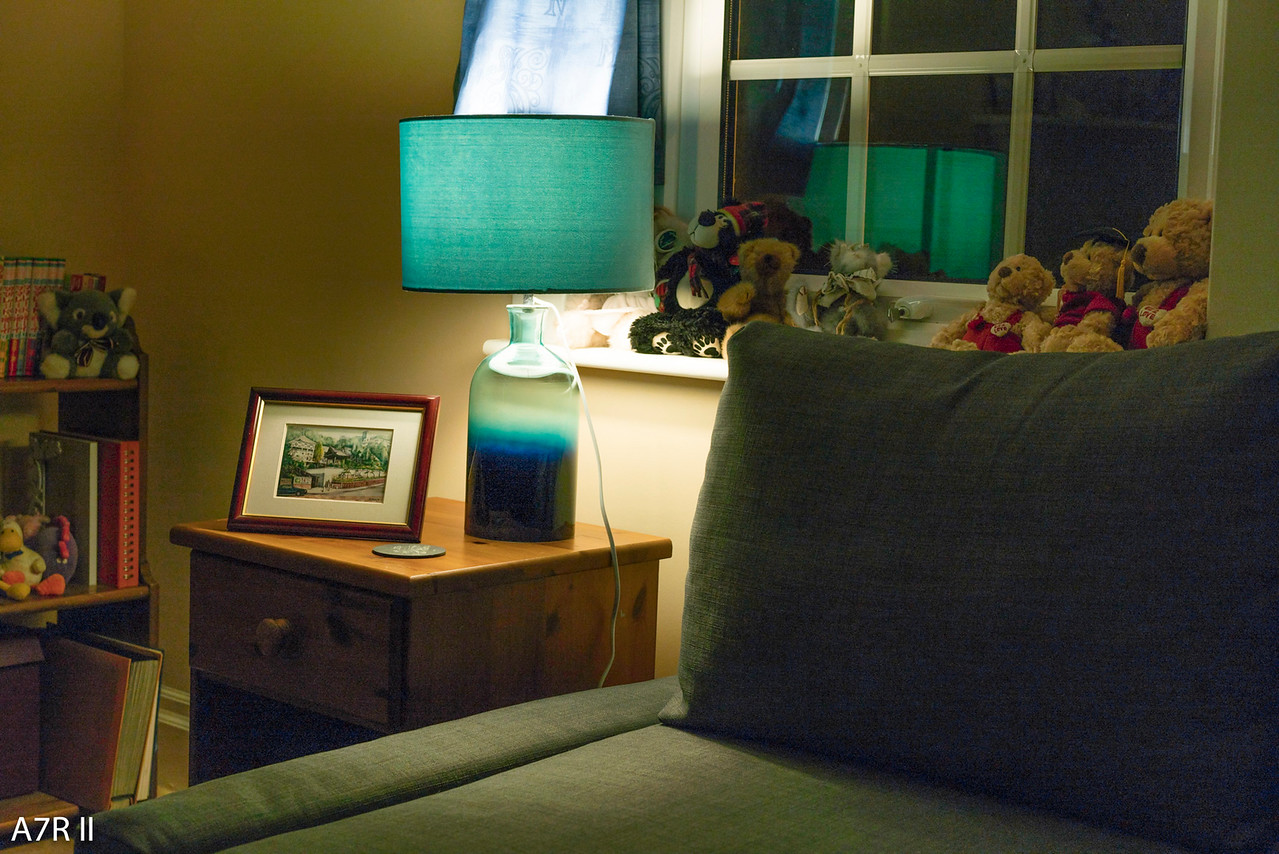
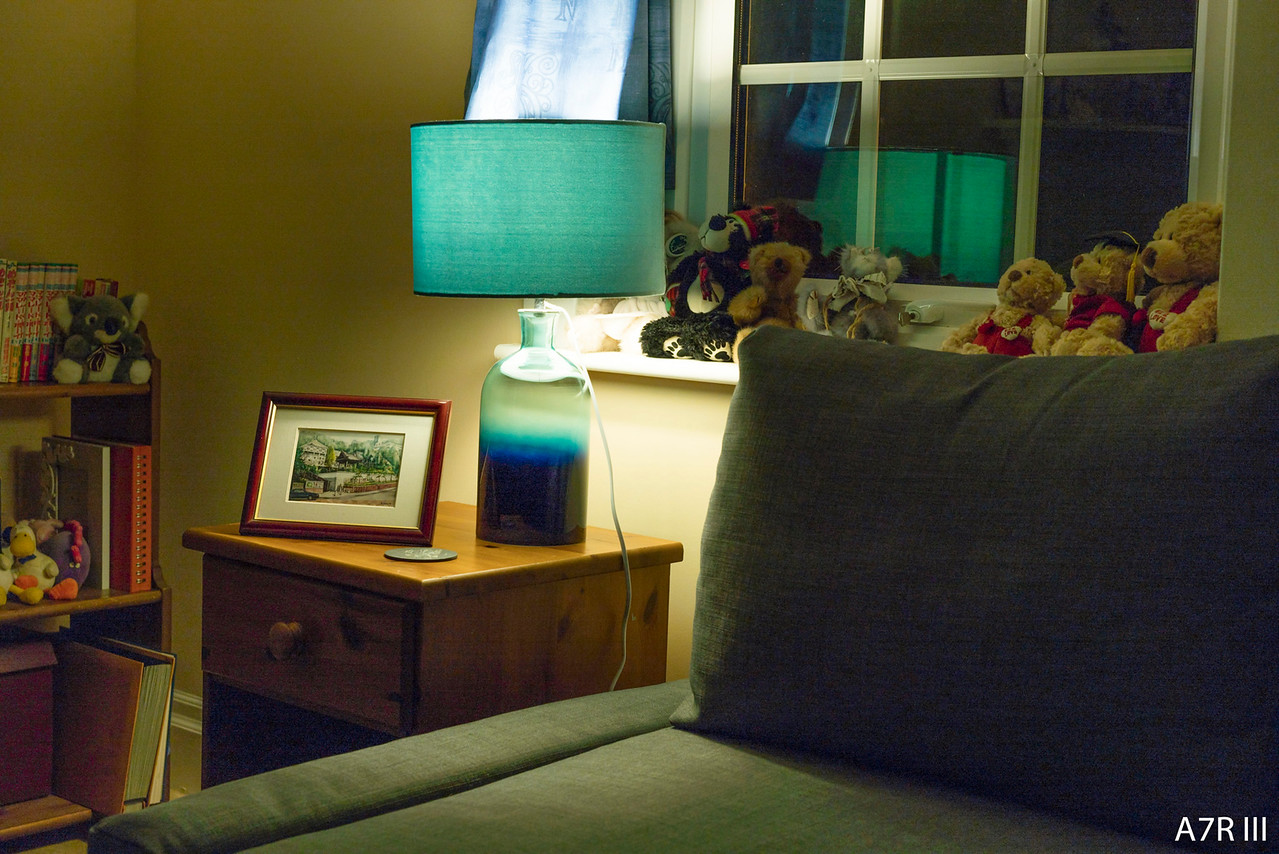

Sony A7R II vs A7R III – Low Light and ISO
The A7R III gains 1/3 of a stop in native ISO sensitivity: it goes from 100 to 32000 whereas the A7R mark II stops at 25600. The extended values remain the same: pull 50, and push up to 102400 ISO.
Here again we can see that the mark III model has a small advantage: noise is slightly more uniform and less pronounced from 6400 upwards. I find both cameras very usable up to that level, and the quality at 12800 is still more than decent considering the high megapixel count. 25600 is usable but after that noise becomes really invasive.


With the straight out of camera JPGs, the A7R III has slightly more colour noise if you leave the Noise Reduction off. With the Low and Standard level however, it is the older A7R II that shows more noise.

To learn more about the best low light settings for your A7 camera, read our guide below.
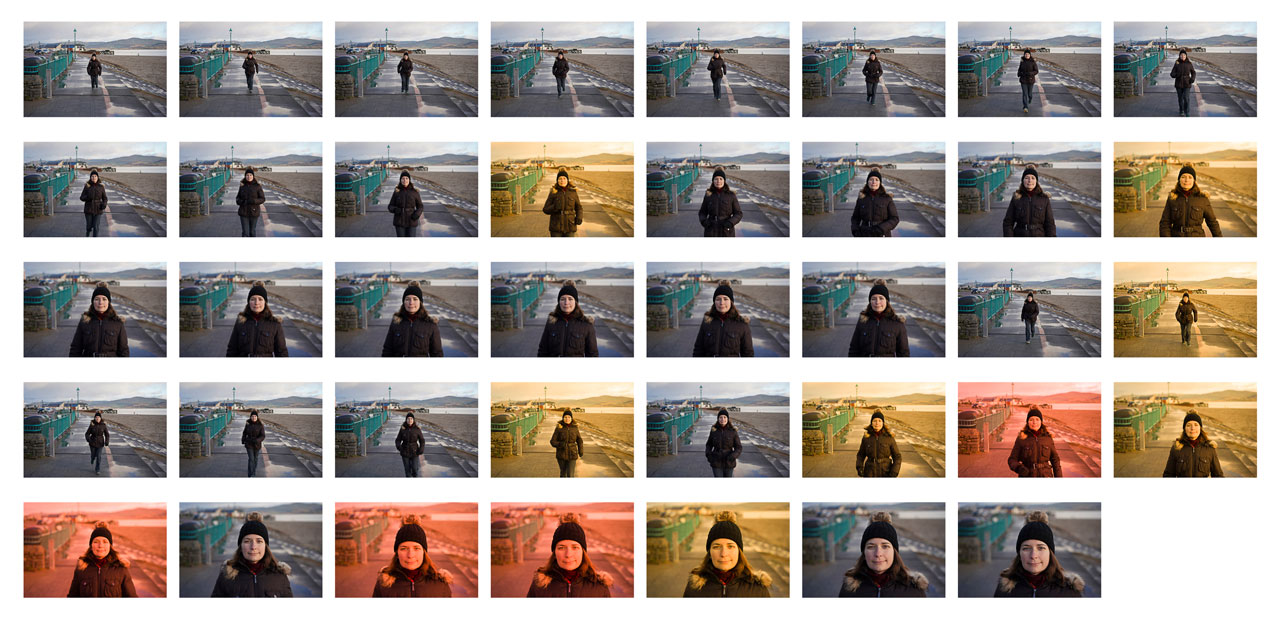
Sony A7R II vs A7R III – Colours
Sony made some subtle improvements to the colour profiles. The selection remains the same (13 Creative Styles in total) but the A7R III has warmer colours in comparison to its predecessor. Of course this is more valid for the SOOC JPGs than the RAW files as you can easily adjust the results in post production with the latter.


With skin tones, especially when using the Portrait style, the A7R III displays less of a yellow tint and has a more uniform rendering.

When processing the RAW file, you can quite easily match the results, although I admit that for this particular example, the A7R III file required a few extra adjustments to suit my taste.

To know more about photography settings on your Sony A7R II or III, check out our dedicated article below.
Sony A7R II vs A7R III – Star Eating
Finally, let’s have a look at two astrophotography examples. One of the most common complaints is the “star eater” issue. After a firmware update released in 2016, many Sony cameras including the A7R II started to apply too much noise reduction to exposures longer than 3.2 seconds, even if the NR setting for long exposures was turned off. You can read more about this topic on Lonely Speck.
As a result, the image processor eliminates small stars that it interprets as noise rather than actual elements in the sky. On the A7R III, the problem seems to have been resolved or at least minimised. As you can see below, you can still perceive the smallest and least bright stars, whereas they are clearly gone in the A7R II image.


Learn how to take great astro-photography shots with our dedicated guide.

Sony A7R II vs A7R III – Autofocus
The autofocus is probably the aspect I tested more thoroughly than any other on the A7R II. At the time of its release, it represented a significant step forward for multiple reasons: it was the camera with the highest concentration of phase detection points, it took features like Eye detection to another level, and it introduced compatibility with DSLR lenses.
Sony has continue to make progress with every new release since, and today other cameras like the A9 outperform the “R” series. Still, the A7R III brings some interesting upgrades to the table.
From a technical point of view, phase detection remains the same with 399 points that are organised over 68% of the sensor’s surface. The A7R III has 425 contrast detection areas, however, meaning that the 25 found on the A7R II have been subdivided into smaller points to improve precision and accuracy.
In single AF, I haven’t noticed a big difference in performance. When using the single points (central, flexible or expanded flexible) both cameras prioritise contrast detection and you can see the “breathing” of the lens going back and forth to acquire focus.
With the Wide and Zone modes, the A7R III switches to phase detection more often which improves the locking speed. When using phase detection, the new camera can work at slow apertures like f/11 or f/16 while the A7R II switches to contrast detection from f/9 and above.


When working in low light conditions, the cameras can prioritise contrast detection (even in C-AF) if a) there isn’t enough light, b) the contrast on the subject is too low or c) the aperture isn’t fast enough. The minimum sensitivity has been increased to -3Ev on the mark III model, which is a one-stop advantage over the mark II. This makes the A7R III more versatile in these difficult situations and indeed I noticed that its performance was more constant in terms of speed and accuracy. That being said, if you pair the A7R II with a fast lens, the performance of the older model isn’t too far behind.


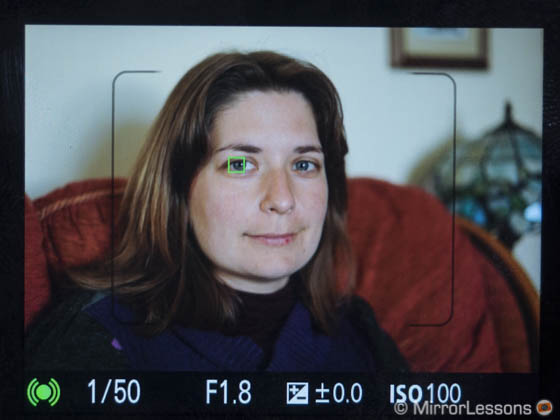
Then we have face and eye detection. For face detection, Sony has introduced additional options: you can choose to enable or disable the square frame that indicates when the camera has found a face, and you can prioritise metering on the detected face when using the Multi setting. As for the performance, I find face detection more stable on the A7R III. Even when the person doesn’t look directly at the lens, the camera is more reactive at keeping track of the subject.

But the real star is EyeAF, which was already good on the A7R II but is faster and more accurate on the A7R III. In fact it never failed during my tests and it is impressive how the camera quickly resumes tracking the eyes after the subject has turned away momentarily. Low light or backlight situations don’t slow down the performance either.
Thanks to firmware 3.0, EyeAF works in real time on the A7R III. It activates when you half-press the shutter button (or press the back button focus) which means you don’t have to assign it to a custom button anymore. The latter option still exists however and you may still want to use it: when EyeAF works in real time, it only activates within the focus area selected. For example if you use the large flexible spot area, EyeAF will only work inside that area and it the area is not on the person’s face, the camera won’t track the eye. If you choose the custom button solution, EyeAF overrides any autofocus area and tracks the subject anywhere on the frame.

Learn all about Eye AF and Portrait Settings for your A7R II / A7R III with our dedicated guide below.
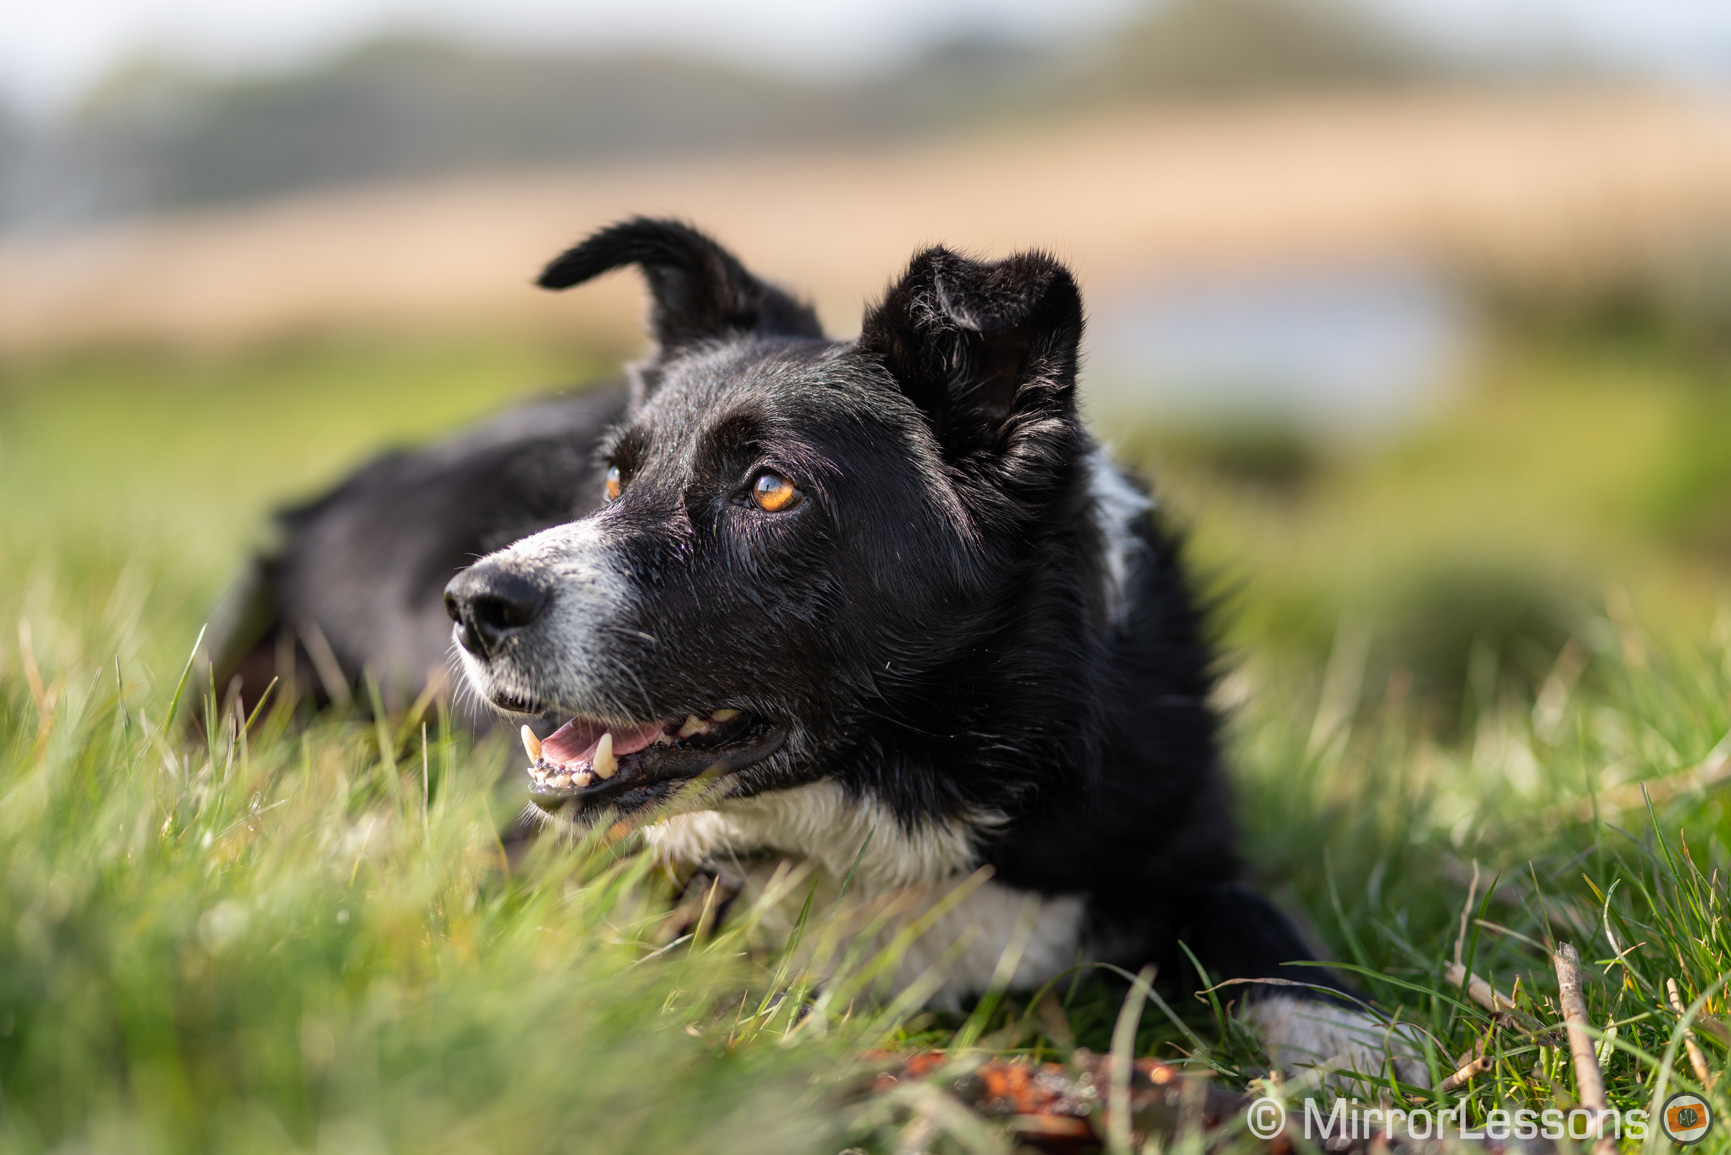
Thanks to firmware 3.0, the A7R III can also track animal eyes. The performance is as good as with humans and I successfully tracked dogs and cats. They need to be close enough in order for EyeAF to activate but it works really well. So far the only unsuccessful attempt has been with birds. Perhaps additional firmware updates will widen the range of animals the camera can recognise.
Moving on continuous autofocus, Sony claims that the A7R III is two times faster and more precise than its predecessor. So I started with a basic test to see if this difference was something I’d notice right away or if it would require more difficult situations. I admit I didn’t have the best lens for this (FE 55mm) but it gave me an initial hint about the performance.

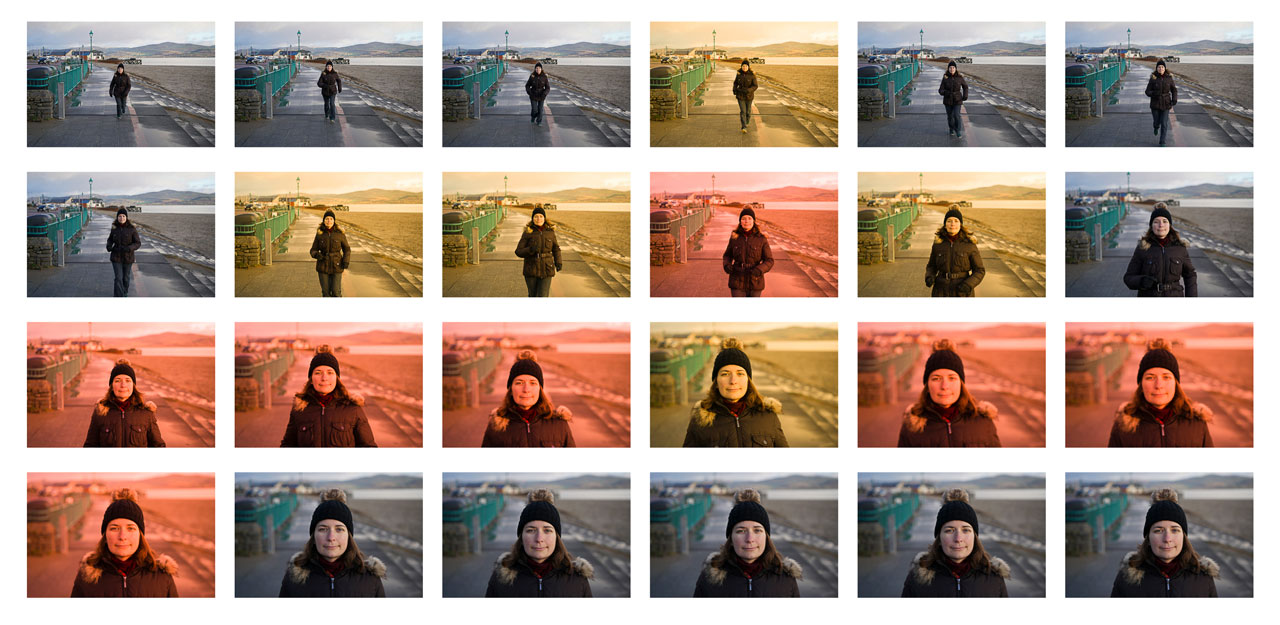
With both cameras I made multiple attempts: the A7R II results were consistent each time with a balanced mix of sharp, slightly soft and out-of-focus images as you can see below.
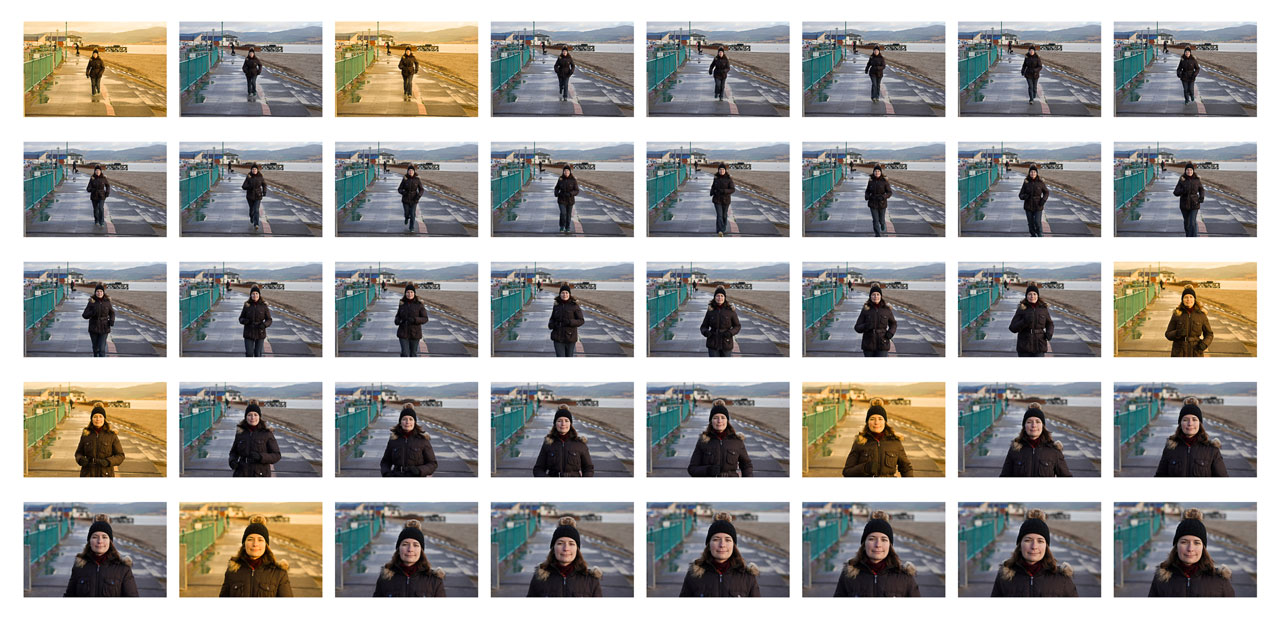
The A7R III gave me better results but the performance was less consistent between each burst, even with the same settings. One thing you can notice straight away is the higher number of images per sequence, which is normal since the camera shoots at a faster frame rate (more on this in the next chapter).
In my long experience with the A7R II and all the torture tests I put it through, I have to say that I always came back with good results, especially when using the native lenses in good light conditions. So I had to dig further to find relevant differences.


Where I found the new camera to be more reactive and accurate than the A7R II was when working in less light with slow lenses. I was quite surprised to see that the mark III’s performance was close to that of the flagship A9 which I was testing at the same time during a football game.

It also did well for birds in flight, considering that the light conditions were far from ideal that afternoon (dark clouds and rain).

Unlike its predecessor, the performance of the A7R III can be tweaked with additional settings to control the AF behaviour such as the new AF Track Sens. It allows you to make the autofocus either more or less reactive in five steps. For example +2 improves the performance for birds in flight or very fast subjects coming towards you. Setting it to -2 can decrease the chance of the camera refocusing on an obstacle passing between you and the subject.


Other improvements found on the A7R III are:
- AF Area Registration: you can recall a specific area position, area mode and focus mode with a custom button
- Focus magnification: you can activate autofocus while working in magnification mode
- Switch Vertical / Horizontal AF Area: you can set the AF area to be re-positioned automatically when switching between landscape and portrait orientation
Last but not least, there is the performance with adapted DSLR lenses. In this case my experience is related to the A7R II because I haven’t had the opportunity to test the A7R III with this kind of set-up yet. But I have no reason to think the new camera shouldn’t handle these lenses well since my experience with the mark II model was quite positive with Metabones, Sigma MC-11 and Sony LA-EA3 adapters. Plus the A7R III can use settings such as EyeAF with adapted lenses unlike the A7R II.


Of course the performance can vary from lens to lens and adaptor to adaptor, and it’s a good idea to remember that while some lenses do perform really well, the native lenses tend to be more accurate. But for those of you who want to work with two system (one mirrorless and one DSLR), it certainly is a great advantage to be able to use the same lens on both.
Learn more about all the autofocus settings available on your A7R II and A7R III.
Shutter, Continuous shooting and Buffer
Both cameras have a mechanical shutter that can go from 1/8000s to 30s plus the bulb mode. The mechanism has been improved on the new camera to reduce vibrations but I didn’t feel a big difference to be honest.
You’ll also find the electronic first curtain and electronic shutter options. The former allows you to reduce shutter shock when shooting at slow shutter speeds (useful for the in-body stabilisation as well) while the second provides silent operation. Neither camera can go past the 1/8000s speed however.
When using the electronic shutter, you can encounter distortion and banding but the mark III has a faster sensor readout that improves the results a little. Note that the A7r III maintains 14-bit RAW when using the e-shutter (except for continuous shooting) whereas the A7r II drops to 12-bit.

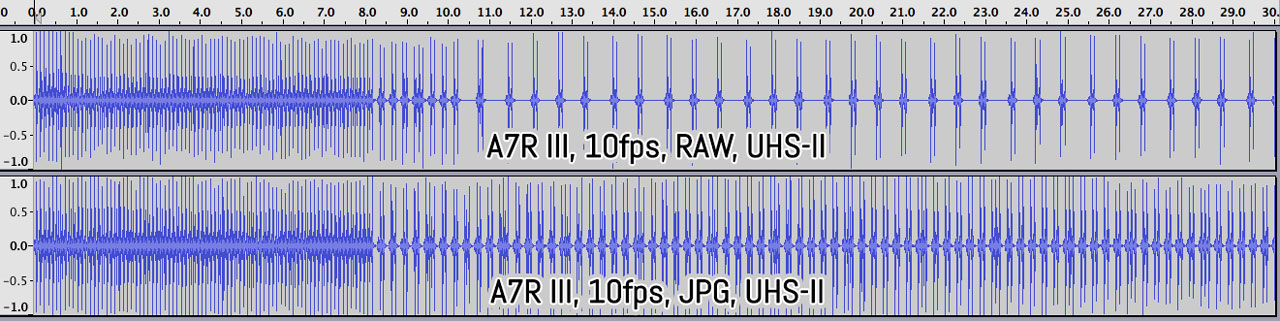
A more important update that makes the performance of the A7R III more interesting for action photography is the continuous shooting speed. Whereas the A7R II can manage a maximum of 5fps, the A7R III goes up to 10fps with AF/AE Tracking. Up to 8fps, it gives you live view with blackouts unlike the A7R II that shows the last image taken. This means that it is easier to track fast moving subjects or anticipate a movement with the mk3 thanks to the live view.
The mark III gains an additional setting to reduce flickering under artificial lights but doesn’t work with the electronic shutter, and the burst speed can decrease as well.
The buffer capabilities have also been improved. The A7R III has a front-end LSI chip that allows the camera to process twice as much data in comparison to its predecessor. The remaining time indicator (vertical bar) on the left of the screen shows you how much you have left before the buffer empties entirely. The custom buttons, playback mode and main menu can be used while the images are being written to the SD card, unlike the A7R II.
As you can see below, despite shooting twice as fast, the A7R III lasts for longer, recording at full speed for 8s before slowing down with RAW or JPG files.
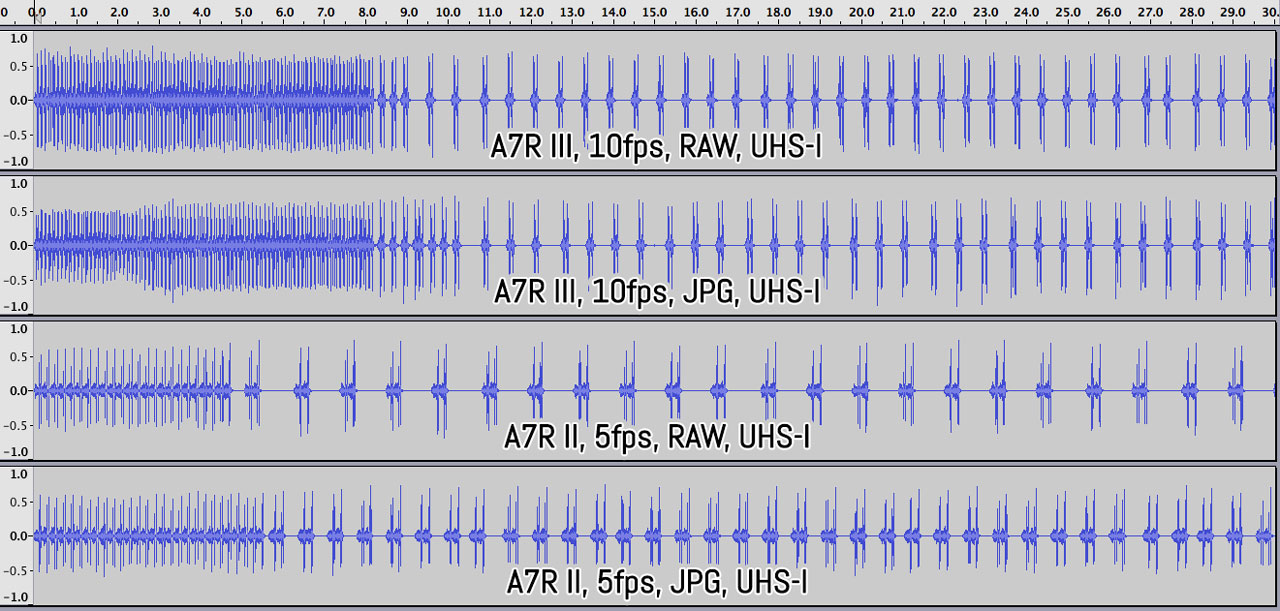
Furthermore, by taking advantage of the faster UHS-II cards, the speed doesn’t decrease as dramatically as with UHS-I cards, especially when shooting JPGs.
Sony A7R II vs Sony A7R III – Sensor shift
Both cameras feature in-body sensor stabilisation which is able to compensate for camera shake on five axes: X, Y, Roll, Pitch and Yaw.
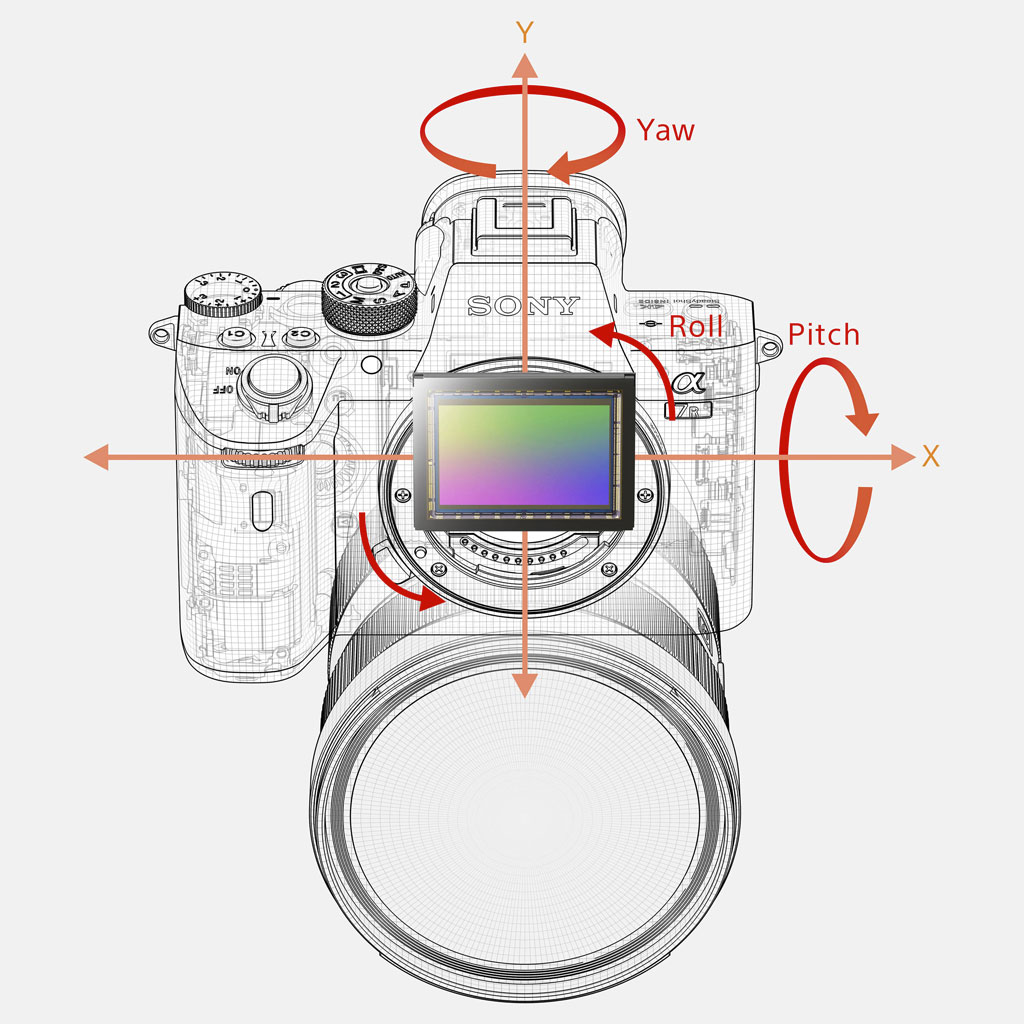
With lenses that can communicate electronically with the mount (either native or via an adapter), the cameras uses 5 axes on the sensor. With lenses that feature optical stabilisation, three axes are used on the sensor (Roll, X, Y) and two on the lens (Pitch, Yaw). If the lens doesn’t have electronic contacts, you can still use three axes on the sensor but the focal length must be set manually in the menu.
By CIPA standards, the A7R III has a one-stop of advantage in comparison to the A7R II (5.5Ev vs 4.5Ev). However in my stress test using the FE 55mm f/1.8 (5-axis on the sensor), I didn’t come across a substantial difference.
The A7R II actually gave me a sharp shot at 1/2 second, but my keeper rate was very bad overall. The sharpest result I got with the A7R III was at 1/4 of a second, but at that speed the keeper rate was way better than with the mark II.


With the A7R mark II, I’ve always found that it is best to stay at around 1/8s or above, and I came to the same conclusion with the A7r III. For this reason, I’d say the only relevant improvement for stills is that the new camera has a better keeper rate.
Speaking of the sensor shift mechanism, the A7R mark III can use this technology for another purpose: Pixel Shift Multi Shoot.
The camera records four pictures and moves the sensor by 1 pixel between each shot. By compositing them in post production*, you get a final photograph where the resolution remains the same but details and colour accuracy improve because each point of the image is recorded by at least one green, red and blue pixel. You need to pixel peep to see the difference but it is there.

Of course there are some limitations to this technology: since it involves four images captured one after the other with a minimum interval of 1 second, any moving elements like a person walking into the scene will result in ghost artefacts. Even with moving water, you will end up with noise and grid patterns. If you use the Sony Imaging Edge software, there is a setting to reduce colour artefacts to a minimum but it is not enough.

So while the improvement in image quality is interesting, the practical limitations mean that this feature is only useful for still life, or landscape / architecture as long as there aren’t any moving elements in the frame.
*Note: you need the Sony Imaging Edge Software or a third party app like Sony PixelShift to DNG to merge the four images. The proprietary .ARQ file created with Imaging Edge can be opened by other software such as Iridient Developer and Adobe Lightroom Classic.
Sony A7R II vs A7R III – Video
The main video specifications haven’t changed, but Sony has made some interesting improvements to image quality and autofocus on the mark III model, not to mention the addition of some new extra settings.
Both can record in 4K up to 30p using the XAVC S codec that works at 100Mbps. Internal recording is 8-bit 4:2:0 while the HDMI output gives you an 8-bit 4:2:2 signal.
In Full HD, it’s 50Mbps unless you choose the AVCHD option which drops down to 24Mbps or 17Mbps depending on your settings. The A7R II can record up to 60fps, whereas the A7R III can go up to 120fps and has the Slow and Quick mode that allows you to select a range from 1fps to 120fps. On the mark II, you need to select 720p to get more frame rates but the quality isn’t great.
You can switch between PAL and NTSC modes but be aware that this often requires you to format your SD card. So if for example you’re working in a PAL country but want to take advantage of the fastest frame rate for slow motion in 1080p (120fps which is available in NTSC), it’s better to work with two different cards.
You can see our video comparison in 4K between the two cameras below. Keep reading for a text analysis.
You can choose to record using the entire sensor width (full frame) or select the Super35/APS-C mode. In addition to the 1.5x crop, there are relevant differences concerning the video quality between the two formats.
The advantage of the full frame mode is that you can keep the native field of view of your full frame lens. However the cameras don’t use the entire 42MP but instead perform pixel binning. This means slightly less sharp results and the possibility of moiré. That being said, the A7R III footage appears a little sharper than the mark II model, although moiré can also be more visible as a result.
The Super35 mode works with full pixel readout: it uses all the pixels contained in the APS-C crop (around 18MP) which is the equivalent of 5K. It is then conformed to 4K to give you more details without moiré or aliasing.
At high sensitivities, the Super35 mode gives you less noise than the full frame mode, although here as well Sony made a rather nice improvement on the A7r III: the full frame footage is much less noisy than on the A7R II. The superior quality is already visible at 1600 ISO and becomes clear from 3200. In Super 35 mode, the mk3 model has a slight advantage as well but it is less evident.
The difference in colour rendering is similar to what we saw with the SOOC JPGs: the A7R III has a warmer rendering, which gives it more character especially for landscapes. They also toned down the saturation of the Vivid style so that it now appears more natural.
The difference in colour rendering carries over to skin tones as well, although it can be more subtle depending on your settings. The A7R III gives you warmer results when using the auto white balance.
In addition to the Creative Styles which are designed for stills, you can configure up to seven Picture Profiles with video-oriented settings that the cameras inherits from Sony’s professional cinema series. They give you more dynamic range and reduce the chance of highlight clipping which is what often happens with the Creative Styles.
The A7R III has a few extra settings: in addition to S-Log2 which is also found on the A7R II, there is S-Log3 which gives you more dynamic range but can be noisier in the shadows. Finally we have the HLG (Hybrid Log Gamma) profile that can be used with compatible HDR TVs.
Rolling shutter is very similar in full frame mode, but is visibly more contained in Super35 mode on the A7R III.
The mark III benefits from further improvements to the continuous autofocus: it does a better job of keeping a fast moving subject in focus, and face detection is more reactive and precise as well.
The only disappointment is image stabilisation: the new camera does marginally better with fixed shots (less jittering) and in full frame mode, but overall I don’t find a large difference compared to its predecessor. As with stills, this is an area where Sony has struggled to make relevant improvements since the release of the first A7 mark II model in late 2014.
With the A7R mark II, I experienced some occasional overheating at the beginning when recording in 4K but firmware 3.0 fixed the problem. I haven’t encounter any issues with the A7R III so far. Plus there is a setting called Auto Power Off Temp that, just like on the a6300/a6500, allows the camera to continue the recording if the body temperature gets warmer than normal.
Other aspects in favour of the mark III include:
- Proxy recording
- Gamma Display Assist when shooting with S-Log2/S-Log3 or HLG
- the possibility to use the shutter release button to start/stop the recording
- the possibility to configure the custom buttons differently for stills and video
- the Sunny Weather option that boost the brightness of the LCD screen remains active during 4K recording
Both cameras include a 3.5mm mic input and a headphone output.
Flash and extra features
Both products have a maximum sync speed of 1/250s and many specifications remain the same including ±3Ev of compensation, bracketing up to 3Ev / 5 frames or 1Ev / 9 frames, slow sync, rear sync, eye reduction and HSS (with compatible units).
You can also use off-camera flashes made by Sony or compatible third-party units. Sony is developing products with optical and radio communication, plus the latest HVL-F45RM and HVL-F60RM can use the front LED light as an AF assist beam. The latter is the answer to a technical limitation where the traditional infrared beam of a flash doesn’t work with the on-sensor phase detection points. Many users have been asking for a solution and third-party brands have also begun adopting it as well.
Sony doesn’t spoil its customers as much as other mirrorless competitors when it comes to extra features. The A7R II retains an advantage however: it is compatible with the PlayMemories apps that you can download and install to add extra functionalities such as Time-Lapse, Digital Filter etc.
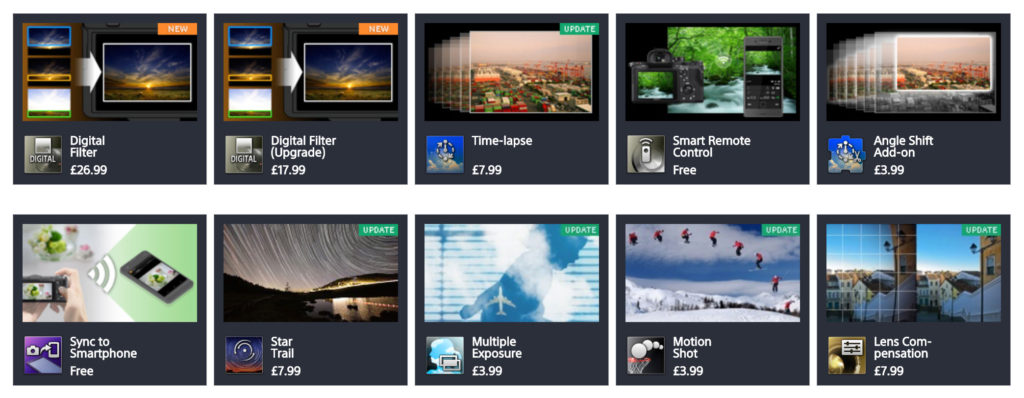
For some reason, the latest E-mount cameras including the A7R III are not compatible with the apps anymore. I always criticised this system for the simple reason that many of them are not free and that functions such as time-lapse are now basic features on most cameras, including entry-level products.
I’m not sure if the company is planning to re-structure the whole concept or if they will simply abandon it, but right now the situation is worse because you can’t access these features at all. Granted, a time-lapse remote doesn’t cost much these days but it’s the logic behind all of it that I’m struggling to comprehend.
So what’s left to look at? Well, first, there are a few things that are similar on both models:
- Wifi/NFC with remote control from a smartphone: on the A7R II you need to download the Smart Remote Control app on your camera (which is quite a tedious experience) while on the A7R III there is a Ctrl w/ Smartphone option built-in. With both solutions you need to connect your mobile device using the Playmemories app (iOS/Android). You can control manual adjustments such as exposure triangle, white balance, burst, self time, etc.
- Tethering: available via USB, it can be used with the Sony Remote Camera Control software or the new Imaging Edge Suite
- Bracketing: WB, DRO and AE with single or continuous options, up to 3Ev/5 or 1Ev / 9 frames
- Metering: Multi, Center and Spot but the A7R III has two extra modes (Highlight, which preserves the brightest areas of the image, and entire screen average), as well as the possibility to adjust compensation for each metering setting in ±1Ev and link the focus point to Spot metering
- MF assist: magnification with the option of activating it automatically when turning the focus ring (with lenses that have electronic contacts). On the A7R III you can also set the initial ratio to 1.0 or 6.2x. and use the AF while in magnification mode. Peaking comes with three levels and three colours (Red, Yellow and White) on both.
The Panorama mode has been ditched on the A7R III while Scene Recognition works automatically in Auto mode. Both modes can be accessed via on the main dial on the A7R II.
Finally the new camera gains other improvements and a few new features such as:
- Priority Set in AWB: when using auto WB, you can prioritise the colour tone of the white source (warmer look) or the white colour instead
- FTP Transfer: you can connect and transfer images from your SD cards to an FTP server
- Bluetooth: you can pair the camera with a mobile device and record location information for your images, which is also useful to correct the date and time on your camera automatically
- Playback mode: a small option but there are more steps to enlarge the image in playback mode.

Sony A7R II vs Sony A7R III – Battery life
The A7R mark III uses the larger NP-FZ100 (the same as A9 and A7 III) which almost doubles the battery life in comparison to the smaller NP-FW50 used by its predecessor. I can bring home 2000 stills taken with continuous AF and burst shooting and still have more than 40% left. This is simply not possible with the A7R II, which is why Sony includes a pair of batteries in the box.
The mark III is the first Sony camera that I’ve used daily without worrying about how much power is left. Actually more than once I even forgot to charge it and I still had enough for the next day (unless I planned to do some intense shooting and 4K recording obviously).
Important note: with firmware 2.0 on the A7R III, you may get a warning on the LCD screen saying that the operation and safety of the battery cannot be guaranteed if you use a third party battery. The percentage indication next to the battery icon disappears as well. Hopefully Sony will fix this problem with another update. You can find out more about it in our A7R III accessory article.
Both cameras can be charged via USB. However the A7R III has two USB ports, one Micro 2.0 and one 3.0 C-Type. The 3.0 C-Type can be used to re-charge the battery while the camera is in operation, even if you connect another accessory (e.g. a USB intervalometer) to the 2.0 port at the same time.
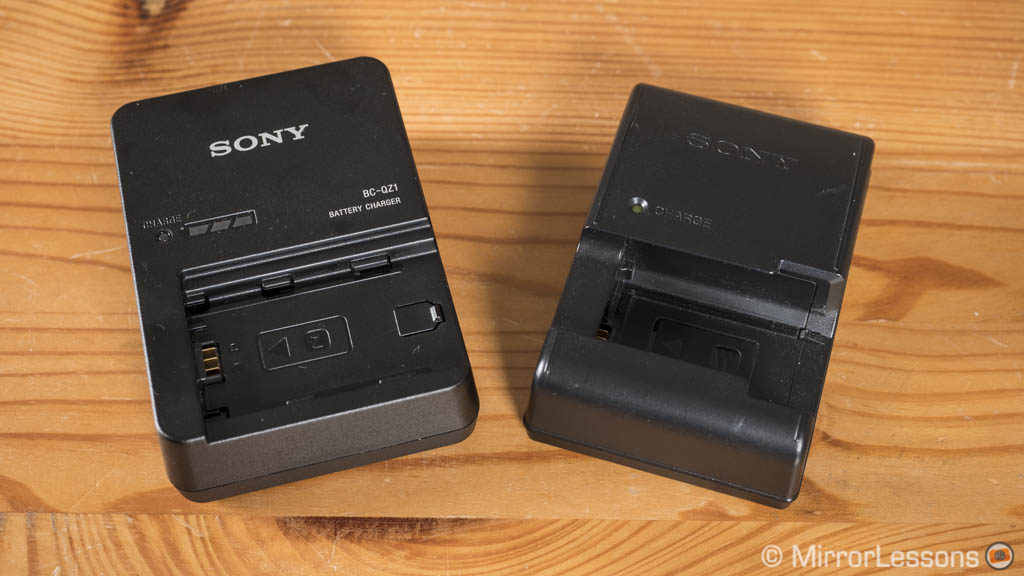
The charger provided with the camera is slightly larger and provides more information about the remaining charge.
There is also a battery grip available for both (VGC2EM for the A7R II, VG-C3EM for the A7R III). The mark III version includes the AF joystick.
Sony A7R II vs Sony A7R III – Price
The A7R mark II is now more than two years old and its retail price has decreased to approximately $2900. However you can easily find better deals than this, with the average street price being around $2400 / £2400 / €2400 (it can vary from country to country). Of course you also have more chances to find a good price second hand.
The A7R III is more recent and as a result still has its original retail price of $3200 / £3200 / €3500.
Sony A7R II or Sony A7R III ? – Conclusion
Now it’s the time to answer the question I raised in the introduction: given the lower price of the a7R II, is the A7R III worth the extra money?
Well, the answer is “no” if your main concern is image quality. Beneath the surface, there is the same 42MP full-frame sensor. Certainly the evolved image processor of the A7R III has allowed Sony to tweak a few things such as dynamic range, high ISO performance and colours but in my opinion, it’s not enough to justify the extra investment. If you work with RAW files – and let’s be honest, why wouldn’t you with this kind of quality – then you are fine with the A7R II. The only exception would be if your primary focus is astro-photography: the new camera has less severe noise reduction and doesn’t “eat” as many stars as the A7R II.

If we take into account all the other aspects however, we soon realise that things aren’t as black and white as they seem. In fact, there is an exhaustive list of big and small changes that make the A7R III a more complete offering.
The performance for action and sports is better for three reasons: it has a more reliable and sensitive autofocus in challenging situations, faster continuous shooting speeds, and live view in the viewfinder. EyeAF and Face detection have also been improved and the difference is valid for video too.
Then we have the excellent viewfinder with its additional resolution, as well as the faster refresh rate, touch AF and several changes in ergonomics and functionality that include the handy AF joystick, two SD cards slots and more customisation.
Finally there are the movie capabilities: the full frame mode of the A7r III has much less noise at high ISOs, and you get slow-motion at 120fps in Full HD and more profiles that include S-Log3 and HDR.

There are only two areas where the A7R III fails to surpass its predecessor: image stabilisation is almost identical on both models, and the grip is just as uncomfortable with large lenses. Sony likes to keep the design and dimensions of its mirrorless cameras as compact as possible, so unless that changes, it’s hard to imagine how the grip issue can be improved.
So the bottom line is: if the A7R II is already your go-to camera for everything, there is a good chance you will find the A7R III a logical upgrade. And if you are looking for high-end still and video quality in a mirrorless camera, the A7R III is also a more than relevant candidate.
But if you are hoping to save some pennies – perhaps to invest in a good lens – then the A7R II remains an excellent choice. There are more flaws, yes, but the rewards in terms of image quality remain as gratifying as they were two years ago.
Choose the Sony A7R mark II if:
- you mainly care about the quality of the sensor and want to save some money
- you’re fine working in APS-C mode for video
Choose the Sony A7R mark III if you:
- you want a more complete product in terms of design and ease of use
- you want better autofocus and speed
- you plan to use a lot of manual focus lenses and can take advantage of the superior viewfinder
- you want better quality in full frame mode for video
- astro-photography is your favourite genre
Check price of the Sony A7r III on
Amazon | Amazon UK | B&H Photo | eBay
Check price of the Sony A7r II on
Amazon | Amazon UK | B&H Photo | eBay
Used Sony cameras on MPB US | MPB UK
Sample images and additional content
You can see various sample images and download some original files by visiting the two galleries below:
You may also be interested in the following articles: