Update: the article now includes an in-depth video tutorial with all the settings to configure as well as an analysis of the performance of the E-M1 mark III. You’ll find the video and a step by step guide with images at the bottom of this article.
The OM-D E-M1 II is an impressive camera in many ways, but there is one area that has always disappointed me, and that is the autofocus performance.
It was a good step forward from its predecessor, the original E-M1, but not enough to stay ahead of the competition. In fact, many mirrorless models, including mid-level products such as the X-T20 and the a6300, offer better performance.
This setback didn’t stop me from putting the E-M1 II at the top of my recommended cameras for wildlife list when I created the article in 2017. Its other virtues, in addition to its compact dimensions, make it a tantalising alternative to DSLRs.
Olympus has been targeting wildlife enthusiasts since the release of the 300mm Pro lens in early 2016, and this is probably the main reason I was disappointed with the AF performance of the E-M1 II. It’s not that it was bad, but it wasn’t great either and, at a time when mirrorless cameras were starting to prove that they could do well in that department, I would have hoped that the OM-D would lead the revolution rather than play catch-up.
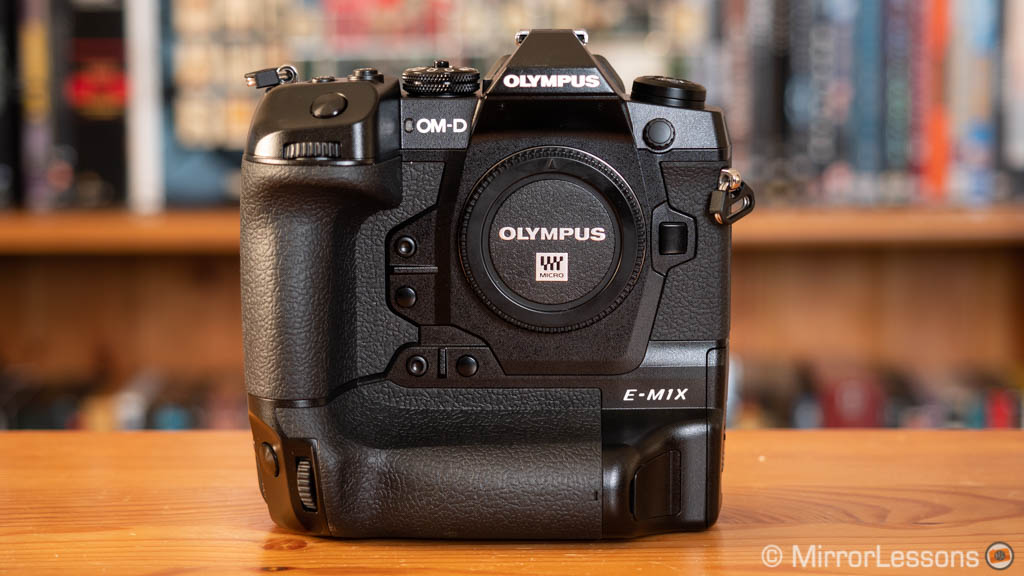
Olympus has attempted to improve the performance via firmware before (version 2.0) but the real upgrade came with the E-M1X, a stronger and larger body designed for the most demanding photographers. For the new flagship the company re-designed the autofocus algorithm from the ground up and finally offered performance on par with the very best mirrorless camera in this class. It made me wonder if some of these new software updates could make it onto the smaller OM-D as well.
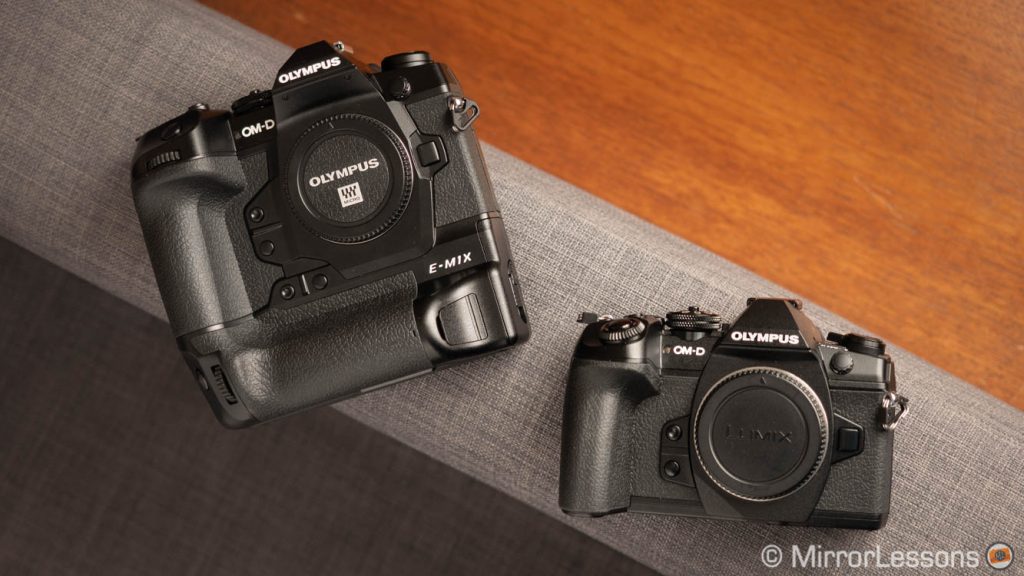
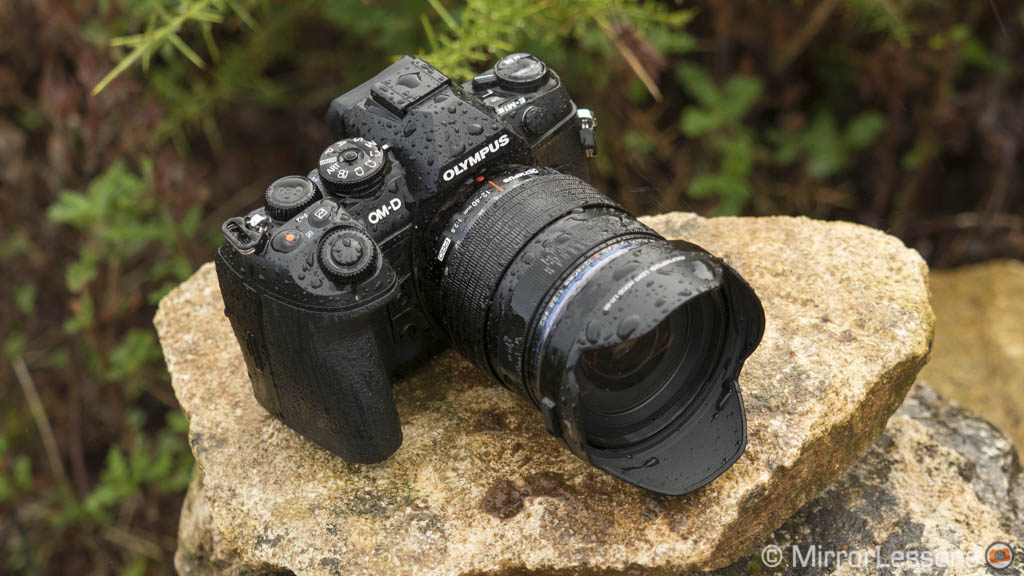
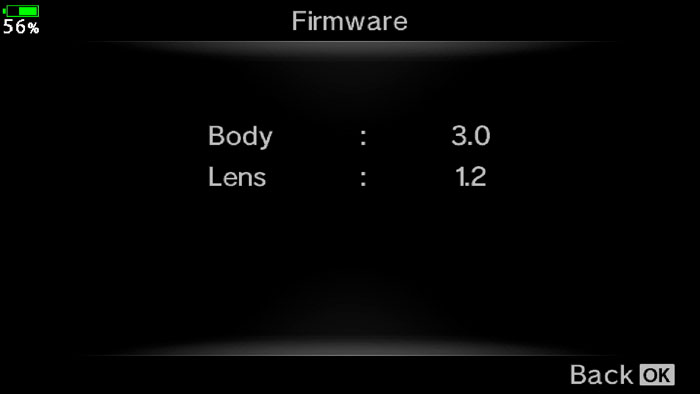
Five months later, Olympus has released firmware 3.0 for the E-M1 II which includes the same AF algorithm used by the flagship camera. Has the E-M1 II finally got the autofocus performance it deserves? To find out, I brought the camera with the 300mm Pro to my favourite testing ground, the Red Kite feeding station in Mid-Wales.
Trivia: Red Kites were almost extinct in the UK but a group of volunteers, later supported by the RSPB, made them a protected species and their numbers started to increase again in the eighties. The feeding station I regularly visit inaugerated the program in 1999. Today you can find many feeding stations across the country.
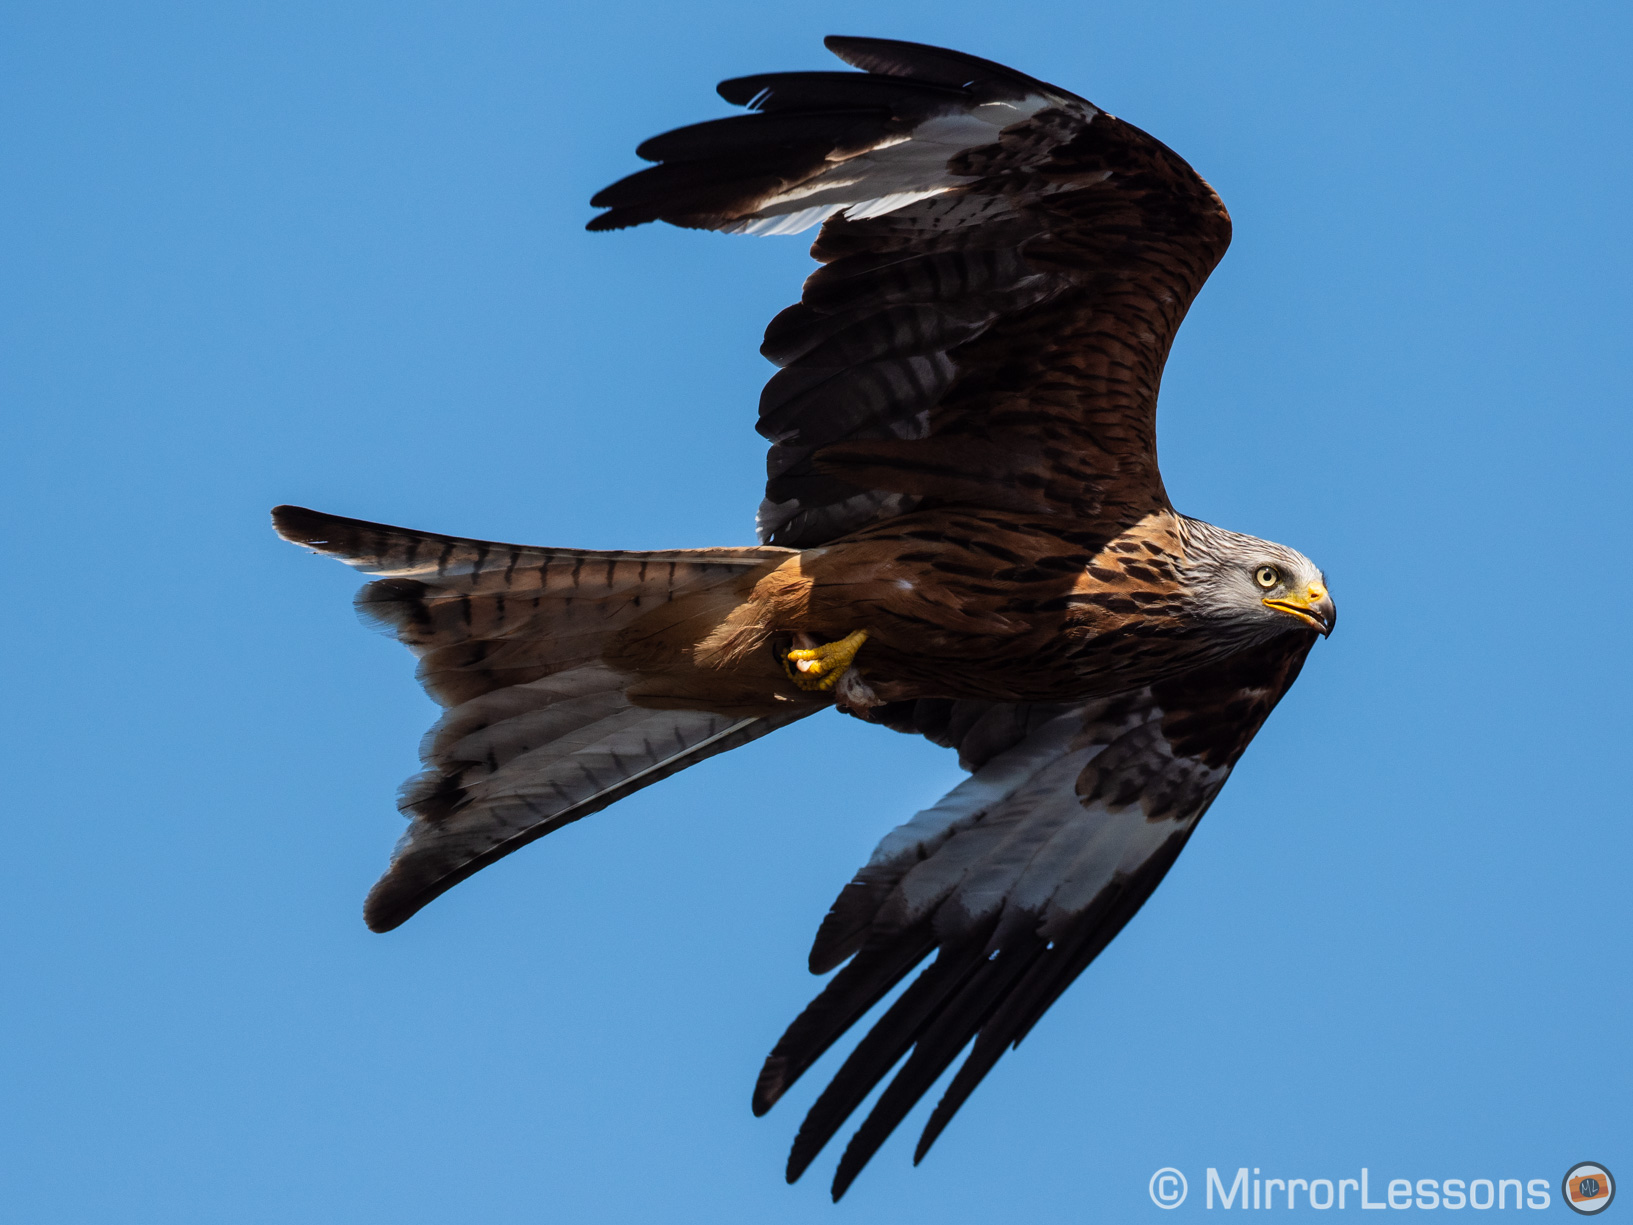
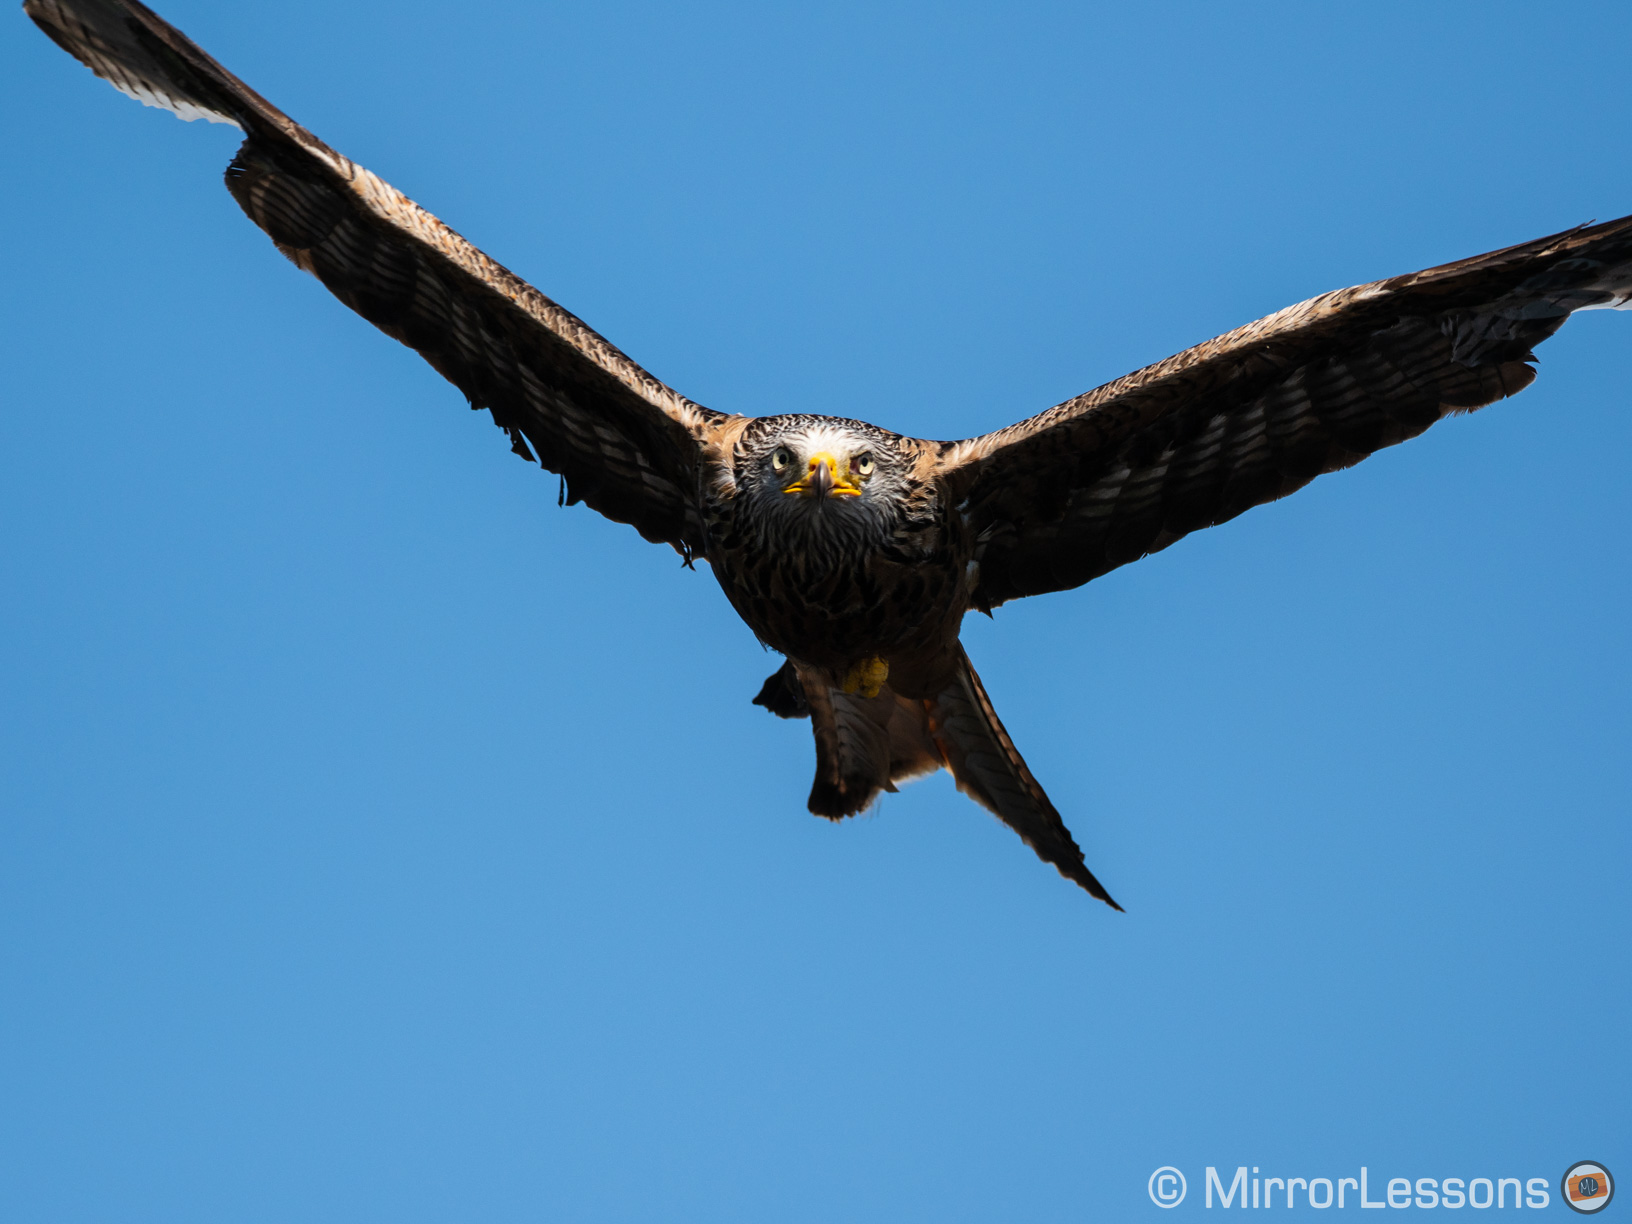
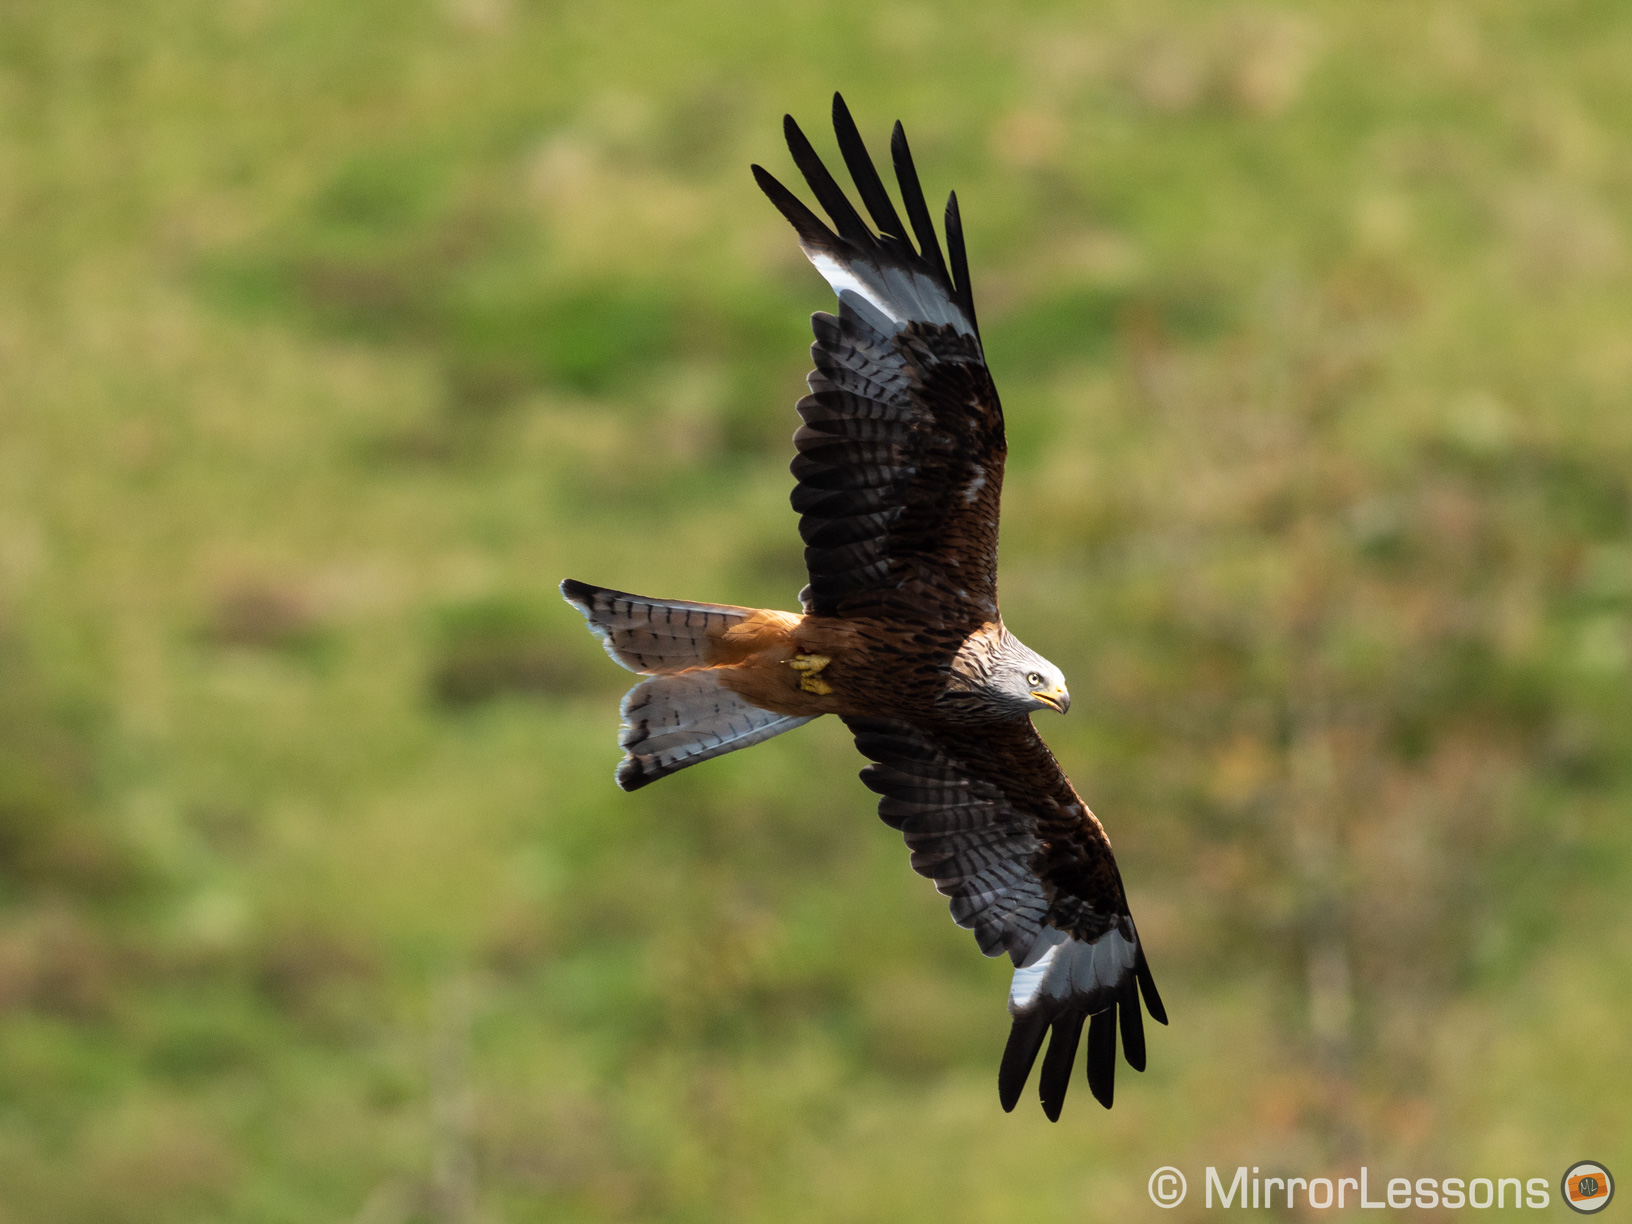
If you read our website on a regular basis, you’ll know that I love red kites (I can sit and watch them flying around for hours). What’s more, they are the perfect subject to put a camera’s autofocus though its paces. They come to the feeding station in big numbers and I can photograph them in the sky or against busy backgrounds (trees and hills). They sometimes fly close to you and of course their speed is impressive, as is their ability to suddenly change direction. (They can still surprise me to this day even though I’ve been photographing them for almost four years).
I arrived at the location on a sunny hot June afternoon. During the summer months, there are fewer kites (around 150) but the number can double in the winter. During the warmest time of the year, the feeding can last several hours whereas in the winter, the feast can be as short as half an hour.
So how did the E-M1 II behave with the new firmware?
Well for a start, I found the camera more reactive, as if it had a better understanding of what and where my subject was. I got better shots this time than the previous attempts I’ve made with the camera.
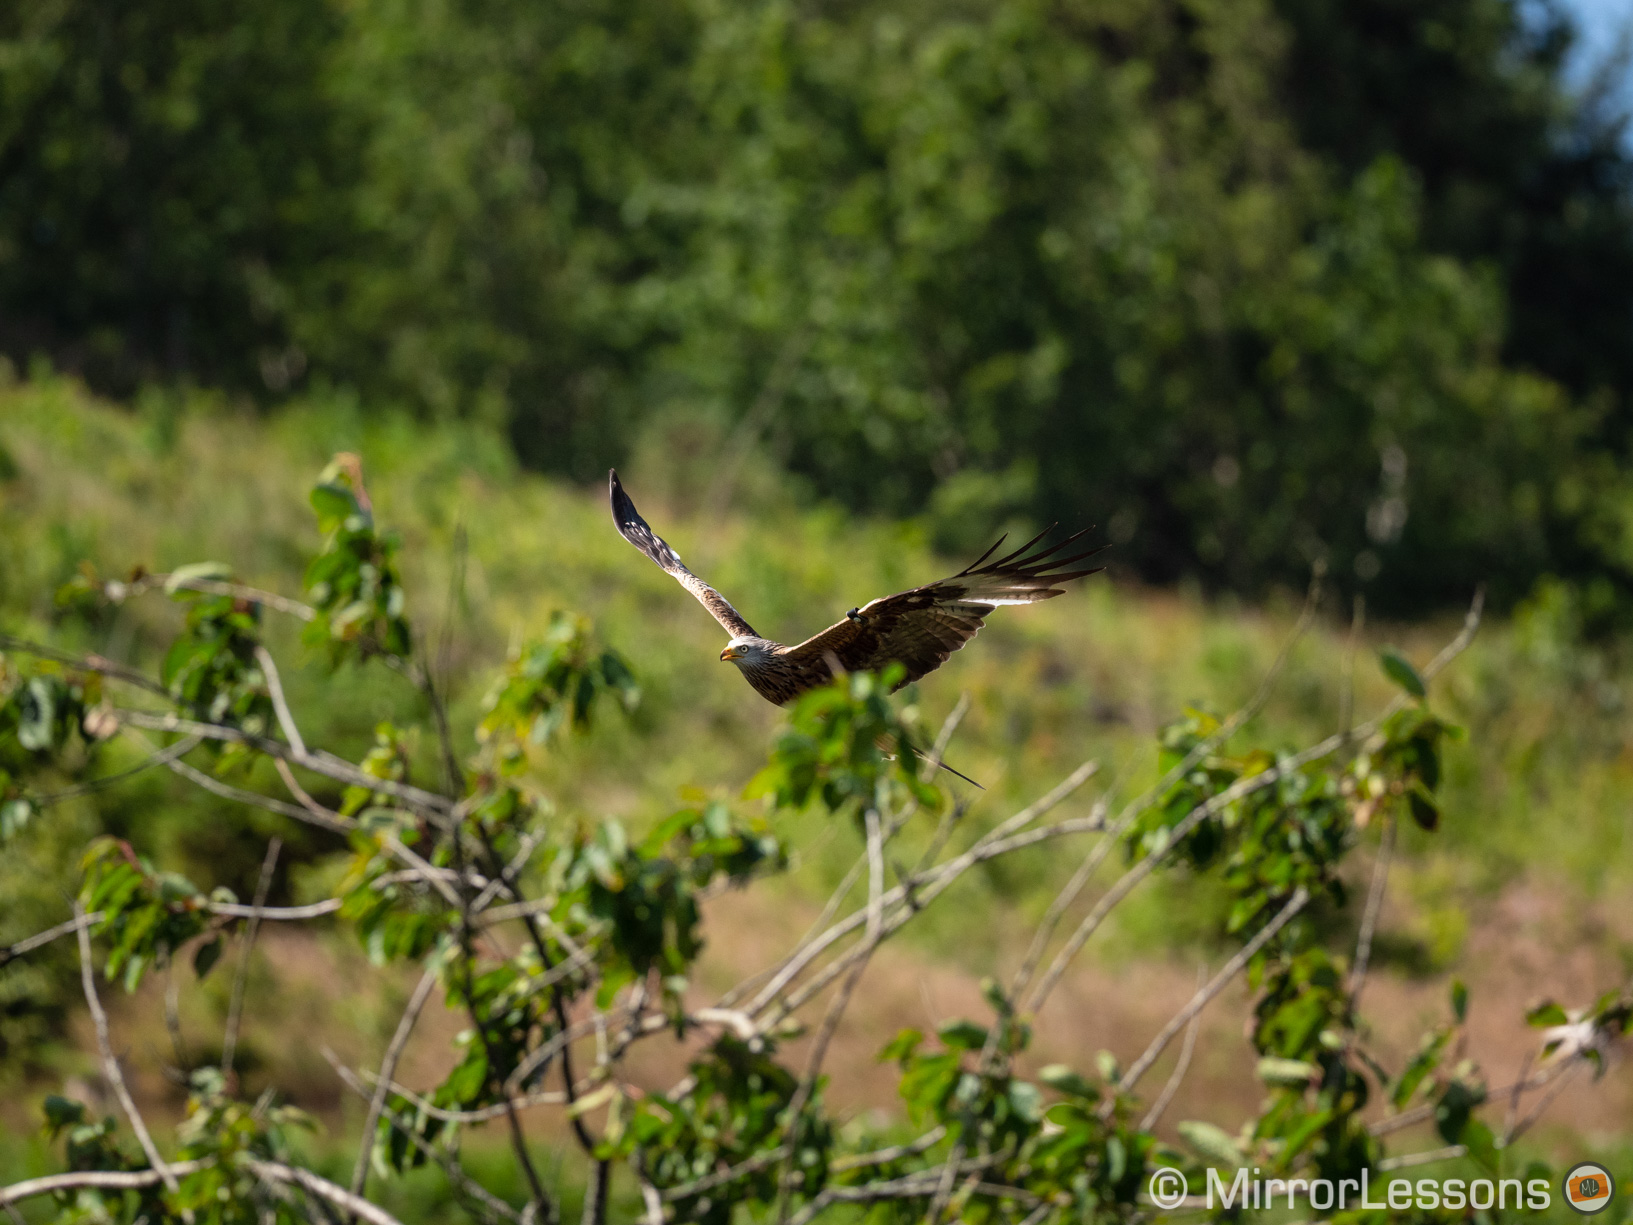
Another thing that surprised me is when the birds were flying momentarily behind branches. With the new firmware the camera didn’t loose track of the kite as much as it was happening before.
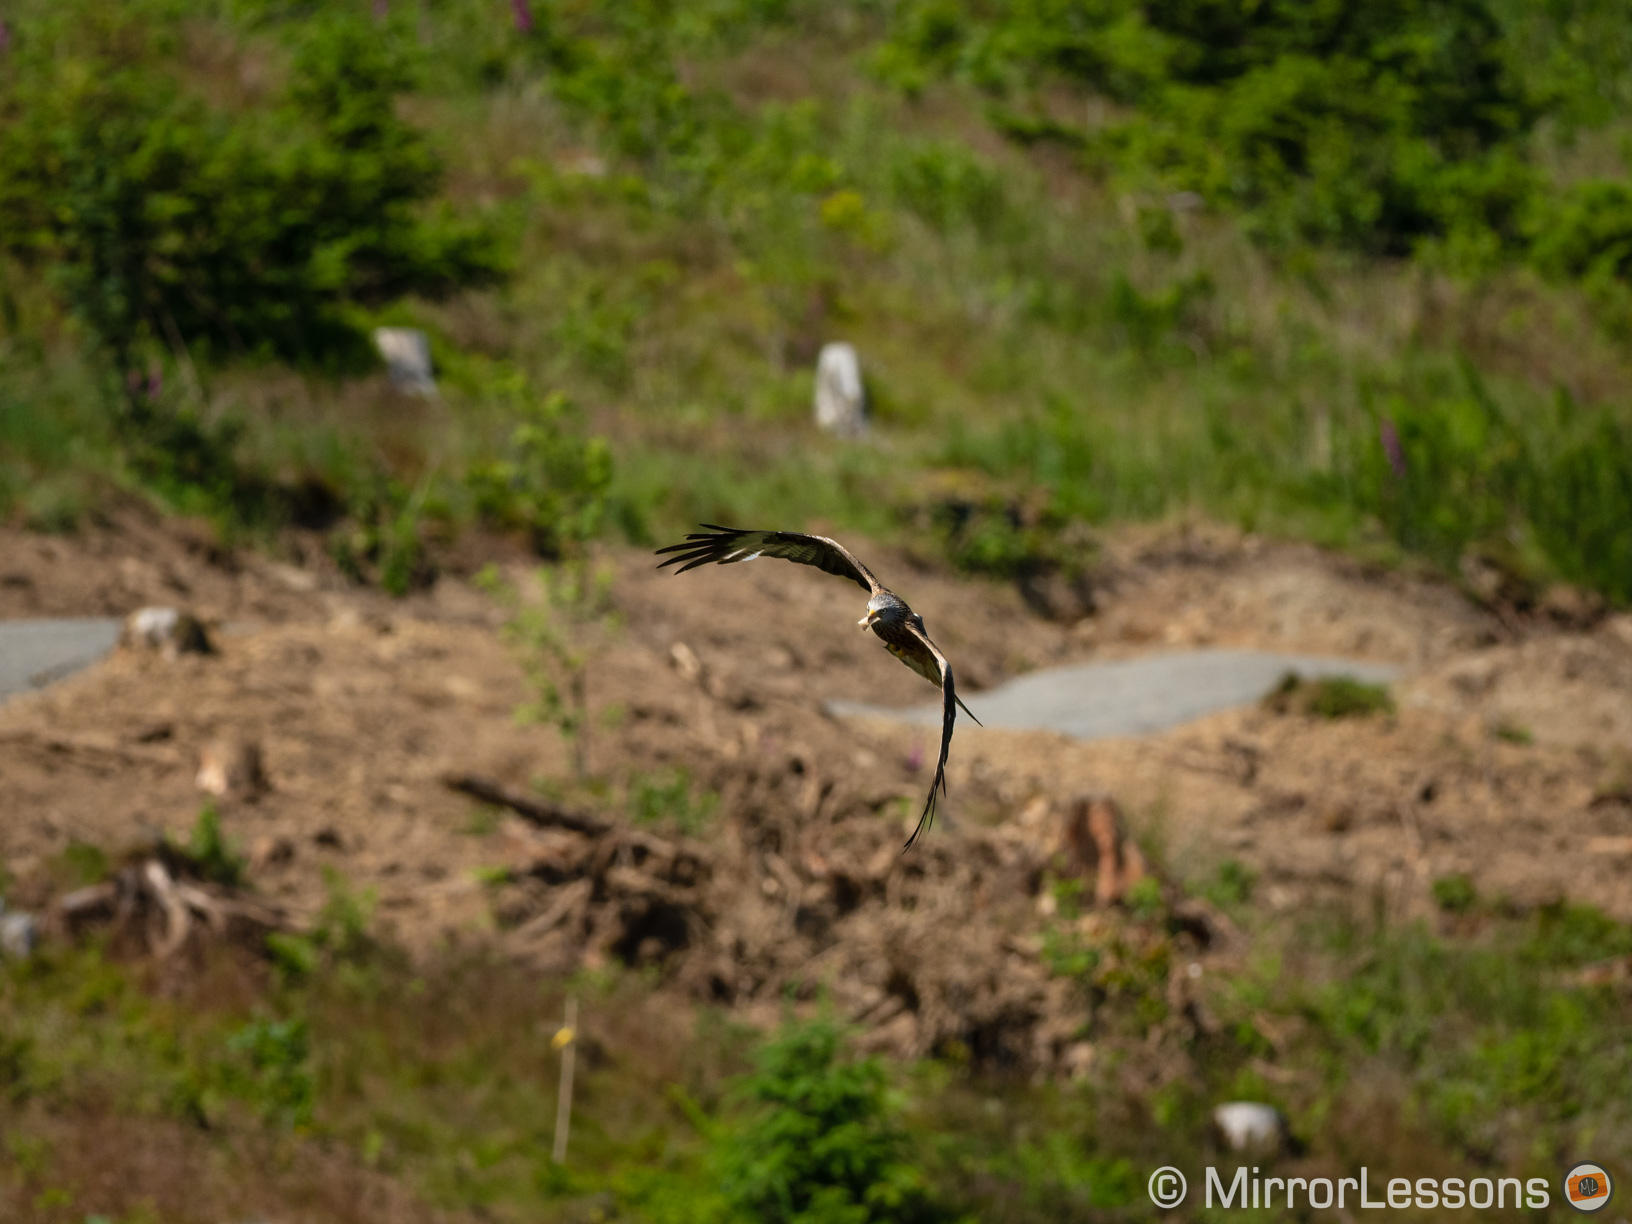
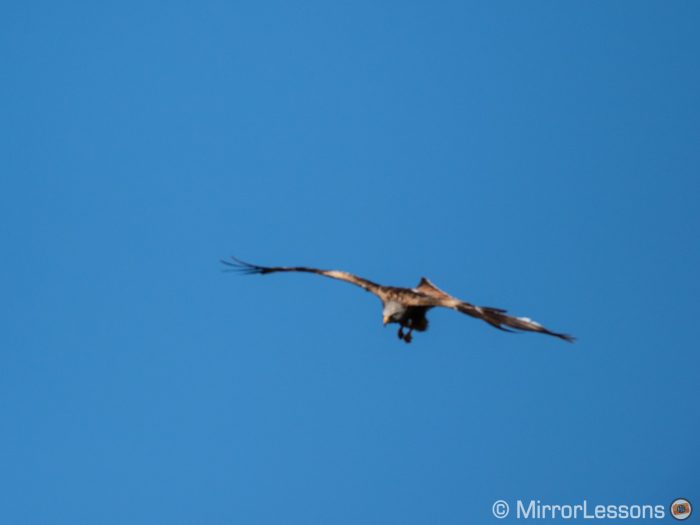
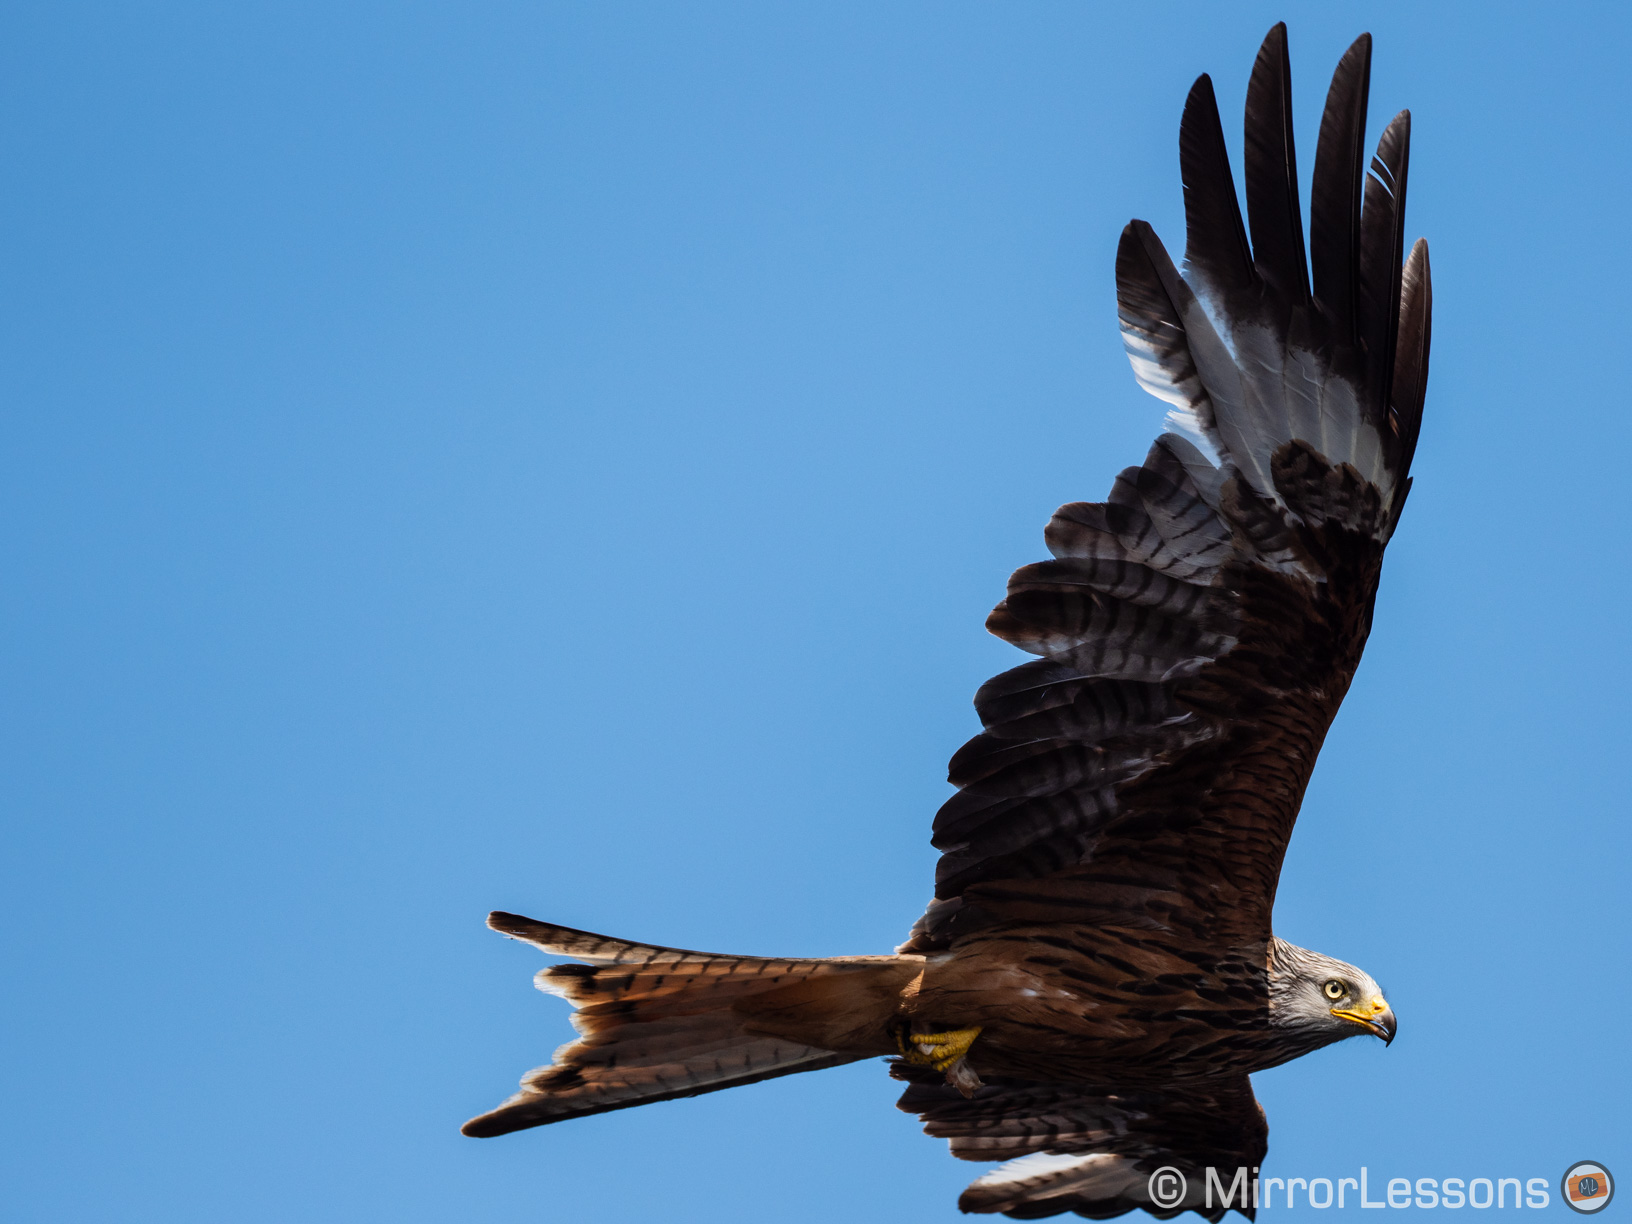
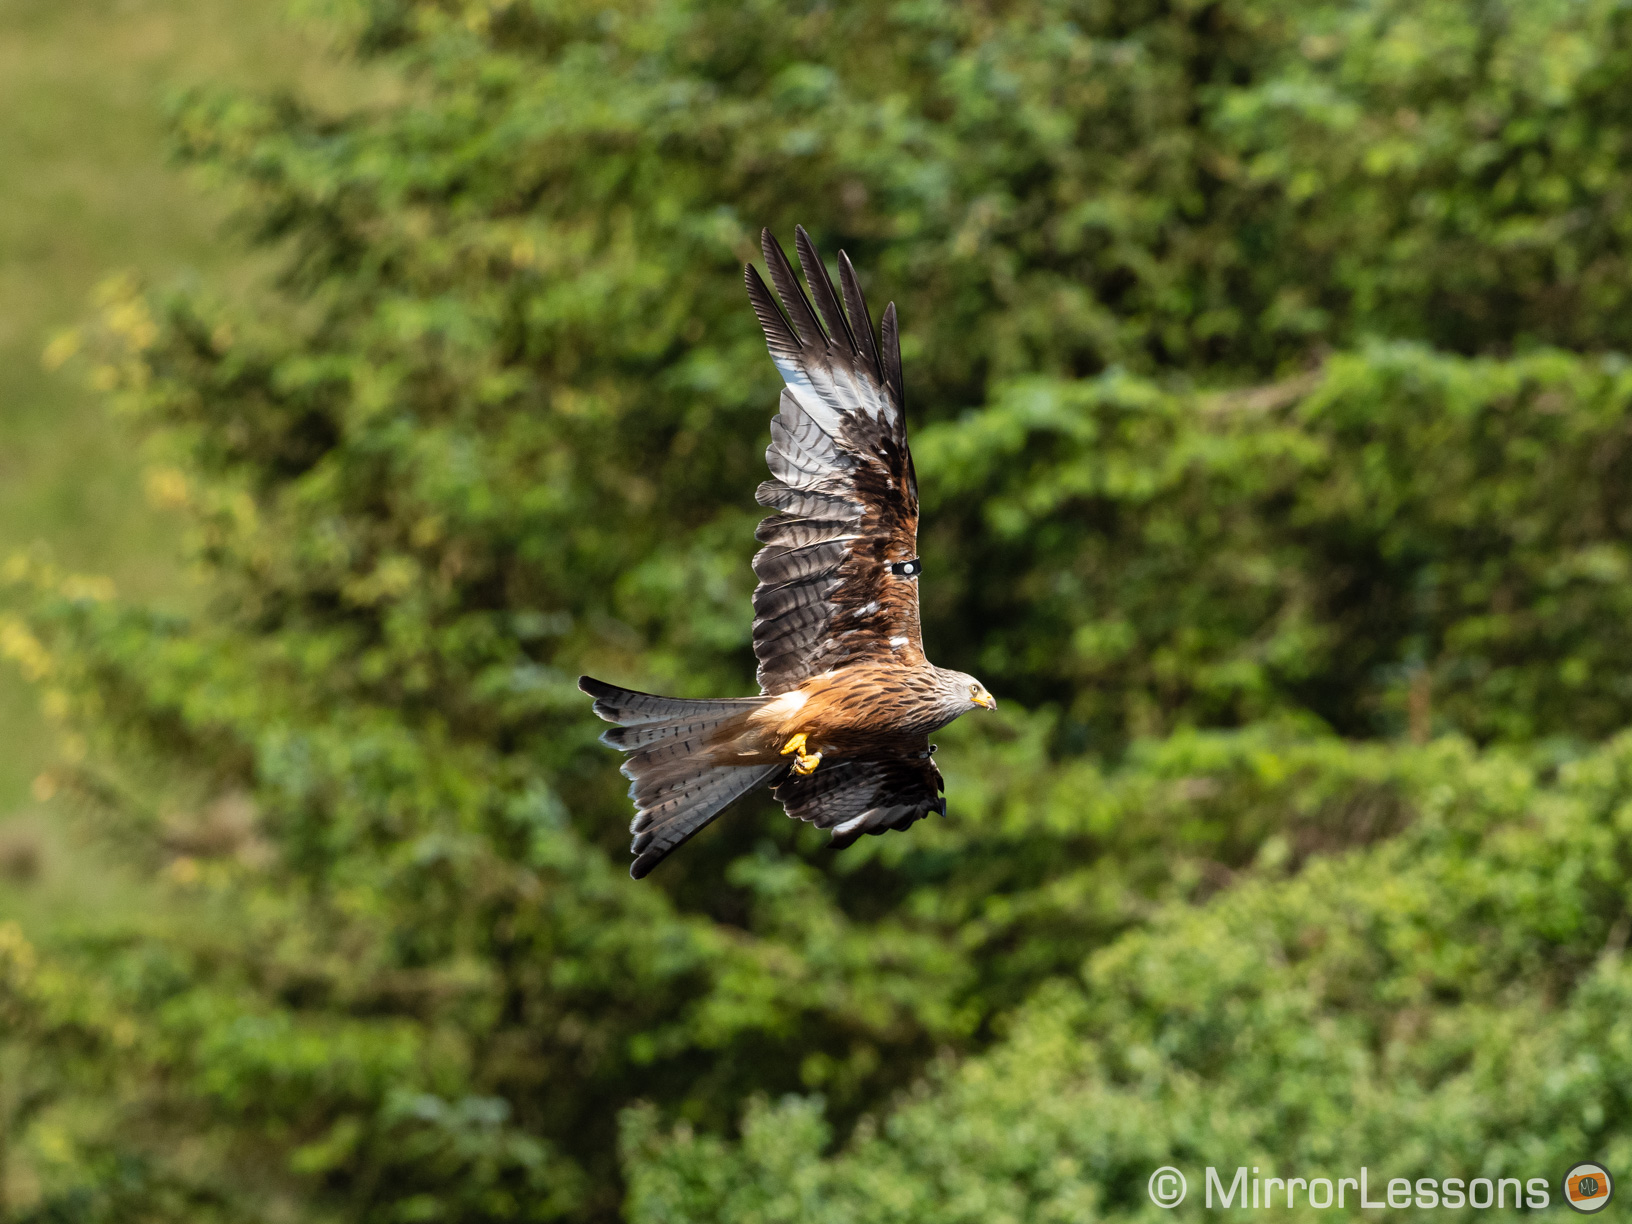
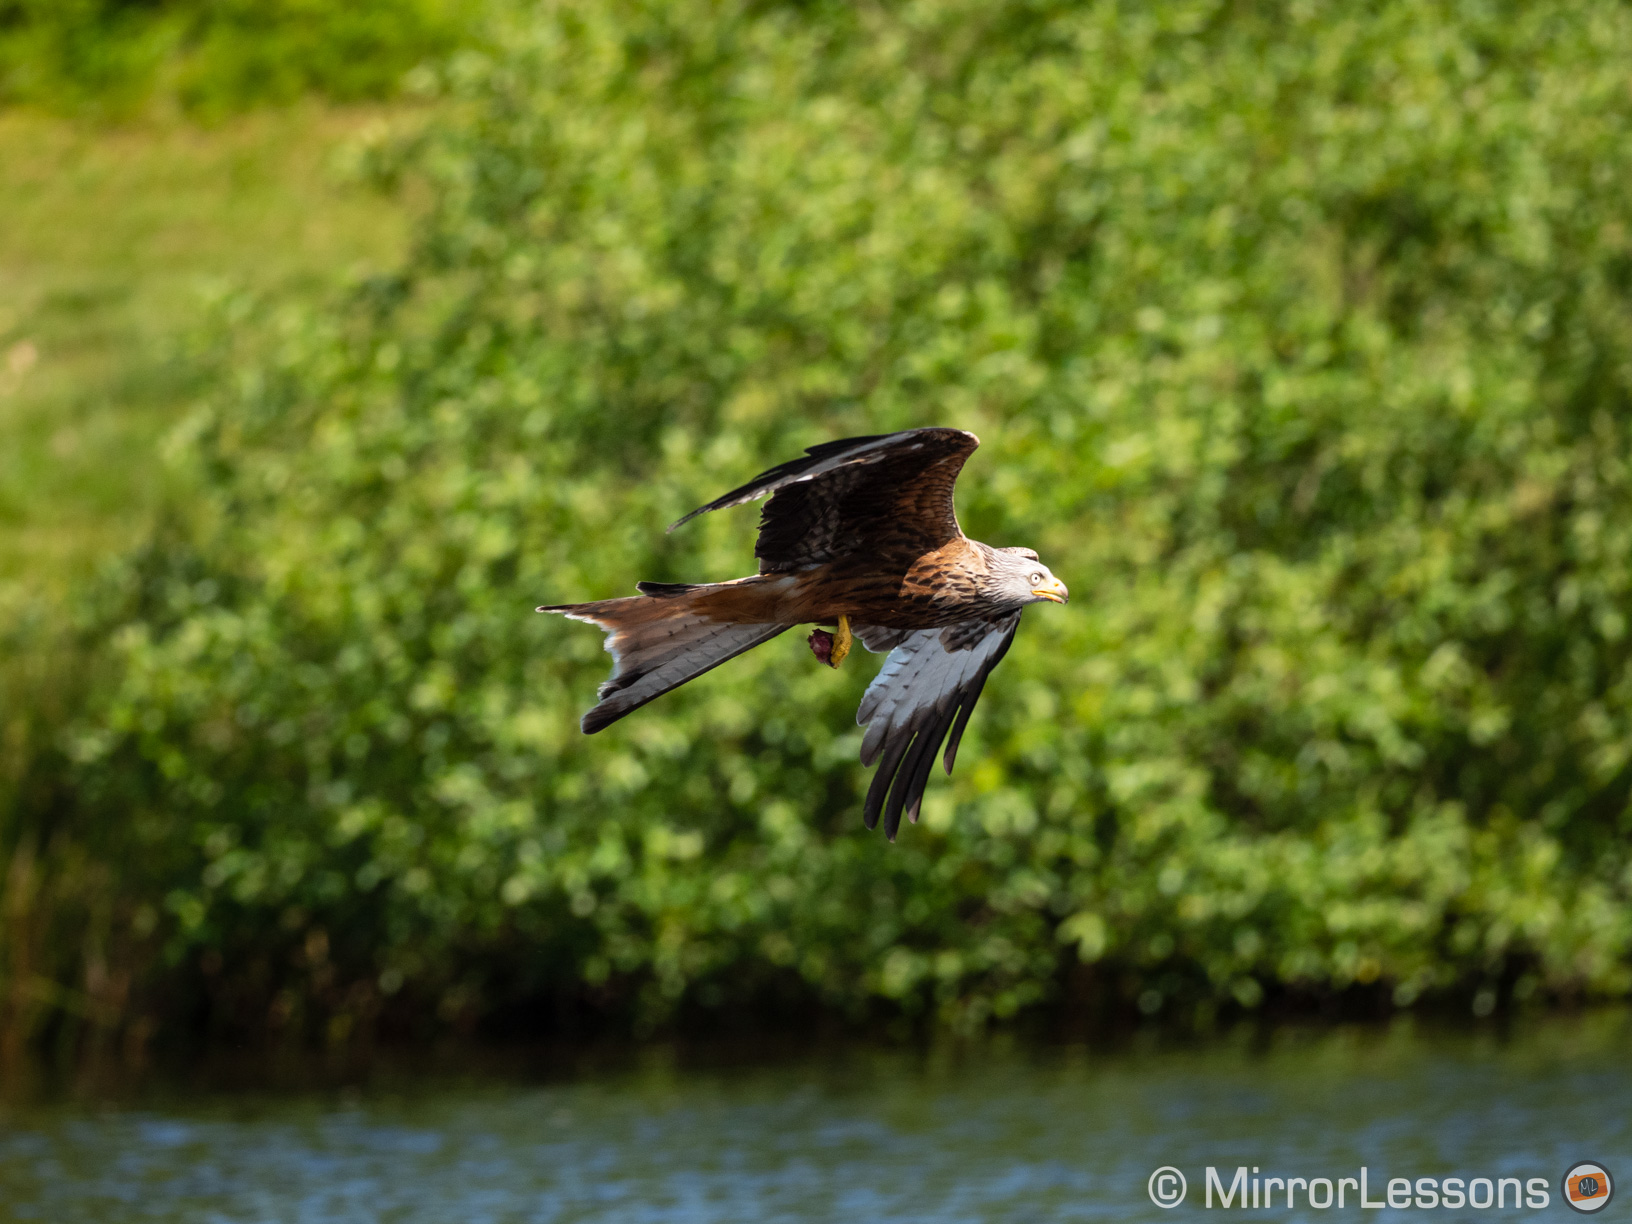
When the bird flies close to you, the change in focus distance is greater and because the bird is moving fast, the camera has to react in a very short amount of time. With the previous firmware, shots like the one below would often be out of focus whereas this time I got sharp results on more than one occasion.
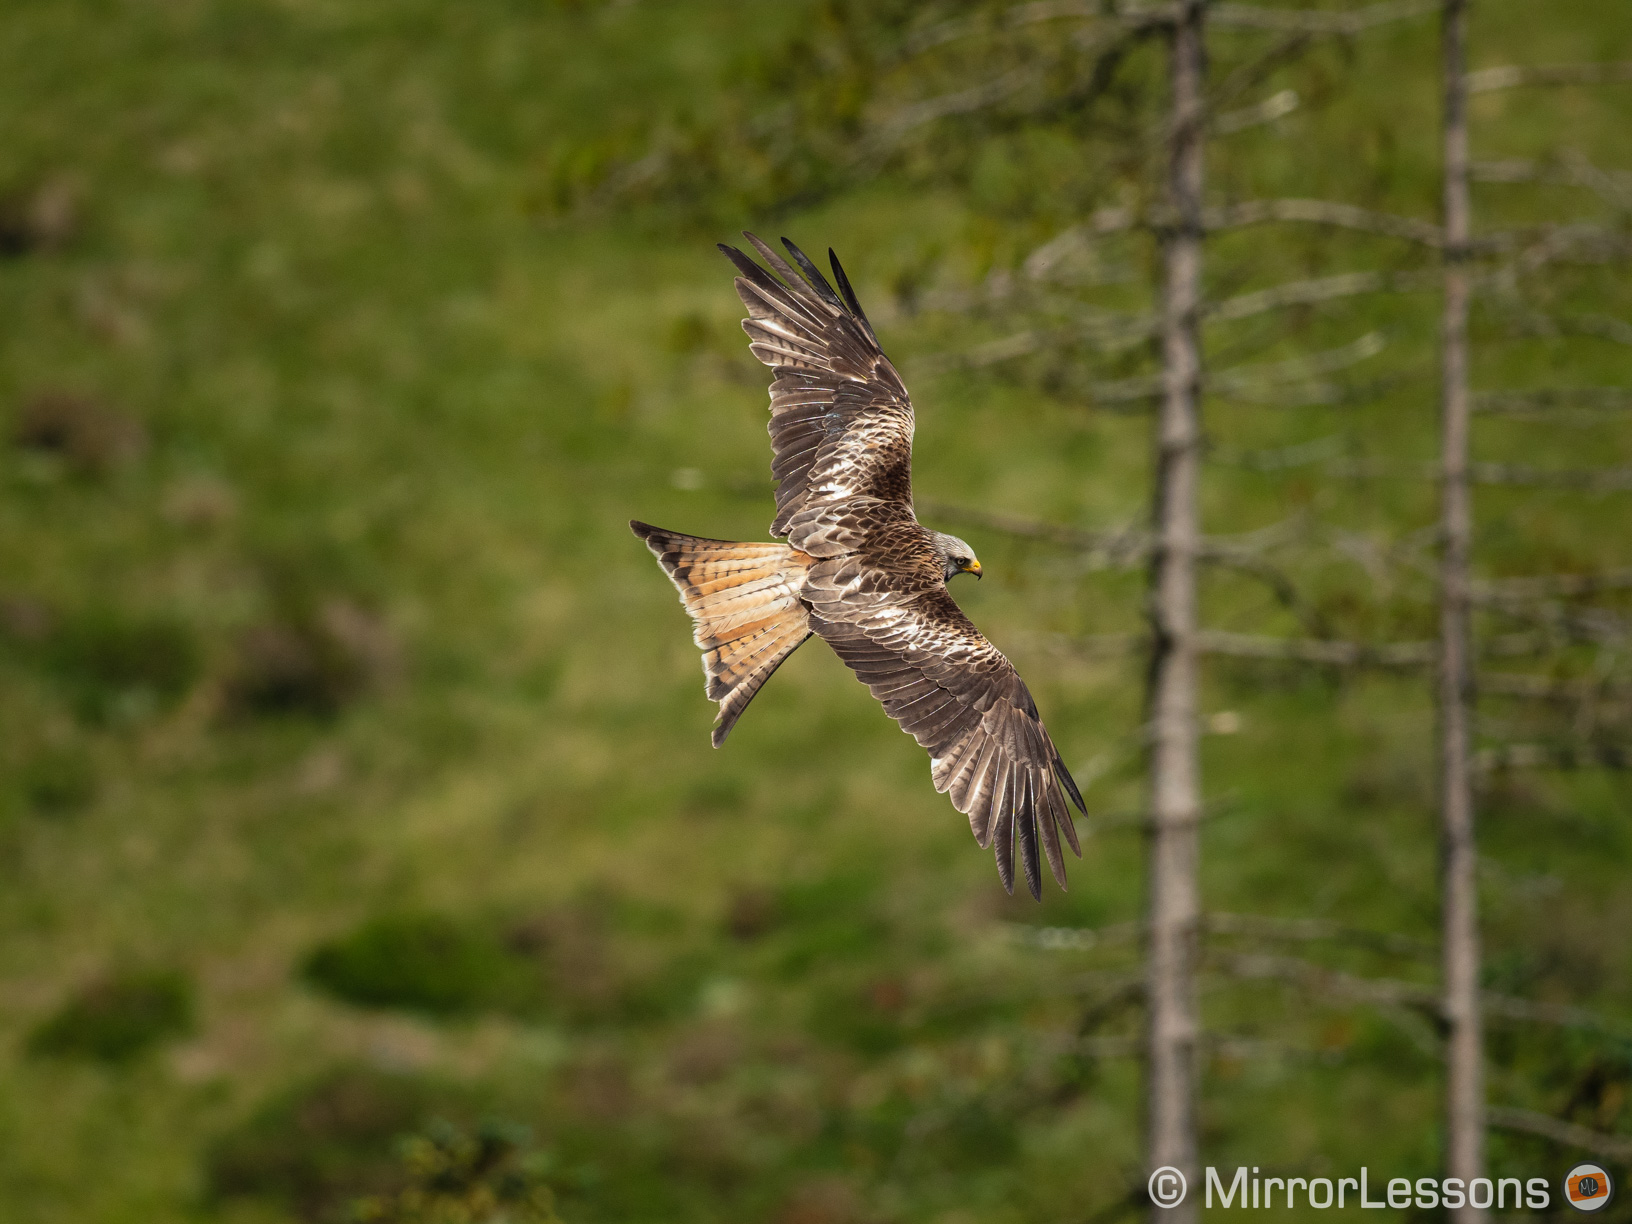
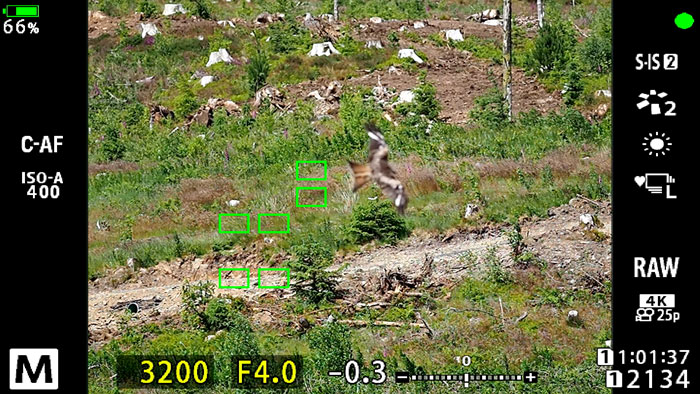
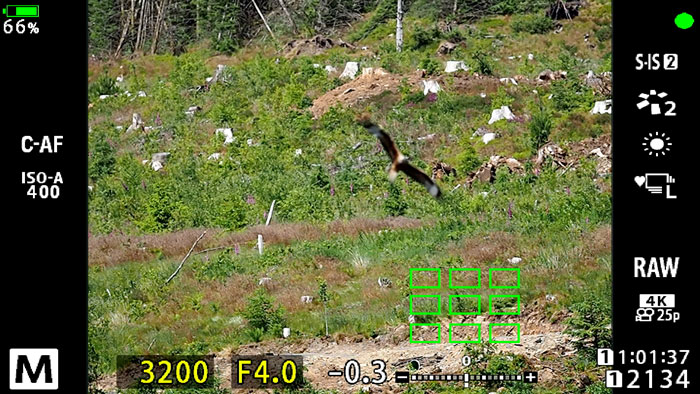
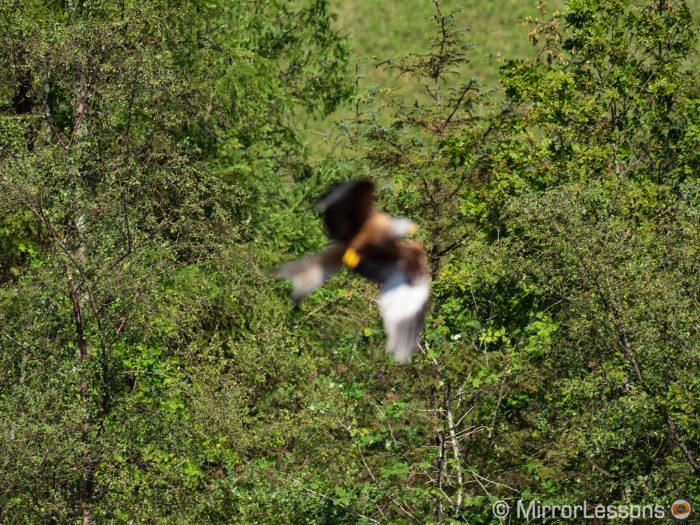
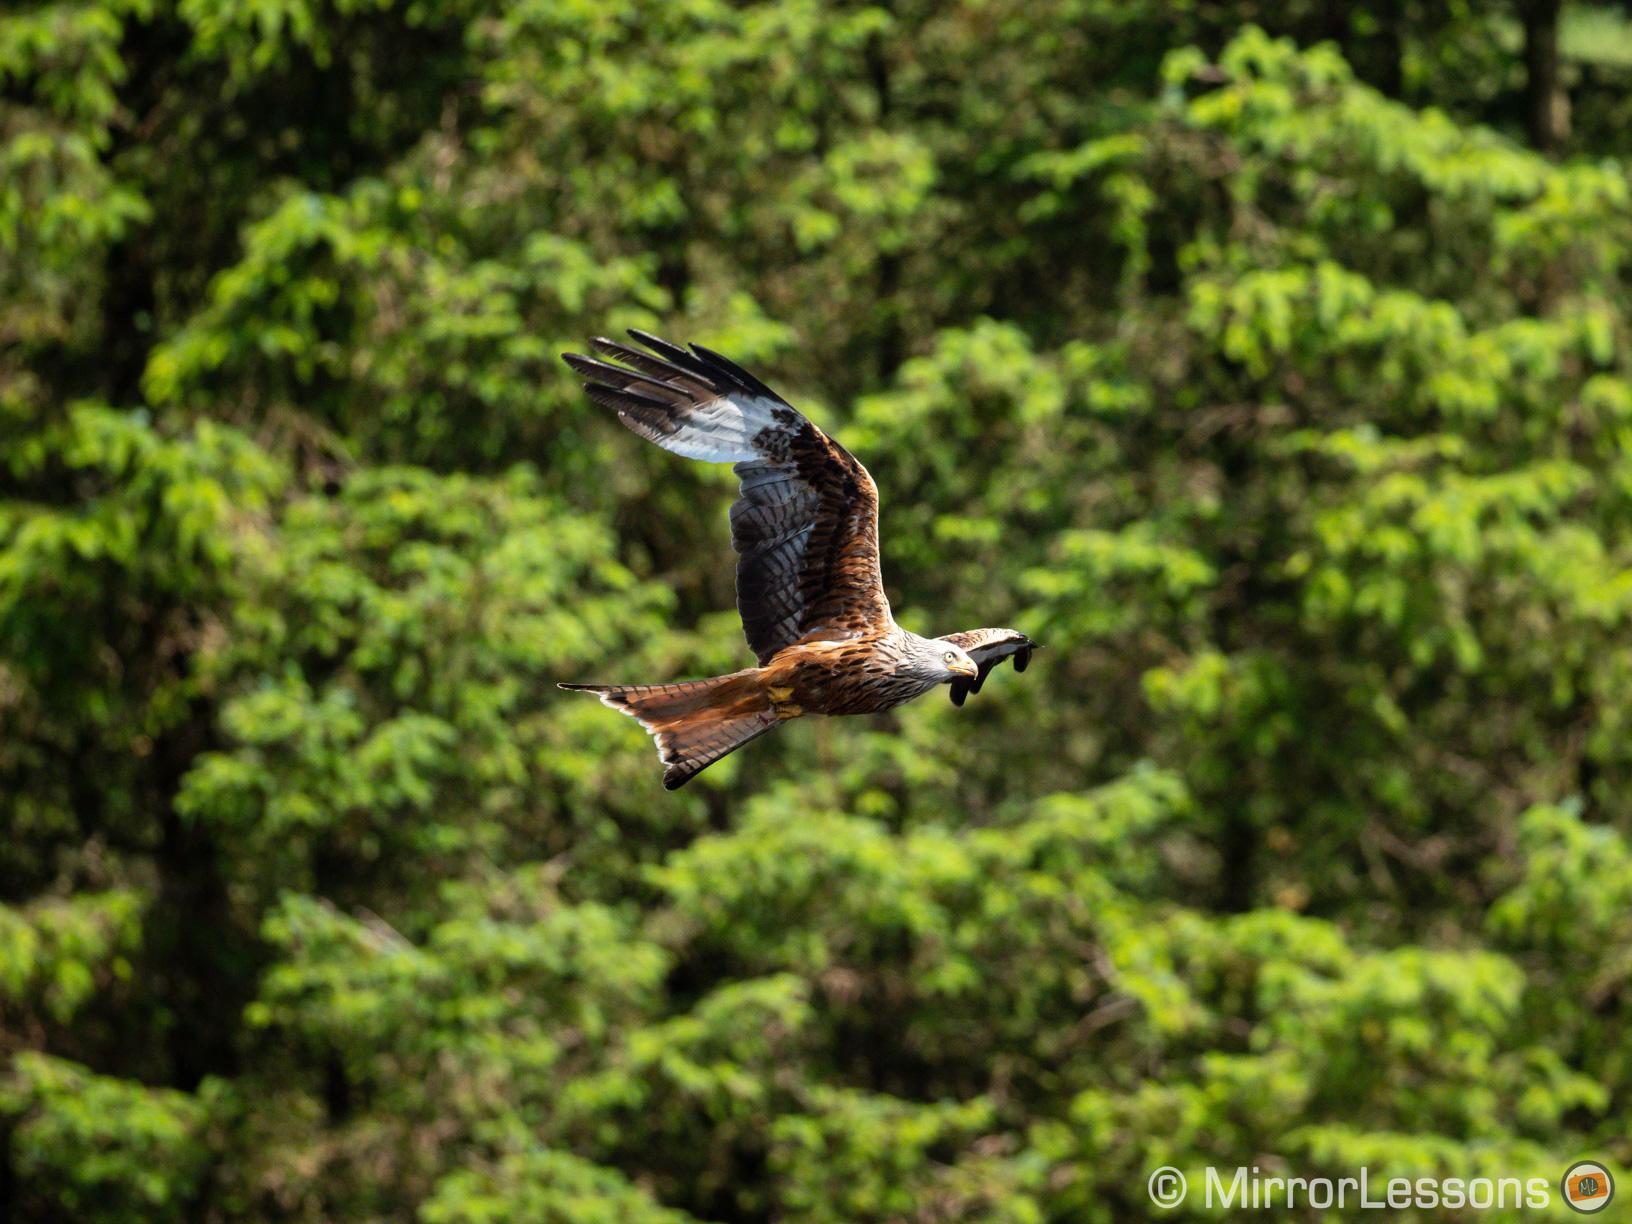
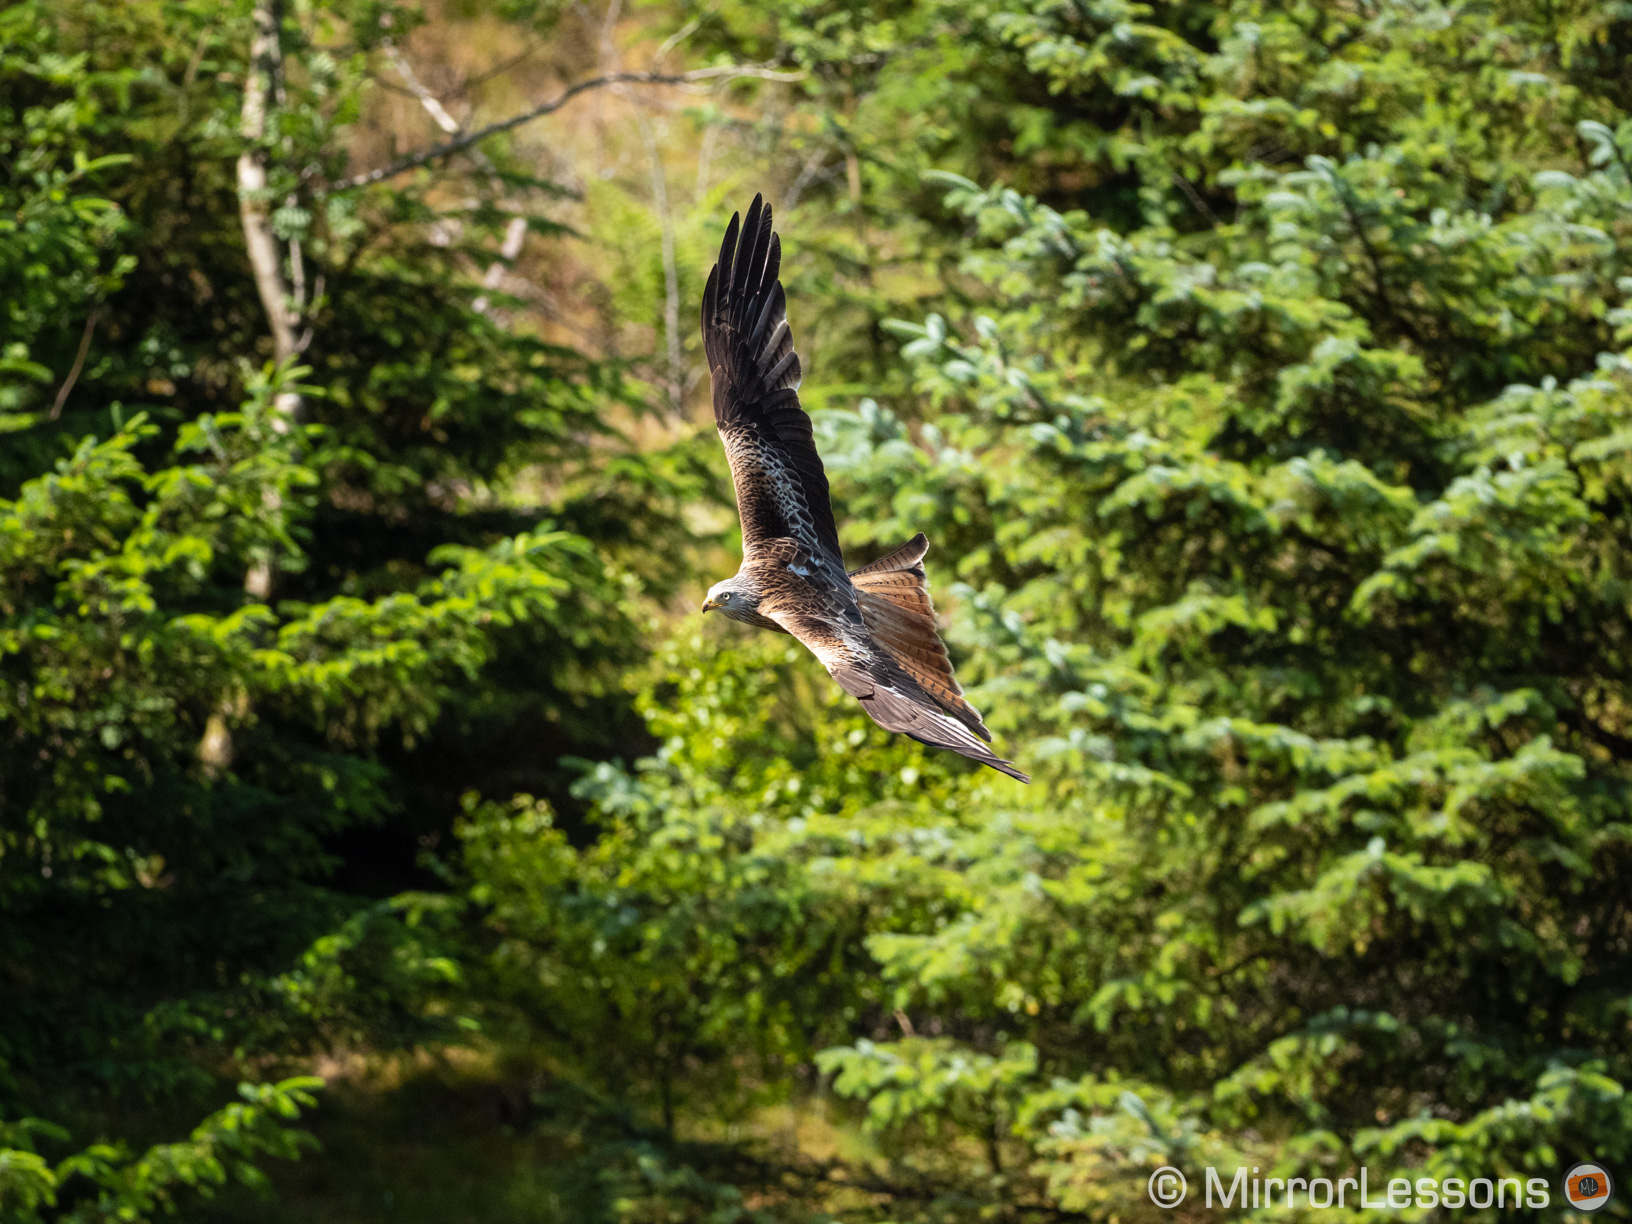
When the bird appears small in the frame and flies against a busy background, the chance that the camera will mis-focus or confuse the subject with the background is greater. In the first image below, you can see that the OM-D has lost the bird and focused on the hill instead. The blurred kite silhouette is not easy to spot with the naked eye either.
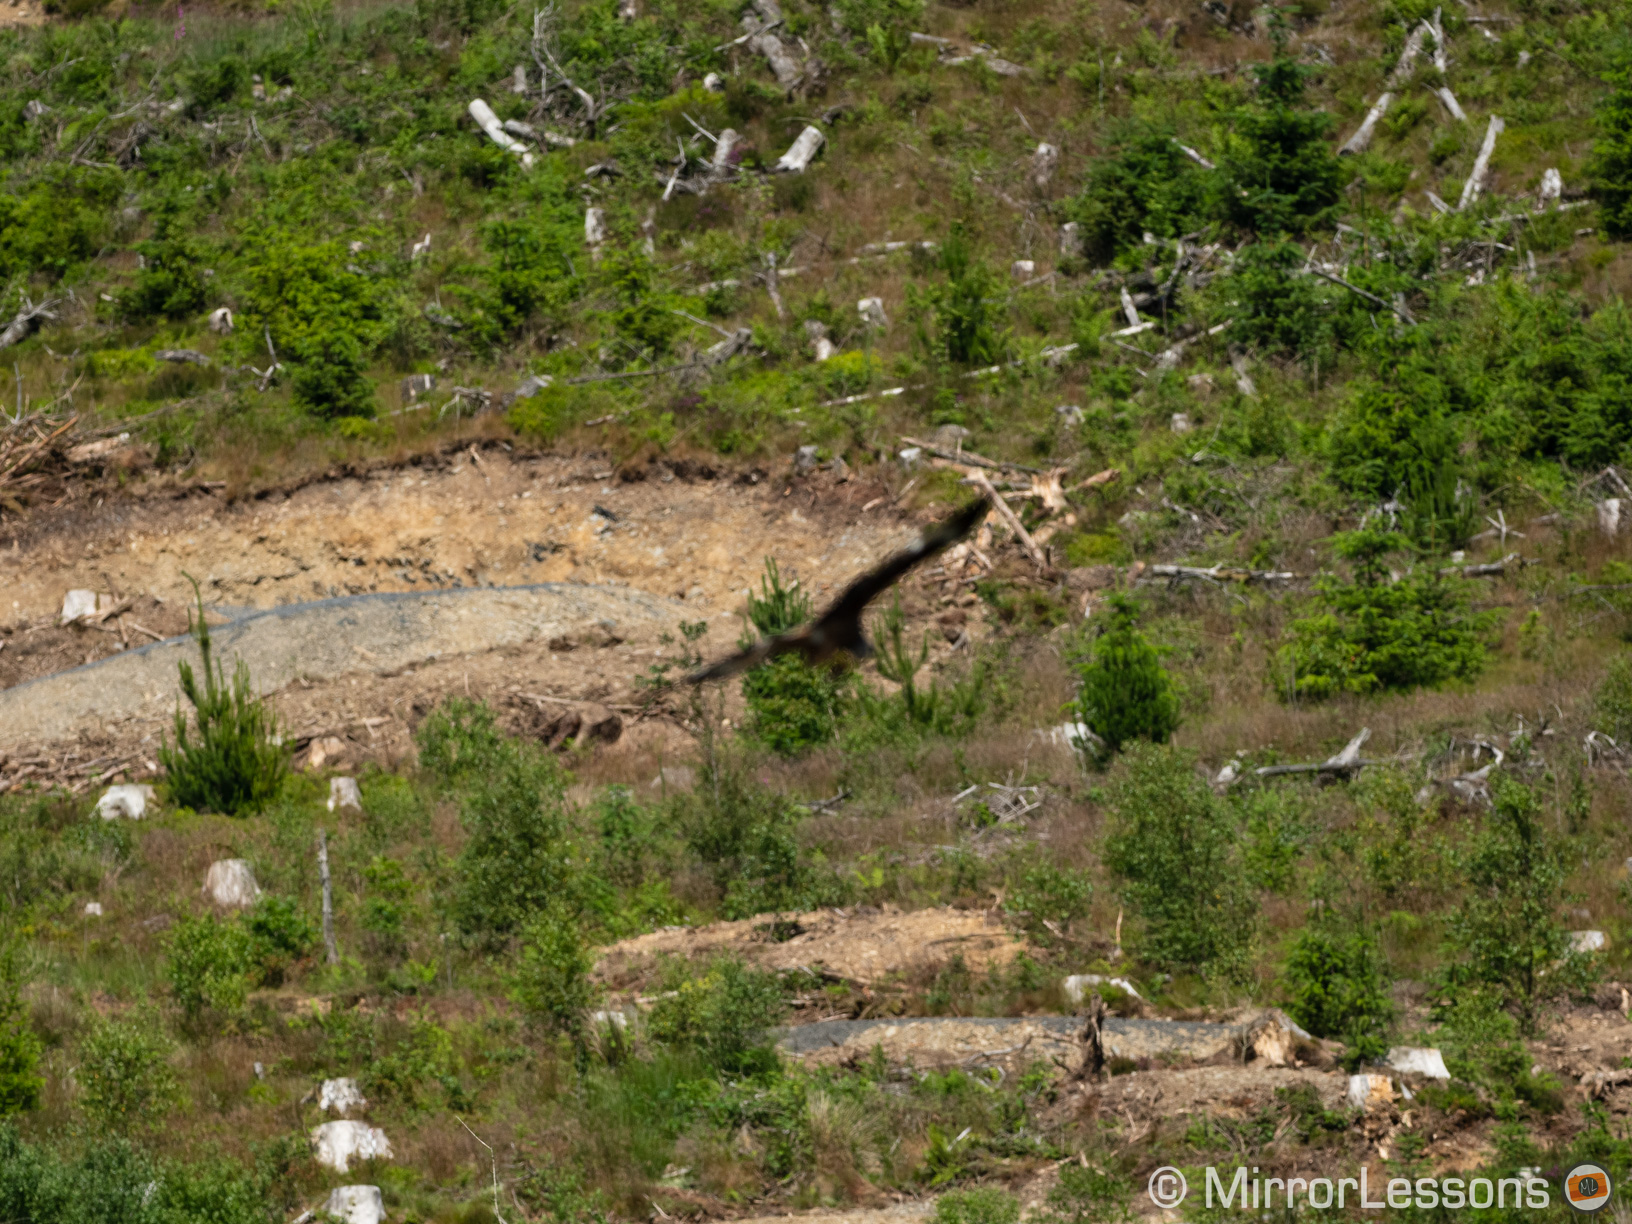
Find the bird!
Below you can see what happens with the camera: the focus points are not on the bird anymore but on the background which has similar colours.
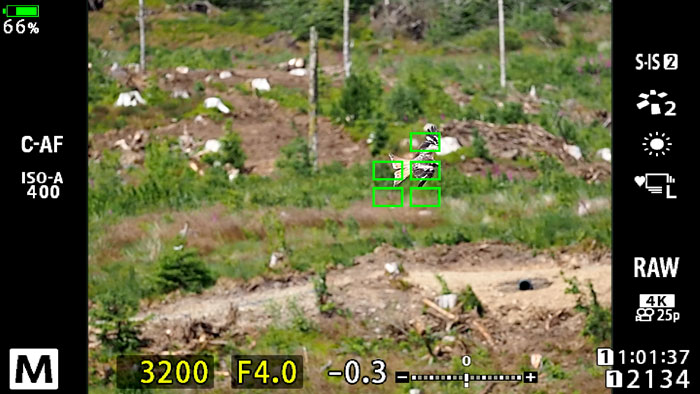
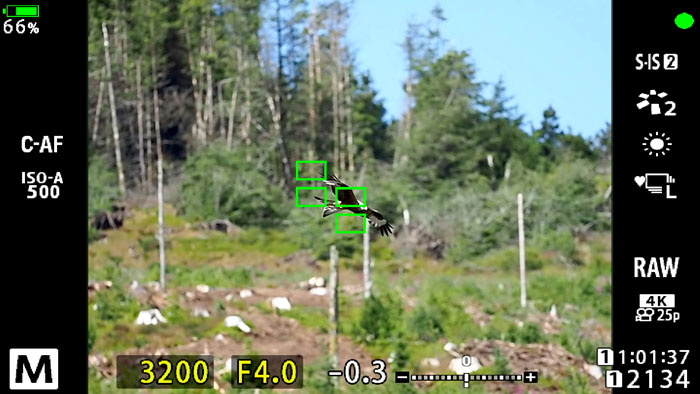
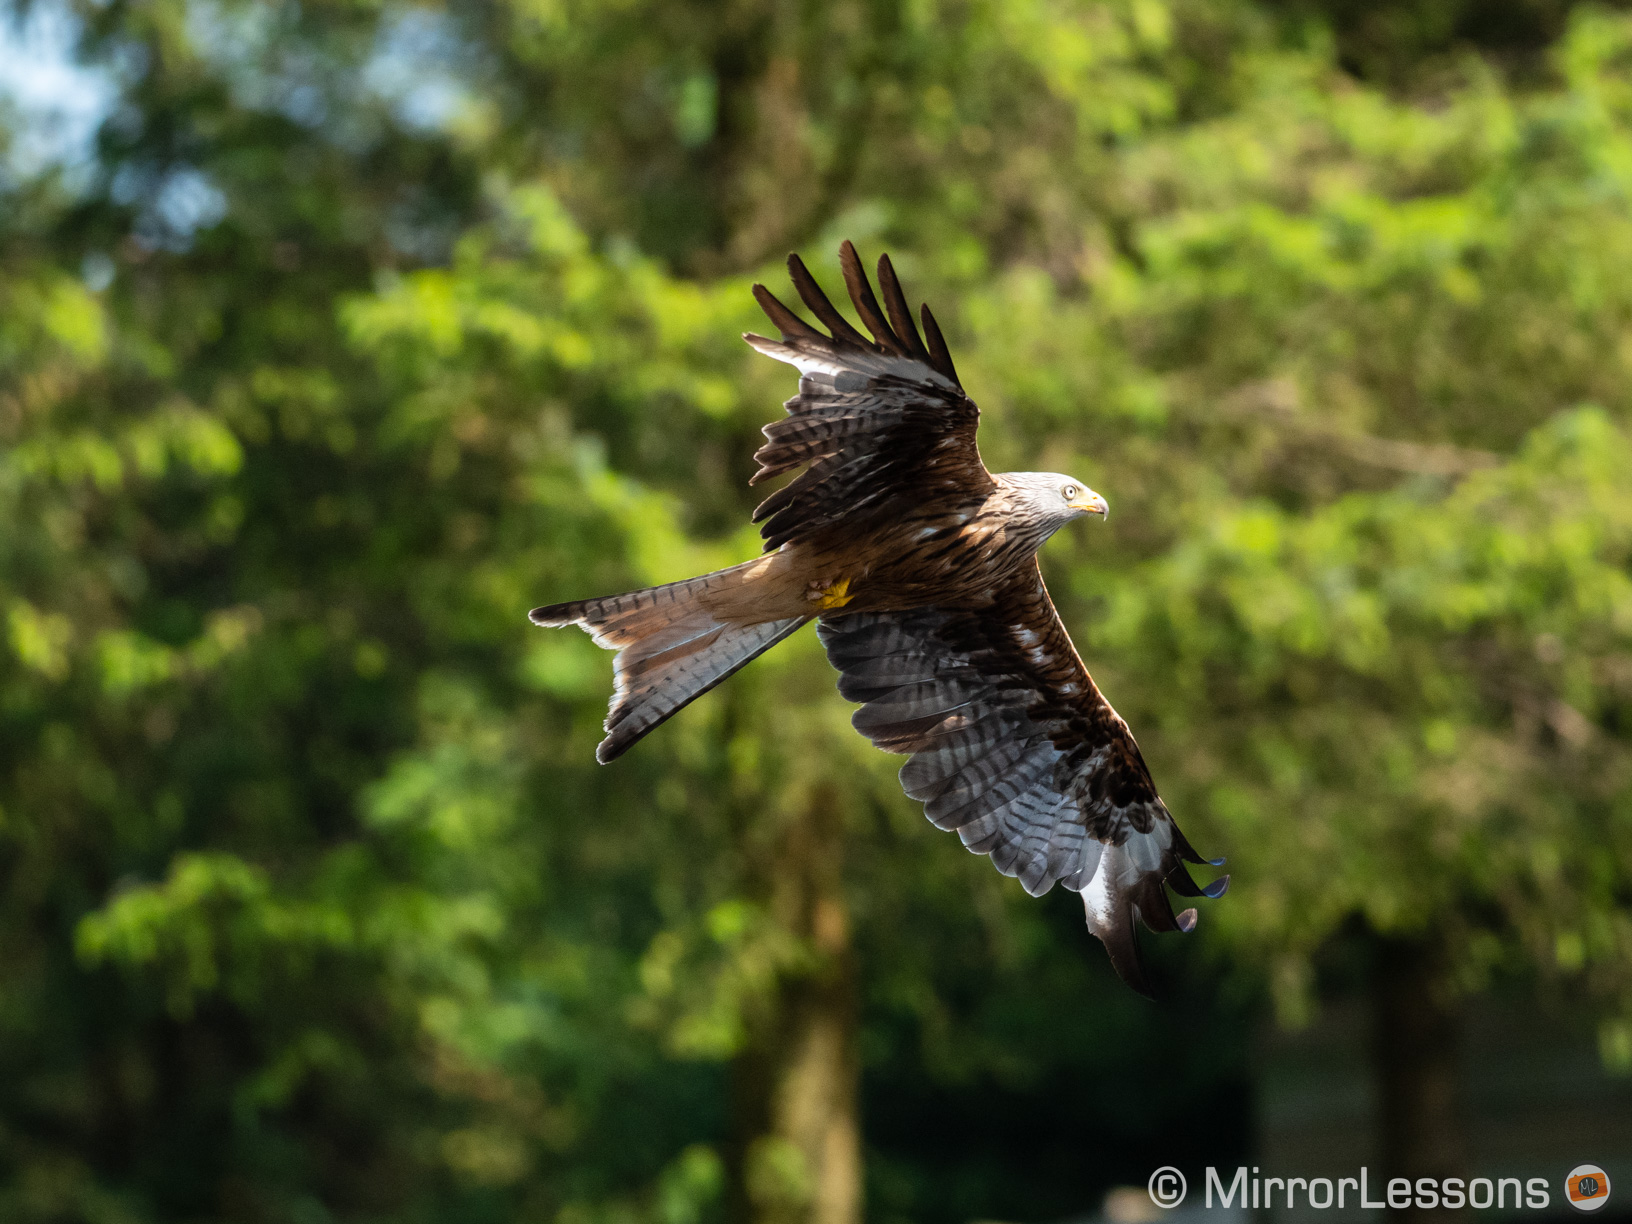
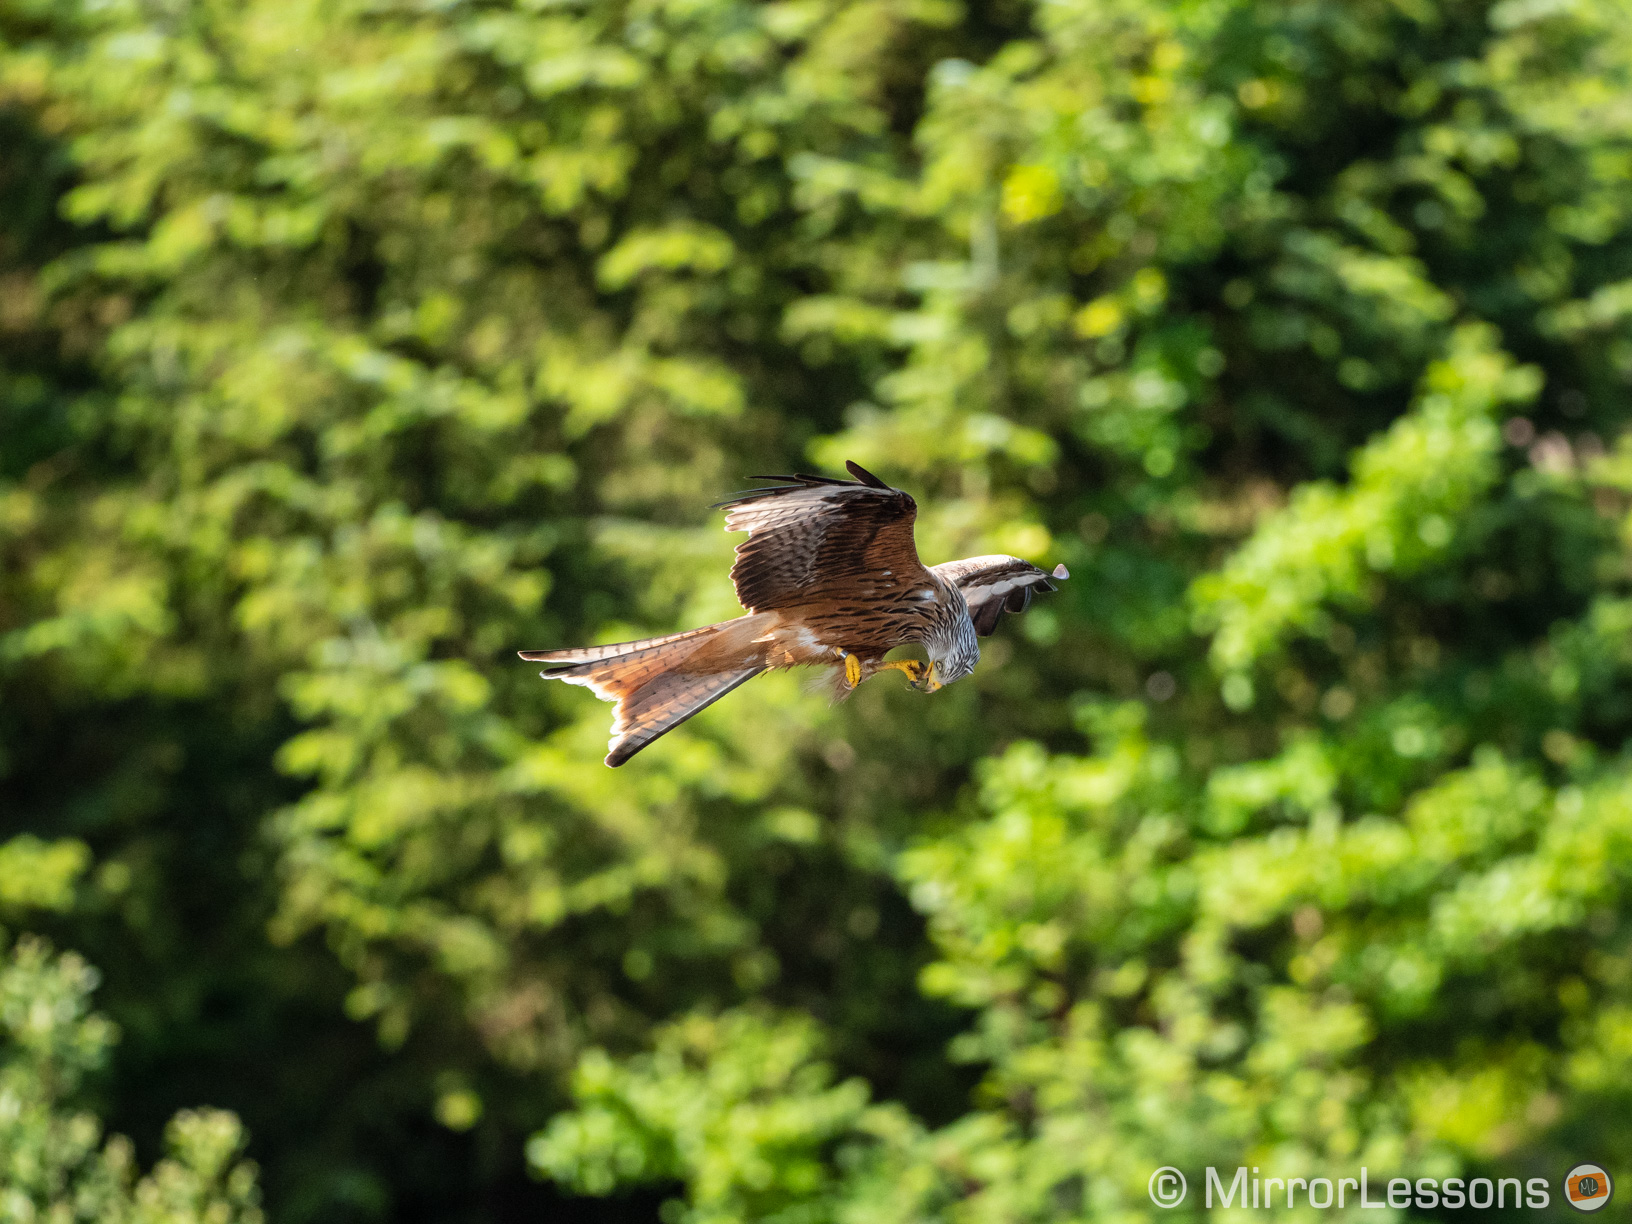
In the second example, the camera managed to keep on top of the bird. Although you’ll still end up with images such as the one above, firmware 3.0 has made the E-M1 II better at tracking smaller birds against such detailed landscapes. It is also more reactive in correcting focus and re-acquiring the subject.
In addition to the focus algorithm, Olympus has included a few settings inherited from the E-M1X.
The most important is the 5×5 Target for the focus points. This was the best setting on the E-M1X and I can confirm it improves the result on the E-M1 II as well. I find it more reliable than the All-Target mode even though you have to be extra sure to keep the bird in the central area of the frame.


The All Target mode is not without its purpose. Following a bird and keeping it at the centre of your composition can be challenging at times. If the camera has more areas to work with, it can use the adjacent points to continue tracking the subject when it is not in the middle of the frame. However with more points the camera can mis-focus more easily.
This is where we find another useful setting called C-AF Center Start. You can activate it for specific Target modes. Every time the camera focuses, it will start from the centre points.
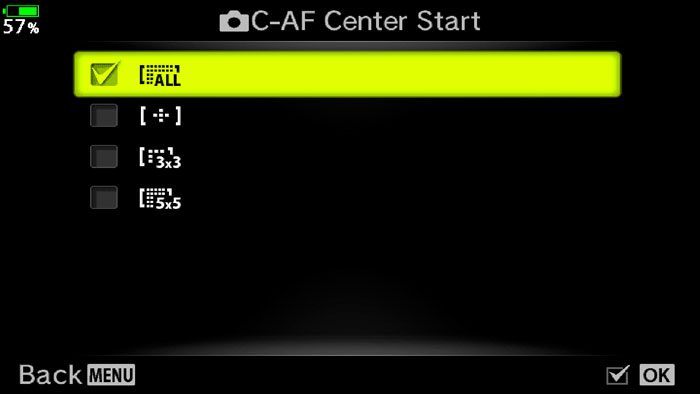
So if you notice that the AF points are not on the subject anymore, you can briefly stop and then resume focusing which will force the camera to start from the central points. Of course this means you have to adjust your composition to bring the bird back to the centre as well.
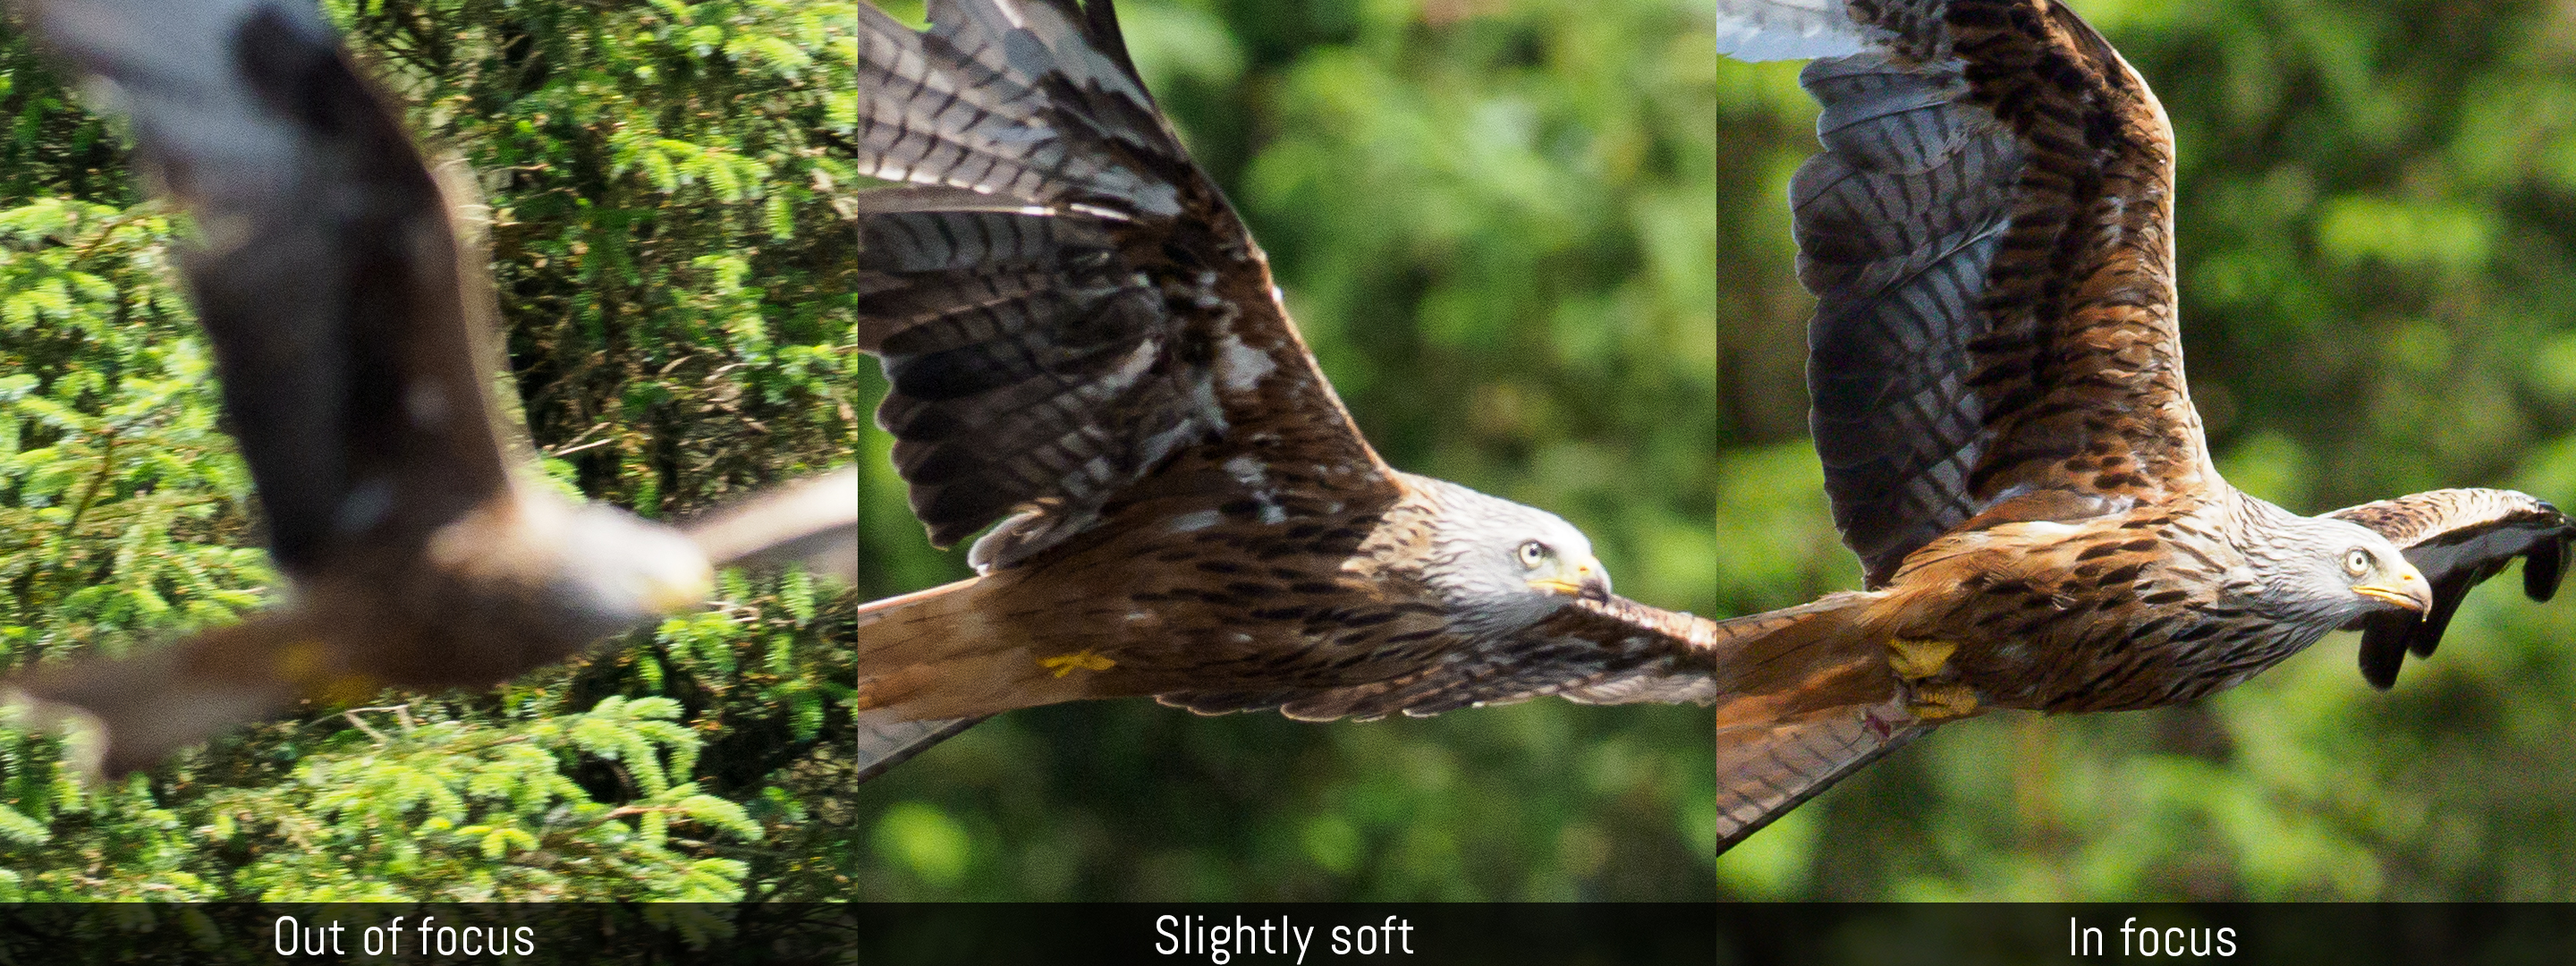
After observing the camera’s behaviour in the field, my work continues at home on the computer. I analyse all the shots and divide them in three categories:
- out of focus: the image is either completely mis-focused or the details on the bird are too blurry
- slightly out of focus: the details on the bird are visible so the subject is recognisable, but the details are not as sharp as they could be
- in focus: the bird and all the details are perfectly rendered.
Then I do some math to calculate the percentage of sharp images. The result is a keeper rate that I can use to measure the performance against other cameras. If I’ve used different setting combinations, I calculate the score for each one of them so that I can see which parameters give the best results.
To give you an idea, here are some scores I got with other mirrorless cameras:
- Sony A9: 80% (95% including slightly soft results)
- E-M1X: 74% / 91%
- Fuji X-T3: 70% / 87%
- E-M1 II (firmware 3.0): 62% / 80%
- E-M1 II (firmware 2.3 or lower): 50% / 75%
As you can see, the keeper rate with firmware 3.0 improves but doesn’t reach the same score as the E-M1X. One of the benefits of the new AF algorithm is that the camera analyses the images that are just being taken in addition to the live view. Because the flagship has two image processors instead of one, a possible explanation is that the E-M1X can read the data faster and therefore make corrections more quickly.
I find support for my theory when I analyse the images. The E-M1 II can still produce entirely out of focus sequences, something that is more rare on the E-M1X.
Another problem with the mark II model is how the behaviour changes depending on the background. You would think that a clear blue sky would make it easier for the camera but I often got the opposite result.
I believe that C-AF + Tracking is a better choice than C-AF alone when the animal is against the sky. However the kites can move quite quickly from a busy background to the clear sky in the same burst sequence, so it becomes difficult to change this kind of setting on the fly. You basically have to choose what type of scene to prioritise but, because other cameras don’t suffer from this problem, I consider it an imperfection of the E-M1 II’s AF system.
With all that said, firmware 3.0 doesn’t produce any miracles but brings a welcome improvement to the AF performance. It doesn’t make the camera better than the E-M1X or the competition, but it does make it more reliable than before for birds in flight. Given the competitive price and compact size, the E-M1 II remains a valuable option after more than two years since its release. And that is a very good thing.
Going a bit off topic, I want to add that the new firmware also improves the AF performance for video. The E-M1 II now uses phase detection at all times when recording movies, which improves the speed dramatically. You can check out the video below to see some examples.
Firmware 3.0 adds a lot of other improvements. I didn’t have another camera sample to do a direct comparison with the previous version, but here is a list of all the most important changes:
- you can choose Drive Priority or Detail Priority for Low ISO values
- L100 has been added in the ISO settings
- the “OM-Log400″ profile is available in video mode
- Frame Rate Priority can be selected in Live View Boost Mode 2
- you can choose between 3 and 15 shots when using Focus Stacking
- you can playback images or change settings while the files are being written to the memory card
- an Anti-Flicker mode is available (stills only)
- you can develop RAW files on Olympus Workspace by using the camera’s image processing engine.
To conclude, you can find extra sample images and a guide at the end of the article on how to set up the E-M1 II (and E-M1X) for birds in flight.
Did you find an improvement after downloading firmware 3.0 to your E-M1 II? Let us know your impressions in the comment section below!
Ethics statement: the camera was sent to us by Olympus UK to test the new firmware. We were not asked to write anything about the product, nor were we provided any other compensation of any kind. Within the article, there are affiliate links. If you buy something after clicking one of these links, we will receive a small commission. To know more about our ethics, you can visit our full disclosure page. Thank you!
Reminder: the links below are affiliate links. If you decided to buy something after clicking the link, we will receive a small commission.
Check price of the Olympus OM-D E-M1 II on:
Amazon | Amazon UK | B&H Photo | eBay
Second-hand Olympus gear on:

E-M1 III Video Review and Tutorial
How to set up the Olympus OM-D E-M1 II and E-M1X for birds in flight
If you own an E-M1 II or E-M1X and want to venture into the wonderful world of birds in flight, here are my recommended settings to get the best performance out of your Olympus camera.
Tools
- Olympus OM-D E-M1 II or E-M1X
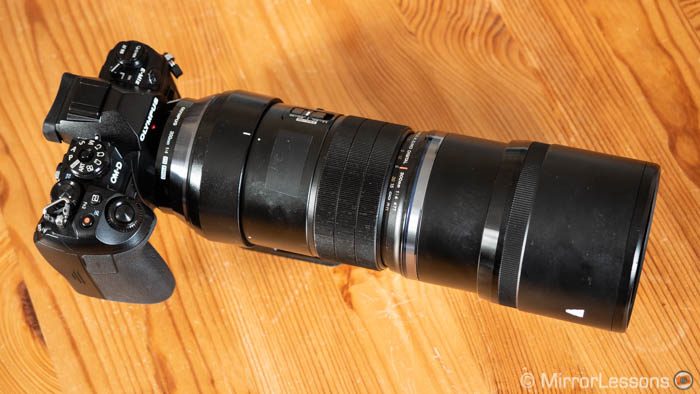
- micro four thirds telephoto lens (300mm Pro, Leica DG 100-400mm or Leica DG 200mm 2.8 with TC 1.4x are my favourite)
- computer with internet connection (for firmware update)
- Olympus Workspace software (for firmware update)
- USB cable (for firmware update)
Instructions
Autofocus settings
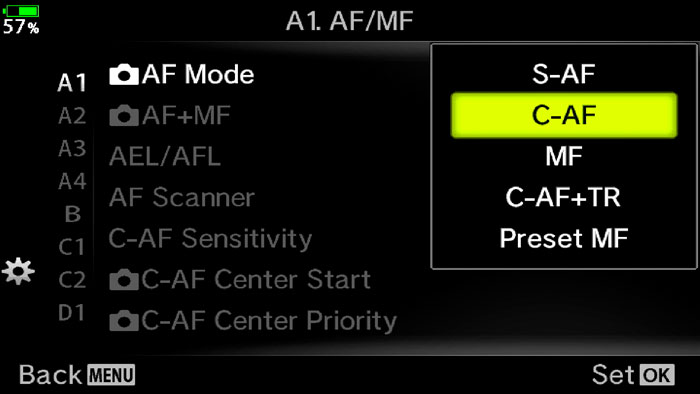
- Turn on the camera, navigate to the Custom Menu A1 and set the AF Mode to C-AF (continuous). Alternatively you can do this via the Super Control Panel (OK button) or the dedicated AF button on top near the On/Off switch.

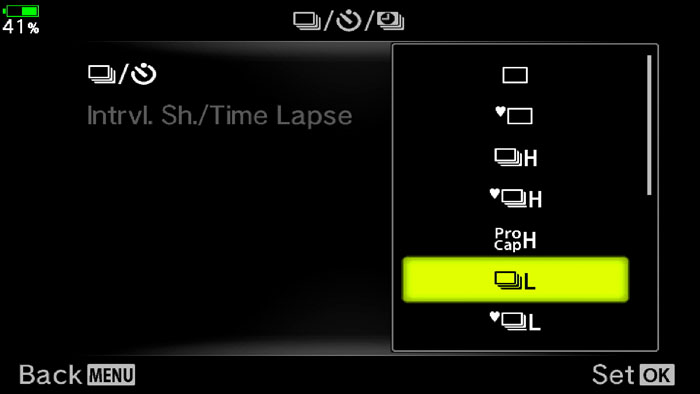
- Choose Sequential Low or Silent Low for the continuous shooting speed (Shooting Menu 1, Super Control Panel or dedicated button on top). If you select High, the camera will lock focus on the first frame and we don’t want that. The difference between Sequential Low and Silent Low is that the latter uses the electronic shutter, which raises the burst speed to 18fps (the maximum with the normal mode is 10fps). Electronic shutter also means you can take pictures without any noise being emitted from the camera.
- Choose the All-Target or 5x5 Target mode for the AF area. 5x5 gave me the best results but keeping a bird at the centre of the frame can be difficult if you don’t have a lot of experience, so you might find the All-Target a better setting to start with.
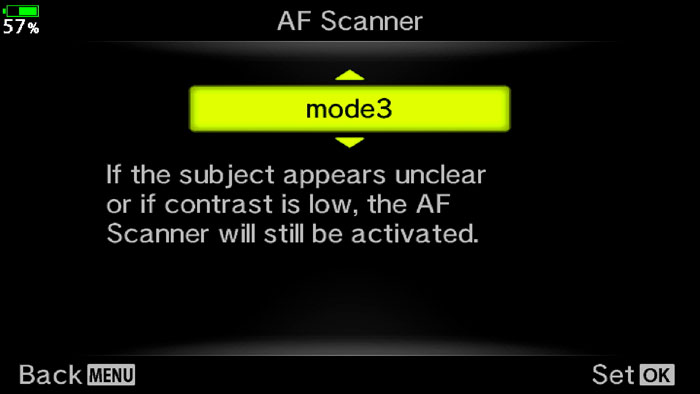
- In Custom Menu A1, choose mode3 for AF Scanner. This ensures that the camera keeps attempting to correct focus if the subject is not clear.
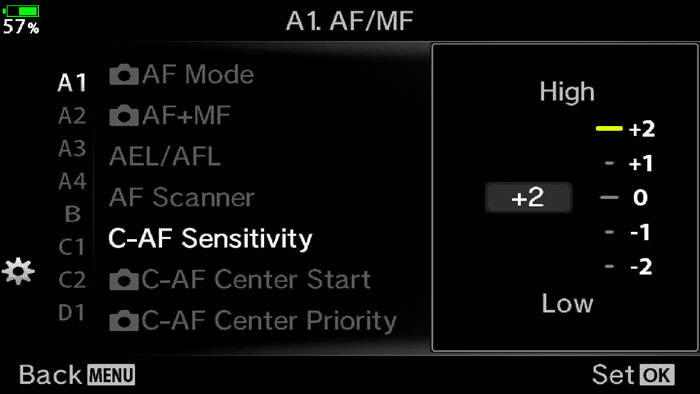
- Set +2 (High) in C-AF Sensitivity. This makes the autofocus as reactive as possible.
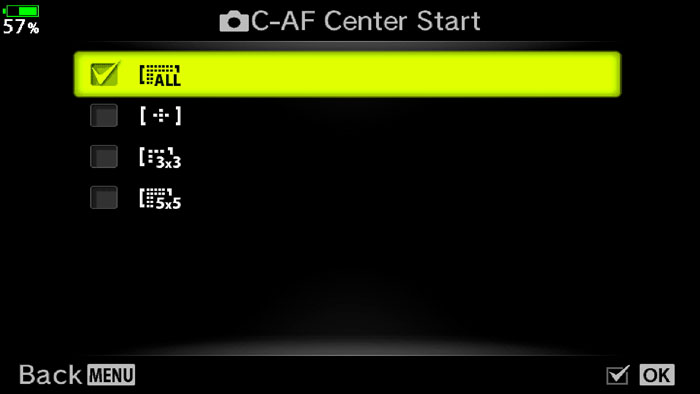
- If you’re using the All-Target area (see point 3), I’d advise you to enable C-AF Center Start for the All-Target mode. This will force the camera to start focusing with the central points, which is most likely where the bird will be when shooting.
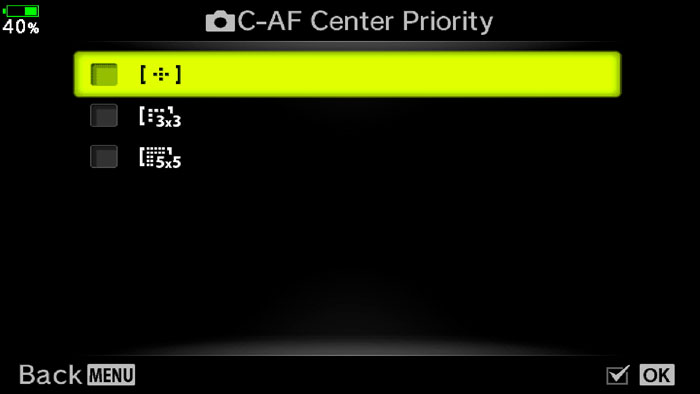
- Disable C-AF Center Priority for the 5x5 Target mode (if you’re using it). You want the camera to use all the points available especially when the bird is a bit off centre.
- In Custom Menu C1, turn off the C-AF Release Priority. This way the camera will give more importance to focus acquisition rather than the shutter release.
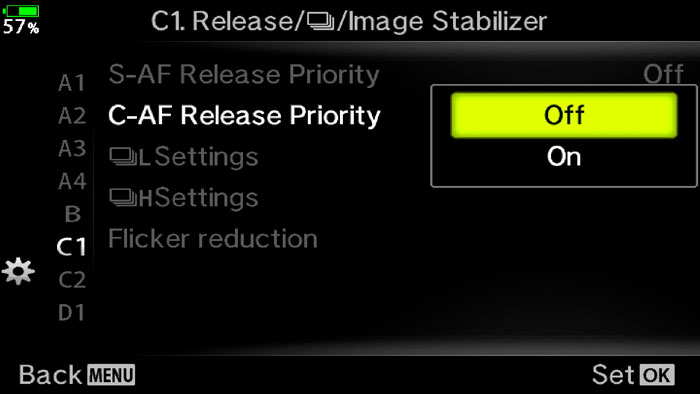
Image quality settings
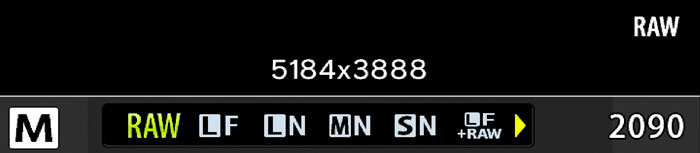
- Choose RAW format in the Shooting Menu 1 or via the Super Control Panel (OK button).

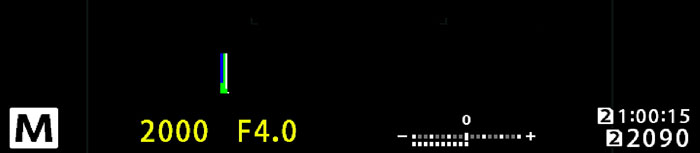
- The shutter speed depends on the type of bird, but generally you want a fast value for birds in flight. On a sunny day, I use anything between 1/2500s and 1/4000s, on a cloudy day I can go down to about 1/1000s to keep the ISO down but if the bird is really fast, you want to raise that to at least 1/1600s.
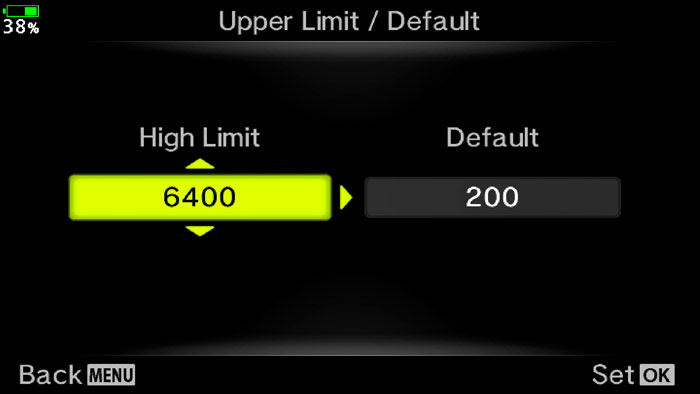
- Set the ISO sensitivity to Auto and choose a maximum value (I leave it to 6400 but this can be changed depending on the amount of light available)
- In the Super Control Panel, set the stabilisation mode to S-IS 2. This will correct only the vertical shake and will avoid motion blur problems.

Other useful settings
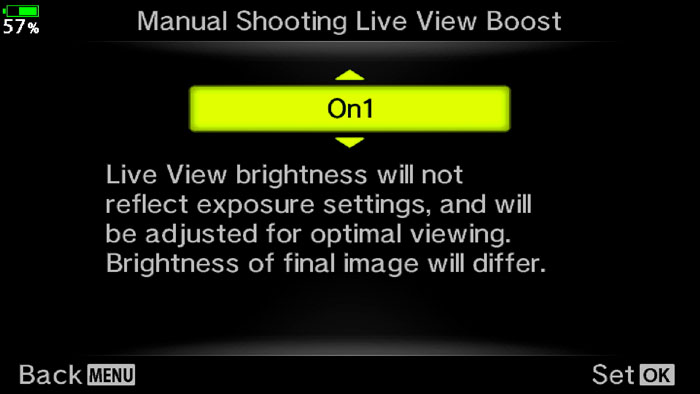
- In Custom Menu D2, enter Live View Boost then Manual Shooting and choose On1. This disables the exposure preview in the EVF and prioritise an optimal brightness which I found helpful when tracking the bird, especially if it flies in different light zones. Alternatively you can enable S-OVF in Custom Menu I.
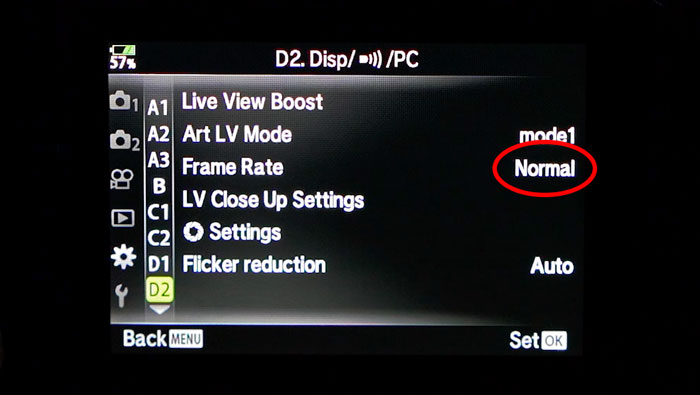
- In D2 again, choose High instead of Normal for Frame Rate. This increases the EVF frame rate to 120Hz for a more fluid view when tracking the bird with the viewfinder.

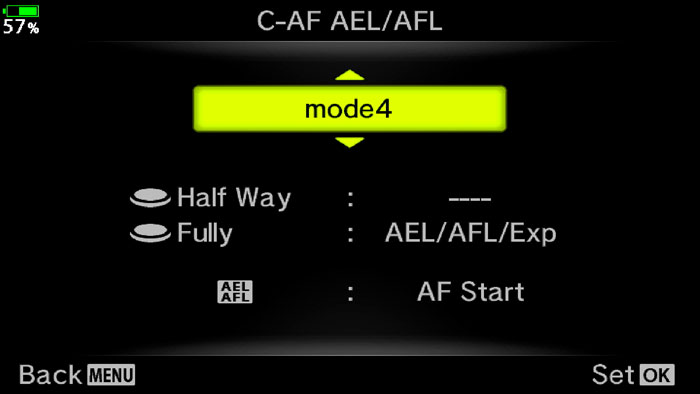
- In Custom Settings A1, click on AEL/AFL, then C-AF and choose mode 4. This will assign focusing to the AEL/AFL button on the rear (back button focus) rather than half pressing the shutter button. This way you’ll use one button to focus and one to take the picture. I find this method more precise.
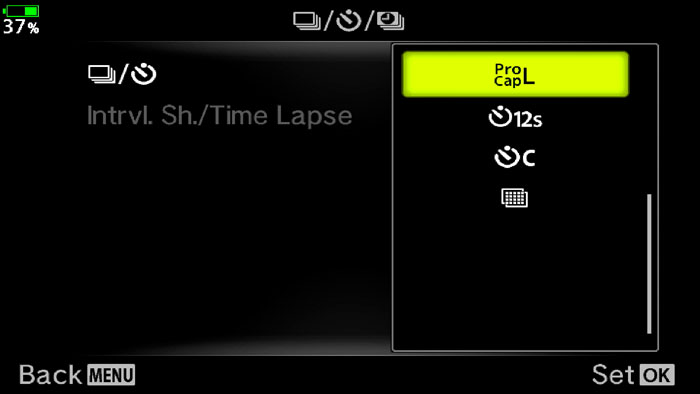
- You can use Pro Capture L instead of the normal Sequence Low. With Pro Capture, the camera pre-loads frames before the shutter is fully pressed, which is useful to capture unpredictable action.
Notes
If you use an E-M1 II, make sure to update the firmware to version 3.0 which includes more settings and a better AF algorithm.
You can update the firmware with the free Olympus Workspace software and by connecting the camera to your computer with the USB cable. Follow the instructions on the Olympus website.
Recommended Products
As an Amazon Associate and member of other affiliate programs, I earn from qualifying purchases.