Electronic devices have evolved considerably over the years and cameras are no different. In addition to constant improvements in image quality, speed and performance, engineers have worked hard to expand the shooting possibilities beyond the basic exposure settings.
Some of these “extra” features would go on to become so standardised that today most of us wouldn’t consider a camera without them. Think about the first integration of autofocus in the seventies and eighties, or the video revolution that began in 2008.
Mirrorless cameras have followed the same trend and are responsible for many of the new features introduced over the past 10 years, probably as part of a strategy to make this new wave of products more appealing to consumers.
If you open a user manual today, the number of functionalities can be overwhelming, to the point where you start to ask yourself: do I really need all this?
Well, undeniably some features have had a significant impact while others can easily be forgotten. So what are the most interesting features that have been introduced to mirrorless cameras and how much of a difference do they make today?
To answer this, we made a list of all the extra features on the mirrorless cameras we’ve reviewed over the past five years, and thought about what kind of photographers can best take advantage of them.
Table of Contents
1. Movie recording
2. In-body image stabilisation
3. High Resolution mode
4. Eye detection autofocus
5. AI subject tracking
6. Electronic shutter and processing speed
7. Features built around movie recording
8. Compositing effects
9. Bracketing
10. Intervalometer
11. RAW processing
12. Creative effects
13. Wireless connectivity
14. Unsuccessful or forgotten features
15. Conclusion
Movie recording
Usefulness rating: a must!
Who does it best? Panasonic, Sony
It sounds weird to call video an extra feature these days given how integral it has become to digital cameras. Those only interested in stills are likely to ignore the video recording button, but many others choose a camera also based (or solely based) on its movie capabilities.
The product that changed the game wasn’t mirrorless though. In 2008, the Canon 5D mark II came out with Full HD video (1080p). Despite not offering manual exposure controls, it shook the market thanks to the image quality and depth of field control offered by the 35mm format sensor. The rest is history.
The huge success of the 5D II encouraged other brands to invest in video seriously. In the mirrorless segment, Panasonic was the first to believe in it when it introduced the GH1 in 2009. Sony included Full HD video on the first E-mount Nex cameras in 2010 and on their RX models, they also added impressive slow motion capabilities up to 1000fps.

From there, the specs got better and better. Today mirrorless cameras are a more interesting option for video than DSLRs thanks to a vast selection of products, from flagship models to more affordable options.
When I was still working in Italy as a video maker, I started to integrate cameras like the Panasonic GH3, GH4 and even the GX7 into my workflow, especially when travelling. This is because the small size of Micro Four Thirds bodies and lenses was a big advantage.
Today, every brand considers video a fundamental function for their products. Even companies that were previously lagging behind, such as Fujifilm, have made remarkable progress.
The market has changed as well, so much that many photographers have started to include movies in their portfolio. So yes, video might just be one of the most successful extra features of digital still cameras!

In-body image stabilisation
Usefulness rating: hard to give it up once tested!
Who does it best? Olympus
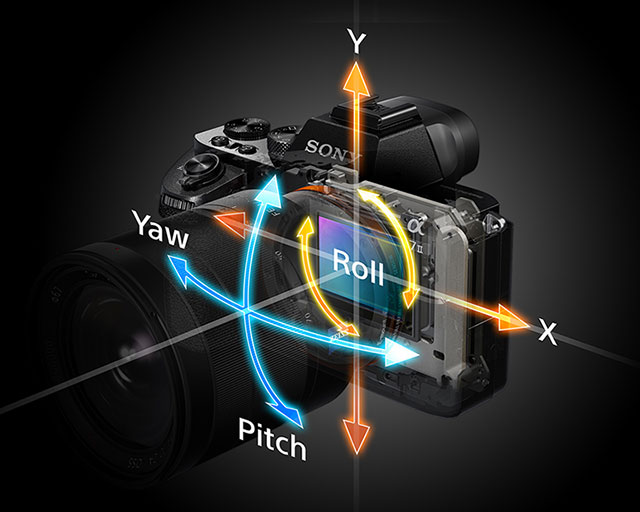
Sensor stabilisation, also known as IBIS or sensor-shift, has become a commonplace feature on most spec sheets. In the mirrorless world, it was Olympus that introduced the technology while in the DSLR segment, Minolta, Pentax and Olympus (with its four thirds DLSR series) all embraced it. Simply put, the sensor moves on different axes to compensate for camera movements.
I remember having a quick walk around a small seaside town in France after supper in 2013. I was testing the original OM-D E-M1 in my spare time. I decided to leave my heavy video tripod at the hotel and push the 5-axis IBIS to its limits. I was blown away by the fact that I was able to capture sharp shots at around 1s. I knew then that in-body stabilisation would be game changing.
From there, Olympus has improved and fine-tuned the technology with the E-M5 II, E-M1 II and E-M1X, while making it available to all the other models. It pushed the boundaries even further by merging sensor and optical stabilisation (Sync IS), shortly after Panasonic introduced its own Dual IS system. Today, a four second shot hand-held is not impossible to achieve and if you are patient, you can go even further.

It didn’t take long for Olympus’ competitors to embrace the technology as well. Panasonic made a great first effort with the GX8 / GX85 and the aforementioned Dual IS, and while it hasn’t managed to reach the same level as the best Olympus cameras with its latest models, it isn’t too far behind.
Sony introduced IBIS for the first time on a full frame camera at the end of 2014 with the A7 II, before making it standard on the A7 and A9 series, and implementing it on the APS-C a6500. Sony has struggled to improve the performance however, and brands that came after it like Nikon already perform better. Perhaps the best full-frame cameras I’ve tested so far in terms of stabilisation are the Panasonic S1 and S1R.

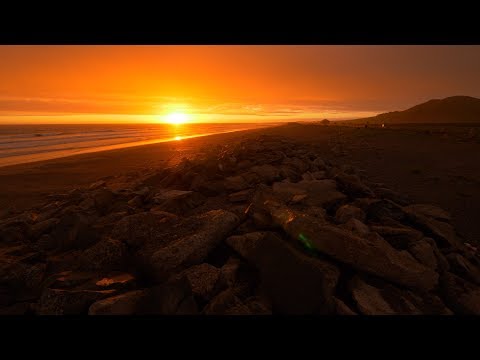
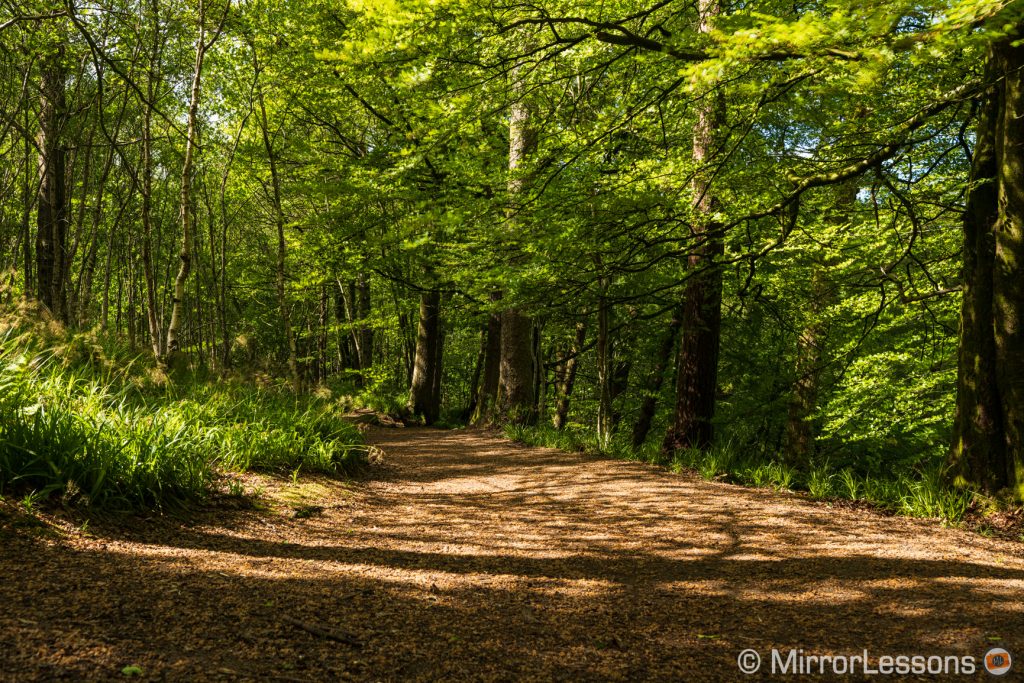
Clearly there are applications where a tripod remains essential, or is simply the preferred method of the photographer. But I’ve lost count of how many times in-body stabilisation has allowed me to bring back a shot without the hassle of carrying extra gear. The latest example is from my recent trip to Scotland where I was visiting Smoo cave. I managed a 4s exposure hand-held (photo above) by resting my arms on a bar. Another tourist had to use a tripod to take the same image.
There is an application for which image stabilisation is not yet perfect and that is video. There have been improvements, especially when it comes to static shots, but distortion and artefacts can be visible when you perform movements. Even micro vibrations can be a problem and that’s why some video makers prefer a non-stabilised body for specialised shots such as camera cars.
But if you don’t pixel peep and learn to work with the limits of this technology for video, you can get excellent results like the ones below.


In my view, IBIS is a must for mirrorless cameras these days although I admit that if you only use optically stabilised lenses, the technology becomes less essential because improvements in OIS have been excellent too. But once you experience the benefits of a stabilised body (and what sensor + a stabilised lens can do), it’s difficult to go back.
High resolution mode
Usefulness rating: a niche, but it’s getting better
Who does it best? Olympus, Panasonic
Related to sensor shift technology is the high resolution mode, which was introduced to the mirrorless world by Olympus and the E-M5 II in 2015.
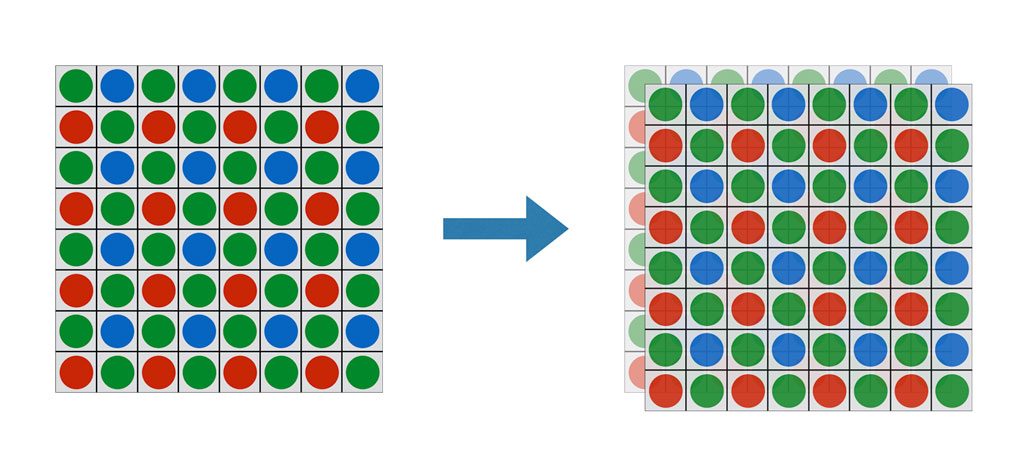
This feature works by taking a series of consecutive images (4, 8 or 16) and moving the sensor by half or one pixel between each frame. The images are then composited to create a final photograph with more resolution than the native sensor megapixel count. Furthermore, because each point in the image is captured by at least one red, green and blue pixel, colour resolution also improves.


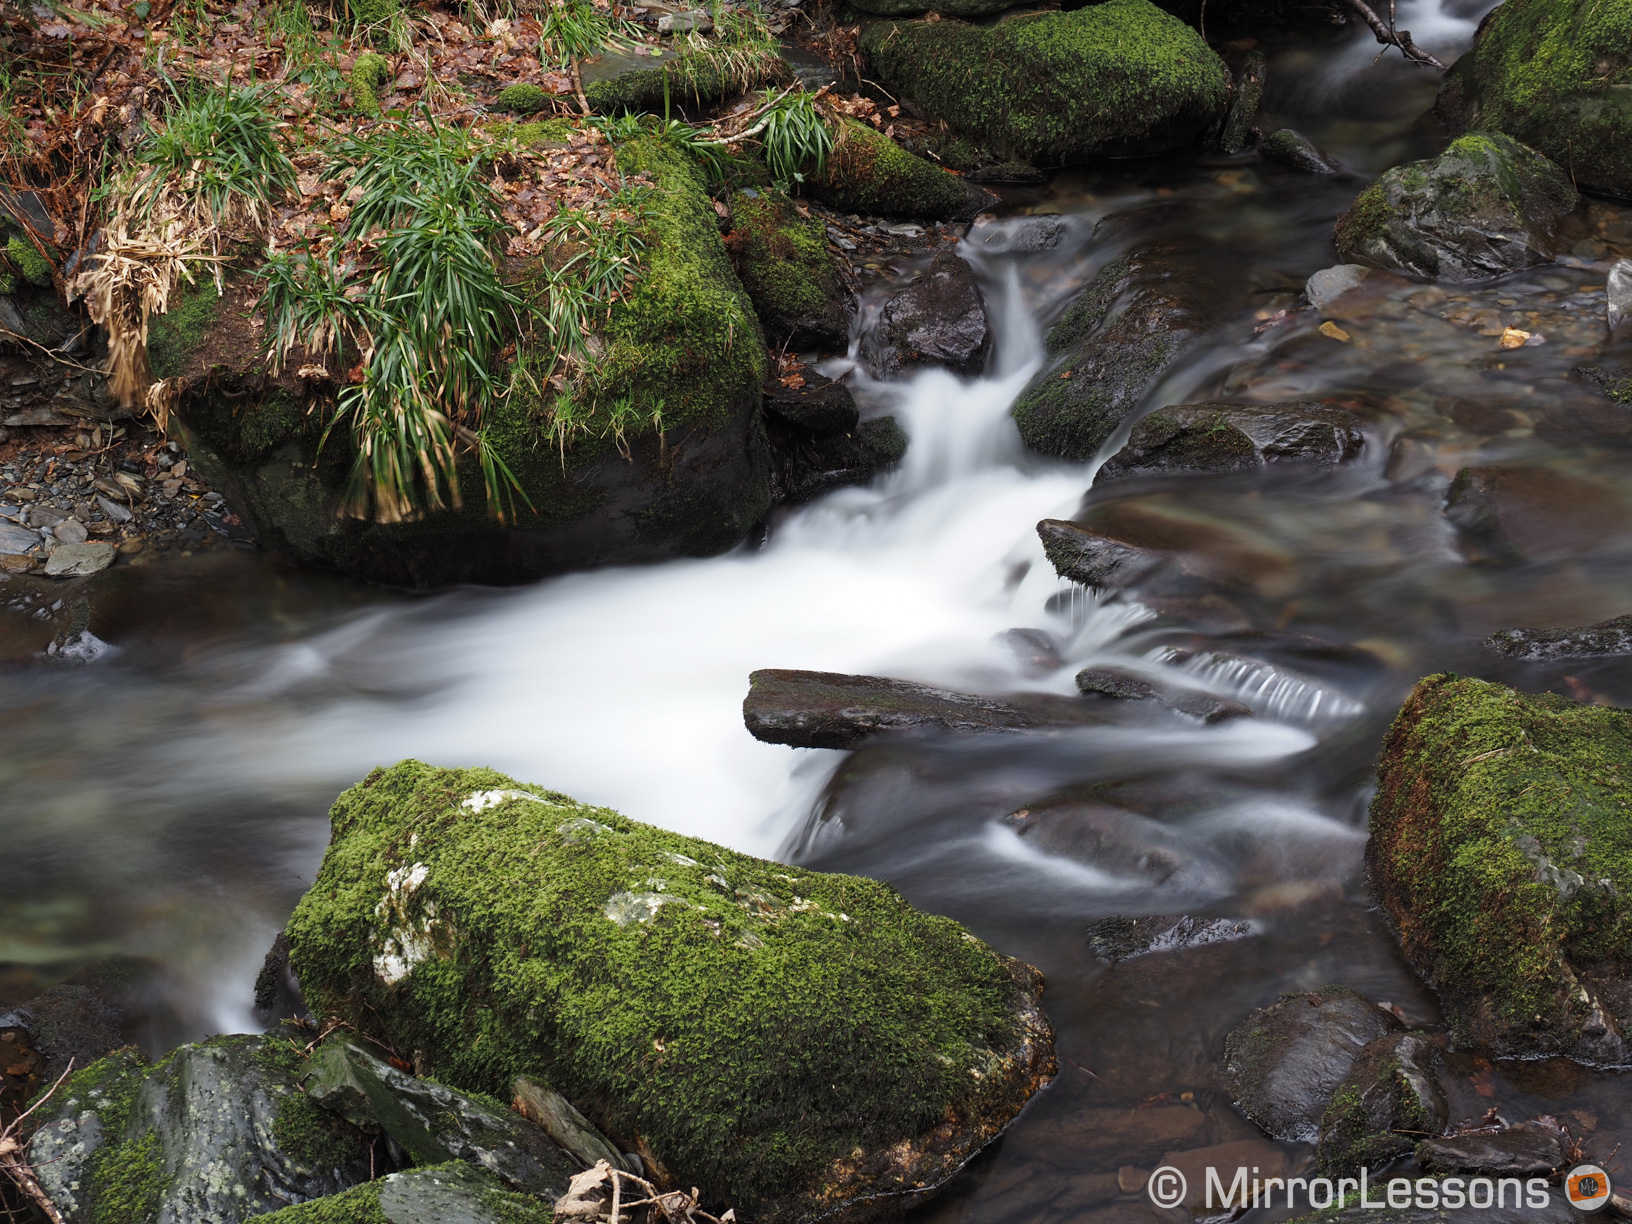
At first this functionality was limited to tripod use without any movements in the scene to avoid artefacts. It was an option for still-life work but not much else. Even landscape photography proved challenging because of moving leaves in the trees or flowing water.


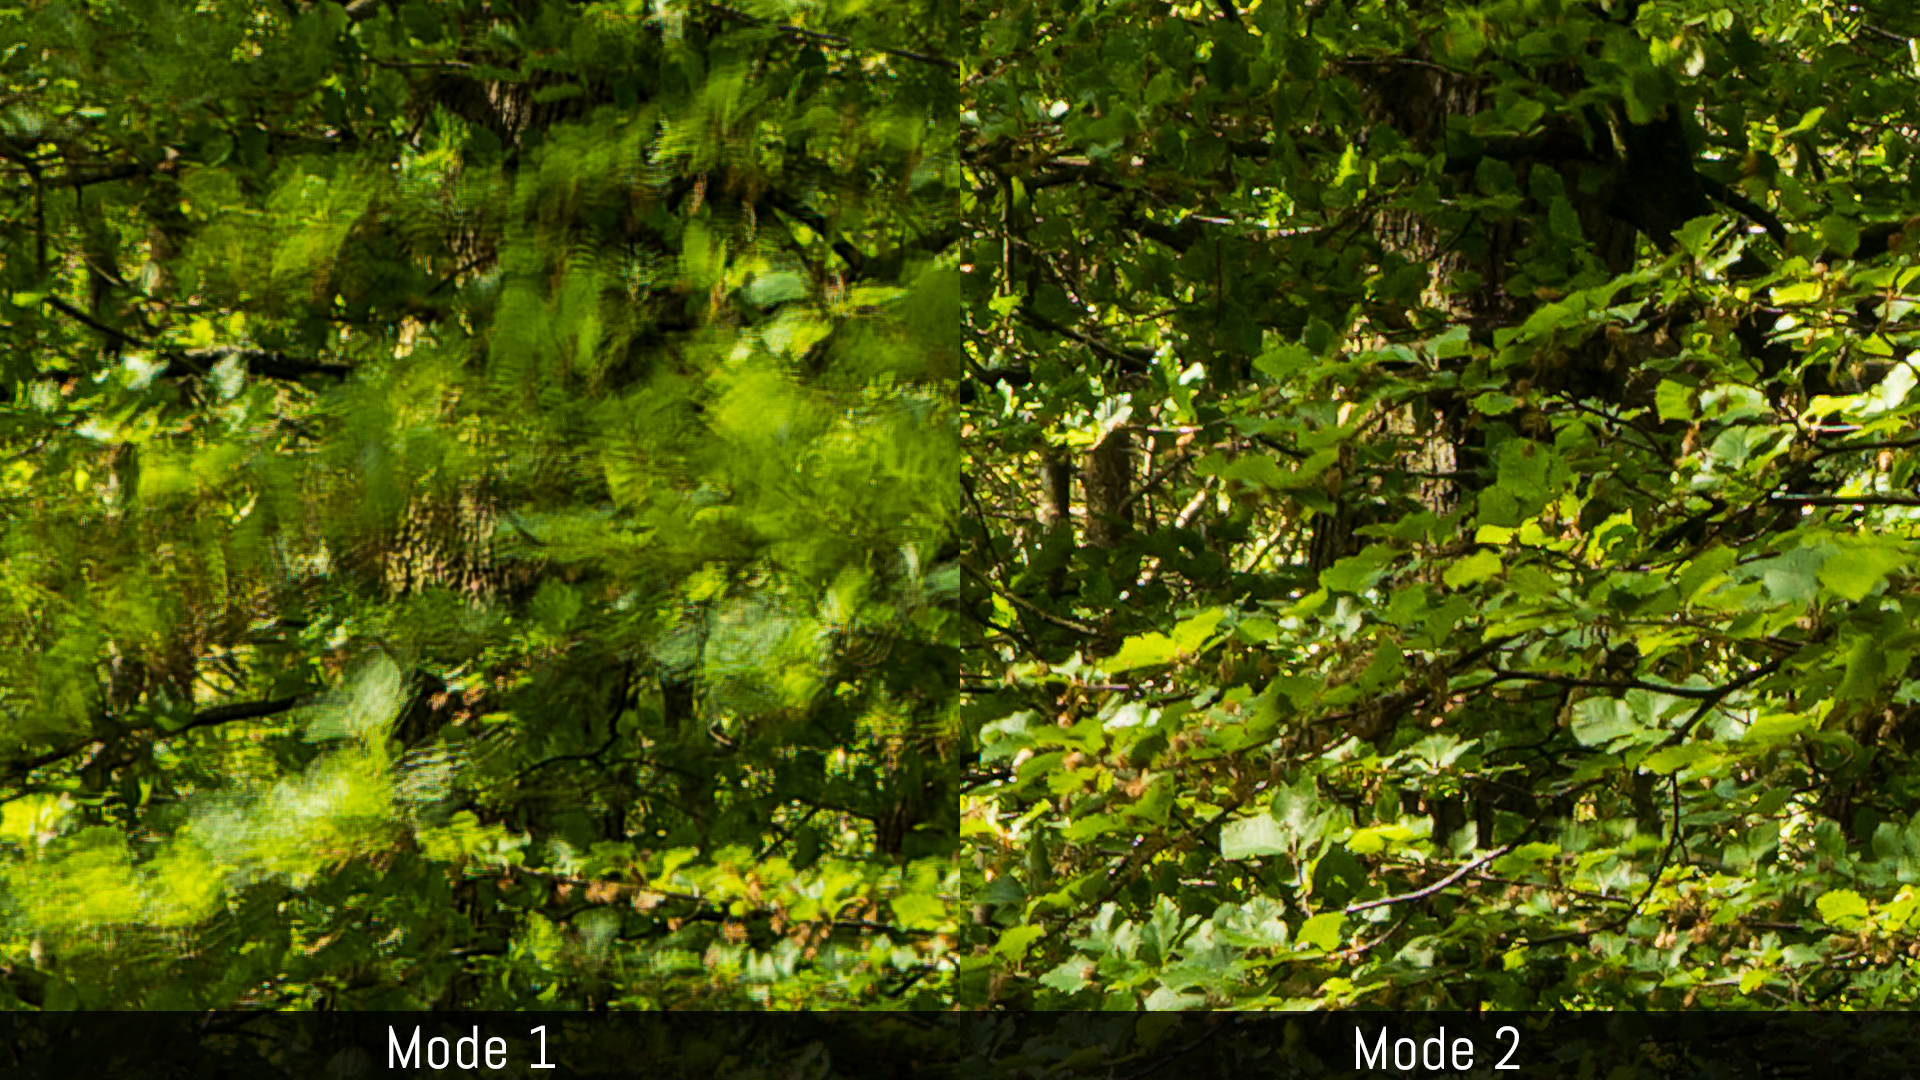
But as processing power became faster, manufacturers have started to overcome this limitation. Olympus introduced the high-res hand-held mode with the E-M1X and it works pretty well, while the Panasonic S1R is the first camera I’ve tested that can successfully suppress artefacts caused by small moving elements (the resolution drops in that area but the image remains usable). Sony has an option as well on the A7R III but the images must be composited in post and only colour resolution increases, not the megapixel count.
High resolution images of 50, 80 or even 180 MP are not necessary for all applications, but this extra feature, which didn’t seem to be able to advance much further at first, is now becoming more usable for landscapes and travel. Watch this space…
Eye detection autofocus
Usefulness rating: great for portraits
Who does it best? Sony
The first cameras with autofocus were introduced in the seventies so as you can imagine, the technology has come a long way. Today it is one of those things most of us can’t live without, although we must give credit to the photographers that still enjoy manual focus.
While most DSLRs continue to rely on a separate phase detection sensor to calculate focus, mirrorless cameras have contributed to the cause by increasing the number of focus points and embedding them on the image sensor directly, as well as pushing the performance of contrast detection AF to new levels.
More and more settings have been added to facilitate subject tracking. One of them is face detection but somehow it never managed to take off completely because of the imprecision in focus accuracy (the nose or ears can often be sharper than the eyes for example). This is when eye detection came onto the scene and Sony, with its single phase detection point focusing on the subject’s eye, has raised the bar to new heights.

Sony’s EyeAF has become so reliable on recent cameras that it is becoming an inseparable ally for portrait photographers. You can concentrate on your composition, quickly change framing and let the person move about freely without worrying about the AF area. Sony is even going a step further with Eye AF for Animals, and the first implementation already feels mature.
With EyeAF becoming an attractive feature of Sony cameras, competitors had to respond. Fujifilm has taken a good step forward with the X-T3 and X-T30, Canon’s own solution is pretty reliable too and Nikon has introduced it for the first time via firmware to the Z6 and Z7. Panasonic and Olympus are also trying to improve the performance.
AI subject tracking
Usefulness rating: it’s starting to become interesting
Who does it best? Sony, Panasonic
One of the latest buzz words is AI, or Artificial Intelligence. More and more brands are coming up with advanced algorithms and databases to recognise various types of subjects. If the camera knows what your subject is, it can choose the correct number of focus points and position them automatically, reducing the need to set up and change things manually. And the better the camera understands what the subject is, the faster and more precise it can be.
I already mentioned Eye AF for Animals, but Sony has also started to upgrade its focusing system with deep learning software that analyses the subject on different levels (brightness, colours, pattern etc.).

The first iteration of this, seen on the a6400, impressed me so much that I started to use subject tracking with more confidence for anything involving moving subjects, be they slow or fast, big or small. Like EyeAF, you cease to worry about which focus area to choose and where to position it. Once tracking has began, the camera is good enough at figuring out the rest for itself, letting you concentrate on your composition.
Sony is not the only one working on AI. The Olympus OM-D E-M1X can detect planes, racing cars and trains. The Panasonic S1 and S1R can not only detect faces but also the entire human body, as well as animals.
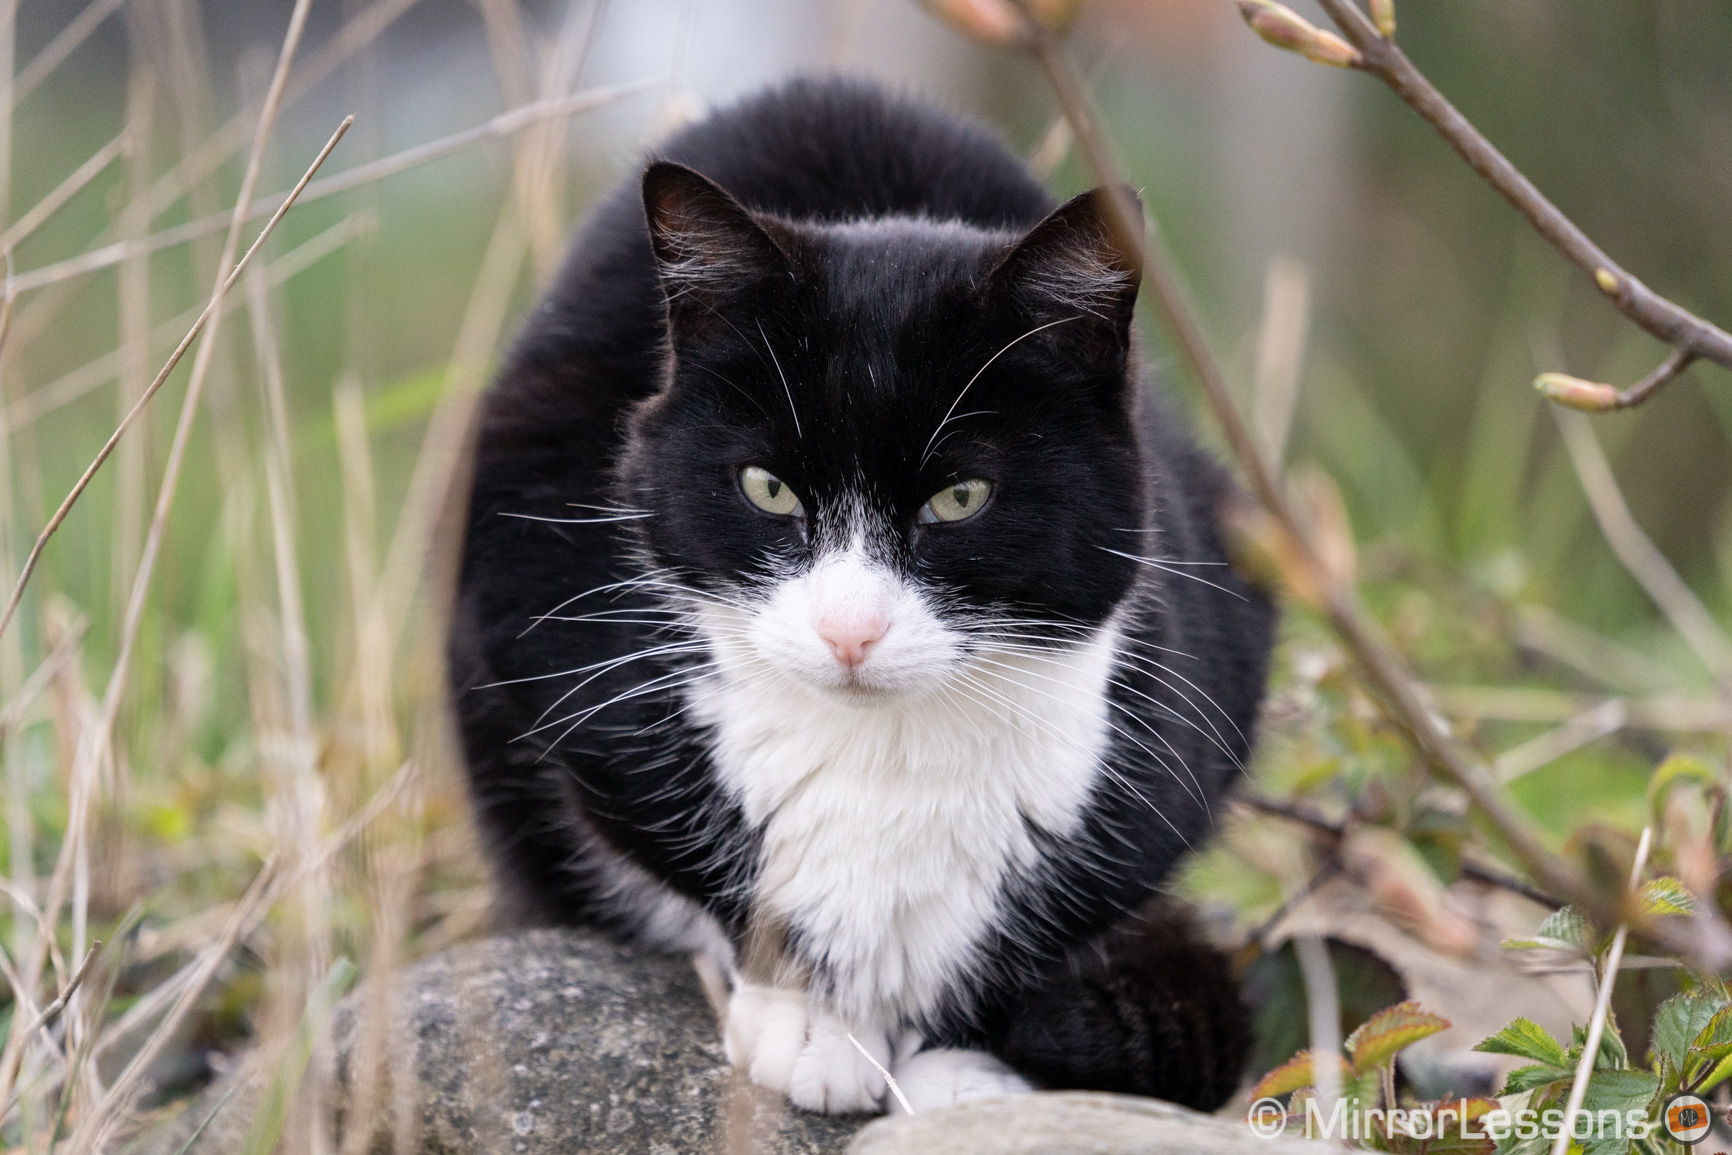
Unlike Sony, the Panasonic solution concentrates on the entire body so focus accuracy isn’t always spot on. That being said, I was impressed to see how the S1R could recognise all sorts of living creatures: dogs, cats, donkeys, cows, lambs, chickens, geese, and so on. It does struggle with birds in flight however, a difficult subject that none of the brands have mastered so far (you can try the plane mode with the E-M1X though).
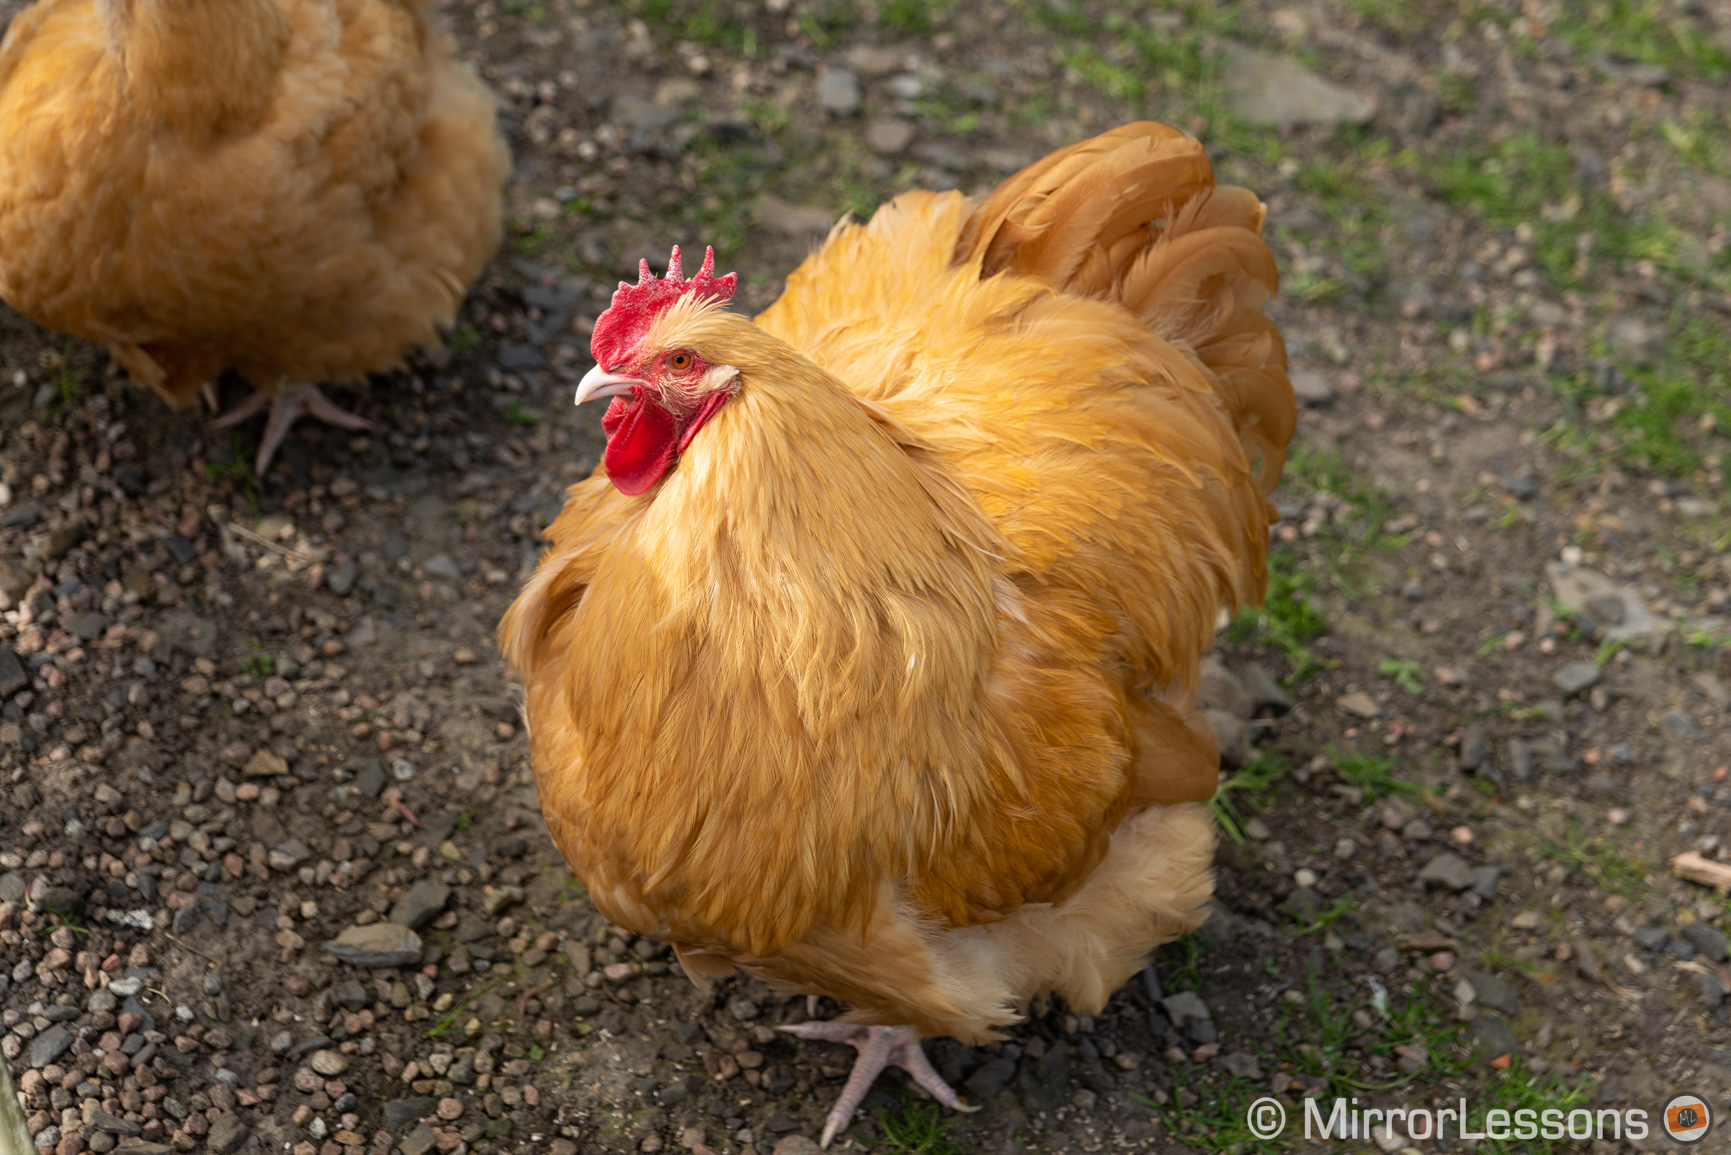
The camera recognises all sorts of animals.
AI sounds like the beginning of a new era where cameras start to become more intelligent, faster and more accurate. You may think that AI is just a marketing buzzword – and you wouldn’t be completely wrong – but so was eye detection, until it became so reliable (on certain cameras at least) that many photographers now find it hard to live without. To be continued…
Electronic shutter and processing speed
Usefulness rating: it could very well become the future
Who does it best? Sony, Olympus, Panasonic, Fujifilm
When mirrorless cameras started to become popular, the silent mode became one of the most sought-after features. In addition to not having the flipping mirror noise found on DSLRs, some cameras were able to take a picture without having to activate the mechanical shutter curtains. Instead, pixels were powered from top to bottom by the internal processor.
While the silent shutter proved useful in situations where discretion is key, there were limitations such as heavy distortion with fast movements (rolling shutter) and severe banding under artificial light sources. But as the technology progressed, sensor readout and processing power increased, reducing these unwanted effects.

The silent shutter proved very useful for contemporary dance where there are often parts without music
The e-shutter also contributed to raising shutter speeds past the conventional 1/4000s or 1/8000s, as well as raising continuous shooting to stunning speeds of 20fps and 60fps. Extra features were added like the possibility to capture images before fully depressing the shutter button, making mirrorless cameras some of the fastest products in the digital camera world. Other features listed in this article also take advantage of the electronic shutter such as the high resolution mode and focus bracketing.

Then came the Sony A9 to complete the circle with the introduction of a blackout-free live view thanks to a RAM memory stacked onto the sensor, which made following difficult and erratic subjects easier than ever before.
I’ve taken advantage of the silent shutter in the past when photographing contemporary dance shows. The silent mode is also useful for certain sports like golf where taking pictures is not always permitted since the shutter sound can distract the players. The A9 is the best camera I’ve used for birds in flight and the blackout-free live view greatly contributed to this. Fujifilm has introduced the same feature on the X-T3 and X-T30.

When there is enough processing power to power all the pixels at once, what we know as the electronic shutter could become the standard, replacing the mechanical shutter once and for all. This next step, known as global shutter, already exists in high-end cinema cameras so it might just be a question of time.
- Additional read: Electronic shutter evolution
Features built around movie recording
Usefulness rating: losing its momentum
Who does it best? Panasonic
Multiple cameras allow you to save a JPG frame from video footage, which can be useful if you want to send a quick preview of what you’re doing to a client for example. It’s far from essential though as you can easily do the same on a computer.
However one brand has developed an entire set of extra features built around video recording, and that is Panasonic. Introduced as a way to shoot stills at very high speeds of 30fps, the 4K Photo mode allows you to maintain the native 4:3 aspect ratio rather than 16:9, and choose options such as Pre-Burst to save frames before fully pressing the shutter button. Because the camera effectively records a video with this function, it also gets rid of the buffer limitation usually found for still burst shooting.

Panasonic has developed more options over the years including Post Focus, Focus Stacking, Light Composition and Sequence Composition. However not every mode works well. Light Composition (advertised as an easy way to do light trails or star trails) offers poor quality in low light because the camera merges compressed video frames. Focus Stacking is often imprecise and displays artefacts. Post Focus (the camera changes focus distance back and forth during the video burst and let’s select the frame with your favourite focus point) is one of those functions where you struggle to find a real use for it.
With 4K Photo, you’re limited to an 8MP JPG when saving the frame, and since we’re talking about video recording, there can be rolling shutter with fast movements depending on the camera and its readout speed capabilities. With the GH5, Panasonic has introduced a 6K Photo mode that allows you to save an 18MP file.

The company has developed other features related to video such as 4K Live Cropping. It allows you to create panning and zooming movements out of a 4K video. I’ve used this more than once for product shots in our Youtube videos, but the output is limited to 1080p.
At first I found these 4K Photo capabilities to be interesting, but with more cameras becoming capable of taking very fast bursts with RAW and JPG files, 4K Photo is becoming a bit less appealing. As video recording quality and processing speeds increase, there might still be room for improvement, but I admit I’m not as fascinated as I was at the beginning.
Compositing effects
Usefulness rating: great for specific applications
Who does it best? Olympus
Merging multiple shots into one can be useful for creative projects. Doing it in camera not only gives you a quick preview while shooting, but saves you the hassle of merging multiple shots in post, which can be power consuming if you don’t have a fast PC or Mac. Seeing the result in the field also allows you to make changes and improve the shot.

Interval composite
One of our favourite shots taken with a composite mode is the image above using the Ricoh GR II. But we must give credit to Olympus, the company that has worked harder than any other to create features such as Live Composite (star trails, light trails, light painting, fireworks) and Live Time (long exposures). The nice thing is that you get a live preview on the screen while taking the exposure, so you know when to stop. The result is saved as a RAW file so you keep all the flexibility you need in post to enhance your photograph. Basically, you get the best of both worlds.

The latest addition, Live ND (for now exclusive to the E-M1X) can take long exposure shots without the need of ND filters. Combine it with image stabilisation and you can take pictures hand-held that would normally require a tripod, physical filters and an exposure time of several minutes. This is another good example of how extra features can offer a real world advantage to the photographer.
Panasonic and Ricoh/Pentax have also implemented some of these functions onto their cameras. Sony has similar options in its PlayMemories app store, so hopefully they’ll include them on future cameras by default. Fujifilm, Canon and Nikon haven’t really concentrated on this type of feature yet.
Bracketing
Usefulness rating: a must for specific genres
Who does it best? all of them
Bracketing is nothing new on this list of extra features. The most popular is AE bracketing which takes a series of shots with different exposures that can later be merged to extend the dynamic range. Some models can also create HDR images in camera but this is usually limited to a couple of exposures and a JPG output, which is not as good as working the RAW files in post with the appropriate software.

Over the years, more types of bracketing have been added such as ISO, white balance, aperture, colour profiles and focus. The last is perhaps the most interesting addition for macro and landscape photographers. You take a series of images with different focus distances that are then stacked together in post to create more depth of field. This technique used to be done manually so having the camera do it for you adds precision and makes the whole shooting process faster.

10 shots, focus differential of 10 (hand-held)
Post-processed in Helicon Focus
Focus bracketing is not available on every camera, but it’s growing in popularity. A few Olympus products can stack images in-camera directly, although the result is not always perfect (blurred artefacts can appear in various zones).
I’ve never bracketed values such as ISO or WB but I guess if you’re unsure about which one to use, it can be a good solution. Perhaps bracketing colour profiles is a bit more interesting as you can decide later on which version you prefer. But you can also use RAW processing in your camera instead, and we discuss that further down.
Intervalometer
Usefulness rating: it has created a genre all its own
Who does it best? all of them
To describe the success of this feature is very simple: many photographers have made time-lapses their signature work. As a result, it has become a genre all its own, a perfect hybrid art between still and motion. You can also use it for star trails and other things.

There are external remotes that allow you to capture a set amount of pictures at precise intervals, but nowadays most cameras have this feature built-in which makes it easier to do. Sony, after ignoring it for a long time (it was a paid option in the PlayMemories app store), has finally started to integrate this by default or bring it via firmware update.
Some cameras go a step further, offering the possibility to create a video out of all the captured images so that you don’t have to do it in post. Panasonic leads the way here. They’ve also introduced a stop motion animation feature which is similar but gives you a preview frame by frame of how your animation is coming along. Once again, when it comes to video-related features, the Lumix brand is second to none.

RAW processing
Usefulness rating: a great tool when testing cameras
Who does it best? Fujifilm
Post producing RAW files is usually a task we like to perform on a computer, large monitor (ideally with the correct calibration) and a powerful software program.
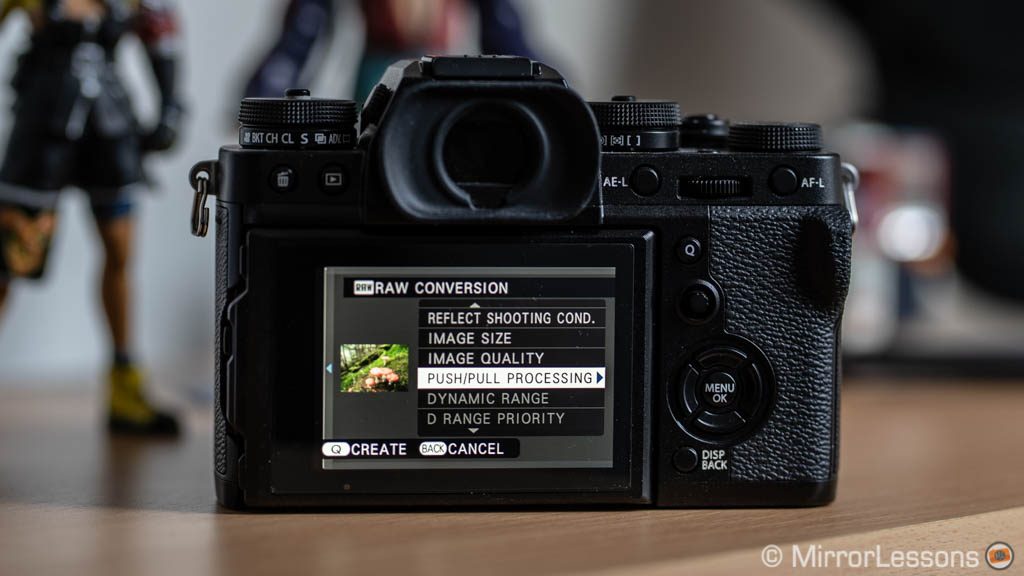
A quick no-brainer solution is processing RAW files in camera and many models offer this possibility. You can apply a different colour profile, change the white balance, correct the exposure (to a certain extent), adjust contrast or sharpness – you name it. The result is saved as a JPG.
Personally I’ve found this option extremely useful when doing side by side tests outside in daylight. I take one RAW file for each model and then convert all the JPGs in-camera rather than taking a series of images for each colour profile. It makes everything much quicker and reduces the chance of having different results between frames if the light changes.
My use of this extra feature is very specific but for the average photographer, I can see it being helpful if you want to transfer an image and share it on social media. The built-in RAW processor allows you to make quick adjustments using the RAW files which ensures better quality than modifying the JPG on your phone. However more and more mobile apps are getting RAW support so you may find it easier to edit your image on the bigger screen of your smartphone or tablet.
It can also be a good ally when quickly adjusting colours or if you want to retain the distinctive look of the camera’s built-in profile. Here Fujifilm has an extra advantage in comparison to the competition. Not only do I find their in-camera software to be one of the best, but you can also use the X RAW Studio software on your computer with the camera connected via USB (the computer uses the camera’s processor and ensures the same exact colours as converted in camera).
Of course if you want in-depth and precise post processing, you’d be better off with a more powerful software designed for photo editing. And we can also question whether we need to retouch the RAW file for a quick share on social media. A well-exposed JPG should fit the bill perfectly and if you need small adjustments, the native photo app of your phone is probably good enough.
Creative effects
Usefulness rating: you may have forgotten that they’re there
Who does it best? Smartphone apps probably
Almost every mirrorless camera that I know of has a set of creative effects. They are different from the standard picture profiles and each brand gives them a different name: Art Filters for Olympus, Creative Control for Panasonic and so on.
They only apply to the JPG and offer adjustments such as colour isolation, extreme vignetting, blur effects and filter simulations that are not far from what you can do on your phone with Instagram filters or similar apps.
I don’t deny that some of these effects look nice (Olympus and its Art Filters are probably among the best) but many just look ugly or are poorly executed. They’re the kind of effects you’d except to find on an entry level camera, not on a high end one.

The truth is that you can achieve more precise (and in many cases better looking) results by transferring the image to your phone and using one of the many excellent apps available in the app store (including the free ones).
The only time I ventured into these settings was when I first started testing cameras. The more I published reviews, the more I started to skip these effects completely. I don’t deny they can be fun to use, and perhaps some of you like them, but I feel as if they’re one of those features that if they weren’t there, we wouldn’t miss them all that much.
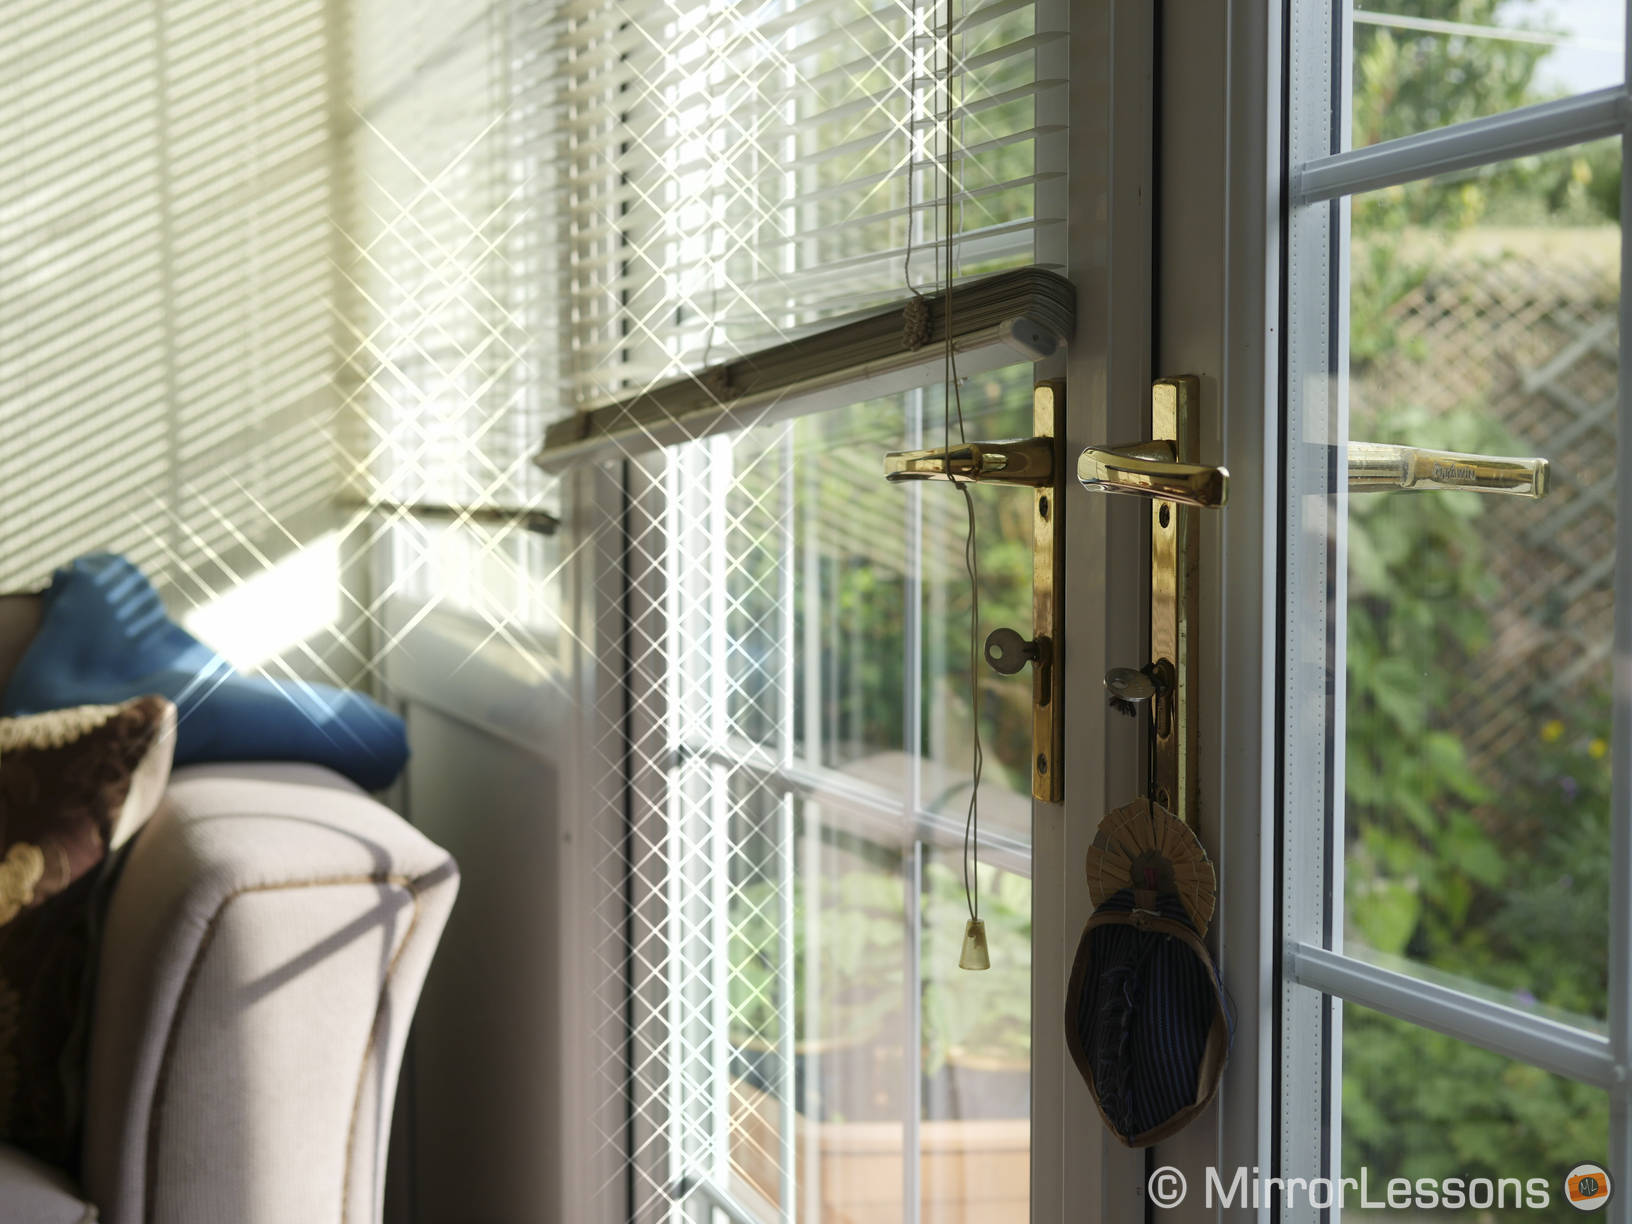
Wireless connectivity
Usefulness rating: flawed but convenient at times
Who does it best? Panasonic
The rise in popularity of smartphones in the world of photography has encouraged all the brands to implement solutions that mimic the flexibility of mobile devices when it comes to sharing on social media.
So far I’ve found this to be only partly successful, mainly because it is difficult to replace the simplicity of taking a photo and sharing it right away with the same device, but also because many of these solutions are limited or have been poorly designed.
In most cases, you need to link your camera to the mobile device (the phone connects to the camera’s wifi network) and often the camera is unusable during that time. Some apps loses the connection every time you go back to the main menu, which becomes frustrating after a couple of minutes.
There are also differences related to the type of mobile device used. For example many Android phones have NFC capabilities, where the connection starts with a simple tap between the two products. This can make the operation a bit quicker (when it works, of course, which is not always a given).
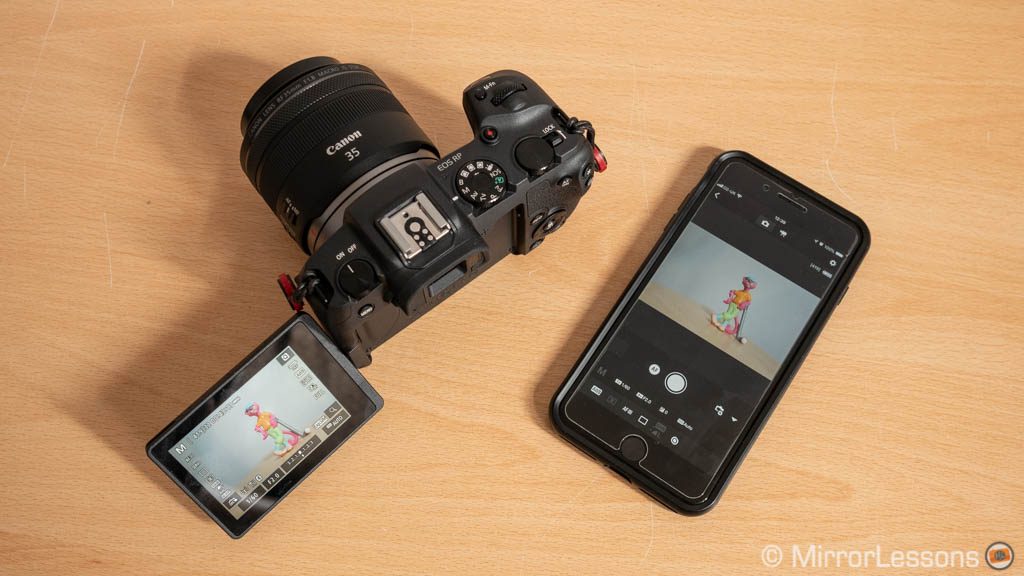
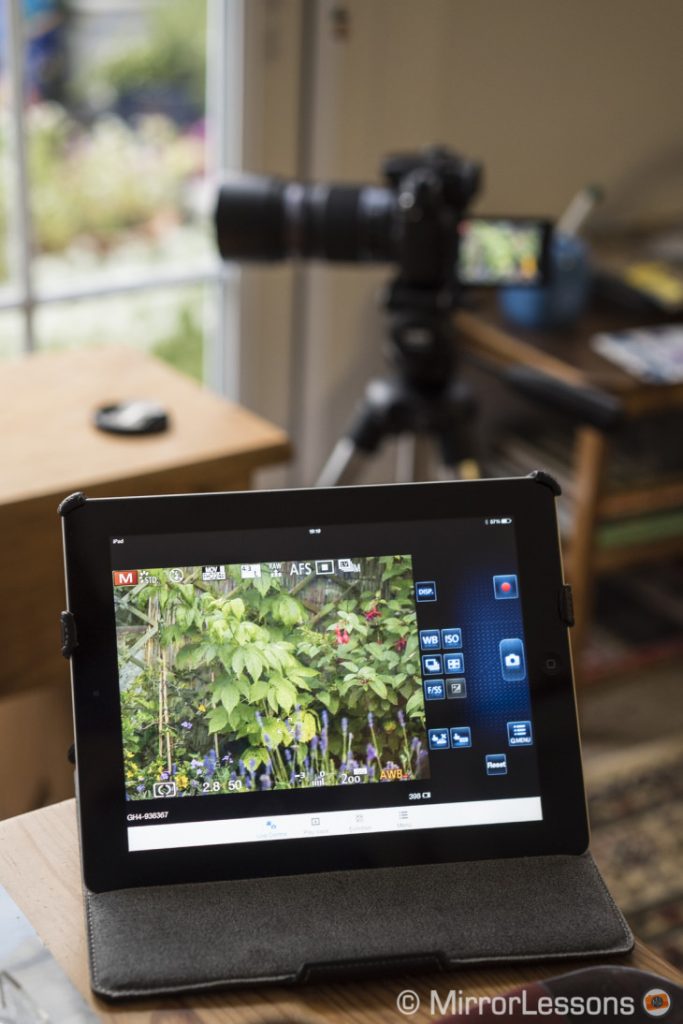
Fortunately some brands design better apps than others (Panasonic is usually my favourite). Many apps allow you to remotely control the camera which is useful if you don’t have a remote trigger with you, or if you’re recording yourself without help and are using the phone to check composition and change settings. Improvements have been made to the whole connection process with the latest cameras I’ve tested, so not everything is bad.
The arrival of Bluetooth has added extra possibilities (geotagging mainly) but unfortunately very few cameras can take advantage of this connection without forcing you to go through the WiFi network as well.
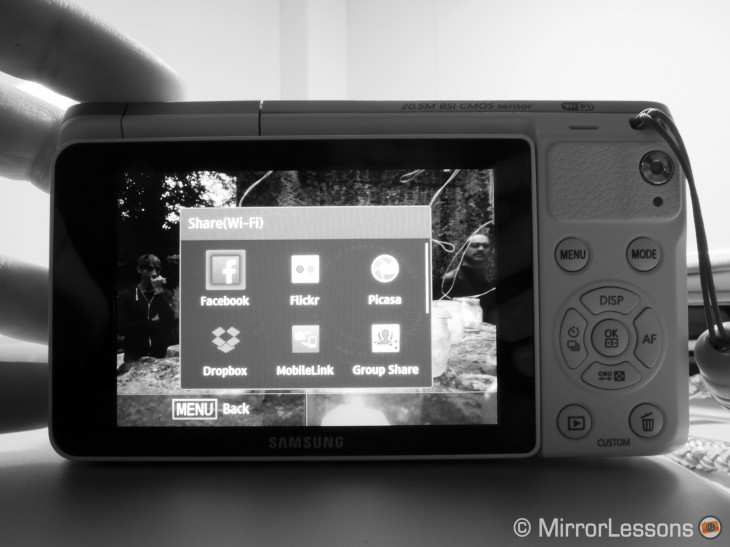
Samsung abandoned the mirrorless market some time ago but its NX series was the only one that got it right from the start. I remember how easy it was to connect to a network and maintain that connection in the background while using the camera. I could even share an image on Facebook from the camera directly without the need of a mobile app at all. I wonder why nobody else has followed the same path.
I admit that my interest in wireless features hasn’t grown a lot over the years, partially because of the frustration related to the design, partially because I have no desire to share my images right away. But if engineers can improve the process, design better apps and make everything more streamlined, I can see myself using it more often. But for now, if I want to share a simple moment with family or friends, the phone remains my weapon of choice.
Wireless can be used for other things that are not mobile device related. Some brand like Panasonic and Sony have implemented FTP capabilities, where a picture taken is automatically transferred to a server. And in addition to wired tethering, brands have now started to offer wireless tethering which gives you more mobility when working in a studio or on location.
Unsuccessful and forgotten features
If many features introduced to cameras over the years have become either very successful or at least earned a static place in the camera’s menu, there are a few that never quite managed to make a name for themselves, so much that we’ve almost forgotten they’re there. Here are a few examples.
Sony Smile Shutter
With this function, the camera takes a picture automatically when it detects the person’s smile. I’ve seen this feature on many Sony E-mount and RX cameras, but I’ve always found it gives fifty-fifty results. I prefer to see the person’s smile first in the live view and then take the picture while he or she holds it for a few more seconds, just as we’ve done for ages. For group shots, the chance of getting everybody to smile at the same time is not always a given, but the camera might think that a few smiles are better than nothing and take the picture anyway. Sony’s advanced software recognition has been employed better for other things.
Nikon Smart Photo Selector and Motion Snapshot
Nikon was the first mirrorless brand to take advantage of the electronic shutter for fast continuous shooting speeds. The 1 series was capable of bursts up to 60fps with RAW files, and the brand included smart features linked to the impressive speed. The Smart Photo Selector would take a burst and choose the best picture automatically, but as you can imagine the camera’s judgement didn’t always match that of the photographer. The Motion Snapshot mode combined a short slow motion video clip with a still image and music background, but the options to customise it (including choosing different types of music) were really poor. The 1 series struggled to gain success and was discontinued in 2018.
Selfie mode and soft skin effect
Another way to tackle the success of smartphones was to introduce a selfie mode. On select Olympus and Panasonic cameras for example, when you rotate the screen 180˚ the camera automatically shortens the zoom range (when using power zoom lenses) to facilitate composition and activate functions such as face detection and self timer. Nothing wrong so far, but some brands also added things like the soft skin effect that in many cases looked really bad. At this point, you’re probably better off using your phone.
Sony 3D Sweep Panorama
In addition to the traditional Sweep Panorama mode, Sony added a 3D version on early Nex models at a time where the electronics market was trying to push 3D products and 3D content, following the rise of 3D films being produced and screened in theatres. The truth is that 3D technology never took off on consumer products, and you would have needed a 3D TV to enjoy it. Unsurprisingly, the 3D panorama mode was quickly abandoned.
Conclusion
I’m sure I’ve missed some other features found on mirrorless cameras but if I continue to write about them all, this article will become a book so I’d better stop here.
I’ve skipped things such as the scene modes which are simply presets where the camera picks the appropriate exposure settings depending on the type of scene photographed. Touch capabilities have also improved a lot, although that has more to do with the use and control of the camera than anything else.
I can briefly mention options such as manual focus assists (peaking etc.). Fujifilm has put extra effort into this by designing Digital Split Image and Digital Pentaprism that emulate rangefinder cameras. But focus magnification remains the best way to check focus accuracy, regardless of the brand or camera in question.
One exception is Canon’s Focus Guide that uses the Dual Pixel CMOS AF technology (phase detection). It is very precise, especially for video. Canon also has a post focus mode that works with the same technology (Dual Pixel RAW) but the adjustments you can make are very small.
Another function I’ve appreciated a lot on the Ricoh GR II is Snap Focus, which helps you work with zone focusing, just as you would with a manual focus lens.
Panorama and Multiple Exposure are also common features. The former still fails at times, depending on the camera (banding or imprecision with the stitching), whereas the latter is interesting when there are more blending options.

To wrap up, I wouldn’t call most of the features mentioned in this article essential simply because there is always an alternative solution to get the same result. Often that solution is a classic method that has been used for years, when technology wasn’t as advanced as it is today.
At the same time though, we can’t deny that some of these features have become very useful, mainly because they allow us to concentrate more on our scene and make the process of capturing a photo easier and quicker than ever before.
Which features do you use the most on your camera? Let us know in the comments below!